Home>Types of Gardening>Edible Gardening>How To Grow Herbs From Seeds Indoors
Edible Gardening
How To Grow Herbs From Seeds Indoors
Modified: January 22, 2024
Learn how to grow herbs from seeds indoors and enjoy edible gardening all year round. Get expert tips and tricks for successful indoor herb cultivation.
(Many of the links in this article redirect to a specific reviewed product. Your purchase of these products through affiliate links helps to generate commission for Chicagolandgardening.com, at no extra cost. Learn more)
Table of Contents
Introduction
Welcome to the world of edible gardening! If you’ve ever dreamed of having a bountiful herb garden right in your own home, then you’ve come to the right place. Growing herbs from seeds indoors is a rewarding and fulfilling journey that allows you to have fresh, flavorful herbs at your fingertips all year round.
Whether you’re a seasoned green thumb or a beginner looking to explore the joys of gardening, this comprehensive guide will walk you through the process of growing herbs from seeds indoors. Not only will you have the satisfaction of knowing exactly where your herbs come from, but you’ll also save money and reduce your carbon footprint by growing your own herbs.
Indoor herb gardening is a versatile and accessible option for those who may not have access to outdoor space or live in regions with harsh climates. With a little bit of planning, preparation, and care, you can successfully grow a variety of herbs right on your windowsill, kitchen counter, or balcony.
In this guide, we will cover everything you need to know to get started on your indoor herb gardening journey. From choosing the right seeds to providing the ideal growing conditions, transplanting seedlings, and harvesting your herbs, we’ve got you covered.
So, roll up your sleeves, grab your gardening tools, and let’s dive into the wonderful world of growing herbs from seeds indoors!
Choosing the Right Seeds
When it comes to growing herbs from seeds indoors, choosing the right seeds is crucial for a successful harvest. There are a few factors to consider when selecting your herb seeds:
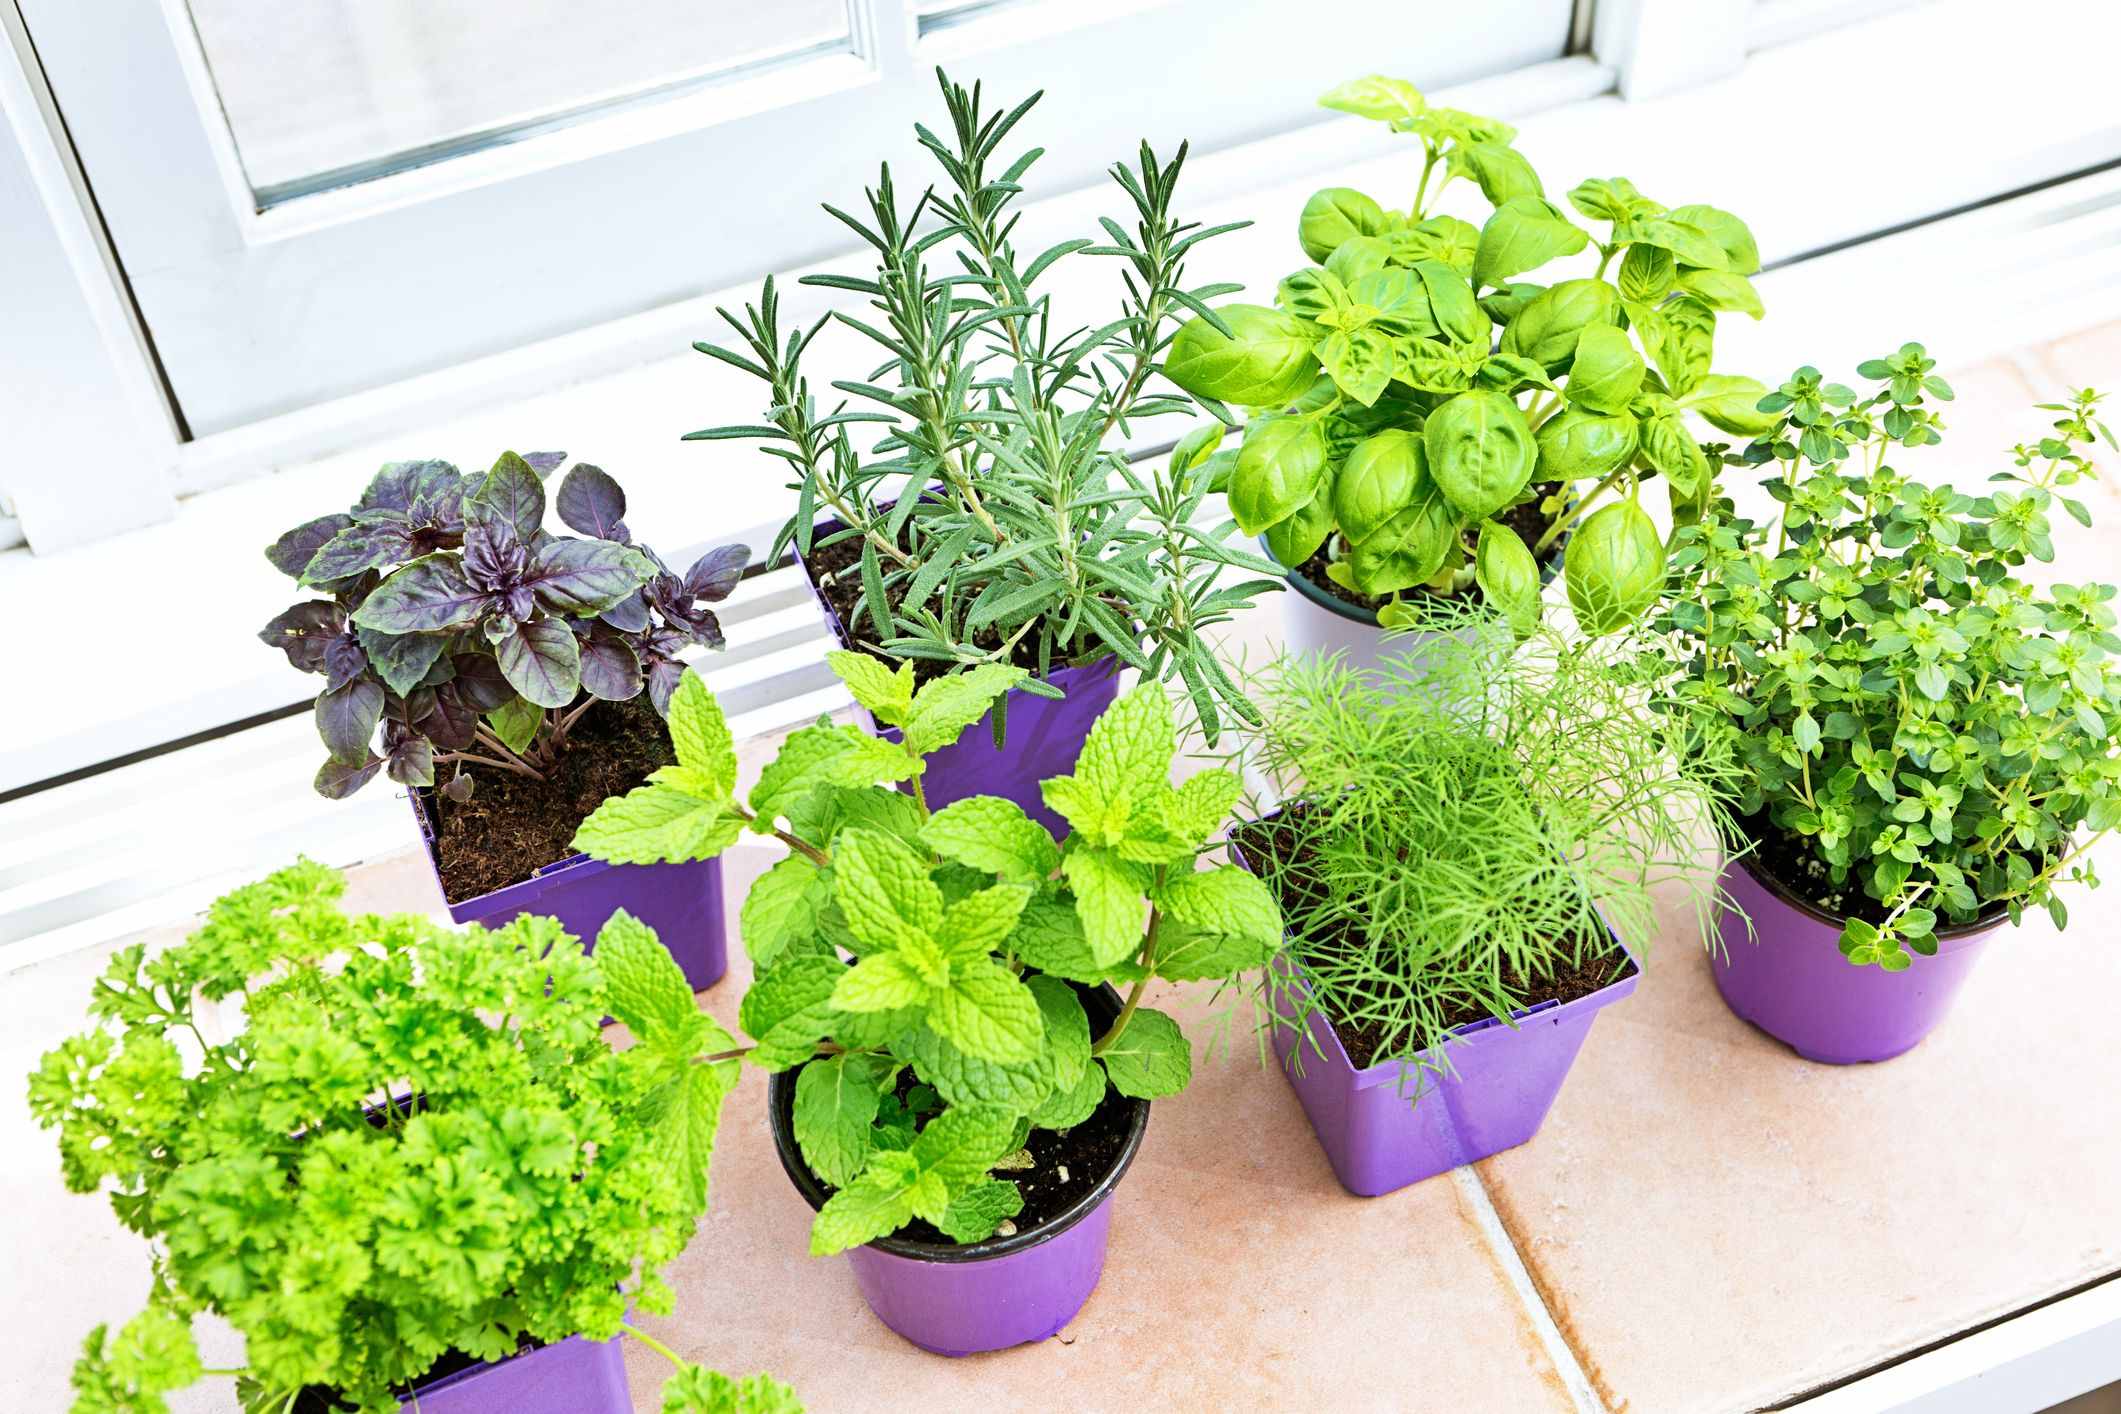
- Herb Varieties: Consider the herbs you use most frequently in your cooking or those that have enticing aromas. Popular choices for indoor herb gardens include basil, parsley, mint, chives, cilantro, and rosemary. Selecting the herbs you love will make your gardening experience even more enjoyable.
- Seed Quality: It’s essential to choose high-quality seeds from a reputable supplier. Look for organic and non-GMO options to ensure that you’re starting with the best genetic material.
- Seed Viability: Check the seed packet or supplier’s information to ensure that the seeds are fresh and viable. Some herbs have a shorter shelf life for their seeds, so make sure you’re starting with seeds that have a high chance of germination.
- Indoor-Friendly: Certain herb varieties are better suited for indoor gardening due to their compact size or adaptability to lower light conditions. Look for varieties labeled as “compact” or “dwarf” and those that can thrive with limited space.
- Germination Time: Different herbs have varying germination periods, ranging from a few days to a couple of weeks. Consider the time you have available and your patience level when choosing herbs with longer germination periods.
It’s also worth considering the type of gardening experience you want. If you’re looking for quick results and a variety of herbs, you can opt for seed mix packets that contain a variety of different herb seeds. This is a great option for beginners or those who want to experiment with different flavors and scents.
Once you’ve selected your seeds, it’s time to move on to the next step—preparing the soil.
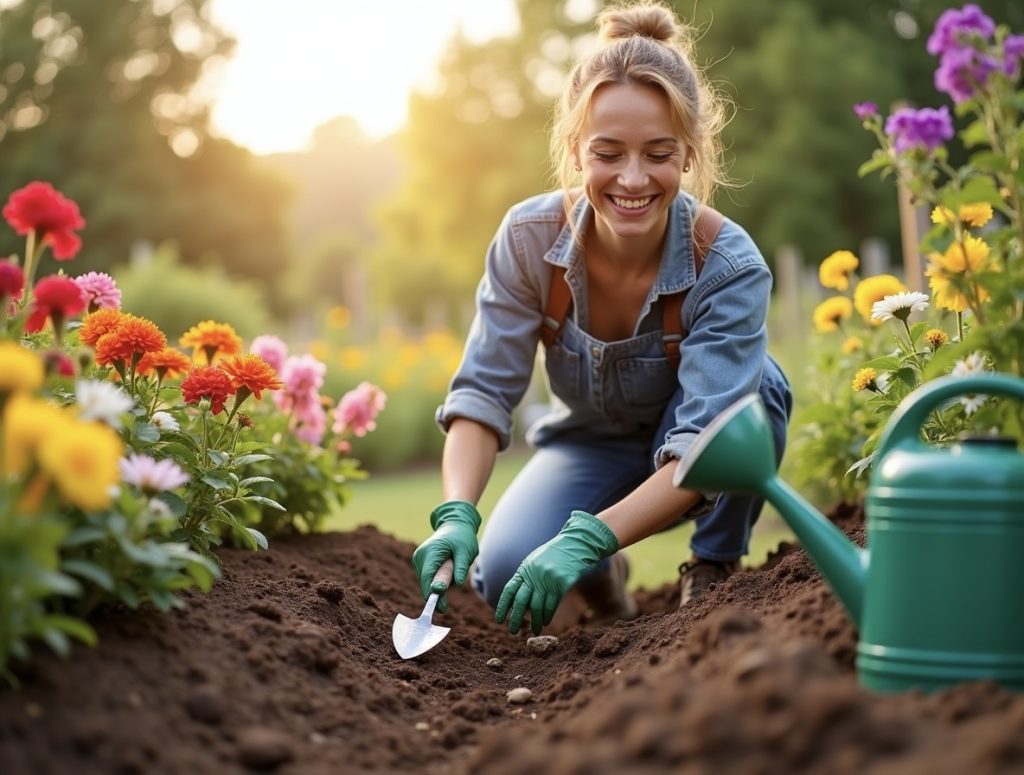
Preparing the Soil
A crucial step in successfully growing herbs from seeds indoors is creating the right soil environment for your plants to thrive. Here’s how to prepare the soil:
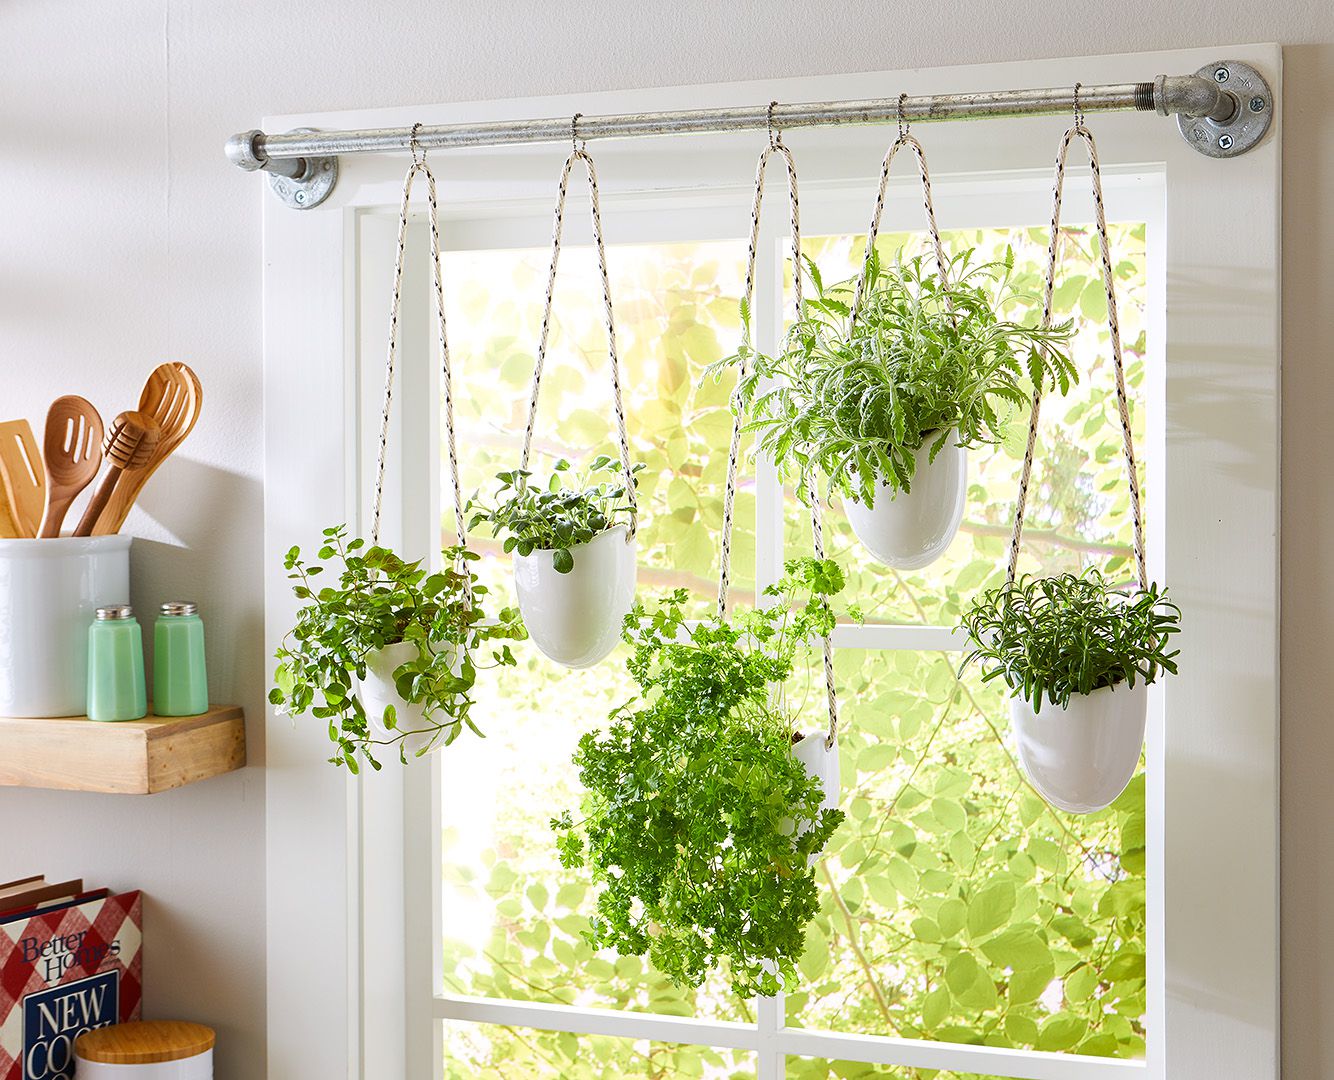
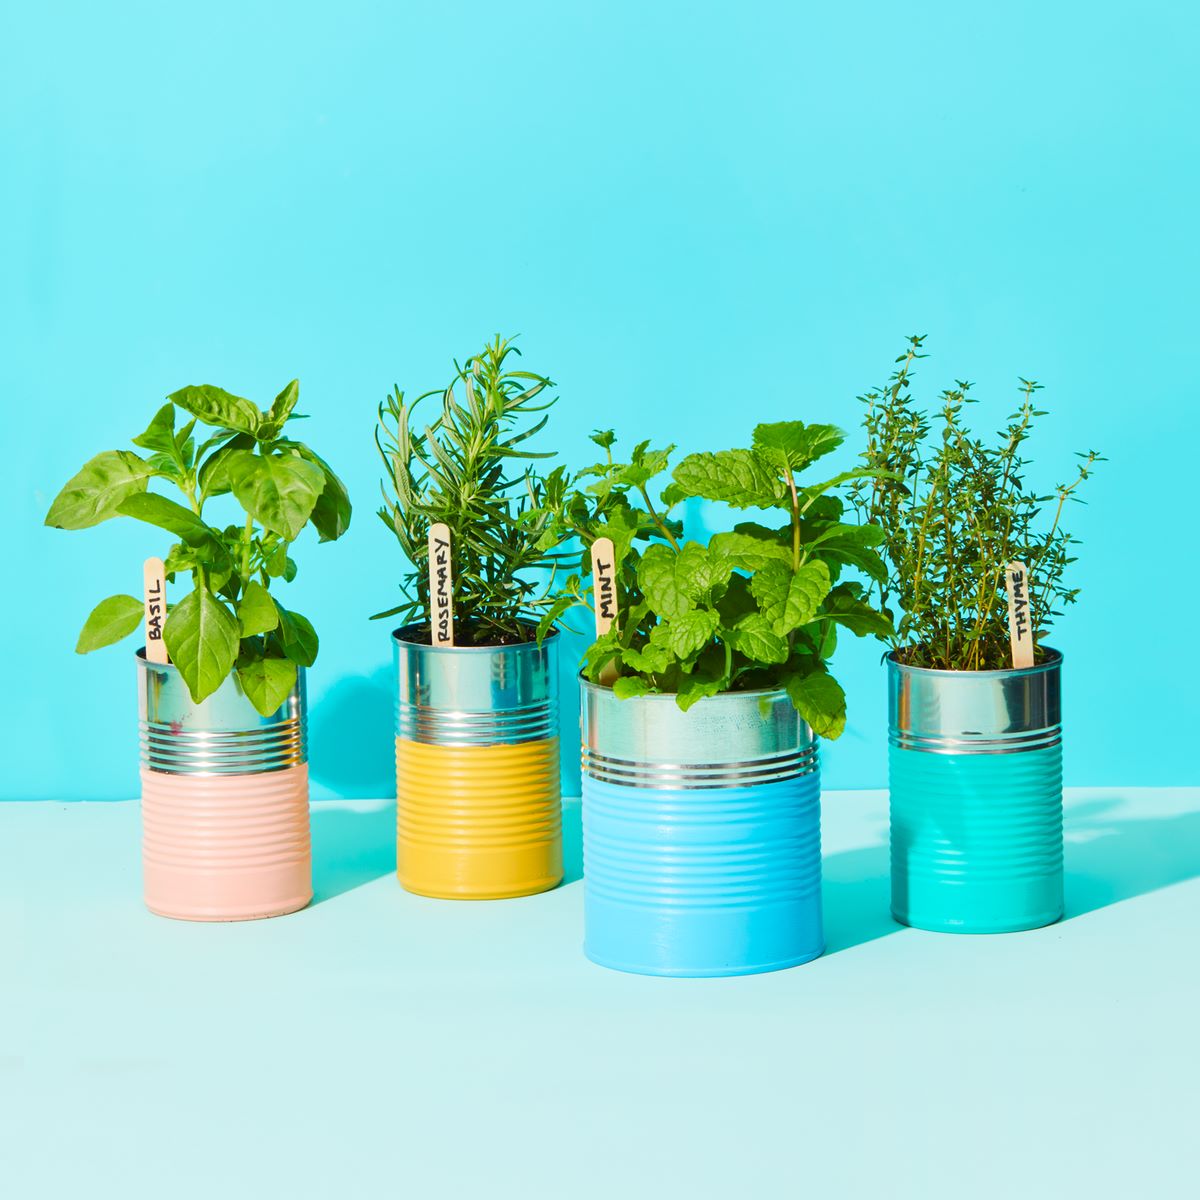
- Choose the Right Container: Select a container that provides proper drainage and is deep enough for the herb’s roots to grow. Opt for containers made of lightweight and porous materials like terra cotta or fabric pots to promote good airflow.
- Use Quality Potting Mix: Avoid using garden soil for your indoor herb garden. Instead, use a high-quality potting mix that is well-draining and enriched with organic matter. This type of mix provides the right balance of nutrients and ensures good airflow to prevent root rot.
- Add Organic Matter: Enhance the fertility of the potting mix by adding organic matter such as compost or well-rotted manure. This will improve nutrient retention, water-holding capacity, and overall soil structure.
- Avoid Compaction: Ensure that the soil is loose and well-aerated by gently loosening it with a fork or your hands. Compact soil can hinder root growth and water movement, leading to unhealthy plants.
- Dampen the Soil: Before planting the seeds, moisten the soil evenly with water. It should be damp but not saturated to prevent waterlogging and the potential for seed rot.
Remember that herbs thrive in well-draining soil, so it’s important to create an environment that allows excess water to drain away instead of pooling at the bottom of the container. Proper soil preparation sets the foundation for healthy growth and ensures that your herb plants get the nutrients they need.
With the soil ready, you’re now ready to move on to the exciting step of planting the seeds.
Planting the Seeds
Now that you have prepared the soil, it’s time to plant the seeds and kickstart your indoor herb garden. Follow these steps to ensure successful seed germination:
- Read the Seed Packet Instructions: Different herb seeds may have specific planting instructions, including depth and spacing. Carefully read the seed packet to determine the requirements for each herb.
- Sow the Seeds: Gently press the seeds into the soil at the recommended depth. As a general rule, larger seeds are planted deeper, while smaller seeds are lightly covered with a thin layer of soil. Space the seeds according to the instructions to allow room for growth.
- Maintain Moisture: After planting, water the seeds gently using a spray bottle or a watering can with a fine nozzle. Ensure the soil remains consistently moist during the germination process, but avoid overwatering, which can lead to rotting seeds or damping-off disease.
- Provide Warmth: Most herb seeds require warm soil for optimal germination. Maintain a consistent temperature of around 70 to 75°F (21 to 24°C) in the planting area. Using a seedling heat mat can help provide the necessary warmth.
- Cover or Enclose: For some herb seeds, covering the container with plastic wrap or using a mini greenhouse can create a humid environment that promotes germination. Check the seed packet instructions to see if this step is recommended for the herbs you are growing.
- Label and Date: Don’t forget to label your containers with the herb names and the date of planting. This helps you keep track of the progress of each herb and its germination time.
Place the containers in a warm, well-lit area that receives indirect sunlight or use artificial grow lights to provide the necessary light for seed germination. Be patient, as germination times may vary depending on the herb. Once the seeds have sprouted, it’s time to move on to the next step—providing adequate light.
Providing Adequate Light
Proper lighting is essential for healthy herb growth. Since indoor environments often have limited natural light, it’s important to provide adequate artificial lighting to ensure your herbs thrive. Here’s what you need to know:
- Choose the Right Light Source: LED grow lights are an excellent choice for indoor herb gardening. They are energy-efficient, emit little heat, and provide the right spectrum of light for optimal plant growth. Place the grow lights a few inches above the herb plants to mimic sunlight.
- Provide Sufficient Light Duration: Most herbs require around 12-16 hours of light per day for proper growth. Setting up a timer for your grow lights ensures a consistent lighting schedule and helps regulate plant growth. Aim for a balance between light and darkness to mimic natural daylight cycles.
- Rotate the Herbs: If you’re using a stationary light source, periodically rotate your herb containers to ensure all sides of the plant receive adequate light. This prevents the herbs from leaning towards the light source and promotes even growth.
- Monitor Light Intensity: Different herbs have varying light requirements, so pay attention to their response. If you notice leggy or stunted growth, it may indicate insufficient light. On the other hand, if the leaves are bleached or scorched, it suggests the light intensity is too high.
- Supplement Natural Light: If you have access to a sunny window, place your herbs there to maximize natural light exposure. However, keep in mind that even with a sunny window, supplemental artificial light may still be necessary, especially during winter or in regions with limited sunlight.
Remember, light is a critical factor in photosynthesis and the production of essential oils in herbs, which contribute to their flavor and aroma. By providing the right amount and quality of light, you’ll help your herbs grow vigorously and develop those delicious flavors you crave in your culinary adventures.
With proper lighting in place, it’s time to move on to watering and fertilizing your growing herb plants.
Watering and Fertilizing
Proper watering and fertilizing are vital for the health and growth of your indoor herb garden. Here are some key guidelines to keep in mind:
- Watering:
- Check the Soil Moisture: Before watering, check the moisture level of the soil by gently sticking your finger about an inch into the soil. Only water when the top inch of soil feels dry. Overwatering can lead to root rot, while underwatering can cause the plants to wilt.
- Use the Right Technique: Water your herbs gently, ensuring the water evenly saturates the soil. Avoid pouring large volumes of water that could dislodge the seeds or damage fragile seedlings.
- Avoid Waterlogged Soil: Ensure your containers have proper drainage holes, and any excess water is able to freely drain away. Stagnant water can cause root rot and other detrimental conditions.
- Consider the Environmental Conditions: Factors such as temperature, humidity, and air circulation can influence the watering needs of your herbs. During hot, dry weather, or if your indoor environment is particularly dry, you may need to water more frequently.
- Fertilizing:
- Choose Organic Fertilizers: Opt for organic fertilizers to ensure the health and safety of your herbs. Organic options such as compost tea, diluted fish emulsion, or seaweed extract provide essential nutrients without the risk of chemical buildup.
- Follow Recommended Application Rates: Read the instructions on the fertilizer package and apply according to the recommended rates. Over-fertilization can lead to nutrient imbalances and damage the plants.
- Fertilize Sparingly: Herbs generally require less fertilization compared to other plants. A light feeding every 4-6 weeks during the growing season should be sufficient. However, adjust the frequency and strength of fertilization based on the specific needs of your herbs.
- Observe Nutrient Deficiencies: Watch for signs of nutrient deficiencies, such as yellowing leaves or stunted growth. This can indicate a lack of specific nutrients. Adjust your fertilization practices accordingly.
Remember, it’s important to strike a balance with watering and fertilizing. Avoid overdoing it, as this can lead to problems such as root diseases or nutrient imbalances. Regular monitoring and adjusting based on the needs of your herbs will ensure their healthy growth and optimum flavor.
With proper watering and fertilizing techniques in place, your herb plants will be well-nourished and ready for the next step—transplanting the seedlings (if needed).
Transplanting the Seedlings
As your herb seedlings grow, they may outgrow their initial containers and require transplantation into larger pots. Here’s how to successfully transplant your herb seedlings:
- Observe Seedling Development: Keep a close eye on the seedlings and look for signs that they are ready for transplanting. These signs include roots starting to emerge from the drainage holes, crowded growth, or stunted development.
- Choose the Right Size Pot: Select a pot that is one size larger than the current container. This allows the herb’s roots to have ample space for continued growth while minimizing the risk of overwatering.
- Prepare the New Pot and Soil: Fill the new pot with fresh potting mix, leaving enough room at the top to accommodate the seedling. Make a small hole in the center to place the seedling and its root ball.
- Unpot the Seedling: Gently loosen the soil around the seedling and carefully lift it out of the old container. Try to disturb the roots as little as possible to minimize transplant shock.
- Place the Seedling in the New Pot: Position the seedling in the prepared hole, making sure it is at the same depth as it was in the previous container. Gently backfill the hole with soil and lightly firm it around the seedling to provide stability.
- Water and Adjust: After transplanting, give the seedling a thorough watering to settle the soil and help reduce transplant shock. Adjust the lighting and watering schedule to accommodate the transplant and assist in the seedling’s recovery.
Transplanting seedlings allows their roots to establish in a larger space, promoting healthier growth and future productivity. Be mindful not to damage the delicate roots during the process, as this can hinder the plant’s ability to absorb nutrients and water.
Ongoing care, including maintaining proper temperature and humidity levels, and preventing pests and diseases, plays a crucial role in the long-term success of your indoor herb garden. We will cover these topics in the following sections.
Maintaining Proper Temperature and Humidity
Proper temperature and humidity levels are vital for the overall health and growth of your indoor herb garden. Creating the right environment for your herbs will ensure they thrive and flourish. Here’s what you need to know:
- Temperature:
- Optimal Temperature Range: Most herbs prefer temperatures between 60-75°F (15-24°C). However, different herbs have specific temperature preferences, so it’s important to research the ideal temperature range for the herbs you are growing.
- Avoid Extreme Temperatures: Avoid exposing your herbs to extreme temperature fluctuations or drafts. Keep them away from heating vents, cooling units, or cold windowsills.
- Provide Adequate Ventilation: Proper air circulation is crucial to prevent the buildup of excess humidity and to minimize the risk of fungal diseases. Open windows or use a small fan to improve ventilation in your indoor garden area.
- Humidity:
- Monitor Humidity Levels: Most herbs prefer moderate humidity levels between 40-60%. Low humidity can cause leaves to dry out, while high humidity can promote fungal diseases. Use a hygrometer to monitor humidity levels in your growing area.
- Increase Humidity: If the air becomes too dry, especially during winter when indoor heating is used, increase humidity by using a humidifier, grouping plants together to create a microclimate, or placing a tray of water near the plants.
- Decrease Humidity: If the air becomes too humid, especially in a closed or poorly ventilated space, use dehumidifiers or fans to lower humidity levels. Proper airflow and ventilation will also help in reducing excess humidity.
Maintaining proper temperature and humidity levels is vital to promote optimal growth and prevent stress or damage to your herbs. By creating a suitable environment, you give your herbs the best chance to thrive and produce flavorsome leaves, stems, and flowers.
Next, we will explore how to protect your herbs from common pests and diseases to ensure their continued health and productivity.
Preventing Pests and Diseases
Pests and diseases can wreak havoc on your indoor herb garden if left unchecked. Taking preventive measures will help keep your herbs healthy and resilient. Here’s how to protect your herbs from common pests and diseases:
- Inspect Regularly: Regularly inspect your herb plants for any signs of pests, such as aphids, spider mites, or whiteflies. Look for discolored leaves, webs, or visible pests on the leaves and stems.
- Practice Good Sanitation: Keep your indoor garden area clean and free from fallen leaves or plant debris. This helps eliminate hiding places for pests and reduces the risk of diseases.
- Isolate Affected Plants: If you notice any signs of pests or diseases on a specific herb, isolate that plant to prevent the infestation from spreading to other herbs.
- Use Natural Pest Control: Consider natural pest control methods such as introducing beneficial insects like ladybugs or using organic insecticidal soaps or neem oil sprays. These methods effectively control pests while being safe for consumption.
- Encourage Air Circulation: Good airflow helps discourage pests and fungal diseases. Place fans near your herb plants or ensure there is adequate space between the plants for air movement.
- Water Properly: Overwatering can create a damp environment, favoring the development of diseases. Water your herbs at their base and avoid getting water on the leaves, as this can lead to fungal growth.
- Rotate Crops: If you’re growing herbs in a small space, rotate their positions periodically. This prevents pests from becoming established and reduces the risk of soil-borne diseases building up in specific spots.
- Maintain Healthy Plants: Healthy herbs are less susceptible to pests and diseases. Provide them with proper growing conditions, including adequate light, balanced watering, and appropriate fertilization, to boost their natural defenses.
By incorporating these preventive measures into your gardening routine, you can minimize the risk of pests and diseases and maintain a flourishing herb garden. However, it’s important to monitor your plants regularly and address any issues promptly to prevent further damage.
Now, let’s move on to the exciting part—harvesting and using the herbs you’ve grown!
Harvesting and Using the Herbs
The time has finally come to enjoy the fruits of your labor – harvesting and using the herbs you’ve grown with care. Here’s everything you need to know about harvesting and utilizing your freshly grown herbs:
- Timing: Harvesting herbs at the right time ensures maximum flavor and aroma. Most herbs are best harvested in the morning after the dew has dried but before the sun is too hot. The leaves are usually at their peak just before the plant flowers.
- Snip or Pinch: Use clean, sharp scissors or your fingertips to gently snip or pinch off the leaves or stems. Avoid tearing or damaging the plant as it can lead to reduced growth or susceptibility to diseases.
- Prune Moderately: Harvesting stimulates growth, so don’t be afraid to prune your herbs regularly. However, avoid removing more than one-third of the plant at a time to maintain its vigor and longevity.
- Preserving Herbs: There are various methods you can use to preserve your herbs for future use. These include drying, freezing, or making herb-infused oils or vinegars. Choose the method that best suits your preferences and the specific herb.
- Using Fresh Herbs in Cooking: Incorporating fresh herbs into your culinary adventures adds a burst of flavor and freshness to your dishes. Whether you’re making a salad, pasta sauce, or soup, herbs like basil, parsley, cilantro, or mint can elevate the taste and presentation of your meals.
- Experiment with Herb Combinations: Don’t be afraid to get creative with herb combinations. Different herbs complement each other in unique ways, allowing you to create custom blends to enhance the flavors of specific cuisines or dishes.
- Explore Medicinal Properties: Many herbs have medicinal properties and can be used for natural healing remedies. Do some research on the herbs you’ve grown to discover their potential health benefits and explore ways to incorporate them into teas or tinctures.
- Share the Bounty: If you find yourself with an abundance of herbs, consider sharing them with friends, family, or neighbors. Herbs make thoughtful gifts and introduce others to the joys of fresh, homegrown flavors.
Remember, harvesting herbs regularly promotes continued growth and ensures a fresh supply for your culinary adventures. Embrace the versatility of your herbs by exploring different methods of preservation and experimenting with their flavors in cooking and natural remedies.
Now that you have a deeper understanding of how to grow, harvest, and utilize your homegrown herbs, it’s time to embark on this rewarding journey. Enjoy the process, savor the flavors, and relish in the satisfaction of nurturing your very own indoor herb garden.
Conclusion
Congratulations on completing this comprehensive guide to growing herbs from seeds indoors! By following the steps outlined in this article, you are well-equipped to embark on your edible gardening journey and enjoy the delights of fresh, flavorful herbs right at your fingertips.
From choosing the right seeds to preparing the soil, planting the seeds, and providing proper light, water, and fertilization, you have learned the essential elements of successful indoor herb gardening. You also discovered how to transplant seedlings, maintain proper temperature and humidity levels, prevent pests and diseases, and ultimately, harvest and utilize your herbs in various ways.
Growing herbs from seeds indoors provides a rewarding experience that not only brings the joy of gardening into your home but also offers numerous benefits. You have the opportunity to save money, reduce your environmental impact, and experience the satisfaction of growing your own fresh, organic herbs.
Remember, gardening is both an art and a science, and it may require some experimentation and learning along the way. Be patient, observe your plants, and fine-tune your techniques to meet the unique needs of your herbs.
So, why wait? Start gathering your supplies, choose your favorite herbs, and embark on this exciting journey of growing herbs from seeds indoors. Enjoy the process, embrace the natural beauty of your plants, and savor the incredible flavors and aromas of freshly grown herbs in your culinary creations.
Happy gardening!