Home>Types of Gardening>Edible Gardening>How To Grow Blueberries From Seeds
Edible Gardening
How To Grow Blueberries From Seeds
Modified: January 22, 2024
Learn how to grow delicious blueberries from seeds in your own edible garden. Discover expert tips and tricks for successful blueberry cultivation.
(Many of the links in this article redirect to a specific reviewed product. Your purchase of these products through affiliate links helps to generate commission for Chicagolandgardening.com, at no extra cost. Learn more)
Table of Contents
Introduction
Are you looking to add a delicious and nutritious fruit to your edible garden? Look no further than blueberries! These small, vibrant berries are not only packed with antioxidants and vitamins but are also a delight to grow in your own backyard. Whether you’re a seasoned gardener or a beginner, growing blueberries from seeds can be a rewarding experience.
Blueberries are perennial shrubs that belong to the Vaccinium genus and are native to North America. They thrive in acidic soil conditions with a pH level between 4.5 and 5.5. While it may take a little patience to grow blueberries from seeds compared to using seedlings or established plants, it’s worth the effort for the satisfaction of watching your plants grow from tiny seeds to bountiful bushes.
In this guide, we’ll walk you through the process of growing blueberries from seeds and provide you with useful tips to ensure success. From selecting the right seeds to caring for your plants and harvesting the fruits, you’ll learn all the necessary steps to transform your garden into a blueberry paradise.
Before we dive into the details, it’s important to note that growing blueberries from seeds may result in variations in plant characteristics, such as fruit size, color, and taste. This is because blueberries are cross-pollinated by insects in nature, leading to genetic diversity. However, if you’re up for the adventure of discovering unique blueberry varieties, growing from seeds is an excellent option.
Now, let’s explore the step-by-step process of growing blueberries from seeds and witness the magic of nature unfold in your own garden.
Step 1: Choosing the Right Blueberry Seeds
Choosing high-quality blueberry seeds is crucial to ensure the success of your gardening endeavor. Here are some important factors to consider when selecting your blueberry seeds:
- Variety: Blueberries come in various cultivars, each with its own unique characteristics. Consider the taste, size, and growth habits of different varieties to choose the one that suits your preferences and growing conditions. Some popular blueberry varieties include ‘Bluecrop,’ ‘Jersey,’ and ‘Northland.’
- Freshness: It’s important to use fresh seeds to improve germination rates. Look for seeds from reputable suppliers or collect them from ripe and healthy blueberries grown in your own garden.
- Organic or Conventional: Decide if you want to grow blueberries organically or using conventional methods. Organic seeds are produced without the use of synthetic chemicals, while conventional seeds may have been exposed to pesticides or fertilizers.
- Hardiness: Consider the hardiness zone of your region and select blueberry seeds that are adapted to your climate. Different varieties have varying levels of cold tolerance, so choose seeds that can withstand the winter temperatures in your area.
Once you’ve chosen the right blueberry seeds, you’re ready to move on to the next step of the process: preparing the soil. By providing the optimal growing conditions, you’ll give your blueberry seeds the best chance to flourish into healthy plants.
Step 2: Preparing the Soil
The key to successful blueberry cultivation lies in providing the right soil conditions. Blueberries thrive in acidic soil with a pH level between 4.5 and 5.5. Here’s how you can prepare the soil for your blueberry seeds:
- Test the Soil: Before planting, it’s important to test the pH level of your soil. You can purchase a pH testing kit from a garden center or send a soil sample to a local agricultural extension office. The test results will help you determine if your soil needs any amendments to achieve the desired acidity.
- Acidify the Soil: If the pH of your soil is too alkaline, you will need to acidify it to create the ideal conditions for blueberries. You can use amendments such as elemental sulfur, aluminum sulfate, or acidic organic matter like pine needles or peat moss. Follow the instructions on the product label or consult a gardening expert for the appropriate application rates.
- Improve Drainage: Blueberries prefer well-drained soil to prevent waterlogging, which can lead to root rot. If your soil has poor drainage, you can amend it with organic matter like compost or finely shredded bark. This will help improve the soil structure and promote better drainage.
- Add Nutrients: Blueberries require certain nutrients to grow vigorously. Organic fertilizers like compost or well-rotted manure are excellent options to provide a slow release of nutrients. Additionally, incorporating a balanced granular fertilizer specifically formulated for acid-loving plants can help ensure your blueberries receive the necessary nutrients.
By properly preparing the soil, you’ll create an optimal foundation for your blueberry seeds to establish strong root systems and thrive in your garden. Once the soil is adequately prepared, it’s time to move on to the exciting part: starting your blueberry seeds indoors.
Step 3: Starting Blueberry Seeds Indoors
Starting blueberry seeds indoors can give them a head start and increase the chances of successful germination. Follow these steps to get your blueberry seeds off to a healthy start:
- Gather Supplies: You will need seed trays or pots, a well-draining seed starting mix, a spray bottle for misting, and a plastic cover or plastic wrap to create a greenhouse-like environment.
- Sow the Seeds: Fill the seed trays or pots with the seed starting mix and moisten it slightly. Place 2-3 blueberry seeds on top of the soil in each container, spacing them evenly. Cover the seeds with a thin layer of soil, about 1/8 inch deep.
- Create Humidity: To create a humid environment, cover the seed trays with a plastic cover or wrap them in plastic wrap. This helps retain moisture and promotes germination. Keep the soil consistently moist, but not overly saturated, by misting it with water using a spray bottle.
- Provide Warmth and Light: Place the seed trays in a warm area with a temperature of around 70-75°F (21-24°C). Blueberry seeds require warmth to germinate. You can also use a heat mat underneath the trays to provide bottom warmth. Additionally, place the trays near a source of natural or artificial light, such as a sunny window or grow lights.
- Be Patient: Germination can take anywhere from 3 to 8 weeks. Keep checking the trays regularly to ensure the soil remains moist and provide light misting as needed. Once the seedlings have sprouted and established their first true leaves, they are ready for the next step.
Starting blueberry seeds indoors allows you to control the germination environment and gives your seeds a better chance of success. Once your blueberry seedlings have grown a bit and are ready for outdoor conditions, it’s time to transplant them into your garden.
Step 4: Transplanting Seedlings Outdoors
Once your blueberry seedlings have grown stronger and are ready for outdoor conditions, it’s time to transplant them into your garden. Follow these steps to ensure a successful transition:
- Choose the Right Location: Select a site in your garden that receives full sun or partial shade. Blueberries prefer at least six hours of direct sunlight daily. Ensure the soil is well-draining and has been properly prepared with the desired acidity level.
- Prepare the Planting Holes: Dig holes that are slightly larger and deeper than the root balls of your seedlings. Space the holes about 4-6 feet apart, allowing enough room for the blueberry bushes to grow and expand.
- Remove Seedlings from Containers: Gently remove the seedlings from their pots or trays, taking care not to damage the delicate roots. You can use your fingers or a small trowel to carefully lift them out.
- Plant the Seedlings: Place each seedling into a planting hole and backfill it with soil, gently firming it around the roots. Ensure the seedlings are planted at the same depth they were in their containers. Water the newly transplanted blueberry seedlings thoroughly to settle the soil.
- Provide Mulch and Support: Apply a layer of organic mulch, such as pine straw or wood chips, around the base of the plants. This helps conserve moisture, suppress weeds, and maintain a cool root environment. Additionally, depending on the variety and the expected height of your blueberry bushes, you may need to provide support such as stakes or a trellis to prevent them from drooping under the weight of the fruit.
Transplanting your blueberry seedlings outdoors is an important step in their growth journey. It allows them to take root in the garden and establish a strong foundation for future growth. Once transplanted, it’s time to provide proper care to ensure the health and vigor of your blueberry plants.
Step 5: Caring for Blueberry Plants
Providing proper care is essential to promote the growth and productivity of your blueberry plants. Here are some important steps to follow:
- Watering: Blueberries need consistent moisture, especially during the growing season. Keep the soil evenly moist, but not waterlogged. Aim for about 1-2 inches of water per week, either through rainfall or supplementary irrigation. Avoid overhead watering, as this can increase the risk of fungal diseases.
- Fertilizing: Blueberries have specific nutritional requirements. Use a balanced, slow-release fertilizer formulated for acid-loving plants in early spring and apply according to the label instructions. Avoid over-fertilizing, as this can damage the plants. Additionally, incorporating organic matter, such as compost or well-rotted manure, into the soil annually can provide additional nutrients.
- Pruning: Regular pruning helps maintain the shape, size, and productivity of your blueberry bushes. In late winter or early spring, remove any dead, damaged, or diseased wood. Thin out crowded branches to improve air circulation and light penetration. Also, remove any low-growing shoots or suckers that emerge from the base of the plants.
- Pest and Disease Control: Keep an eye out for common pests, such as aphids, mites, and blueberry maggot flies. Regularly inspect your plants for signs of infestation, and use organic pest control methods or insecticidal soaps if necessary. Additionally, monitor for common diseases like powdery mildew and rust, and take appropriate measures to prevent or control them.
- Winter Protection: Blueberries are generally hardy, but some varieties may require winter protection if you live in a region with harsh winter conditions. Apply a layer of mulch around the base of the plants to protect the roots from extreme cold. You can also consider using burlap or protective covers to shield the plants from frost and wind.
By following these care guidelines, you will provide your blueberry plants with the optimal conditions for growth and productivity. With time and attention, your plants will reward you with a bountiful harvest of delicious and nutritious blueberries.
Step 6: Harvesting Blueberries
When your blueberry bushes are mature and have reached their full potential, it’s time to enjoy the fruits of your labor. Here’s how to properly harvest your blueberries:
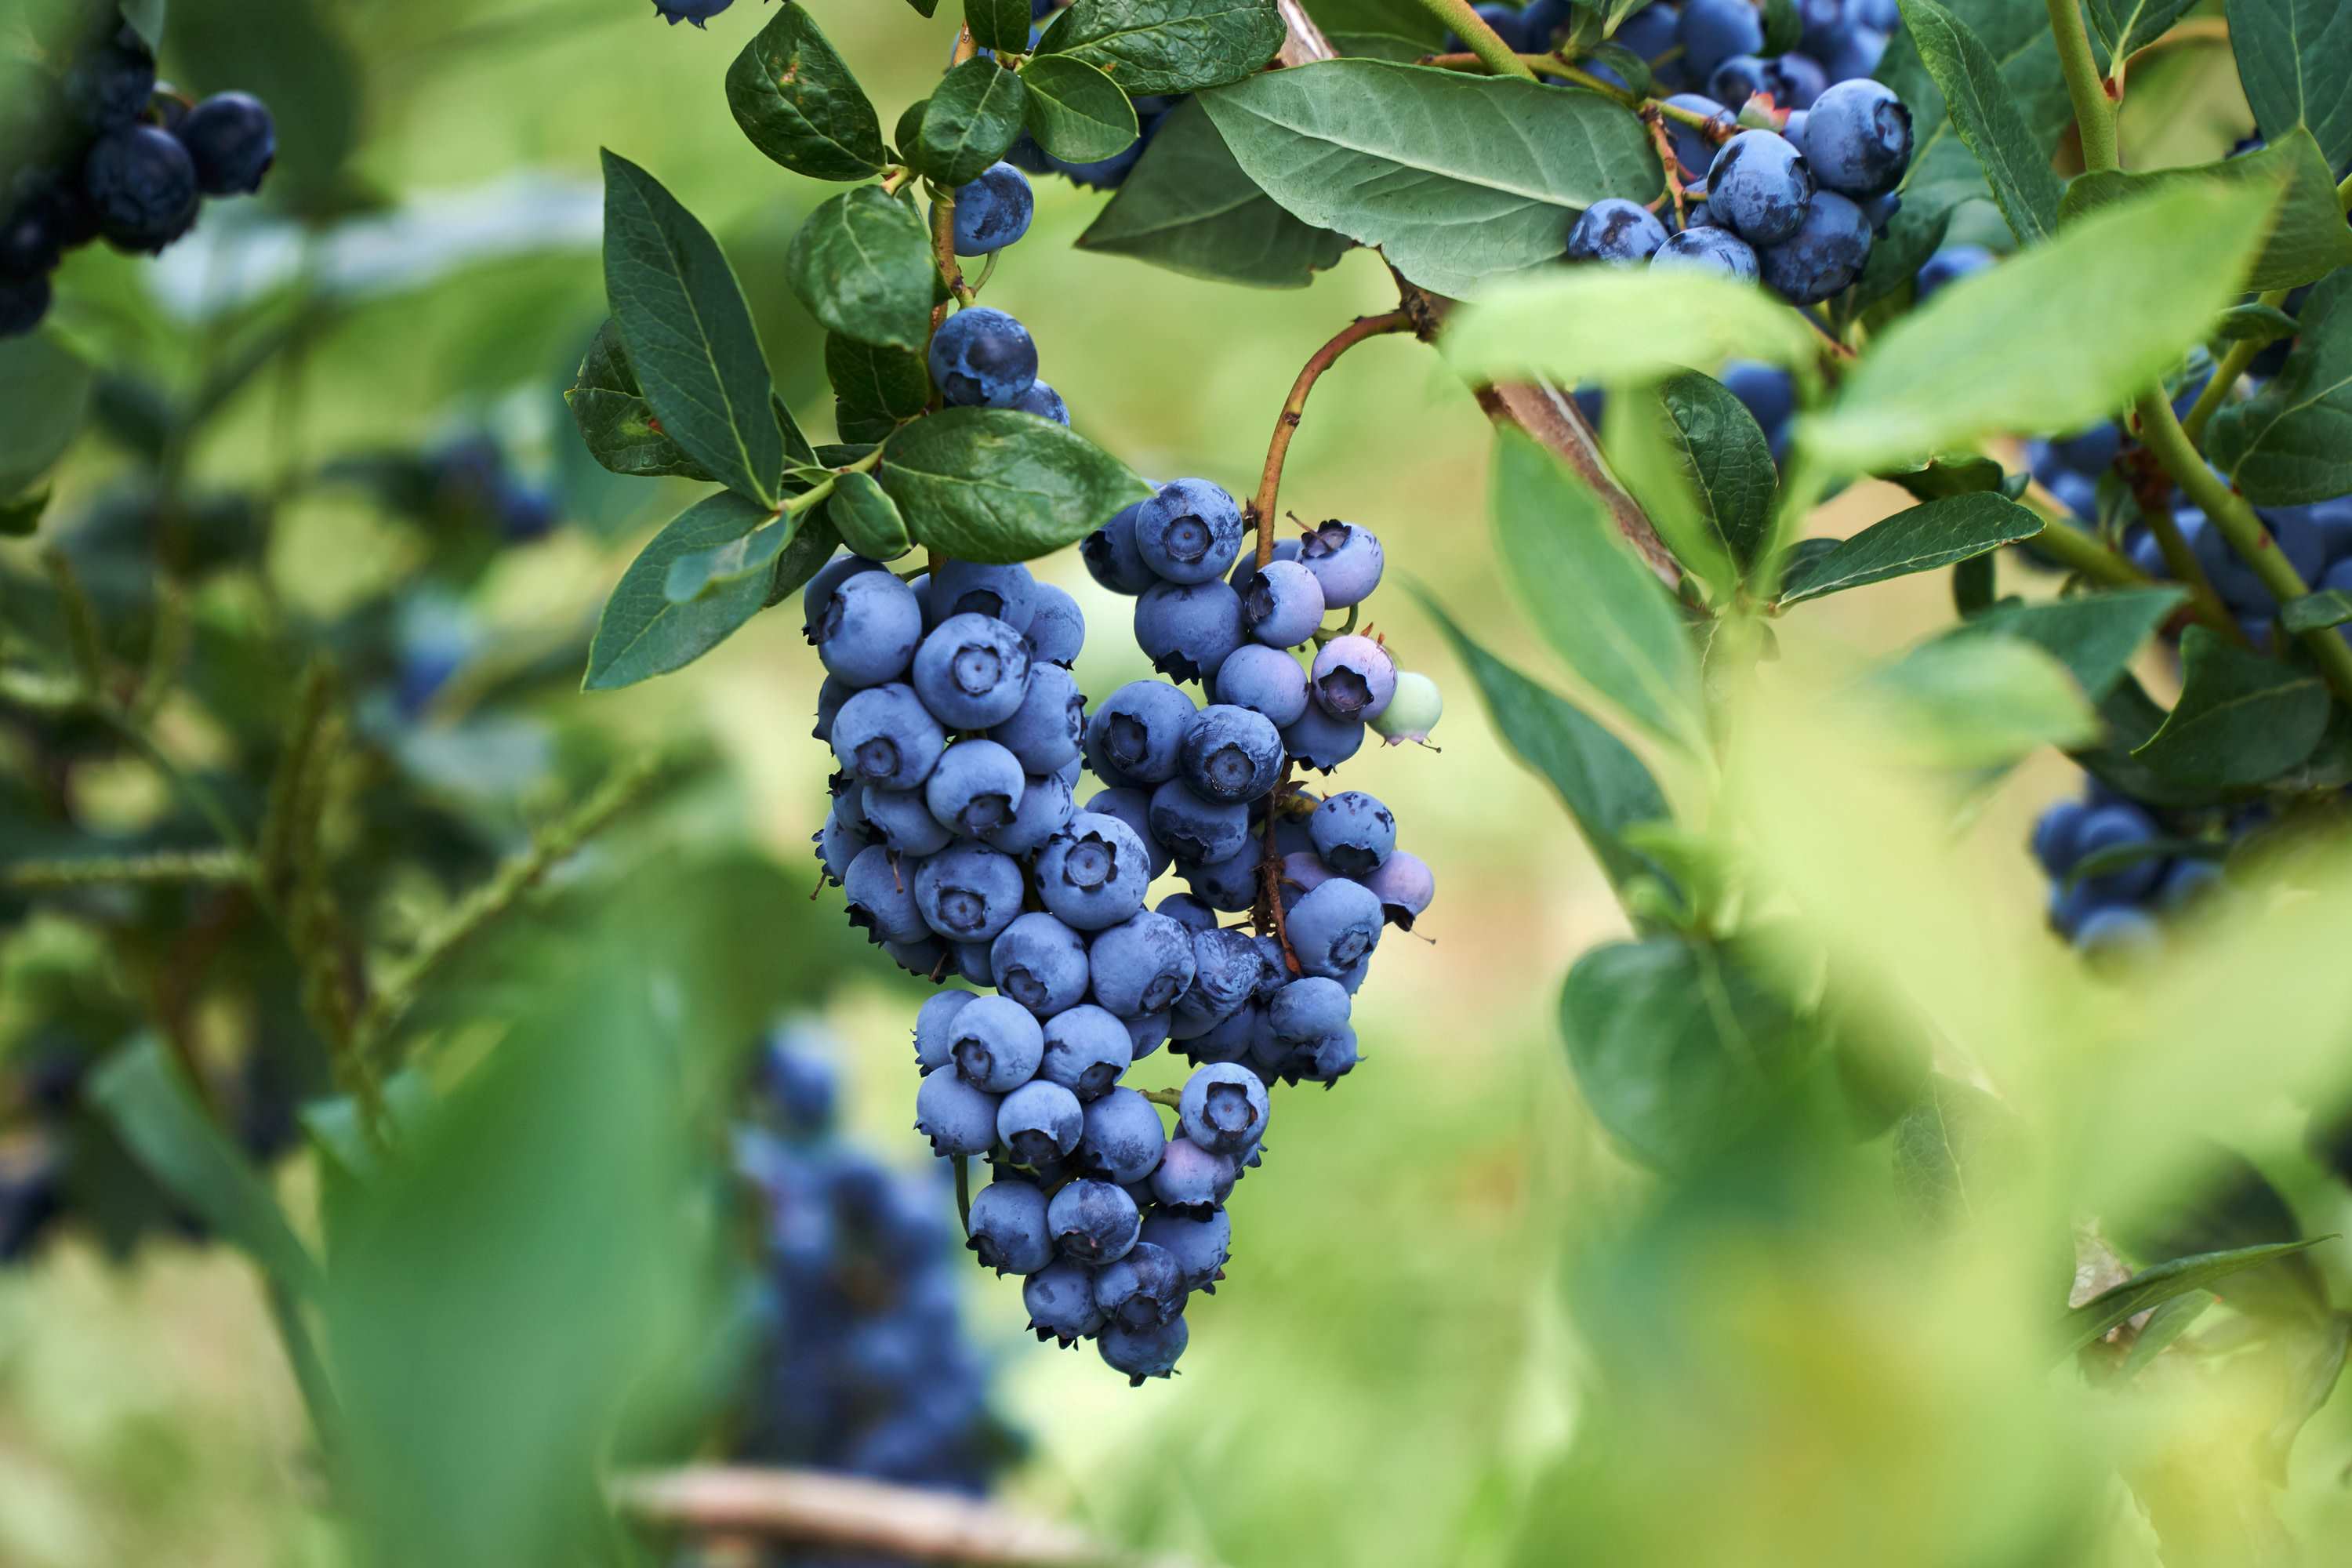
- Timing: Blueberries are ready to be harvested when they have fully ripened. This is typically indicated by their deep blue color and a slight softness when gently squeezed. The timing will depend on the variety and local climate, so refer to the specific guidelines for the blueberry variety you are cultivating.
- Picking Technique: Gently hold the cluster of blueberries in one hand and use your other hand to pluck the ripe berries. It’s important to handle the berries with care to avoid bruising them. If the berries do not come off easily, they are not yet fully ripe, so leave them on the plant for a little longer.
- Collection Container: Place the harvested blueberries in a shallow container, such as a basket or bowl. Avoid piling the berries too high to prevent crushing the bottom layer.
- Post-Harvest Care: Once you have finished harvesting, promptly remove any damaged or overripe berries from the collection container. Store the freshly harvested blueberries in the refrigerator to maintain their quality and freshness. Blueberries can stay fresh for up to two weeks when properly stored.
It’s worth noting that blueberry plants usually produce fruit over a few weeks, with the berries ripening in stages. Therefore, it’s a good idea to check your plants regularly and harvest the ripe berries as they become ready.
Harvesting blueberries can be a rewarding experience as you taste the sweet and tangy flavors of your homegrown fruit. Enjoy them fresh, use them in pies, jams, or smoothies, or freeze them for later use. The possibilities are endless!
Conclusion
Growing blueberries from seeds can be a fulfilling and rewarding experience for any edible gardener. While it may require some patience and care, the process of nurturing blueberry plants from tiny seeds to abundant bushes is truly magical.
By following the step-by-step guide outlined in this article, you can successfully grow blueberries from seeds and enjoy the delicious and nutritious fruits they produce. From choosing the right blueberry seeds to preparing the soil, starting the seeds indoors, transplanting the seedlings, caring for the plants, and finally harvesting the berries, each step plays a vital role in the overall success of your blueberry gardening journey.
Remember, blueberries thrive in acidic soil with a pH level between 4.5 and 5.5. Providing the right soil conditions, regular watering, proper fertilization, pruning, and protection from pests and diseases are essential for the health and productivity of your blueberry plants.
With dedication and attention, you’ll be rewarded with bountiful harvests of fresh, juicy blueberries. Whether you enjoy them right off the bush, incorporate them into your favorite recipes, or preserve them for later use, there’s nothing quite like the taste of homegrown blueberries.
So, dig in, get your hands dirty, and start your journey of growing blueberries from seeds. Embrace the challenges, embrace the rewards, and watch as your garden transforms into a colorful and fruitful oasis.