Home>Gardening Techniques>Plant Care>How To Grow Squash From Seeds
Plant Care
How To Grow Squash From Seeds
Modified: January 22, 2024
Learn the best plant care tips for growing squash from seeds. Discover how to start your own squash garden and achieve a bountiful harvest.
(Many of the links in this article redirect to a specific reviewed product. Your purchase of these products through affiliate links helps to generate commission for Chicagolandgardening.com, at no extra cost. Learn more)
Table of Contents
- Introduction
- Step 1: Choosing the Right Seeds
- Step 2: Preparing the Soil
- Step 3: Planting the Seeds
- Step 4: Providing Proper Watering
- Step 5: Ensuring Adequate Sunlight
- Step 6: Taking Care of Seedlings
- Step 7: Transplanting the Seedlings
- Step 8: Maintaining the Squash Plants
- Step 9: Dealing with Pests and Diseases
- Step 10: Harvesting the Squash
- Conclusion
Introduction
Are you a plant enthusiast looking to add some variety to your garden? Growing squash from seeds is a satisfying and rewarding experience. Whether you’re a seasoned gardener or a beginner, this comprehensive guide will walk you through the step-by-step process of growing squash from seeds with expert tips and tricks. With its vibrant colors, delicious taste, and numerous health benefits, squash is a versatile vegetable that can be enjoyed in a variety of culinary dishes.
Before you embark on your squash-growing journey, it’s important to understand its basic requirements. Squash plants thrive in warm weather, making them ideal for growing in the summer months. They belong to the Cucurbitaceae family, which also includes cucumbers and melons. With proper care and attention, you can enjoy a bountiful harvest of squash in your own backyard.
This article will guide you through each step of the process, from choosing the right seeds to harvesting your squash. You’ll learn how to prepare the soil, plant the seeds, provide proper watering and sunlight, take care of the seedlings, transplant them into your garden, and maintain the plants throughout the growing season. Additionally, we’ll discuss common pests and diseases that may affect your squash plants and provide tips on how to deal with them.
So, if you’re ready to embark on a journey of nurturing and growing squash from seeds, grab your gardening tools and let’s get started!
Step 1: Choosing the Right Seeds
Choosing the right seeds is crucial for successful squash growth. There are numerous varieties of squash available, each with its own unique characteristics and growing requirements. Here are some factors to consider when selecting your squash seeds:
- Climate: Consider the climate in your region and choose squash varieties that are well-suited for your specific conditions. Some varieties are more tolerant of hot weather, while others thrive in cooler climates.
- Space: Take into account the space available in your garden. If you have limited space, look for compact or bush varieties that don’t require as much room to grow. If you have ample space, consider larger varieties like vining or trailing squash.
- Taste and Texture: Different squash varieties offer a range of flavors and textures. Determine whether you prefer a mild or robust taste, and whether you want a squash with a creamy or firm texture.
- Purpose: Consider how you plan to use the squash in your culinary endeavors. Some varieties are best suited for roasting, while others are perfect for stuffing, grilling, or making into soups and stews.
- Seed Source: Choose seeds from a reputable source, such as a local nursery or a trusted seed supplier. This ensures that you are getting high-quality seeds that are more likely to germinate and produce healthy plants.
Once you’ve considered these factors, it’s time to purchase your squash seeds. You can find a wide variety of seeds at gardening stores, online seed catalogs, or even from fellow gardeners who may be willing to share their seeds. Select an assortment of different varieties to add diversity to your garden and offer a variety of flavors and textures.
Remember to read the seed packet instructions carefully. They will provide important information such as the ideal planting depth, spacing between plants, and germination time. Some varieties may require specific treatment, such as pre-soaking in water before planting.
By choosing the right seeds, you’re setting yourself up for a successful squash-growing adventure. Now that you have your seeds, it’s time to move on to the next step: preparing the soil.
Step 2: Preparing the Soil
Preparing the soil is an essential step in ensuring the health and productivity of your squash plants. Squash plants require well-drained, fertile soil with a pH level between 6 and 7. Here’s how to prepare the soil for optimal squash growth:
- Clear the area: Begin by clearing the area where you plan to plant your squash. Remove any weeds, rocks, or debris that may interfere with the growth of the plants.
- Loosen the soil: Use a garden fork or a tiller to loosen the soil to a depth of about 12 inches. This will improve drainage and aeration, allowing the roots to penetrate the soil more easily.
- Add organic matter: Enrich the soil with organic matter, such as compost or well-rotted manure. This will improve the soil structure, increase fertility, and provide essential nutrients for the growing plants.
- Balance nutrient levels: Conduct a soil test to determine the nutrient levels in your soil. Based on the results, you may need to amend the soil with additional nutrients, such as nitrogen, phosphorus, and potassium, to ensure optimal growth.
- Level the soil: Smooth out the soil surface using a rake, ensuring it is leveled and free of large clumps. This will provide a uniform surface for planting and promote proper water distribution.
- Warm the soil: If you are planting squash early in the season or in a cooler climate, warm the soil by covering it with a black plastic mulch or using row covers. This will help raise the temperature of the soil and encourage faster germination and growth.
Remember to perform these soil preparation steps a few weeks before planting your squash seeds. This will give the soil enough time to settle and allow any amendments to integrate thoroughly.
By properly preparing the soil, you are setting the stage for healthy root development and vigorous growth of your squash plants. Now that the soil is ready, it’s time to move on to the next step: planting the seeds.
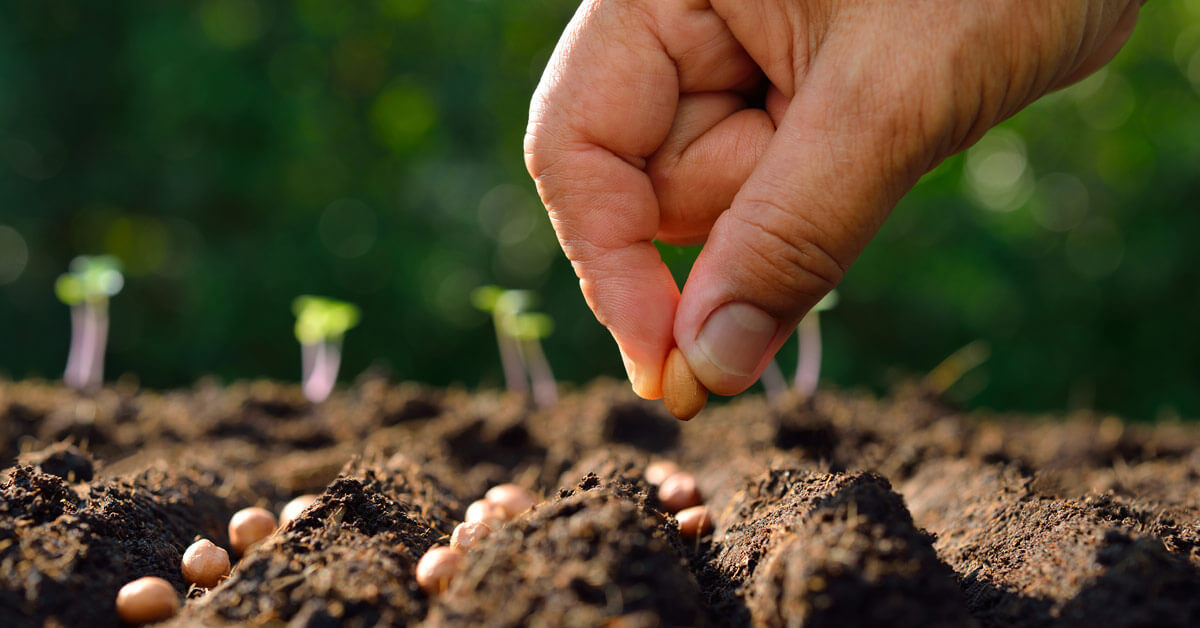
Step 3: Planting the Seeds
Planting the seeds is an exciting step in the process of growing squash. Proper placement and spacing are key to ensure that the plants have enough room to grow and receive adequate sunlight and nutrients. Follow these steps to plant your squash seeds:
- Select the planting site: Choose a sunny spot in your garden for planting your squash. Ensure that the area receives at least 6-8 hours of direct sunlight per day.
- Planting method: There are two main planting methods for squash – direct seeding and starting seeds indoors. Direct seeding involves planting the seeds directly into the garden soil, while starting seeds indoors allows you to transplant seedlings into the garden later. Select the method that works best for you.
- Planting depth: Plant the squash seeds about 1 inch deep into the soil. If you’re using the direct seeding method, sow 3-4 seeds in each hole, with a spacing of about 3 feet between each hole. Starting seeds indoors allows you to plant one seed per individual container.
- Watering: After planting the seeds, water the soil gently but thoroughly. This will help settle the soil around the seeds and initiate the germination process.
- Thin out seedlings: If you’ve planted multiple seeds in each hole, thin out the weaker seedlings once they have grown to about 2 inches tall. Leave the strongest seedling in each hole to ensure proper spacing and growth.
- Provide support if necessary: If you’re planting vining or trailing squash varieties, consider providing support such as trellises or stakes. These will help keep the vines off the ground and prevent the fruit from rotting.
- Label your plants: It’s a good practice to label your plants to keep track of the different varieties you’ve planted. This will help you identify them as they grow.
Remember to water the plants regularly, keeping the soil consistently moist but not waterlogged. As the seeds germinate and the seedlings grow, monitor their progress and provide support and proper care as needed.
With the seeds planted, you’re one step closer to enjoying fresh and tasty squash from your very own garden. The next step will focus on providing proper watering to ensure healthy plant growth.
Step 4: Providing Proper Watering
Proper watering is essential for the healthy growth and development of squash plants. Watering requirements may vary depending on factors such as climate, soil type, and the stage of plant growth. Here are some guidelines to help you provide proper watering for your squash:
- Water deeply: When watering, ensure that the water reaches the root zone of the plants. Shallow watering may result in weak root development. Water deeply, allowing the soil to be thoroughly soaked to a depth of at least 6 inches.
- Water consistently: Consistent moisture is important for the growth of squash plants. Ensure that the soil remains evenly moist throughout the growing season. Avoid letting the soil dry out completely between waterings.
- Time of day: Water your squash plants in the early morning or late afternoon. This allows the foliage to dry before nightfall, reducing the risk of disease development.
- Avoid overhead watering: Squash plants are susceptible to fungal diseases. To minimize the risk, avoid overhead watering methods that wet the foliage. Instead, water directly at the base of the plant, using a drip irrigation system or a watering can.
- Mulch: Apply a layer of organic mulch, such as straw or wood chips, around the base of the plants. This helps to conserve moisture, suppress weed growth, and regulate soil temperature.
- Monitor soil moisture: Regularly check the moisture levels in the soil by sticking your finger about an inch below the surface. If it feels dry, it’s time to water. If it feels moist, wait a bit longer before watering again.
- Avoid overwatering: While it’s essential to keep the soil consistently moist, overwatering can lead to root rot and other problems. Avoid waterlogged conditions by ensuring proper drainage in the soil.
By providing proper watering, you’ll help your squash plants thrive and produce healthy fruits. As the plants grow, continue to monitor their water needs and adjust your watering schedule accordingly.
Now that you’ve learned how to provide proper watering for your squash plants, it’s time to move on to the next step: ensuring adequate sunlight.
Step 5: Ensuring Adequate Sunlight
Adequate sunlight is crucial for the healthy growth and productivity of squash plants. Sunlight provides the energy necessary for photosynthesis, which is essential for the development of strong stems, lush foliage, and bountiful fruits. Here are some tips to ensure your squash plants receive the required amount of sunlight:
- Select a sunny location: Choose a planting site that receives full sun, ideally 6-8 hours of direct sunlight per day. Avoid places that are shaded by trees or buildings, as this can hinder the plant’s growth.
- Monitor sunlight exposure: Observe your garden throughout the day and note any areas where shadows may occur due to adjacent structures or trees. This will help you determine the best spots to plant your squash to maximize sunlight exposure.
- Provide proper spacing: Plant your squash with enough space between each plant to prevent overcrowding. This allows for good air circulation and ensures that each plant receives adequate sunlight without being shaded by nearby plants.
- Use reflective surfaces: Consider placing reflective surfaces, such as white stone or aluminum foil, around your squash plants. This can help redirect sunlight and increase the overall light intensity for optimal growth.
- Rotate your plants: If you have recurring shaded areas in your garden, consider rotating your squash plants each season. This will allow for equal exposure to sunlight and prevent any specific plants from constantly being deprived of light.
- Prune excessive foliage: Monitor the growth of your squash plants and prune away any excessive foliage that may be blocking sunlight from reaching the lower parts of the plant. This will promote better air circulation and ensure that sunlight reaches all parts of the plant.
Remember that providing adequate sunlight is essential from the early stages of growth to the fruiting stage. By ensuring your squash plants receive enough sunlight, you’ll promote healthy plant development, faster fruiting, and a higher yield.
With the importance of sunlight covered, let’s move on to the next step: taking care of the seedlings.
Step 6: Taking Care of Seedlings
Proper care of seedlings is crucial for their healthy growth and development into strong and vibrant squash plants. Seedlings are delicate and require special attention to ensure they have the best start. Here are some tips to help you take care of your squash seedlings:
- Watering: Keep the soil consistently moist but not waterlogged. Gently water the seedlings, ensuring that the water reaches the roots. Avoid overwatering, as excessive moisture can lead to damping-off disease.
- Thinning: If you’ve planted multiple seeds in each hole, thin out the weaker seedlings once they have grown to about 2 inches tall. This will prevent overcrowding and competition for resources, allowing the remaining seedlings to thrive.
- Fertilization: Once the seedlings have developed their first set of true leaves, you can begin fertilizing them. Use a balanced liquid fertilizer or a slow-release granular fertilizer, following the manufacturer’s instructions for application rates.
- Protect from pests: Keep an eye out for common pests such as aphids, slugs, and snails. If you notice any signs of pest damage, take appropriate measures to control them. This can include manually removing pests, using natural predators, or applying organic pest control methods.
- Provide support: If you’re growing vining or trailing squash varieties, provide supports such as trellises or stakes. This will help them grow vertically and prevent the plants from sprawling on the ground, reducing the risk of fungal diseases.
- Weed control: Regularly weed the area around your seedlings to prevent competition for nutrients and water. Be careful not to disturb the shallow roots of the young plants while weeding.
- Protect from extreme weather: If there are sudden temperature drops or strong winds, consider protecting your seedlings with row covers or cloches. This will shield them from the harsh elements and help them establish more successfully.
- Monitor growth: Keep a close eye on the growth of your seedlings, ensuring they are developing a healthy root system and producing new leaves. Promptly address any signs of wilting, yellowing, or stunted growth.
By providing the proper care and attention to your seedlings, you are setting the foundation for healthy and robust squash plants. As the seedlings grow, continue to monitor their progress and provide support and maintenance as needed.
With the seedlings well taken care of, it’s time to move on to the next step: transplanting them into your garden.
Step 7: Transplanting the Seedlings
Transplanting your squash seedlings from their nursery containers into the garden is a critical step in their journey towards becoming fully grown plants. This process allows the seedlings to establish their roots in the designated growing area. Follow these steps to successfully transplant your squash seedlings:
- Timing: Choose the right time to transplant your seedlings. Wait until the danger of frost has passed and the soil has warmed up sufficiently. Typically, this is about 2-3 weeks after the last expected frost date in your area.
- Prepare the soil: Prior to transplanting, prepare the soil in the garden bed by removing weeds and loosening the soil. Ensure that the soil is well-drained and fertile, with a pH level between 6 and 7.
- Dig holes: Dig holes in the garden bed that are slightly larger than the root ball of the seedlings. Space the holes according to the recommended spacing for the specific squash variety you are growing.
- Water the seedlings: Before removing the seedlings from their nursery containers, give them a thorough watering. This helps to keep the root ball intact and minimizes shock during transplantation.
- Remove the seedlings: Gently remove the seedlings from their containers, taking care not to damage the roots. You can use a small trowel or your fingers to carefully loosen the root ball if necessary.
- Transplant the seedlings: Place each seedling into a prepared hole, ensuring that the top of the root ball is level with or slightly above the soil surface. Backfill the hole with soil, gently firming it around the base of the seedling.
- Water thoroughly: After transplanting, water the seedlings thoroughly to help settle the soil and establish good contact between the roots and the surrounding soil. Provide regular watering in the following days to ensure the seedlings receive adequate moisture.
- Protect from extreme conditions: If you anticipate extreme weather conditions, such as excessive heat or strong winds, consider providing temporary shade or protection for the newly transplanted seedlings until they become established.
Transplant shock is common when seedlings are moved from containers to the ground. However, with proper care and attention, the seedlings will recover and continue to grow. Keep an eye on the transplanted squash plants, providing supportive measures such as watering, fertilizing, and protecting from pests and diseases as needed.
With the seedlings successfully transplanted, it’s time to move on to the next step: maintaining the squash plants.
Step 8: Maintaining the Squash Plants
Maintaining your squash plants is crucial for their overall health and productivity. Regular care and attention throughout the growing season will help ensure strong growth, abundant blossoms, and a bountiful harvest. Here are some essential tasks to include in your maintenance routine:
- Watering: Continue to provide consistent moisture by watering your squash plants regularly. Aim to keep the soil evenly moist, but not waterlogged. Deep watering is important to encourage deep root growth.
- Fertilizing: Feed your squash plants with a balanced fertilizer to provide them with essential nutrients. Follow the recommended dosage on the fertilizer packaging, and apply it according to the specific instructions for your chosen fertilization method.
- Weed control: Regularly weed around your squash plants to prevent unwanted competition for nutrients and water. Be careful not to disturb the shallow roots while removing weeds.
- Pruning: Monitor your plants and prune away any dead, damaged, or diseased leaves or vines. This helps improve air circulation and reduces the risk of fungal diseases. You can also pinch off the tips of vining varieties to promote bushier growth.
- Pollination: Squash plants require proper pollination to set fruit. If you notice a lack of fruit development, you can hand-pollinate the flowers by transferring pollen from the male flowers to the female flowers using a small brush or cotton swab.
- Support: If you’re growing vining or trailing squash varieties, provide support such as trellises or stakes to help keep the vines off the ground. This reduces the risk of pests and diseases and allows for easier harvesting.
- Monitor for pests and diseases: Regularly inspect your squash plants for any signs of pests or diseases. Common pests include squash bugs, vine borers, and powdery mildew. Take appropriate measures, such as using organic insecticides or fungicides if necessary.
- Harvesting: Monitor your plants for ripening fruits and harvest them when they reach the desired size. Regularly harvesting encourages more fruit production and prevents over-ripening or rotting.
By maintaining your squash plants with proper care and attention, you can enjoy a thriving garden filled with healthy plants and a plentiful harvest. Stay vigilant and address any issues promptly to ensure the continuous growth and productivity of your squash plants.
With the maintenance routine in place, it’s time to move on to the next step: dealing with pests and diseases.
Step 9: Dealing with Pests and Diseases
Pests and diseases can be a challenge when growing squash plants, but with proper prevention and timely intervention, you can effectively manage and mitigate their impact. Here are some strategies for dealing with common pests and diseases that affect squash:
- Squash Bugs: These pests suck sap from the leaves, causing wilting and yellowing. Remove any eggs found on the undersides of leaves and use organic insecticidal soap or neem oil to control adult bugs. Regularly inspect your plants to catch infestations early.
- Squash Vine Borers: These larvae bore into stems, causing wilting and plant decline. To combat them, monitor the base of the plant for entry holes and remove any larvae found. You can also use physical barriers like row covers to prevent the adult moths from laying eggs on the plants.
- Powdery Mildew: This fungal disease manifests as a white, powdery coating on leaves, inhibiting photosynthesis. To manage powdery mildew, improve air circulation by spacing plants adequately and removing affected leaves. Applying fungicidal sprays or using organic alternatives like milk or baking soda can also help prevent its spread.
- Downy Mildew: This disease causes yellow spots on leaves, leading to defoliation. Provide good airflow and avoid overhead watering to prevent moisture buildup. Fungicides or organic alternatives like copper-based sprays may be used to control downy mildew, especially during damp conditions.
- Cucumber Beetles: These pests can transmit diseases and damage plants by feeding on leaves and blossoms. Remove any infected plants and physically remove beetles when spotted. Applying organic insecticides or using deterrents like floating row covers can help protect your plants.
- Preventative Measures: Implement preventative practices such as crop rotation, proper spacing, and regular sanitation to reduce the risk of pests and diseases. Additionally, using organic pest control methods and promoting beneficial insects, like ladybugs and lacewings, can help maintain a balanced ecosystem in your garden.
Regular monitoring of your squash plants is key to catching pest and disease problems early on. By acting promptly and employing appropriate control measures, you can minimize the damage and preserve plant health.
With an understanding of how to deal with pests and diseases, you’re well-equipped to face any challenges that may arise in your squash garden. Now, let’s move on to the final step: harvesting the fruit of your labor.
Step 10: Harvesting the Squash
Harvesting squash is a gratifying and exciting moment in your gardening journey. Knowing the right time to harvest ensures that you enjoy the best flavor, texture, and quality of your squash. Here are some essential tips for harvesting your squash:
- Observe maturity: Different squash varieties have varying maturity times. Refer to the seed packet or variety information to determine the expected maturity period for your specific squash. Harvesting too early can result in underdeveloped fruit, while waiting too long can lead to overripe or tough squash.
- Check color and size: Look for mature squash that has a vibrant color, a glossy skin, and a firm texture. The size will depend on the variety, so be sure to harvest when they reach their appropriate size. Generally, summer squash is harvested when it is 6-8 inches in length, while winter squash is harvested when the rind has hardened and it has reached its full size.
- Use a sharp tool: When harvesting, use a sharp knife or pruning shears to cut the stem about 1-2 inches from the fruit. Avoid pulling or twisting the squash, as this can damage the plant and potentially lead to rotting or disease spread.
- Harvest frequently: Regularly check your plants for ready-to-harvest squash, as they can quickly grow in size. Harvesting frequently encourages continuous fruit production and prevents squash from becoming oversized and less flavorful.
- Handle with care: Handle your harvested squash with care to avoid any bruising or damage. Place them gently in a basket or a container, avoiding any rough handling that may impact their quality and shelf life.
- Storage: Depending on the type of squash, you can store them at room temperature, in a cool and dark place, or in a refrigerator. Summer squash tends to have a shorter shelf life and is best consumed within a few days, while winter squash can be stored for several months.
- Enjoy the harvest: Now comes the best part – enjoying the fruits of your labor! Incorporate squash into delicious recipes, such as stir-fries, soups, casseroles, or simply enjoy them grilled or roasted. The possibilities are endless!
Remember to continue caring for your squash plants even after harvesting. Regular watering, fertilizing, and pest control measures are important for maintaining the health of the plants and ensuring a successful harvest throughout the growing season.
Now that you know how to harvest your squash at the perfect time, it’s time to savor the flavors of your homegrown produce. Happy harvesting!
Conclusion
Congratulations! You have now become well-versed in the art of growing squash from seeds. With each step, from choosing the right seeds to harvesting the fruits of your labor, you have gained the knowledge and skills needed to cultivate healthy and productive squash plants.
Remember to consider factors like climate, space, taste, and purpose when selecting your squash seeds. Prepare the soil properly to provide an optimal growing environment for your plants. Take care of the seedlings, ensuring they receive adequate watering, sunlight, and nutrients. Transplant them into the garden with care and maintain the plants by providing proper watering, fertilization, and protection from pests and diseases.
Throughout the growing season, be observant and proactive in monitoring the health of your plants. Deal with any pests or diseases promptly to prevent them from impacting your squash plants. Once the fruits have ripened, harvest them at the right time by checking for color, size, and texture. Handle the squash with care and store them appropriately to extend their shelf life.
Growing squash from seeds is not only a rewarding experience but also a delicious one. Experiment with various squash varieties and enjoy the abundance of flavors and textures they offer. Whether you cook them into savory dishes or savor them in their natural form, your homegrown squash will undoubtedly bring you joy and satisfaction.
Remember, gardening is a continuous learning process. Don’t be afraid to experiment, try new techniques, and adapt to the unique conditions of your garden. With patience, perseverance, and a green thumb, your squash plants will flourish year after year.
So, roll up your sleeves, grab your gardening tools, and embark on the journey of growing squash from seeds. Enjoy the process, embrace the challenges, and relish the delightful rewards of a thriving squash garden. Happy growing!