Home>Types of Gardening>Edible Gardening>How To Plant Eggplant Seeds
Edible Gardening
How To Plant Eggplant Seeds
Modified: January 22, 2024
Learn how to plant eggplant seeds and start your own edible gardening journey. Discover tips and techniques for successful growth.
(Many of the links in this article redirect to a specific reviewed product. Your purchase of these products through affiliate links helps to generate commission for Chicagolandgardening.com, at no extra cost. Learn more)
Table of Contents
- Introduction
- Step 1: Choosing the right eggplant seeds
- Step 2: Preparing the seeds for planting
- Step 3: Selecting the planting location
- Step 4: Preparing the soil
- Step 5: Planting the eggplant seeds
- Step 6: Watering the seeds
- Step 7: Providing proper sunlight
- Step 8: Protecting the seedlings
- Step 9: Transplanting the seedlings (if applicable)
- Step 10: Caring for the growing eggplant plants
- Step 11: Harvesting the eggplants
- Conclusion
Introduction
Welcome to the world of edible gardening! If you’re a fan of fresh, homegrown produce, then growing your own eggplants should definitely be on your to-do list. Not only are eggplants delicious and versatile, but they also add a touch of elegance to any dish. From classic Italian recipes like eggplant Parmesan to smoky grilled eggplant salads, the possibilities are endless.
But before you can enjoy the bountiful harvest of eggplants, you need to start from scratch and plant the seeds. Don’t worry if you’re new to gardening; this article will guide you through each step of the process, ensuring that you have all the necessary information to successfully grow eggplant plants.
From choosing the right eggplant seeds to caring for the growing plants, we’ll cover it all. By the end of this article, you’ll be equipped with the knowledge and confidence to embark on your own eggplant growing adventure.
So, let’s roll up our sleeves and get ready to dig in!
Step 1: Choosing the right eggplant seeds
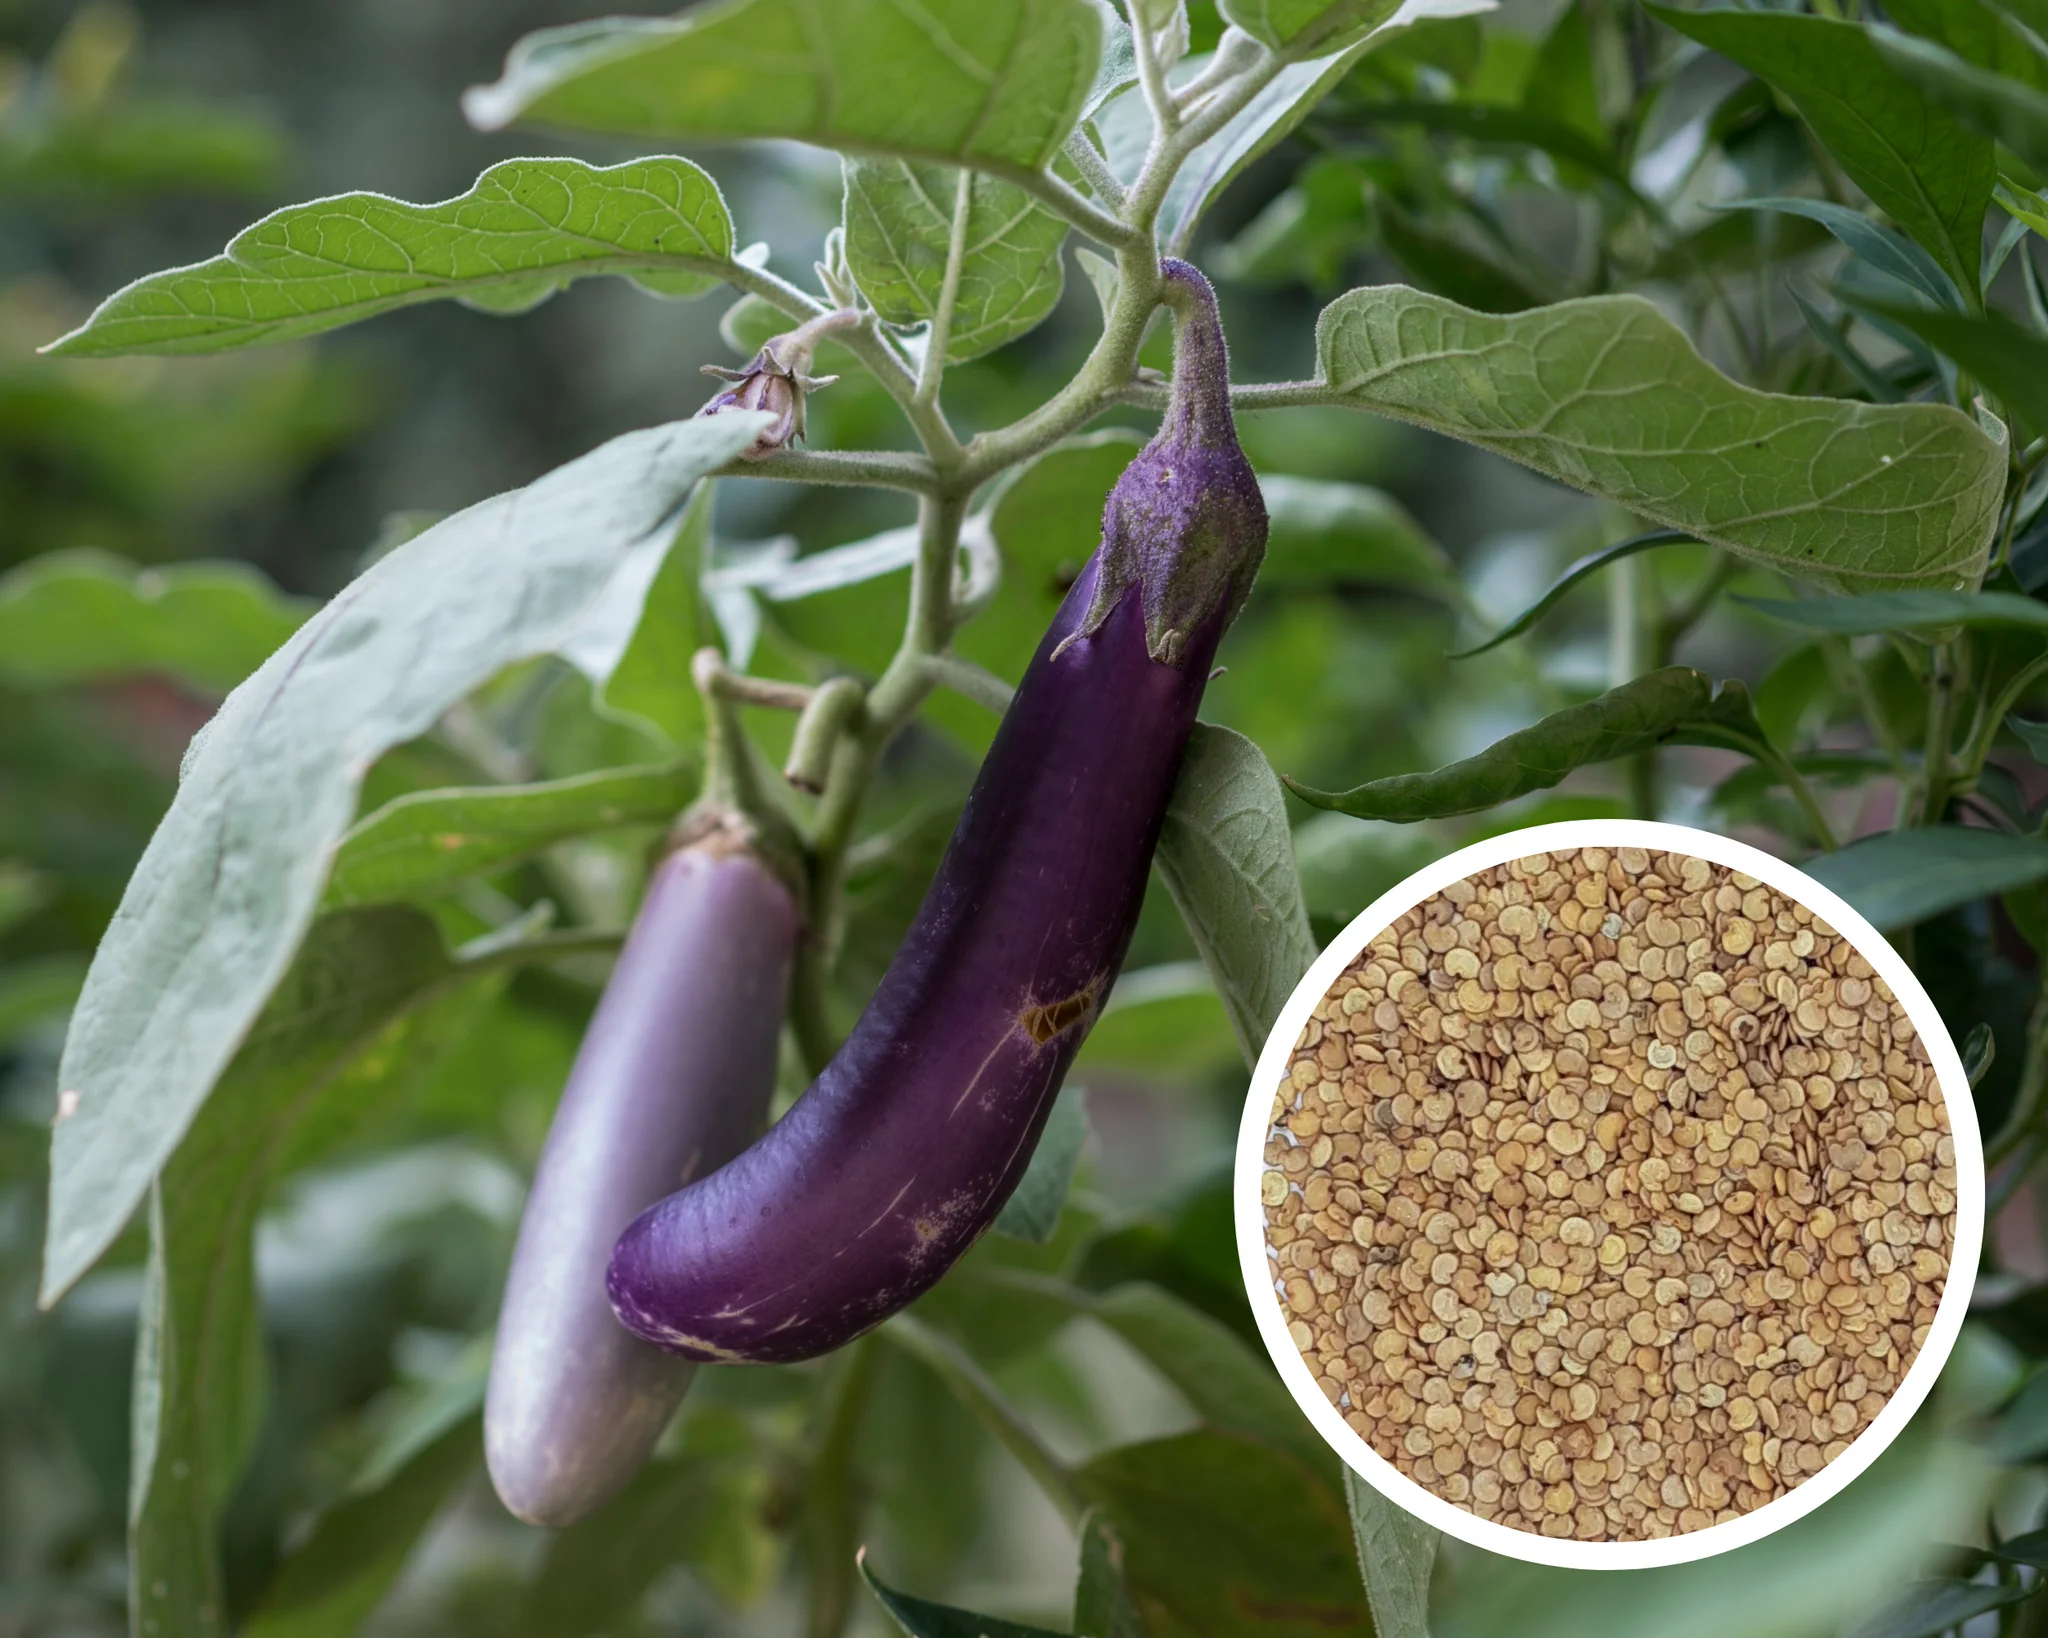
When it comes to growing eggplants, selecting the right seeds is crucial. Whether you prefer the traditional purple varieties or want to experiment with unique colors and shapes, there are a few factors to consider when choosing your eggplant seeds.
Firstly, decide on the type of eggplant you want to grow. There are various varieties to choose from, each with its own characteristics and flavors. Some common types include Italian eggplants, Asian eggplants, and miniature eggplants. Consider the size, shape, and taste preferences that suit your needs and culinary desires.
Next, it’s important to consider your climate and growing conditions. Some eggplant varieties thrive in hot climates, while others are better suited for cooler regions. Check the recommended planting zones for each seed variety to ensure it aligns with your specific location.
When purchasing eggplant seeds, opt for reputable seed companies or nurseries to ensure quality and reliability. Look for organic and non-GMO seeds if possible, as they are free from harmful chemicals and are more environmentally friendly.
Additionally, you may want to explore heirloom or hybrid varieties. Heirloom seeds are open-pollinated and have been passed down through generations, while hybrids are a crossbreed of two different eggplant varieties. Both options have their advantages, so consider your preferences and gardening goals.
Lastly, don’t forget to check the seed packaging for important information such as the seed’s expiration date, germination rates, and any special care instructions. This will help you determine the viability and success rate of the seeds.
Remember, selecting the right eggplant seeds is the first step towards a successful harvest. Take your time, do your research, and choose the varieties that will thrive in your specific growing conditions.
Step 2: Preparing the seeds for planting
Once you have chosen the perfect eggplant seeds, it’s time to prepare them for planting. Proper seed preparation is essential for ensuring successful germination and healthy seedlings. Follow these steps to get your eggplant seeds ready for the next stage of growth:
1. Start by soaking the seeds: Fill a small bowl with warm water and place the seeds in it. Allow them to soak for about 24 hours. This process helps soften the seed coat and promotes faster germination.
2. Prepare a germination medium: While the seeds are soaking, prepare a suitable germination medium. You can use a seed-starting mix or create your own by combining equal parts of peat moss, vermiculite, and perlite. Fill seed trays or small pots with the germination medium, leaving a little space at the top.
3. Drain and sow the seeds: After soaking, drain the water from the seeds and spread them evenly on top of the germination medium. Gently press them into the soil, ensuring they are not buried too deep. Space the seeds about an inch apart to give each seedling adequate room to develop.
4. Cover and label the trays: Cover the seed trays with a plastic dome or a clear plastic wrap to create a mini greenhouse-like environment. This helps retain moisture and promotes germination. Don’t forget to label each tray with the seed variety and the date of sowing for easy identification.
5. Provide the right conditions: Place the trays in a warm location with indirect sunlight. Eggplant seeds prefer temperatures between 70-80°F (21-27°C) for optimal germination. Keep the soil evenly moist by misting it with water when necessary. Avoid overwatering, as it can cause the seeds to rot.
6. Be patient and monitor progress: Germination typically takes around 7-14 days, though it can vary depending on the variety and environmental conditions. Keep a close eye on the trays and monitor the progress of the seedlings. Once they start sprouting, remove the plastic cover and continue to provide them with the right conditions.
By following these steps, you will give your eggplant seeds the best chance of germinating and developing into healthy seedlings. Proper seed preparation sets the stage for successful growth and ensures a strong start to your eggplant gardening journey.
Step 3: Selecting the planting location
Choosing the right planting location is crucial for the success of your eggplant plants. Eggplants require specific environmental conditions to thrive and produce abundant harvests. Consider the following factors when selecting the ideal planting spot:
1. Sunlight: Eggplants are sun-loving plants and require a minimum of 6-8 hours of direct sunlight each day. Choose a location in your garden that receives ample sunlight and is not shaded by trees or buildings. The more sunshine your eggplants receive, the better they will grow and produce fruits.
2. Soil quality: Eggplants thrive in well-draining soil that is rich in organic matter. Ideally, the soil should have a pH level between 5.8 and 6.5. Conduct a soil test to determine the pH level and make necessary amendments to adjust it if needed. Incorporating compost or aged manure into the soil will improve its fertility and drainage.
3. Air circulation: Good air circulation is essential to prevent the development of fungal diseases and promote healthy growth. Avoid planting eggplants in areas with poor air circulation, such as low-lying spots or crowded spaces. Adequate air movement will help keep your plants dry and reduce the risk of fungal issues.
4. Protection from wind: While air circulation is important, strong winds can damage eggplant plants. Choose a planting location that is somewhat protected from strong winds, such as near a fence or a wall. If strong winds are prevalent in your area, consider using windbreaks or planting in containers that can be moved indoors during extreme weather.
5. Space availability: Eggplants need room to grow and spread. Ensure that you have enough space in your chosen location to accommodate the mature size of the plants, which can range from 2-3 feet in height and width. Adequate spacing will allow good airflow between the plants and minimize the risk of overcrowding.
By carefully considering these factors and selecting the right planting location, you will provide an optimal growing environment for your eggplant plants. This will contribute to healthier plants, increased productivity, and a more enjoyable gardening experience.
Step 4: Preparing the soil
Preparing the soil is a crucial step in ensuring the success of your eggplant plants. The right soil conditions provide essential nutrients, good drainage, and a suitable environment for healthy root development. Follow these steps to prepare your soil before planting:
1. Clear the area: Remove any weeds, rocks, or debris from the planting area. Weeds compete with eggplants for nutrients and can hinder their growth. Clearing the area will also provide a clean slate for the new plants.
2. Loosen the soil: Eggplants prefer loose and well-draining soil. Use a garden fork or a tiller to break up compacted soil and improve its structure. This process will ensure that the roots can penetrate the soil easily and access the necessary nutrients.
3. Amend the soil: Enhance the soil’s fertility by adding organic matter such as compost, aged manure, or leaf mold. These amendments will enrich the soil with essential nutrients and improve its ability to retain moisture without becoming waterlogged. Incorporate the organic matter evenly into the top few inches of the soil.
4. Test the soil pH: Conduct a soil test to determine the soil’s pH level. Eggplants prefer slightly acidic soil with a pH range of 5.8-6.5. If the pH level is too high or too low, you can adjust it by adding sulfur or lime accordingly. Follow the recommended application rates on the product packaging.
5. Add additional nutrients: Prior to planting, consider adding a balanced organic fertilizer to provide a boost of nutrients for your eggplant plants. Choose a fertilizer that is specifically formulated for vegetables and follow the recommended application rates. This will supply the necessary nutrients for healthy growth and optimal fruit production.
6. Rake and level the soil: After incorporating the amendments, use a garden rake to level the soil surface. This will provide an even bed for planting and allow for uniform germination and growth of your eggplant seeds or seedlings.
By carefully preparing the soil, you provide your eggplant plants with a fertile and well-drained environment, setting the stage for vigorous growth and abundant harvests. Take the time to properly assess and amend your soil, and you’ll reap the rewards throughout the growing season.
Step 5: Planting the eggplant seeds
Now that you have prepared the soil, it’s time to plant your eggplant seeds. Follow these steps to ensure successful planting:
1. Determine the planting method: There are two main methods for planting eggplant seeds – direct sowing and starting seeds indoors. Direct sowing involves planting the seeds directly into the prepared soil, while starting seeds indoors allows for controlled germination before transplanting the seedlings outdoors. Choose the method that best suits your gardening preferences and climate.
2. Dig the planting holes: If you are direct sowing, use your finger or a small trowel to create shallow holes in the soil, about 1/4 to 1/2 inch deep. Space the holes 18-24 inches apart to provide ample room for the mature plants. If starting seeds indoors, fill seed trays or small pots with seed-starting mix and create shallow depressions for the seeds.
3. Plant the seeds: Place one or two seeds in each planting hole. Cover the seeds with soil or lightly press them into the depressions in the seed trays. If planting more than one seed, thin out the weaker seedlings later to maintain proper spacing.
4. Water the seeds: After planting, gently water the area to ensure the soil is evenly moist. Avoid overwatering, which can cause the seeds to rot. Keep the soil consistently moist during the germination process.
5. Provide proper labeling: It’s essential to label your seed rows or trays to identify the variety and planting date. This will help you keep track of their progress and enable you to provide proper care as they grow.
6. Protect the seeds: If you are direct sowing, cover the area with a light layer of straw or mulch to retain moisture, suppress weed growth, and protect the seeds from extreme temperatures. For indoor seedlings, use a plastic dome or cover to create a greenhouse effect until germination occurs.
7. Monitor and care for the seedlings: Keep a close eye on the seeds or seedlings, checking for signs of germination, such as tiny sprouts emerging from the soil or seed trays. If you started the seeds indoors, ensure they receive adequate light and maintain proper moisture levels. Adjust the lighting and watering as needed to promote healthy growth.
By following these steps, you will successfully plant your eggplant seeds, whether directly into the garden or in seed trays indoors. Proper planting sets the foundation for strong and healthy eggplant plants, bringing you one step closer to a bountiful harvest.
Step 6: Watering the seeds
Proper watering is essential for the successful germination of your eggplant seeds. Maintaining optimal moisture levels helps to ensure that the seeds receive the necessary hydration to sprout and grow. Follow these guidelines for watering your eggplant seeds:
1. Be mindful of moisture during germination: The germination phase is crucial, and the seeds require consistent moisture to break dormancy and start developing. Check the soil moisture daily and water as needed to keep the soil evenly moist but not waterlogged. Avoid letting the soil dry out completely, as this can hinder germination.
2. Use a gentle watering method: When watering the seeds, use a gentle watering method to avoid disruption or displacement. Carefully pour water onto the soil or use a spray bottle to mist the soil surface, ensuring that the seeds or seedlings are not disturbed.
3. Focus on the root zone: Direct the water around the base of the seeds or seedlings, focusing on the root zone. This helps ensure that the moisture reaches the roots where it is needed most. Avoid overhead watering, as it can increase the risk of fungal diseases and damage delicate seedlings.
4. Water when the soil feels dry: As the seedlings grow, monitor the moisture levels in the soil by testing the top inch with your finger. If it feels dry to the touch, it’s time to water. However, be cautious not to overwater, as excessive moisture can lead to root rot and other issues.
5. Do not let the soil dry out completely, but also avoid waterlogged conditions. Aim for a balance, providing adequate moisture without causing soggy soil.
6. Adjust watering as the plants mature: As the eggplant plants grow and establish their root systems, their water needs may increase. Increase the amount of water provided accordingly, but always ensure that the soil has good drainage to prevent waterlogged conditions.
7. Monitor weather conditions: Take weather conditions into account when determining your watering schedule. During hot and dry periods, you may need to water more frequently to prevent the soil from drying out. Conversely, during periods of rain or cooler weather, you may need to adjust the watering frequency to prevent excess moisture.
By following these guidelines and maintaining proper moisture levels, you will facilitate the healthy germination and growth of your eggplant seeds. Consistent and attentive watering is key to ensuring the success of your eggplant plants throughout their life cycle.
Step 7: Providing proper sunlight
Sunlight is a crucial factor in the growth and development of your eggplant plants. Providing them with the right amount of sunlight ensures strong and healthy plants that can produce abundant fruits. Follow these guidelines to ensure proper sunlight for your eggplants:
1. Choose a sunny location: Eggplants thrive in full sun, which means they require a minimum of 6-8 hours of direct sunlight each day. Select a planting location in your garden that receives ample sunlight and is not shaded by trees, buildings, or other structures. The more sun exposure your eggplants receive, the better they will grow and produce fruits.
2. Monitor the sun’s path: Observe how sunlight moves across your garden throughout the day. Make note of any areas that may become shaded due to nearby structures or trees. This will help you determine the optimal location for your eggplant plants to receive maximum sunlight.
3. Use reflective surfaces: If your chosen planting location receives partial shade, you can maximize the amount of sunlight reaching your eggplants by using reflective surfaces. Place reflective materials, such as aluminum foil or white boards, around the plants to bounce sunlight back onto the leaves. This helps to increase the light intensity and encourages better growth.
4. Rotate plants for even sunlight exposure: If you have multiple eggplant plants, consider rotating them throughout the growing season. This ensures that each plant has an equal opportunity to receive sunlight from different angles and avoids excessive shading from neighboring plants.
5. Protect from intense heat: While eggplants enjoy sun, they can be susceptible to extreme heat, especially in regions with scorching summers. If you experience intense heatwaves, provide some shade for your plants during the hottest part of the day. You can use shade cloths, row covers, or plant them near taller crops or structures that provide some relief from the direct sun.
6. Monitor for sunscald: Sunscald occurs when the fruit is exposed to excessive sunlight, resulting in a white or pale patch on the skin. To prevent sunscald, consider using mulch around the base of the plants to keep the soil cooler and reduce the likelihood of the fruits coming into direct contact with hot soil.
By providing your eggplant plants with proper sunlight, you ensure that they receive the necessary energy for photosynthesis, growth, and fruit production. A sunny location and strategic placement will contribute to robust and productive eggplant plants in your garden.
Step 8: Protecting the seedlings
Protecting your eggplant seedlings is crucial for their survival and growth, as they are particularly vulnerable to various threats during the early stages. By taking the necessary precautions, you can ensure that your seedlings have the best chance of thriving. Follow these guidelines to protect your precious eggplant seedlings:
1. Shield them from extreme weather: Young eggplant seedlings are sensitive to extreme temperatures and weather conditions. Protect them from strong winds by using windbreaks or planting them close to structures that offer some protection. If frost is a concern, cover the seedlings with row covers or cloths to insulate them until the temperature rises. Conversely, if temperatures get too hot, provide some shade during the hottest part of the day.
2. Guard against pests: Pests can pose a threat to your tender seedlings. Use physical barriers such as row covers or netting to keep out insects like flea beetles, which can damage young plants. Monitor for signs of pest infestation, such as chewed leaves or holes, and take appropriate measures to eliminate or control the pests. Consider using organic pest control methods to minimize chemical exposure.
3. Prevent diseases: Diseases can quickly spread and hinder the growth of your seedlings. Avoid watering from overhead or during the evening, as excessive moisture on the leaves can lead to fungal diseases. Provide adequate spacing between seedlings and ensure good air circulation to prevent the buildup of moisture. Remove any infected plants or debris from the garden area to contain the spread of diseases.
4. Protect from wildlife: Garden critters, such as rabbits, squirrels, or birds, may find your tender seedlings tempting. Use physical barriers like fences or netting to keep them at bay. You can also try using repellents or decoy plants to distract wildlife from your eggplant seedlings.
5. Mulch around the plants: Applying a layer of organic mulch around your seedlings can help retain moisture, regulate soil temperature, suppress weed growth, and reduce the risk of soil-borne diseases. Mulch also acts as a physical barrier, protecting the base of the seedlings from damage during watering or weeding.
6. Be diligent with weed control: Weeds can compete with your eggplant seedlings for nutrients, water, and sunlight, potentially stunting their growth. Regularly inspect the area around your seedlings and remove any weeds that may emerge. Take care when weeding to avoid damaging the delicate seedlings.
By taking proactive measures to protect your eggplant seedlings, you create a nurturing environment that allows them to thrive. Vigilance, proper care, and timely intervention will ensure the healthy growth and development of your precious seedlings.
Step 9: Transplanting the seedlings (if applicable)
If you started your eggplant seedlings indoors or in a greenhouse, you will need to transplant them into the garden once they have grown and developed a bit. Transplanting can be a critical step in the growth process, so it’s important to handle the seedlings with care and provide them with optimal conditions for a smooth transition. Follow these guidelines when transplanting your eggplant seedlings:
1. Timing is key: Wait until the seedlings have developed sturdy stems and are at least 6-8 inches tall before transplanting. Usually, this occurs around 6-8 weeks after sowing the seeds. Transplanting too early may expose the seedlings to cold temperatures or stunt their growth.
2. Choose the right time of day: Transplant your seedlings during the cooler parts of the day, preferably in the late afternoon or early evening. This helps reduce stress on the plants and allows them to establish before facing the heat of the day.
3. Prepare the soil: Before transplanting, prepare the planting holes in the garden bed. Dig holes that are slightly larger than the root balls of the seedlings, ensuring proper spacing between the plants according to their mature size.
4. Handle seedlings with care: Gently remove the seedlings from their containers, being careful not to damage the delicate roots. Hold the seedlings by their leaves, rather than pulling or tugging on the stem, to avoid causing any harm. If the root systems are dense or tangled, you can gently loosen them with your fingers or a small tool.
5. Plant at the correct depth: Place each seedling in a planting hole, making sure to position it at the same depth it was growing before. The top of the root ball should be level with the soil surface. If the seedlings are tall and leggy, you can bury them slightly deeper to promote better stability.
6. Fill soil around the seedlings: Gently fill the soil around the seedlings, pressing it down lightly to eliminate any air pockets. Avoid compacting the soil too firmly, as this can hinder root development and water absorption.
7. Water thoroughly: Immediately after transplanting, water the seedlings thoroughly. This helps settle the soil around the roots and ensures that the plants receive adequate moisture during the critical post-transplant phase. Provide regular watering as needed, keeping the soil consistently moist but not waterlogged.
8. Provide support if necessary: If your eggplant variety is tall or has heavy fruit, consider providing support such as stakes or a trellis. This prevents the plants from falling over or getting damaged by strong winds and heavy rain.
By following these guidelines, you will ensure a successful transition for your eggplant seedlings from the indoor environment to the garden. Proper handling, timing, and care during the transplanting process set the stage for healthy growth and productive eggplant plants in your garden.
Step 10: Caring for the growing eggplant plants
Proper care is essential for the continued health and productivity of your growing eggplant plants. By providing the right conditions and following good cultural practices, you can ensure optimal growth and maximize your harvest. Here are some key steps to care for your growing eggplant plants:
1. Water consistently: Eggplants require regular and consistent watering to keep the soil evenly moist. Monitor the soil moisture level and water deeply when the top inch of soil feels dry. Avoid overwatering, as it can lead to root rot and other fungal issues. Remember to water at the base of the plants to minimize wetting the foliage, which can invite disease.
2. Mulch around the plants: Apply a layer of organic mulch around the base of your eggplant plants. Mulch helps to conserve moisture, regulate soil temperature, suppress weed growth, and prevent soil-borne diseases. Maintain a 2-3 inch layer of mulch, ensuring that it does not touch the stems to prevent rotting.
3. Fertilize appropriately: Eggplants are heavy feeders and benefit from regular fertilization. Apply a balanced organic fertilizer or compost every 4-6 weeks throughout the growing season to provide necessary nutrients. Follow the package instructions for the appropriate application rates, taking care not to over-fertilize as it can negatively impact plant growth.
4. Support the plants: As your eggplant plants grow taller and bear fruit, they may require support to prevent them from bending or breaking under their weight. Use stakes, cages, or trellises to provide the necessary support, keeping the stems and branches upright. This also helps promote good air circulation and reduces the risk of disease.
5. Prune when necessary: Pruning can help manage the size and shape of your eggplant plants, promote airflow, and improve fruit production. Remove any yellowed or damaged leaves and suckers (small growths that develop in the leaf axils). Be cautious not to over-prune, as eggplants need sufficient foliage to support fruit production.
6. Monitor for pests and diseases: Regularly inspect your eggplant plants for signs of pests or diseases. Common pests include aphids, flea beetles, and tomato hornworms. Treat infestations promptly using organic pest control methods or deterrents. For disease prevention, practice good cultural practices such as proper spacing, adequate airflow, and regular inspection of the plants.
7. Harvest at the right time: Harvest your eggplants when they reach a desirable size and color. Different varieties have different maturity indicators, so refer to the specific instructions for your chosen variety. Use a sharp knife or pruners to cut the eggplants from the plant, leaving a short stem attached. Harvest regularly to encourage continuous fruit production.
By providing regular care and attention to your growing eggplant plants, you will ensure their well-being and increase the likelihood of a bountiful harvest. Consistent watering, fertilization, support, and pest management will contribute to the overall success and productivity of your eggplant garden.
Step 11: Harvesting the eggplants
The time has finally come to harvest the fruits of your labor – it’s time to harvest your eggplants! Knowing when and how to harvest your eggplants is crucial for enjoying them at their peak flavor and texture. Here are the steps to properly harvest your eggplants:
1. Determine the right time: Eggplants are typically ready to harvest when they reach their mature size and have a glossy, firm skin. The exact timing will depend on the variety you are growing, so refer to the seed packet or variety-specific information for guidance. In general, most eggplants are harvested when they are around 6-8 inches long, but this can vary.
2. Check the color and texture: Look for eggplants that have developed a deep, rich color. Different varieties can range from vibrant purple to lighter shades, so choose based on the desired color for your recipe. The skin should be smooth and shiny, indicating the fruit’s maturity. Gently press the fruit with your thumb – it should have a slight give without feeling too soft or mushy.
3. Use sharp tools: To harvest your eggplants, use a sharp knife or pruners. Make a clean cut through the stem, leaving a short stub attached to the fruit. Avoid twisting or pulling the fruit, as this can damage the plant and its remaining fruits.
4. Handle with care: Eggplants have delicate skins, so handle them with care to avoid bruising or damaging the fruit. Place harvested eggplants in a basket or bucket, taking care not to stack them on one another to prevent pressure marks. Bruised or damaged eggplants should be consumed immediately or used for cooking purposes as they will not store well.
5. Harvest regularly: Continue to harvest your eggplants regularly throughout the growing season. Regular harvesting promotes the production of new fruit and prevents mature eggplants from becoming overripe or bitter. Aim to harvest every few days for the best results.
6. Use harvested eggplants promptly: For the best flavor and texture, it’s recommended to use harvested eggplants soon after picking. Freshly harvested eggplants can be stored at room temperature for a day or two, but they are best enjoyed when used shortly after harvest. If you need to store them for longer, keep them in a cool, dry place, such as the refrigerator, for up to a week.
Harvesting your eggplants at the right time ensures that you enjoy them at their peak flavor and tenderness. By following these steps, you’ll be able to savor the fruits of your gardening efforts and indulge in delicious eggplant dishes for yourself and your loved ones.
Conclusion
Congratulations on successfully growing your own eggplants! By following the steps outlined in this guide, you have learned valuable techniques and insights to cultivate healthy and productive eggplant plants from seed to harvest.
We began by choosing the right eggplant seeds, considering factors such as variety, climate, and seed quality. Then, we prepared the seeds for planting, ensuring proper soaking and providing a suitable germination medium. Next, we discussed the importance of selecting an appropriate planting location, considering sunlight, soil quality, and protection against wind and animals.
Afterward, we delved into preparing the soil, emphasizing the need for loose and well-amended soil for optimal growth. We provided guidelines for planting the eggplant seeds, focusing on proper depth, spacing, and watering techniques.
As the eggplant plants grew, we covered essential care steps, including watering, sunlight exposure, protection against pests and diseases, and supporting the plants as they matured. We also highlighted the importance of regular monitoring and addressing any issues that arise along the way.
Finally, we discussed the rewarding moment of harvesting your homegrown eggplants. Emphasizing the importance of checking for maturity indicators, using sharp tools, and handling the fruits with care.
Now that you are equipped with the knowledge and skills required to successfully grow eggplants, it’s time to enjoy the harvest. Experiment with different recipes and savor the unique flavors and versatility of this wonderful vegetable.
Remember, edible gardening is a continuous learning process, and each season brings new opportunities and challenges. By reflecting on your experiences and building on your newfound knowledge, you can continue to refine your skills and improve your future harvests.
So, keep cultivating, exploring, and delighting in the world of edible gardening. May your garden flourish and your harvests be abundant!