Home>Types of Gardening>Edible Gardening>How To Plant Loofah Seeds

Edible Gardening
How To Plant Loofah Seeds
Modified: January 22, 2024
Discover the secrets of planting loofah seeds to grow your own edible loofahs! Get expert tips and advice on edible gardening for a bountiful harvest.
(Many of the links in this article redirect to a specific reviewed product. Your purchase of these products through affiliate links helps to generate commission for Chicagolandgardening.com, at no extra cost. Learn more)
Table of Contents
- Introduction
- Step 1: Choosing the Right Seeds
- Step 2: Preparing the Soil
- Step 3: Germinating the Seeds
- Step 4: Planting the Seeds
- Step 5: Providing Proper Watering
- Step 6: Ensuring Adequate Sunlight
- Step 7: Supporting the Vines
- Step 8: Pruning and Training
- Step 9: Monitoring and Controlling Pests
- Step 10: Harvesting the Loofahs
- Conclusion
Introduction
Welcome to the world of edible gardening, where you can experience the joy of growing your own fresh produce right in your backyard! One fascinating plant to consider adding to your garden is the loofah. Yes, the same loofah that you may use in the shower can actually be grown at home and harvested for its usefulness beyond its exfoliating properties.
The loofah, also known as Luffa cylindrica or sponge gourd, is a tropical vine that produces long, cylindrical fruits with a fibrous interior. These fruits can be left to mature and eventually transform into natural sponges with a multitude of practical uses. From dish scrubbers to bath accessories, loofahs offer an environmentally friendly and sustainable alternative to synthetic materials.
Not only are loofahs practical, but they are also beautiful additions to any garden. With their vibrant yellow flowers and lush green foliage, they can create a stunning visual display along fences, trellises, or even on pergolas.
While loofahs are typically grown in warm and humid climates, they can also be cultivated in cooler regions with some extra care. In this comprehensive guide, we will walk you through the steps to successfully plant loofah seeds, providing you with the knowledge and confidence to embark on this exciting gardening adventure.
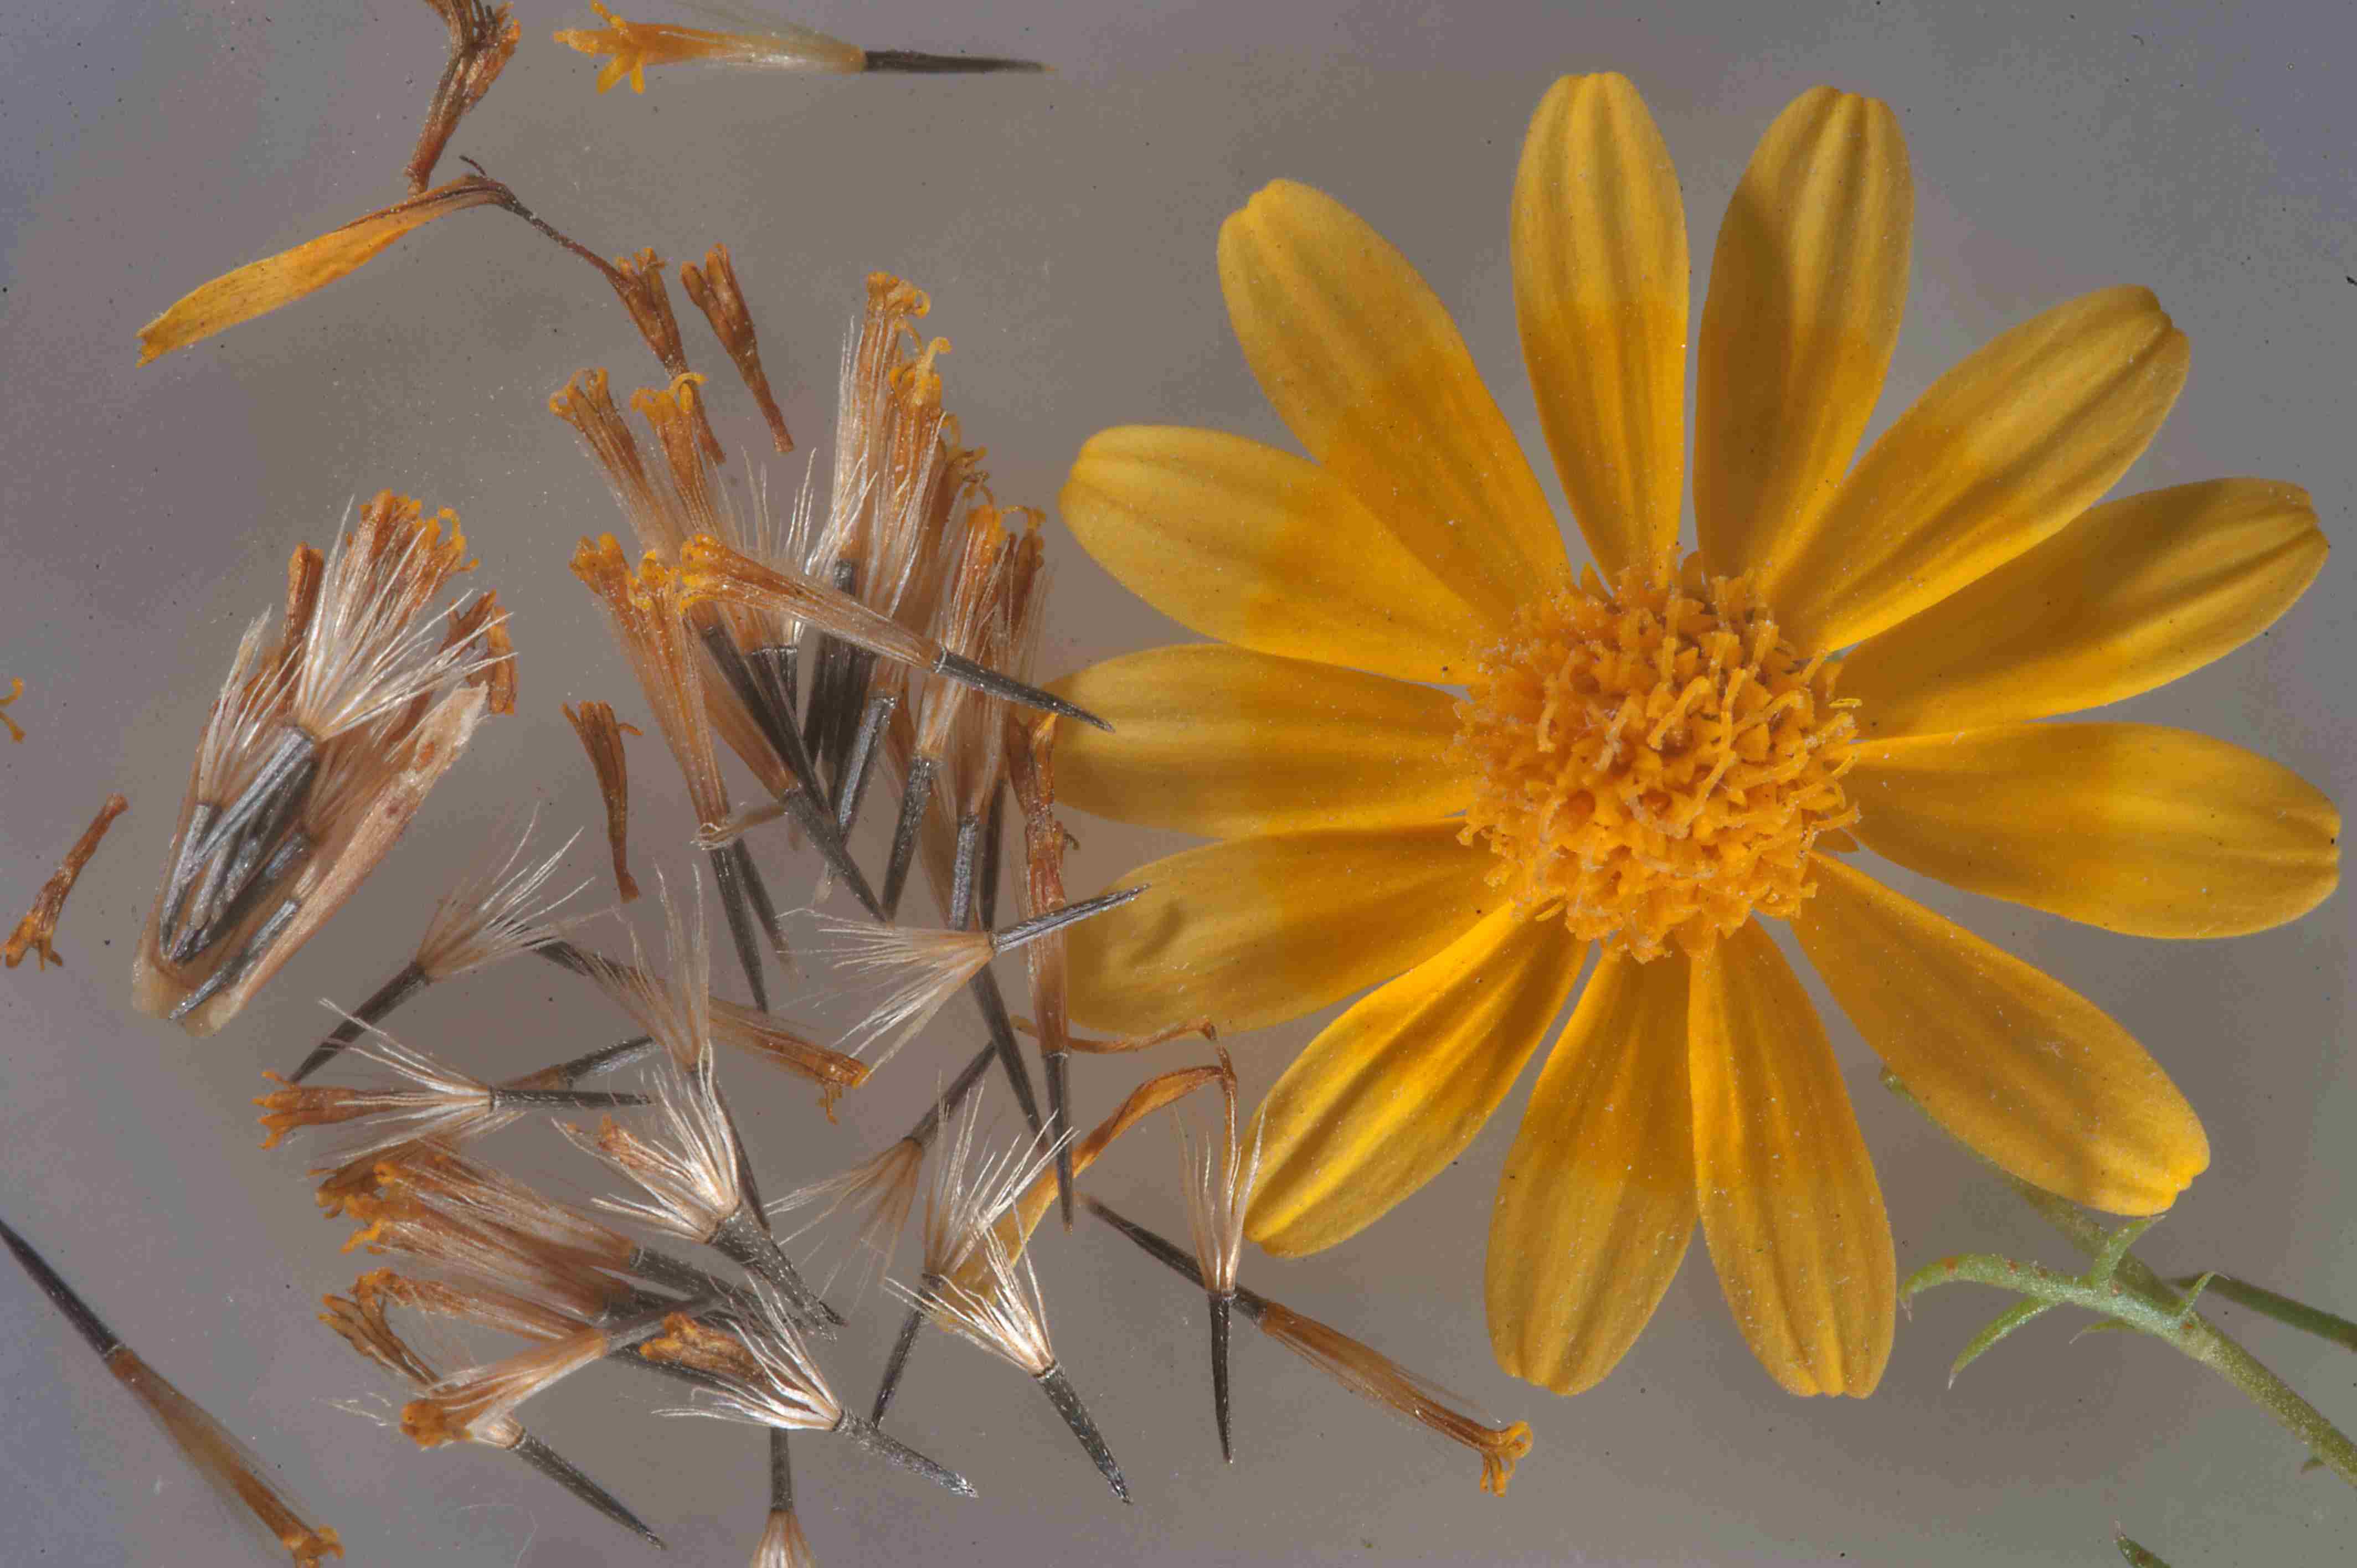
Step 1: Choosing the Right Seeds
The first step in planting loofah seeds is to ensure you have the right seeds for your garden. When selecting loofah seeds, there are a few factors to consider.
Variety: Loofahs come in different varieties, with some producing long and slender fruits, while others have shorter, rounder fruits. Decide on the type of loofah you prefer based on your personal preference and intended use. It’s worth noting that some varieties are more suitable for exfoliation purposes, while others are best for culinary use.
Quality: Choose high-quality seeds from a reputable source to increase your chances of success. Look for seeds that are plump, firm, and free from damage or mold. Avoid seeds that are discolored or appear old and shriveled.
Organic: Opting for organic seeds ensures that you’re using seeds that have been grown without the use of synthetic pesticides or other harmful chemicals. Organic seeds are a great choice if you prioritize sustainability and environmental stewardship.
Germination Rate: Check the germination rate of the seeds. A higher germination rate indicates that a larger percentage of seeds will successfully sprout. Aim for seeds with a germination rate of at least 80% to increase your chances of a successful harvest.
Seed Saving: If sustainability is important to you, consider saving seeds from a previous harvest. Loofah seeds can easily be saved and stored for future use. Just ensure that the seeds are fully matured and properly dried before storing them in a cool, dry place.
By selecting the right loofah seeds for your garden, you’ll set the foundation for a successful and rewarding growing experience. With high-quality seeds in hand, you’re now ready to move on to the next step: preparing the soil.
Step 2: Preparing the Soil
Proper soil preparation is key to providing the loofah plants with the optimal growing conditions they need to thrive. Loofahs prefer well-draining soil that is rich in organic matter. Follow these steps to prepare the soil for your loofah plants:
1. Select the Right Location: Choose a sunny spot in your garden that receives at least 6-8 hours of direct sunlight. Loofahs are warm-season plants and require ample sunlight to grow and produce fruit.
2. Clear the Area: Remove any weeds, rocks, or debris from the chosen planting site. Loofah vines can be quite vigorous, so it’s important to provide them with enough space and remove any obstacles that may hinder their growth.
3. Loosen the Soil: Loofah plants have deep root systems, so it’s beneficial to loosen the soil before planting. Use a garden fork or tiller to break up compacted soil and improve its aeration and drainage.
4. Amend the Soil: Loofahs thrive in soil that is rich in organic matter. Incorporate compost or well-rotted manure into the soil to increase its fertility and nutrient content. This will provide a steady supply of nutrients to the plants throughout the growing season.
5. Adjust Soil pH: Loofahs prefer slightly acidic soil with a pH ranging from 6.0 to 6.8. Test the soil pH using a soil testing kit and adjust it if necessary by adding appropriate amendments. This will create the ideal pH conditions for the loofah plants to thrive.
6. Improve Drainage: Loofahs cannot tolerate waterlogged soil. If your soil tends to retain water, consider adding organic matter such as compost or sand to improve its drainage. This will prevent waterlogged conditions that can lead to root rot and other plant diseases.
7. Level the Soil: Smooth out the soil surface, removing any large clumps or bumps. A level planting surface will help with proper water distribution and prevent pooling.
By taking the time to properly prepare the soil, you will provide a favorable environment for your loofah plants to establish healthy roots and grow vigorously. The next step will guide you through the process of germinating the seeds and getting them ready for planting.
Step 3: Germinating the Seeds
Before planting the loofah seeds in the garden, it’s important to give them a head start by germinating them indoors. This step will help ensure a higher success rate and allow for better control over the growing conditions. Follow these guidelines to successfully germinate your loofah seeds:
1. Soaking the Seeds: Start by soaking the loofah seeds in water for 24 to 48 hours. This process helps soften the seed coat and encourages faster germination. Make sure to change the water every 12 hours to prevent stagnation.
2. Preparing the Germination Medium: Choose a well-draining germination medium such as seed-starting mix or coconut coir. Fill a seed tray or small pots with the germination medium, leaving about half an inch of space at the top for watering.
3. Planting the Seeds: Place the soaked loofah seeds onto the germination medium, spacing them about an inch apart. Lightly press them into the surface of the medium, ensuring good seed-to-soil contact without burying them too deep. Cover them with a thin layer of the germination medium, about a quarter inch thick.
4. Providing Moisture: Water the tray or pots gently until the germination medium is evenly moist. Avoid overwatering, as excess moisture can lead to fungal diseases. It’s helpful to place the tray or pots on a saucer filled with water to allow for bottom watering. This helps prevent waterlogging and keeps the germination medium consistently moist.
5. Creating a Mini Greenhouse: To create a warm and humid environment for the seeds to germinate, cover the tray or pots with a clear plastic bag or a seed-starting dome. This helps retain moisture and heat, promoting faster germination. Place the tray or pots in a warm location, preferably around 75 to 85°F (24 to 29°C).
6. Ensuring Proper Air Circulation: It’s essential to provide proper air circulation to prevent mold growth and encourage healthy seedlings. Open the plastic bag or seed-starting dome for a few hours each day to allow fresh air to circulate. This will also help prevent damping-off disease, which can occur in overly humid conditions.
7. Germination Period: Loofah seeds typically take around 7 to 10 days to germinate. Check the tray or pots daily to monitor progress. Once the seeds have sprouted and developed small leaves, they are ready to be transplanted into the garden.
By following these steps, you’ll give your loofah seeds the best start for healthy germination. In the next step, we’ll guide you through planting the germinated seeds in the garden and ensuring their proper growth.
Step 4: Planting the Seeds
Once your loofah seeds have germinated and developed into small seedlings, it’s time to transplant them into the garden. Follow these steps to ensure a successful planting process:
1. Timing: Wait until all chances of frost have passed before transplanting your loofah seedlings outdoors. Loofahs thrive in warm temperatures, so choose a time when the soil has warmed up and the weather is consistently mild.
2. Preparing the Planting Holes: Dig holes in the prepared soil that are slightly larger than the size of the root ball of the seedlings. Space the holes about 2 to 3 feet apart to allow enough room for the loofah vines to spread out as they grow.
3. Transplanting the Seedlings: Gently remove the loofah seedlings from the germination tray or pots, taking care not to damage the delicate roots. Place each seedling in a planting hole and backfill the soil around it, ensuring that the top of the root ball is level with the surrounding soil surface.
4. Watering the Seedlings: Water the newly transplanted loofah seedlings thoroughly to settle the soil and provide them with the necessary moisture. Be careful not to overwater, as this can lead to root rot. Aim for a deep watering rather than frequent shallow watering.
5. Mulching: Apply a layer of organic mulch around the base of the seedlings to help conserve moisture, suppress weed growth, and regulate soil temperature. Straw, shredded leaves, or wood chips make excellent choices for mulching.
6. Staking or Trellising: Loofah vines are vigorous climbers and require support as they grow. Install stakes or trellises near each seedling to provide a structure for the vines to climb. This will prevent them from sprawling on the ground and keep the fruits clean and off the soil.
7. Adequate Spacing: Ensure that you’ve given each loofah seedling enough space to grow. Proper spacing allows for good air circulation, reduces the risk of diseases, and enables the plants to receive sufficient sunlight and nutrients.
By following these steps, you’ll successfully transplant your loofah seedlings into the garden and provide them with the ideal growing conditions. In the next step, we’ll discuss the importance of providing proper watering for your loofah plants.
Step 5: Providing Proper Watering
Proper watering is essential to the growth and development of your loofah plants. Loofahs require consistent moisture, but they are sensitive to overwatering. Follow these guidelines to ensure your loofahs receive the right amount of water:
1. Watering Frequency: Loofahs prefer evenly moist soil, but not waterlogged conditions. Water deeply once or twice a week, allowing the top few inches of soil to dry out between waterings. Adjust the frequency based on weather conditions and the moisture level of the soil.
2. Deep Watering: When watering, aim for deep penetration into the soil. Watering deeply encourages the loofah roots to grow deeper into the ground, increasing their stability and ability to access moisture during dry periods. Avoid shallow watering, as it can lead to shallow root growth.
3. Morning Watering: It’s best to water your loofah plants in the morning. This allows the leaves to dry off during the day, reducing the risk of fungal diseases that can develop in moist conditions. Morning watering also ensures that the plants have enough moisture to sustain them throughout the day.
4. Watering Near the Base: Direct the water near the base of the plants, focusing on the root zone. Avoid overhead watering, as this can wet the foliage excessively and increase the likelihood of fungal infections. Irrigating the base of the plants also reduces water wastage through evaporation.
5. Mulching: Mulching around the base of the loofah plants helps retain moisture in the soil, reducing the need for frequent watering. Apply a layer of organic mulch, such as straw or wood chips, to help regulate soil temperature and prevent moisture evaporation.
6. Monitor Soil Moisture: Regularly monitor the moisture level of the soil by inserting your finger into the soil up to the first knuckle. If it feels dry at that depth, it’s time to water. However, if the soil feels moist, wait a bit longer before watering again.
7. Avoid Overwatering: Overwatering can be detrimental to loofah plants, leading to root rot and other issues. Make sure not to let water pool or stagnate around the plants. If you notice signs of overwatering, such as yellowing leaves or wilting, reduce the watering frequency immediately.
By providing proper watering techniques, you’ll ensure that your loofah plants receive the moisture they need for healthy growth without risking water-related problems. In the next step, we’ll focus on the important role that sunlight plays in the development of your loofah vines.
Step 6: Ensuring Adequate Sunlight
Adequate sunlight is essential for the optimal growth and productivity of your loofah plants. Loofahs are sun-loving plants that thrive in full sun conditions. Follow these guidelines to ensure your loofah vines receive the necessary sunlight:
1. Choose a Sunny Location: Select a planting site in your garden that receives at least 6-8 hours of direct sunlight daily. Loofahs need ample sunlight to produce robust vines and abundant fruits.
2. Avoid Shade: Keep your loofah plants away from shaded areas, as they require uninterrupted sunlight to fuel their growth. Overly shaded areas can lead to weak and spindly vines with fewer fruits.
3. Monitor Shade Patterns: Observe the shade patterns in your garden throughout the day and over the seasons. Pay attention to the movement of trees, structures, or nearby buildings that may cast shadows on your loofah plants. Adjust your planting location if needed to maximize sun exposure.
4. Reflective Surfaces: Utilize reflective surfaces or materials near your loofah plants to redirect sunlight and increase its intensity. White-painted walls, reflective mulch, or light-colored stones can help bounce sunlight back onto the leaves and keep the plants well-illuminated.
5. Prune Nearby Plants: Keep the area around your loofah plants free from overgrown vegetation, especially larger plants or trees that may block sunlight. Prune nearby plants that shading the loofah vines to ensure they receive optimal sunlight.
6. Regularly Rotate Vines: Loofah vines tend to grow towards the sunlight. To ensure even exposure and prevent the vines from becoming lopsided, gently rotate them every few days. This will allow all sides of the vines to receive ample sunlight, resulting in balanced growth.
7. Monitor Sunlight Levels: Regularly assess the sunlight levels received by your loofah plants. If you notice signs of insufficient light, such as weak growth or small leaves, consider adjusting the planting location or implementing shading mechanisms during peak summer heat to prevent sun scorching.
By ensuring your loofah plants receive adequate sunlight, you’ll promote healthy vine growth, sturdy structures, and abundant fruit production. In the next step, we’ll discuss the importance of supporting the loofah vines as they grow.
Step 7: Supporting the Vines
Supporting the vines of your loofah plants is crucial to their health, productivity, and overall aesthetics. Loofah vines are vigorous climbers that can reach impressive lengths, so providing the right support system is essential. Follow these guidelines to effectively support your loofah vines:
1. Choose the Right Support Structure: Consider using trellises, bamboo poles, or sturdy wire frames as support structures for your loofah plants. The support structure should be strong enough to bear the weight of the vines and withstand strong winds.
2. Install the Support Early: It’s best to install the support system before the loofah vines start to grow vigorously. This allows the vines to naturally cling to the support structure as they grow, reducing the risk of damage or disturbance later on.
3. Position the Support Properly: Place the support structure alongside the loofah plants, ensuring that it is tall enough to accommodate the vine’s potential height. Position it at a distance that allows adequate airflow between the vines for better disease prevention.
4. Train the Vines: Encourage the loofah vines to climb the support system by gently guiding them towards it. Utilize soft plant ties, gardening twine, or fabric strips to loosely secure the vines to the support structure. Avoid tying them too tightly to prevent damage to the growing stems.
5. Regularly Check and Adjust: Monitor the growth of the loofah vines and regularly check that they are properly attached to the support system. Adjust the ties or reposition the vines as needed to ensure they remain well-supported and evenly distributed.
6. Prune Excess Growth: As the loofah plants grow, they may produce multiple side shoots or suckers. To prevent overcrowding and maintain a well-structured support system, prune any excess growth that may compete for space or weigh down the vines.
7. Monitor Load-Bearing Capacity: Loofah fruits can become heavy, so ensure that your support structure can handle the weight. Periodically inspect the support system for any signs of strain or weakness, especially as the fruits mature.
By providing proper support to your loofah vines, you’ll promote healthy growth, prevent damage to the plants, and make harvesting easier. In the next step, we’ll discuss the importance of pruning and training your loofah plants.
Step 8: Pruning and Training
Pruning and training your loofah plants are essential tasks that help promote healthy growth, maintain structure, and maximize fruit production. By following these guidelines, you’ll ensure that your loofah vines grow in a controlled and productive manner:
1. Prune Excess Growth: Regularly inspect your loofah plants for excessive side shoots, suckers, and overcrowded growth. Use clean, sharp pruning shears to remove these unwanted branches. Pruning helps improve airflow, reduces the risk of diseases, and redirects the plant’s energy towards fruit production.
2. Train the Vines: As the loofah vines grow, gently guide them towards the support structure. Encourage them to climb in a controlled manner and avoid tangling or overcrowding. Train the main vine to grow along the desired path, ensuring it receives ample sunlight and space to develop.
3. Remove Weak or Diseased Growth: Regularly inspect your plants for any weak, damaged, or diseased growth. Promptly remove these parts to prevent the spread of diseases and maintain the overall health of the loofah plants. Dispose of any diseased plant material safely to avoid contamination.
4. Manage Lateral Shoots: Lateral shoots, or side branches, can divert energy from fruit development and lead to a tangled vine. Gently prune or pinch off any excessive lateral shoots that may compete for resources or hinder the growth of the main vine. This encourages better airflow and directs the plant’s energy towards fruit production.
5. Remove Unripe or Misshapen Fruits: As the loofah fruits develop, keep an eye out for any unripe or misshapen ones. Removing such fruits allows the plant to focus its energy on producing high-quality, well-shaped loofahs. Use clean pruning shears to cut off the unwanted fruits at the stem, taking care not to damage the vine or nearby foliage.
6. Regularly Inspect and Adjust: Continuously monitor the growth of your loofah plants and make necessary adjustments. Check for any new growth that requires training or pruning, and ensure that the support structure adequately supports the expanding vines and fruits.
7. Be Mindful of Timing: Late-season pruning or excessive pruning can interfere with fruit development. Avoid aggressive pruning once the loofah fruits have formed to prevent stress and potential loss of fruit production. Focus on maintenance pruning and training during the early stages of growth.
By practicing proper pruning and training techniques, you’ll promote healthier and more productive loofah plants. In the next step, we’ll discuss the importance of monitoring and controlling pests in your loofah garden.
Step 9: Monitoring and Controlling Pests
As with any garden, loofah plants are susceptible to pests that can hinder their growth and reduce fruit production. Regular monitoring and timely intervention are essential for keeping pests under control. Follow these guidelines to effectively monitor and control pests in your loofah garden:
1. Regular Inspections: Regularly inspect your loofah plants for any signs of pest infestation. Look for chewed leaves, holes in the foliage, discolored or wilting leaves, and the presence of insects on the plant. Early detection allows for prompt action and prevents the infestation from spreading.
2. Natural Predators: Encourage beneficial insects such as ladybugs, lacewings, and parasitic wasps in your garden. These natural predators help control common pests by preying on them. Planting flowers and companion plants that attract beneficial insects can help attract and support these beneficial predators.
3. Handpicking: For larger pests such as caterpillars or beetles, handpick them off the plants and dispose of them carefully. Inspect the underside of leaves and along stems where pests often hide. This method is particularly effective for smaller gardens or when dealing with a limited number of pests.
4. Neem Oil: Neem oil is an organic and effective solution for combating a range of pests. Dilute neem oil according to the instructions on the package and apply it to the foliage, focusing on the undersides of the leaves where pests tend to congregate. Repeat the application every two weeks or as needed.
5. Insecticidal Soap: Insecticidal soap is another safe and organic option for controlling pests. Spray the affected parts of the loofah plants with an insecticidal soap solution, making sure to cover both sides of the leaves. Repeat the application as necessary, following the instructions on the label.
6. Companion Planting: Take advantage of companion planting to repel or distract pests from your loofah plants. For example, planting marigolds, basil, or mint near your loofahs can repel aphids and other common pests. Research and choose companion plants that deter specific pests in your area.
7. Organic Pest Control Products: If the infestation is severe and natural remedies don’t provide sufficient control, consider using organic pest control products. Look for products approved for use in edible gardens and carefully follow the instructions provided to ensure safe and effective application.
By regularly monitoring your loofah plants and implementing appropriate pest control measures, you can keep pests at bay and ensure healthy growth and abundant fruit production. In the next step, we’ll discuss the exciting process of harvesting your home-grown loofahs!
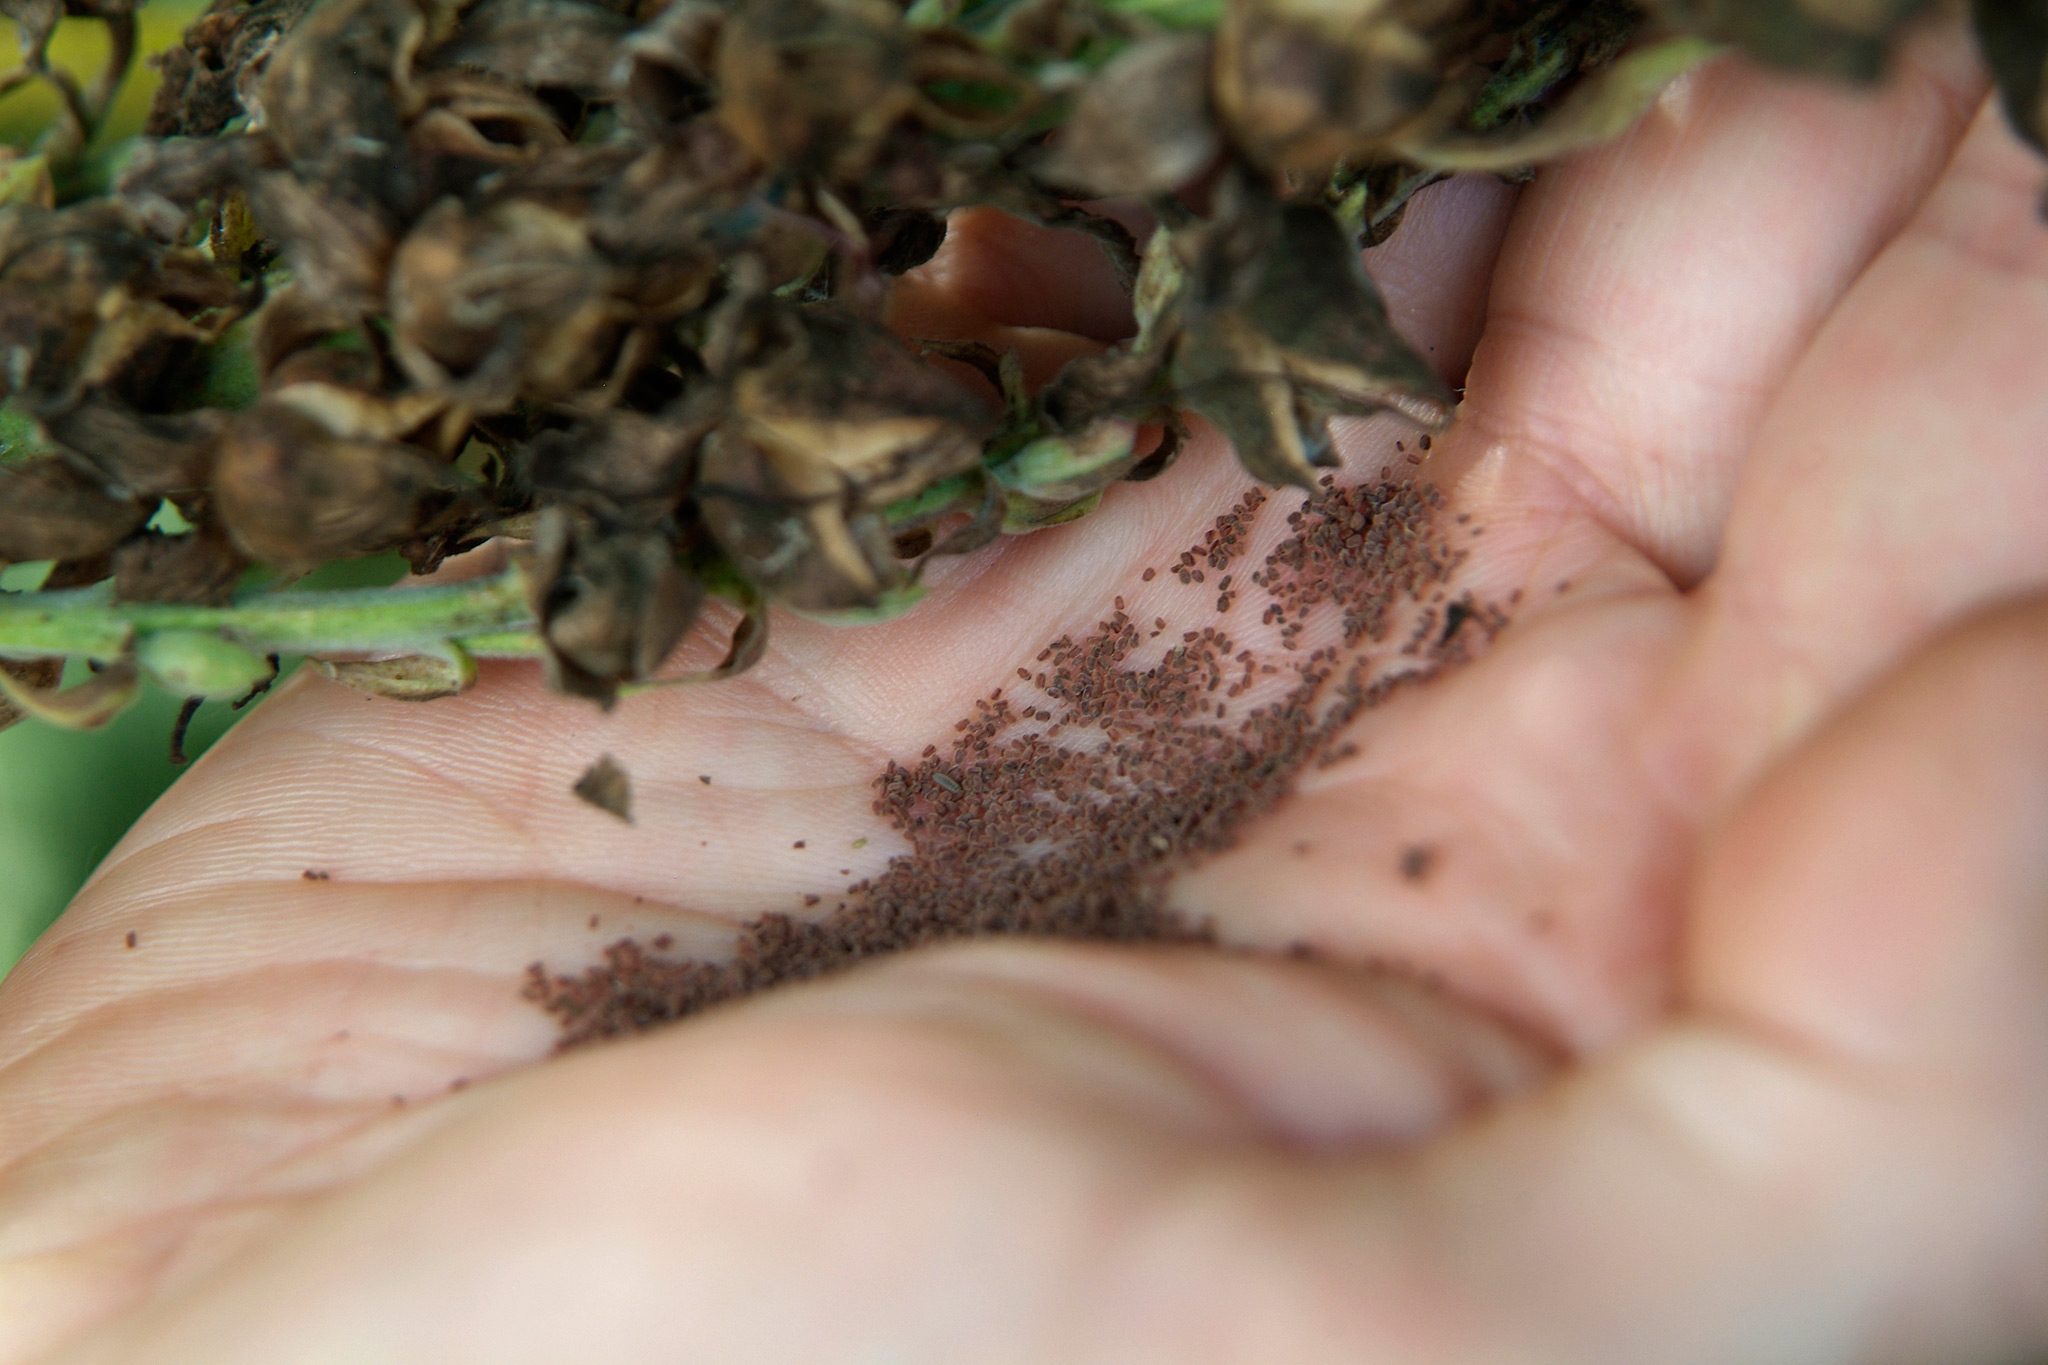
Step 10: Harvesting the Loofahs
After weeks of nurturing and caring for your loofah plants, it’s time to reap the rewards of your efforts by harvesting the mature loofahs. Follow these guidelines to ensure a successful and satisfying loofah harvest:
1. Timing is Key: Loofahs are ready to harvest when they have reached their mature size and the outer skin has turned yellow or brown. Depending on the variety, this usually occurs around 4 to 6 months after planting. Harvesting too early can result in immature and less fibrous loofahs.
2. Inspect the Fruits: Carefully examine each loofah to ensure it is fully matured and ready for harvest. The skin should be dry and crackling, indicating that the loofah is thoroughly dried out and the fibrous interior is formed.
3. Use Pruning Shears or a Knife: To harvest the loofahs, use clean pruning shears or a sharp knife to cut the fruit from the vine. Leave a short stem attached to the loofah, as this will help with handling during the drying process.
4. Remove Excess Blossom End: Trim any excess blossom ends from the harvested loofahs. This can be done by gently cutting the tip of the loofah, ensuring that the inner fibrous structure remains intact.
5. Soak and Remove the Skin: Place the harvested loofahs in a bucket of water and let them soak for a few hours or overnight. This will help soften the outer skin, making it easier to peel off. Once soaked, use your hands or a scrub brush to remove the skin, revealing the fibrous interior of the loofah.
6. Rinse and Dry: Rinse the peeled loofahs thoroughly with clean water to remove any remaining skin or debris. After rinsing, squeeze out any excess water and place the loofahs in a well-ventilated area or hang them to dry. Allow them to air dry completely for a couple of weeks until they become fully dried and hardened.
7. Store in a Dry Place: Once the loofahs are completely dried, store them in a dry, well-ventilated area away from moisture. Keep them in a cool place with low humidity to prolong their shelf life.
8. Reuse or Share: Your harvested loofahs are now ready for use! Save some for yourself to enjoy as bath or shower sponges, and consider gifting some to family and friends. They make unique and eco-friendly presents that can be enjoyed in various household applications.
By following these harvesting guidelines, you’ll be able to enjoy the fruits of your labor by using your homegrown loofahs in various practical and sustainable ways. Congratulations on successfully growing and harvesting your own loofahs!
Conclusion
Congratulations! You’ve reached the end of our comprehensive guide on how to plant, grow, and harvest loofahs in your own garden. By following the ten steps outlined in this article, you now possess the knowledge and skills to embark on your own loofah-growing adventure.
From choosing the right seeds to providing proper watering, sunlight, and support, each step is crucial in ensuring the success of your loofah plants. By monitoring for pests, pruning and training the vines, and finally harvesting the mature fruits, you’ll be rewarded with a bountiful harvest of natural sponges ready for use.
Remember, as you venture into the world of edible gardening, experimentation and learning from your experiences is key. Each growing season presents an opportunity to refine your techniques and discover what works best for your specific environment and conditions.
Growing your own loofahs not only offers practical and sustainable benefits but also provides a sense of accomplishment and connection to the natural world. From scrubbing dishes to exfoliating skin, loofahs have a range of uses that can replace synthetic alternatives and contribute to a greener lifestyle.
So, gather your gardening tools, select your loofah seeds, and get started on this exciting journey. Enjoy the process of watching your loofah plants flourish and the satisfaction of harvesting your very own homegrown sponges. Happy gardening!