Home>Types of Gardening>Edible Gardening>How To Plant Pear Seeds
Edible Gardening
How To Plant Pear Seeds
Modified: February 9, 2024
Learn the steps of planting pear seeds in your edible garden with our comprehensive guide. Start growing your own delicious pears today!
(Many of the links in this article redirect to a specific reviewed product. Your purchase of these products through affiliate links helps to generate commission for Chicagolandgardening.com, at no extra cost. Learn more)
Table of Contents
- Introduction
- Step 1: Selecting the Pear Seeds
- Step 2: Preparing the Growing Container
- Step 3: Pre-Soaking the Seeds
- Step 4: Planting the Pear Seeds
- Step 5: Providing Adequate Water and Sunlight
- Step 6: Caring for the Young Pear Seedlings
- Step 7: Transplanting the Pear Seedlings
- Step 8: Continued Care and Maintenance
- Conclusion
Introduction
Welcome to the exciting world of edible gardening! There’s nothing quite like the satisfaction of growing your own food, and one popular option for home gardeners is planting pear trees from seeds. Not only do pear trees produce delicious and nutritious fruit, but they also add beauty and shade to your garden.
In this article, we will guide you through the process of planting pear seeds to help you get started on your edible gardening journey. From selecting the right seeds to caring for the seedlings, we’ll cover all the essential steps to ensure your pear tree thrives.
But before we dive into the details, it’s essential to note that growing pear trees from seeds requires patience and dedication. Unlike other fruit trees, pear trees don’t always grow true to the parent plant from seeds. This means that the characteristics of the fruit may vary, and it can take several years for your tree to bear fruit. However, it can still be a rewarding experience to watch your pear tree grow and develop.
Now that we’ve set the expectations, let’s start with step one – selecting the pear seeds. Remember, the journey of growing your own pear tree begins with a single seed!
Step 1: Selecting the Pear Seeds
To get started with planting pear seeds, you need to choose high-quality seeds that have the best chance of germinating successfully. Here are some tips to help you select the right pear seeds:
- Obtain seeds from a reliable source: Look for reputable nurseries, garden centers, or online seed suppliers that specialize in fruit trees. They will offer a wide variety of pear seeds to choose from. Selecting seeds from a trusted source increases the likelihood of obtaining viable and healthy seeds.
- Choose the right pear variety: Pear trees come in a range of varieties, each with its own unique flavor, texture, and growth characteristics. Consider the climate and growing conditions in your area to determine which pear variety is best suited for your garden. Popular varieties like Bartlett, Anjou, or Bosc are good options for home gardens.
- Freshness matters: Freshly harvested pear seeds have a higher germination rate compared to older seeds. If possible, opt for recently collected seeds. Avoid seeds that have been stored for a long time or have been exposed to adverse conditions, as they may have reduced viability.
- Check for maturity: Pear seeds should be fully matured before they are harvested. Mature seeds are firm and have a brown color. Avoid selecting seeds that are still green or have a soft texture, as they are unlikely to germinate successfully.
- Consider hybrid vs. heirloom seeds: Hybrid pear seeds are the result of cross-pollination between different pear varieties. They often exhibit desirable traits, such as disease resistance and improved productivity. However, keep in mind that the offspring of hybrid seeds may not produce fruit that is identical to the parent plant. Heirloom varieties, on the other hand, are open-pollinated and tend to preserve the characteristics of the parent plant.
Once you have chosen the pear seeds, it’s time to move on to the next step: preparing the growing container. Get ready to get your hands dirty!
Step 2: Preparing the Growing Container
Now that you have your pear seeds ready, it’s crucial to provide them with an ideal growing environment. Preparing the right growing container will ensure that your seeds have the best chance of germination and early growth. Follow these steps to prepare the perfect growing container:
- Choose the right container: Select a container that is spacious enough to accommodate the growing root system of the pear seedling. A seed tray, peat pots, or biodegradable seedling pots are excellent options. Ensure that the container has drainage holes at the bottom to prevent waterlogging.
- Prepare the potting mix: Use a well-draining and nutrient-rich potting mix to ensure optimal growth. You can either purchase a pre-made mix or make your own by combining equal parts of peat moss, vermiculite, and compost. Avoid using garden soil, as it can be too heavy and may contain pests or diseases.
- Moisten the potting mix: Before filling the container with the potting mix, moisten it slightly. This will help the seeds to absorb water more efficiently and promote germination. Avoid making the mix too wet, as excess moisture can lead to seed rot.
- Fill the container: Fill the container with the moistened potting mix, leaving about half an inch of space at the top. Gently tap the container to settle the mix and ensure there are no air pockets.
- Create planting holes: Use your finger or a small dibber to make planting holes in the potting mix. The holes should be deep enough to accommodate the pear seeds, usually about half an inch to an inch deep.
- Label the container: It’s essential to label the container with the name and date of the pear variety you are planting. This will help you keep track of different varieties and their progress during the growing process.
With the growing container prepared, you are ready to move on to the next step: pre-soaking the pear seeds. This crucial step helps to kickstart the germination process and improve seed viability. Let’s continue the journey towards growing your own pear tree!
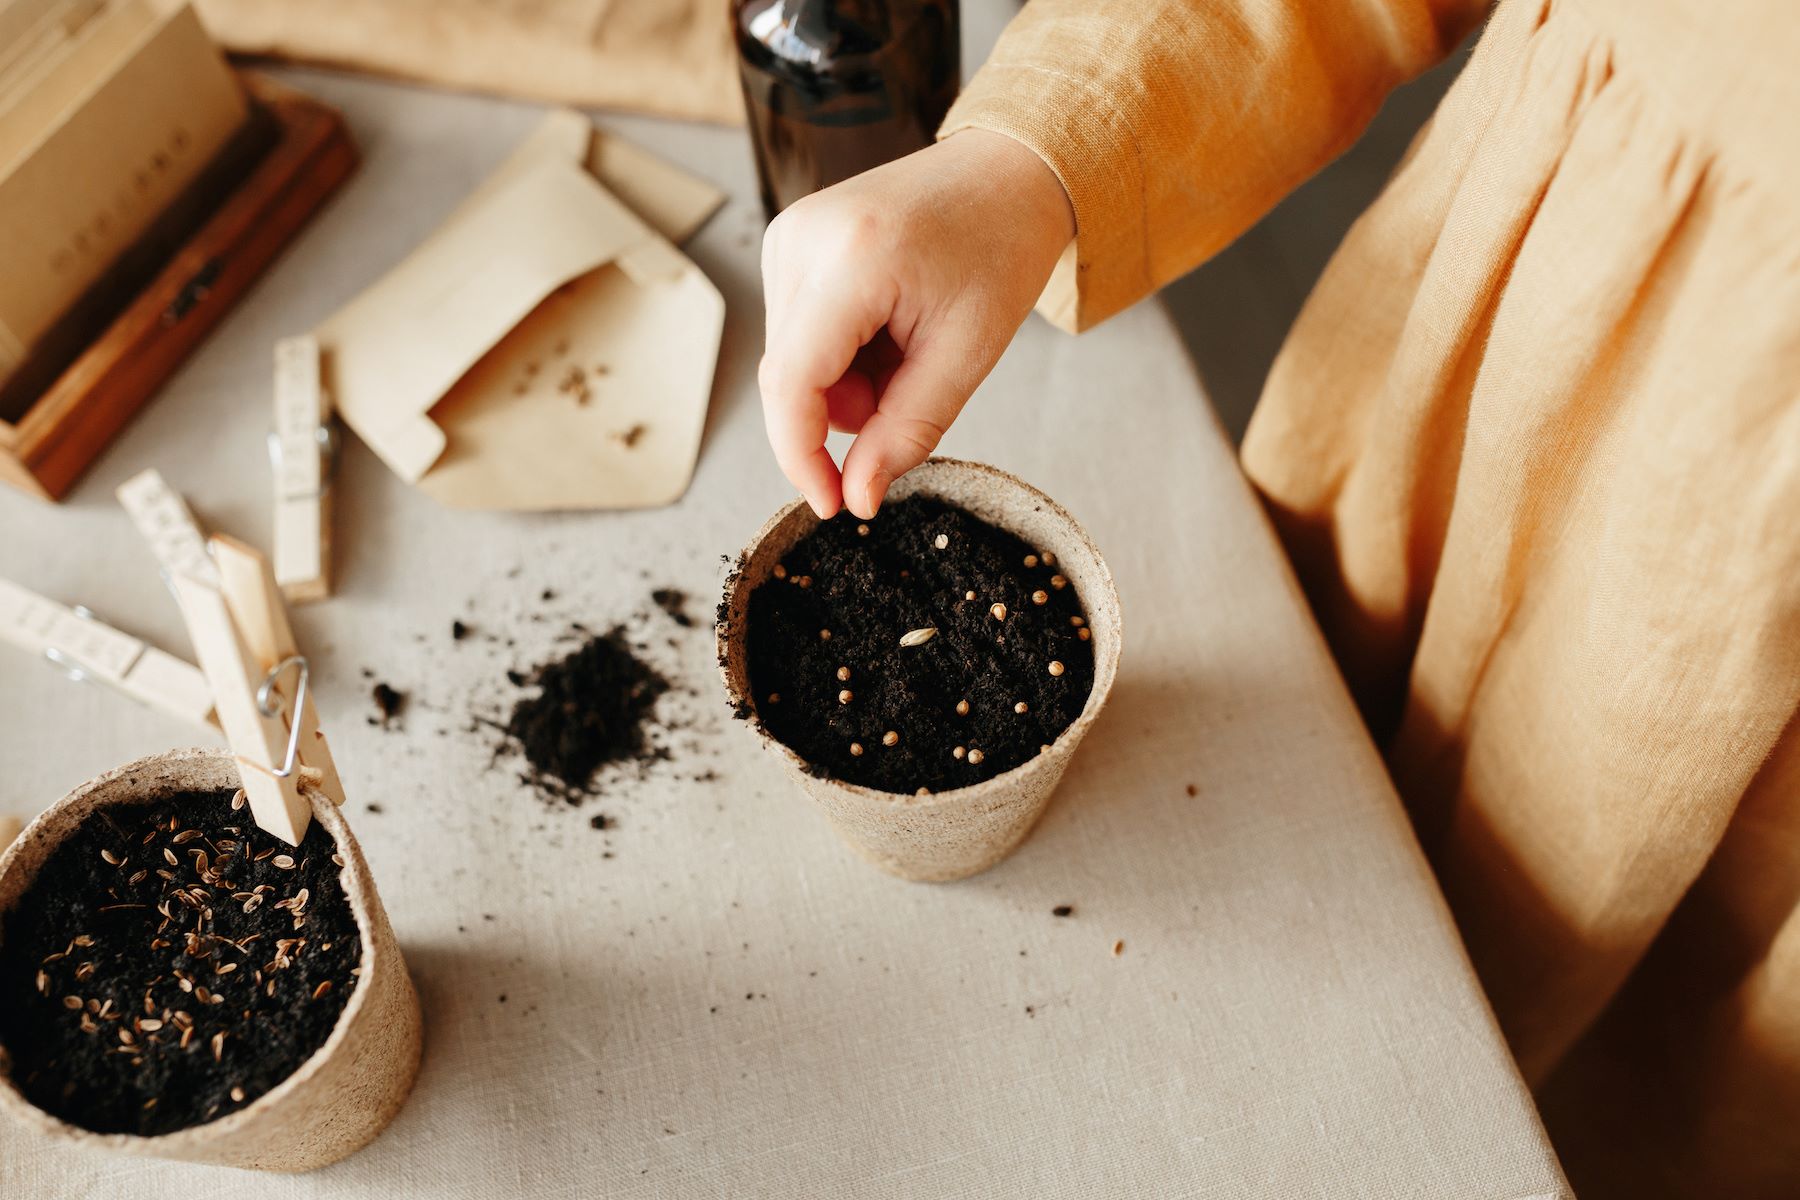
Step 3: Pre-Soaking the Seeds
Before you plant the pear seeds, it’s a good idea to pre-soak them to enhance their germination rate and speed up the overall growth process. Pre-soaking helps to soften the seed coat and activate enzymes within the seed, promoting quicker and more consistent germination. Follow these steps to pre-soak your pear seeds:
- Gather the required materials: You’ll need a shallow container or bowl, clean water at room temperature, and your pear seeds.
- Place the seeds in the container: Take your pear seeds and place them in the shallow container or bowl. Ensure that the seeds are not overcrowded, allowing them space to absorb water evenly.
- Add water to the container: Pour room temperature water over the seeds, making sure to cover them fully. Use enough water to submerge the seeds completely, but avoid using excessive amounts.
- Soak the seeds: Let the pear seeds soak in the water for 24 to 48 hours. This time frame allows the seeds to absorb water gradually, softening the outer seed coat and stimulating the germination process.
- Monitor the seeds: During the soaking period, check on the seeds occasionally. If you notice any seeds that are floating on the surface, remove them, as they are unlikely to germinate successfully.
- Drain the water: After the soaking period, gently pour out the water from the container. Avoid using forceful methods such as rinsing the seeds, as this can damage the delicate sprouts.
- Transfer to the growing container: Now that your pear seeds have been pre-soaked, you can transfer them to the prepared growing container. Place each seed into the pre-made planting holes in the potting mix, ensuring that they are covered with a thin layer of soil.
Pre-soaking your pear seeds is an essential step that can significantly improve their germination rate. With the seeds in the growing container, we’re one step closer to seeing those tiny seeds transform into flourishing pear seedlings. Let’s move on to the next step: planting the pear seeds!
Step 4: Planting the Pear Seeds
Now comes the exciting part – planting the pre-soaked pear seeds! This step marks the beginning of your journey towards growing your very own pear tree. Follow these simple steps to plant the pear seeds:
- Prepare the growing container: Ensure that the growing container with the pre-soaked pear seeds is ready. The container should be filled with moistened potting mix and have pre-made planting holes that are about half an inch to an inch deep.
- Take the pre-soaked seeds: Carefully remove each pre-soaked pear seed from the shallow container or bowl. Gently pat them dry with a paper towel if necessary, being careful not to damage the delicate sprouts.
- Plant the pear seeds: Place each pear seed into the pre-made planting holes in the potting mix. Ensure that the sprout or root end is facing downwards, while the pointed end is facing upwards. Planting the seeds in the correct orientation will help them establish healthy root systems.
- Cover the seeds: Once the pear seeds are positioned in the planting holes, cover them with a thin layer of potting mix. This layer should be enough to provide adequate protection while still allowing the emerging seedlings to push through the soil easily.
- Mist the soil: After covering the seeds, mist the soil using a spray bottle or a fine mist setting on a watering can. This helps to settle the soil and provide moisture for germination. Avoid using a heavy stream of water, as it may dislodge the seeds or compact the soil too much.
- Label the container: It’s crucial to label the container with the name and date of the pear variety you are planting. This will help you keep track of different varieties and their progress as they start to sprout and grow.
With the pear seeds planted and the growing container properly labeled, you have completed the essential step of getting the seeds into the soil. The next steps will focus on providing the right conditions for the seeds to germinate and grow into healthy young pear seedlings. Get ready to provide the care these little seeds need!
Step 5: Providing Adequate Water and Sunlight
Now that your pear seeds are planted, it’s crucial to provide them with the right amount of water and sunlight. These two factors play a significant role in the germination and growth of your pear seedlings. Follow these guidelines to ensure your seedlings thrive:
- Watering:
- Keep the soil consistently moist: It’s essential to keep the soil in the growing container consistently moist but not waterlogged. Check the moisture level regularly by gently inserting your finger about an inch into the soil. If it feels dry, it’s time to water.
- Avoid overwatering: While it’s crucial to provide adequate moisture, overwatering can lead to root rot and other issues. Ensure that the container has proper drainage to prevent water from stagnant in the soil. Water thoroughly, allowing the excess water to drain from the container.
- Mist the seedlings gently: In addition to regular watering, mist the seedlings gently with water using a spray bottle. This helps to create a humid microclimate around the seedlings and promotes healthy growth.
- Adjust watering as needed: As the seedlings grow and develop, their water needs may change. Pay attention to the moisture level of the soil and adjust watering frequency accordingly.
- Sunlight:
- Provide ample sunlight: Pear seedlings need a minimum of six to eight hours of direct sunlight each day to thrive. Place the growing container in a sunny location, such as a south-facing window or a spot in the garden with full sun exposure.
- Rotate the container: If you notice that the seedlings are leaning or reaching towards a specific direction, rotate the container regularly. This encourages even growth and prevents the seedlings from becoming lopsided.
- Supplement with artificial light: If you don’t have access to sufficient natural sunlight, supplementing with artificial light can be beneficial. Invest in a grow light specifically designed for seedlings and adjust the height and duration of lighting based on the seedlings’ needs.
Remember, providing adequate water and sunlight is crucial for the healthy development of your pear seedlings. Monitor their growth and make adjustments as needed to ensure they receive the optimal conditions for germination and early growth. With these important factors in place, the pear seedlings will soon start to flourish with vibrant green leaves.
Step 6: Caring for the Young Pear Seedlings
As your pear seedlings continue to grow, it’s important to provide them with proper care to ensure their healthy development. Here are some essential tips for caring for the young pear seedlings:
- Thinning the seedlings: If multiple seedlings have sprouted in the same container, it’s necessary to thin them out. Choose the healthiest and strongest-looking seedling and carefully remove the others, ensuring not to disturb the roots of the remaining seedling. Thinning allows the remaining seedling to have ample space, light, and nutrients to grow.
- Supporting the seedlings: As the pear seedlings grow taller, they may require support to keep them upright. Gently insert a small stake next to the seedling and tie it loosely with a soft plant tie or twine. This will provide additional support and prevent the seedling from bending or breaking due to wind or its own weight.
- Fertilizing: After the seedlings have developed a few sets of true leaves, you can start fertilizing them. Use a balanced organic fertilizer formulated for fruit trees and follow the instructions on the packaging for application rates. This will provide essential nutrients to support their growth and overall health.
- Pruning: Once the seedlings have grown a few inches tall and have several sets of leaves, you can start pruning them. Use clean and sharp pruning shears to remove any crossing or damaged branches, as well as any excess growth that may hinder the plant’s development. Pruning helps shape the pear tree and encourages stronger branching.
- Protecting from pests and diseases: Keep a close eye on your pear seedlings for any signs of pests or diseases. Common pests that may affect pear trees include aphids, caterpillars, and mites. Should you notice any signs of infestation, you can use organic pest control methods or consult with a local garden center for appropriate treatments. Also, ensure that the seedlings are kept in a clean and well-ventilated space to minimize the risk of disease development.
- Transplanting to larger containers: As the pear seedlings continue to grow, they will outgrow their initial growing container. When the seedlings are a few inches tall with a well-developed root system, it’s time to transplant them into larger containers. Use a pot that allows for ample root growth and provides proper drainage. Fill the new container with fresh potting mix, make a hole large enough for the root ball of the seedling, and gently transfer the seedling, ensuring the soil level remains consistent with its previous planting depth.
By providing proper care and attention to your young pear seedlings, you are setting the stage for their success in becoming well-established and productive pear trees. With regular monitoring, nurturing, and adjustment of their growing conditions, you will soon witness the promising growth of your pear seedlings.
Step 7: Transplanting the Pear Seedlings
Once your pear seedlings have outgrown their initial containers and have developed a strong root system, it’s time to transplant them into their permanent location. Transplanting the seedlings ensures that they have ample space to grow and thrive. Follow these steps to transplant your pear seedlings:
- Choose the right time: Find the optimal time to transplant your pear seedlings, typically during the early spring or fall when the weather is mild. Avoid transplanting during extreme heat or cold, as it can shock the seedlings.
- Prepare the new planting location: Select a sunny location in your garden with well-draining soil. Remove any weeds or grass from the area and amend the soil with compost or organic matter to improve its fertility.
- Water the seedlings: Before transplanting, thoroughly water the pear seedlings in their current containers. This ensures that the root ball remains intact during the transplantation process.
- Dig the planting hole: Dig a hole in the prepared planting location that is slightly larger and deeper than the root ball of the seedling. The hole should be wide and deep enough to accommodate the entire root system without bending or crowding the roots.
- Remove the seedlings from their containers: Gently tap the sides and bottom of the container to loosen the root ball. Carefully lift the seedling, grasping it by the base of the stem, and guide the root ball out of the container. Avoid pulling on the delicate stem or damaging the roots.
- Place the seedling in the planting hole: Lower the seedling into the planting hole, ensuring that the root ball is level with or slightly above the soil surface. The graft union (if present) should be positioned above the soil level to prevent it from rotting.
- Backfill the hole: Fill the remaining space around the root ball with the amended soil, gently firming it to eliminate air pockets. Avoid compacting the soil too much, as this can hinder root growth and water penetration.
- Water the transplanted seedlings: Give the newly transplanted pear seedlings a thorough watering to settle the soil and provide moisture for their continued growth. Keep the soil consistently moist in the following weeks to help the seedlings establish in their new location.
Transplanting your pear seedlings is a significant step in their journey towards becoming established pear trees. By following these transplanting guidelines, you are providing them with the opportunity to spread their roots and flourish in their permanent home. Now, onto the final step: continued care and maintenance to ensure the growth and productivity of your pear trees!
Step 8: Continued Care and Maintenance
Congratulations on successfully transplanting your pear seedlings! To ensure the long-term health and productivity of your pear trees, proper care and maintenance are crucial. Here are the essential steps for continued care:
- Watering: Provide regular and consistent watering, especially during dry periods. Keep the soil evenly moist, but be cautious of overwatering, as it can lead to root rot. Water at the base of the tree, avoiding getting the leaves wet to reduce the risk of fungal diseases.
- Fertilizing: Feed your pear trees with balanced organic fertilizer in early spring and late fall to provide them with essential nutrients. Follow the instructions on the fertilizer package for proper application rates based on the size and age of your trees.
- Pruning: Regular pruning helps maintain the shape, health, and productivity of your pear trees. Prune during the dormant season, removing any dead, damaged, or crossing branches. Also, thin out excessive growth to improve air circulation and reduce the risk of pest and disease issues.
- Weed control: Keep the area around your pear trees free from weeds and competing vegetation. Weeds can rob the trees of essential nutrients and water. Use mulch or regularly hand-pull weeds to maintain a weed-free zone around the base of the trees.
- Pest and disease management: Monitor your pear trees regularly for any signs of pests or diseases. Common pests that can affect pear trees include aphids, codling moths, and pear psylla. Deploy integrated pest management strategies, such as using beneficial insects or organic sprays, to manage pest infestations. Additionally, practice good sanitation and remove any fallen fruits or diseased plant material to minimize disease risk.
- Protecting from extreme weather: Pear trees can be susceptible to extreme weather conditions. During frost events, consider using protective coverings or frost blankets to shield the trees. In regions with intense summer heat, provide shade or use shading material to prevent sunburn on the tree trunks.
- Regular monitoring: Continuously observe your pear trees for any changes in growth, leaf color, or signs of pests or diseases. Promptly address any concerns and take necessary action to ensure the health and vitality of your trees.
- Harvesting and enjoying the fruits: Depending on the variety, pears will typically ripen and become ready for harvest in late summer or early fall. Harvest the pears when they are mature but still firm. Allow them to ripen off the tree at room temperature until they reach your desired level of sweetness and juiciness. Enjoy the delicious fruits of your labor!
By providing ongoing care and maintenance, you are creating a nurturing environment for your pear trees to thrive and produce bountiful harvests. Remember, each pear tree is unique and may require specific care based on its variety and growing conditions. Enjoy the journey of tending to your pear trees and savor the rewards of your efforts for years to come!
Conclusion
Congratulations on successfully learning how to plant pear seeds and nurturing them into healthy young pear seedlings! Edible gardening is a rewarding and fulfilling journey, and growing your own pear trees allows you to enjoy the delicious taste of homegrown pears while adding beauty to your garden. Here are the key takeaways from this guide:
1. Select high-quality pear seeds from a reliable source, considering the right variety and maturity.
2. Prepare a suitable growing container with well-draining potting mix and proper drainage.
3. Pre-soak the pear seeds to promote germination and seed viability.
4. Plant the pre-soaked seeds in the container, ensuring the correct orientation and covering them with a thin layer of soil.
5. Provide adequate water and sunlight to support the growth of the pear seedlings.
6. Care for the young pear seedlings by thinning, supporting, fertilizing, pruning, and protecting them from pests and diseases.
7. Transplant the seedlings into their permanent location when they outgrow their initial containers.
8. Offer continued care and maintenance, including watering, fertilizing, pruning, and monitoring for pest and disease issues as the trees mature.
Remember, growing pear trees from seeds requires patience and dedication. It may take several years before your trees bear fruit, but the journey is worth it. Enjoy the process of nurturing your pear trees and savor the rewards when you finally get to taste the sweet and juicy fruits from your own garden.
So, roll up your sleeves, grab your gardening tools, and embark on the wonderful adventure of growing your own pear trees. May your garden be abundant with flourishing pear trees and may your harvests be delicious and fulfilling!