Home>Types of Gardening>Edible Gardening>How To Plant Blackberry Seeds
Edible Gardening
How To Plant Blackberry Seeds
Modified: February 9, 2024
Learn the steps on how to plant blackberry seeds and start your own edible gardening adventure. Discover the joys of growing your own blackberries!
(Many of the links in this article redirect to a specific reviewed product. Your purchase of these products through affiliate links helps to generate commission for Chicagolandgardening.com, at no extra cost. Learn more)
Table of Contents
- Introduction
- Step 1: Gather the necessary materials
- Step 2: Prepare the planting site
- Step 3: Harvest blackberry seeds
- Step 4: Prepare the seeds for planting
- Step 5: Plant the blackberry seeds
- Step 6: Provide proper care for the seeds
- Step 7: Transplant seedlings (optional)
- Step 8: Troubleshooting common issues
- Step 9: Harvesting and enjoying your blackberries
- Conclusion
Introduction
Edible gardening is an incredibly rewarding and fulfilling hobby, allowing you to grow your own food and experience the satisfaction of harvesting and enjoying fresh produce. One popular fruit that many gardeners love to grow is the blackberry. Blackberries are not only delicious to eat but also rich in antioxidants and other beneficial nutrients.
Whether you’re a seasoned gardener or a beginner just starting out, planting blackberries from seeds can be a fun and exciting project. Not only does it give you the opportunity to witness the entire life cycle of the plant, but it also allows you to experiment with different varieties and enjoy the fruits of your labor.
Before you dive into planting blackberry seeds, it’s important to understand the process and gather the necessary materials. In this article, we’ll guide you through each step, from preparing the planting site to harvesting and enjoying your homegrown blackberries. So, roll up your sleeves, grab your gardening tools, and let’s get started on this flavorful journey!
Step 1: Gather the necessary materials
Before you begin planting blackberry seeds, it’s important to gather all the necessary materials. Having everything on hand will make the process smoother and more efficient. Here are the items you’ll need:
- Blackberry seeds: Purchase or collect blackberry seeds from a reputable source. Make sure they are fresh and viable.
- Potting soil: Use a high-quality potting mix that is well-draining and nutrient-rich.
- Seed trays or pots: You can use seed trays with individual cells or small pots to start your seeds.
- Plastic wrap or a transparent cover: This will create a greenhouse-like environment to ensure proper germination.
- Watering can or spray bottle: Use a watering can with a fine spray or a spray bottle to moisten the soil without disturbing the seeds.
- Labels or markers: Keep track of the blackberry variety and planting date by labeling your trays or pots.
- Grow lights or a sunny window: Blackberry seeds need plenty of light to germinate and grow, so ensure they receive sufficient light either naturally or with the help of grow lights.
- Planting trays or containers: Once your seedlings are ready to be transplanted, you’ll need larger planting trays or containers.
- Fertilizer: Choose a balanced organic fertilizer to provide nutrients as your blackberry plants grow.
- Gardening gloves and hand tools: Having gloves and hand tools handy will make the planting process easier and protect your hands.
By gathering these materials beforehand, you’ll be fully prepared to start your blackberry seed planting journey. Now that you have everything ready, it’s time to move on to the next step: preparing the planting site!
Step 2: Prepare the planting site
Creating the ideal planting site for your blackberry seeds is crucial for their successful growth and development. Here’s how you can prepare the planting site:
- Choose the right location: Blackberries thrive in sunny areas, so select a location that receives at least 6-8 hours of direct sunlight each day. Ensure the site has well-draining soil to prevent waterlogging.
- Clear the area: Remove any weeds, rocks, or debris from the planting site. Clearing the area will minimize competition for nutrients and create a clean space for your blackberry plants to grow.
- Improve the soil: Blackberries prefer slightly acidic soil with a pH between 5.5 and 6.5. Test the soil pH and amend it if necessary by adding organic matter, such as compost or well-rotted manure. This will improve the soil structure and provide essential nutrients.
- Create raised beds or mounds: If your soil has poor drainage, consider creating raised beds or mounds. This will help prevent water from pooling around the roots, reducing the risk of root rot.
- Space the plants: Plan the spacing according to the specific variety you’re planting. Most blackberries require about 3-4 feet of space between plants. This allows air circulation and room for the plants to spread out as they grow.
- Install a support system: Blackberry plants benefit from a support system to keep the canes upright and make harvesting easier. Install a trellis or fence behind the planting area, ensuring it’s sturdy enough to handle the weight of the mature plants.
- Prepare the irrigation system: Set up a reliable irrigation system, such as drip irrigation or soaker hoses, to provide consistent moisture without wetting the foliage excessively.
By following these steps, you’ll create an optimal planting site that provides the necessary conditions for your blackberry seeds to thrive. Now that the planting site is prepared, it’s time to move on to the next step: harvesting blackberry seeds!
Step 3: Harvest blackberry seeds
Harvesting blackberry seeds is an integral part of the process, as it allows you to collect seeds from mature berries and ensures the viability of the seeds for planting. Here’s how you can harvest blackberry seeds:
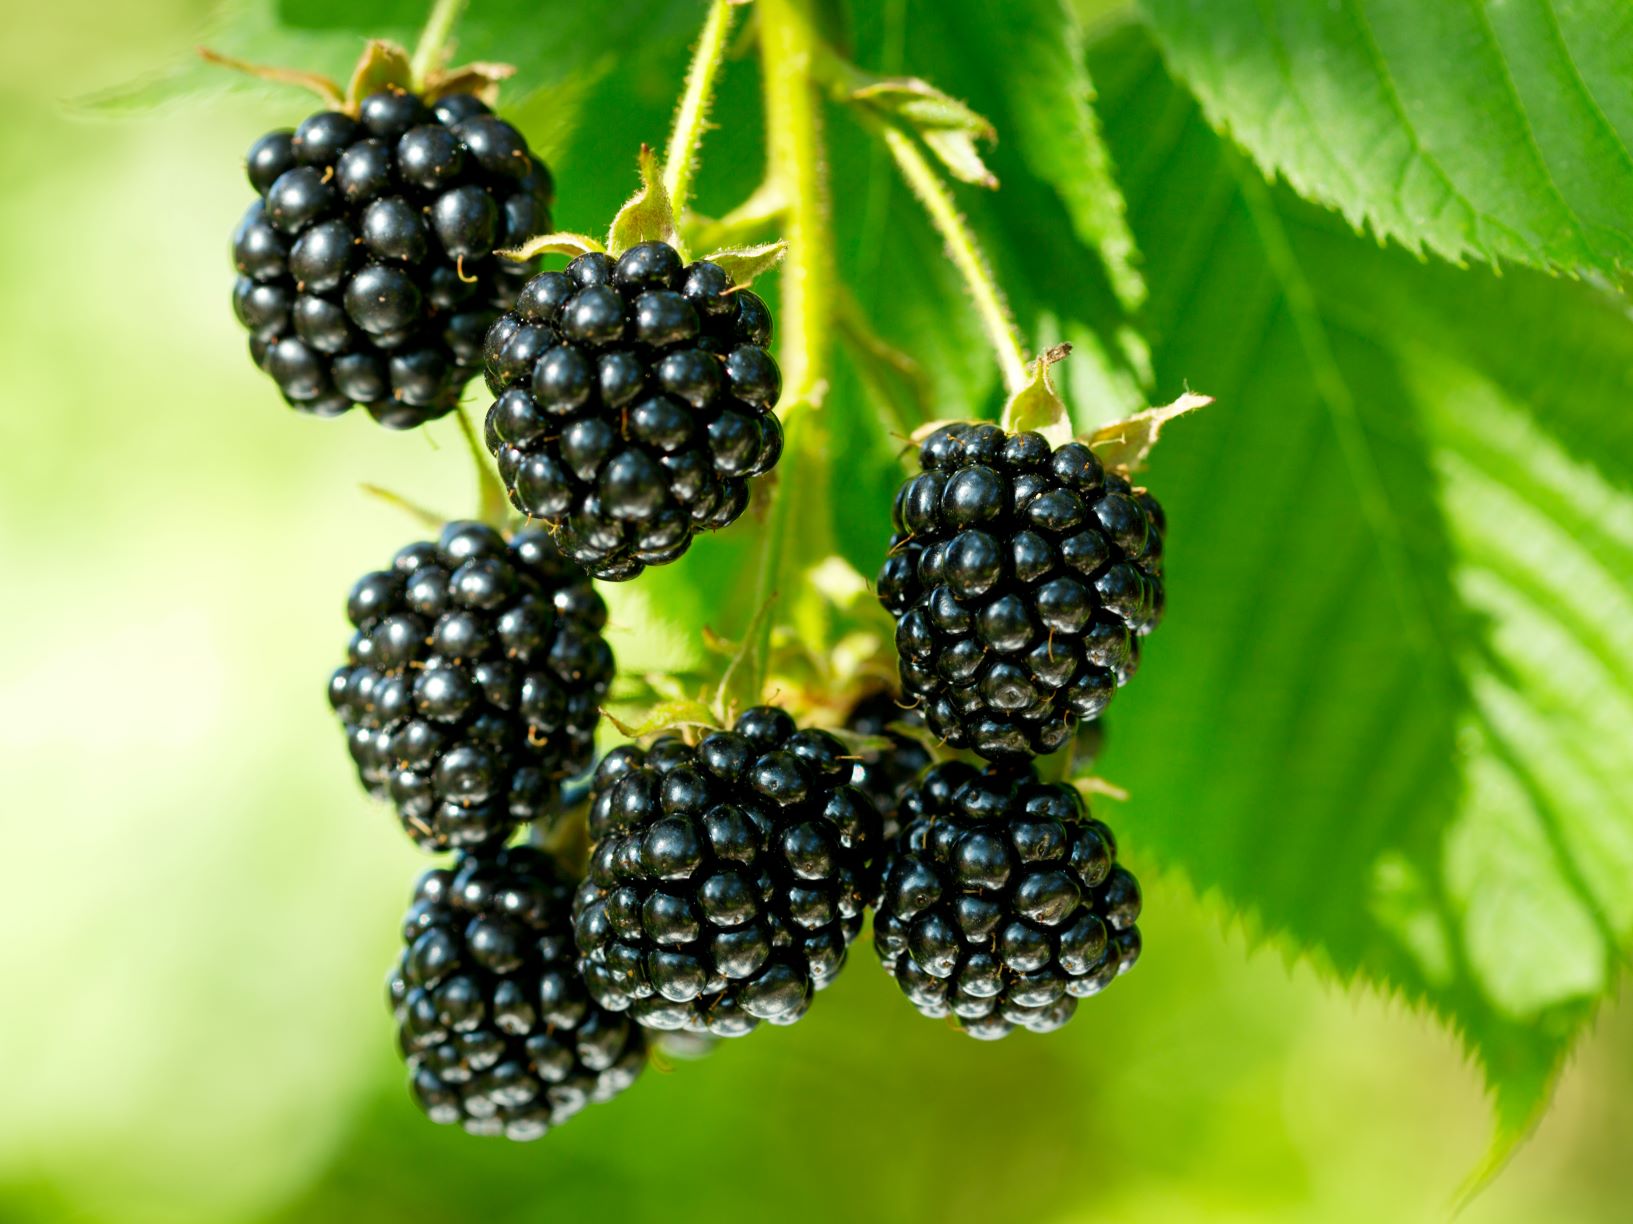
- Select ripe blackberries: Choose fully ripe blackberries from healthy and disease-free plants. Ripe blackberries are usually dark in color, plump, and easily detach from the plant when gently tugged.
- Gently crush the blackberries: Place the ripe blackberries in a bowl or container and gently crush them with a fork or your fingers. This will help release the seeds from the flesh.
- Separate the seeds from the pulp: Fill the container with water and stir the crushed blackberries. The viable seeds will sink to the bottom, while the pulp and debris will float. Carefully pour off the floating material, being cautious not to discard any seeds.
- Rinse and dry the seeds: Transfer the seeds to a fine mesh sieve and rinse them under running water to remove any remaining pulp. After rinsing, spread the seeds on a paper towel or a clean cloth to dry. Make sure they are completely dry before proceeding to the next step.
- Store the seeds: Once the seeds are dry, transfer them to a labeled envelope or a small airtight container. Store them in a cool, dry place like a refrigerator until you’re ready to plant them.
It’s important to note that blackberry seeds from hybrid varieties may not produce plants that are true to the parent plants. If you want to ensure consistent characteristics, it’s best to collect and plant seeds from non-hybrid, heirloom varieties.
Now that you know how to harvest blackberry seeds, you’re one step closer to planting and growing your own blackberry plants. The next step is preparing the seeds for planting!
Step 4: Prepare the seeds for planting
Properly preparing the blackberry seeds for planting is essential to maximize their germination and ensure successful growth. Here’s how you can prepare the seeds:
- Scarfify the seeds: Blackberry seeds have a hard outer coating that may hinder germination. To improve germination rates, scarify the seeds by gently rubbing them with fine-grit sandpaper or nicking them with a sharp knife. This will help water penetrate the seed coat and initiate germination.
- Soak the seeds: After scarification, place the seeds in a bowl of lukewarm water and let them soak for 24-48 hours. This further softens the seed coat and promotes germination.
- Stratify the seeds: Blackberry seeds benefit from a period of cold stratification to simulate natural winter conditions. Moisten a paper towel or coffee filter, place the seeds inside, and fold it over to create a seed packet. Place the packet in a plastic bag and refrigerate it for 4-6 weeks.
- Check for seed viability: After stratification, remove the seeds from the refrigerator and check for viability. Discard any seeds that show signs of mold, damage, or decay. Viable seeds will appear plump and firm.
Now that your blackberry seeds are scarified, soaked, stratified, and viable, they’re ready to be planted. But before you get your hands dirty, make sure you have all the necessary materials and tools ready for the next step.
Note: Not all blackberry seeds require scarification or stratification. Some varieties may have naturally softer seed coats and do not need these pre-planting treatments. Consult the specific instructions for the variety you’re planting to ensure the best results.
In the next step, we’ll guide you through the process of planting the blackberry seeds and starting your own blackberry seedlings.
Step 5: Plant the blackberry seeds
Now that you’ve prepared the blackberry seeds, it’s time to plant them and watch them grow into seedlings. Follow these steps to successfully plant your blackberry seeds:
- Fill seed trays or pots with potting soil: Start by filling seed trays or small pots with a well-draining potting mix. Leave a small space at the top for watering.
- Make small indentations: Use your finger or a pencil to make small indentations in the soil, about ¼ inch deep. Space the indentations at least an inch apart to allow room for growth.
- Plant the seeds: Place one blackberry seed in each indentation and cover it lightly with soil. Gently press the soil down to ensure good seed-to-soil contact.
- Water the seeds: Use a watering can or a spray bottle to moisten the soil without disturbing the seeds. Ensure the soil is evenly moist, but not overly saturated.
- Create a greenhouse-like environment: Cover the seed trays or pots with plastic wrap or use a transparent cover to create a greenhouse effect. This will help retain moisture and maintain a stable temperature for germination.
- Provide the right conditions for germination: Place the covered seed trays or pots in a warm location, ideally with a temperature between 70-75°F (21-24°C). Keep them out of direct sunlight initially.
- Monitor and maintain moisture: Regularly check the soil moisture level and mist the seeds lightly if needed to prevent drying out. Be careful not to overwater, as excessive moisture can lead to damping off disease.
- Wait for germination: Blackberry seeds typically germinate within 2-4 weeks, but it can vary depending on the variety and growing conditions. Be patient and keep an eye out for the first seedlings to emerge.
Once the blackberry seedlings have emerged, remove the plastic cover and gradually expose them to more light. Position them in a location where they can receive at least 6-8 hours of direct sunlight each day or provide supplemental grow lights to ensure healthy growth.
Now that you’ve successfully planted the blackberry seeds, it’s time to move on to the next step: providing proper care for the seedlings to ensure their continued growth and development.
Step 6: Provide proper care for the seeds
Once your blackberry seedlings have emerged, it’s important to provide them with proper care to promote healthy growth and ensure their successful transition into mature plants. Follow these guidelines to provide the best care for your blackberry seedlings:
- Watering: Keep the soil consistently moist but not waterlogged. Water the seedlings regularly, especially during dry spells, ensuring the water reaches the root zone. Avoid overhead watering, as wet foliage can promote fungal diseases.
- Light exposure: Place the seedlings in a location that receives at least 6-8 hours of direct sunlight each day. If growing indoors, use fluorescent grow lights to provide sufficient light. Rotate the seedlings regularly to promote even growth.
- Temperature and humidity: Blackberry seedlings prefer temperatures between 60-75°F (15-24°C). Maintain moderate humidity levels around the seedlings. Use a room humidifier or place trays of water nearby to increase humidity if necessary.
- Fertilization: After the seedlings have developed their first set of true leaves, start feeding them with a balanced liquid fertilizer. Follow the label instructions for application rates and frequency to avoid overfertilization.
- Weed control: Keep the area around the seedlings free from weeds and competing plants. Weeds can rob the seedlings of nutrients and moisture, stunting their growth. Regularly hand-pull or use mulch to suppress weed growth.
- Pruning: Once the seedlings have grown a few inches tall, pinch off the top set of leaves. This will encourage branching and result in a bushier plant. Also, prune any weak or leggy stems to promote stronger growth.
- Support: As the blackberry seedlings grow, provide a support system such as a trellis, fence, or stakes. This will help train the canes to grow vertically, making harvesting easier and preventing them from sprawling on the ground.
- Pest and disease control: Monitor your seedlings regularly for signs of pests or diseases, such as aphids, spider mites, or powdery mildew. If an issue is detected, take appropriate measures, such as using organic pest control methods or applying fungicides if necessary.
By providing proper care for your blackberry seedlings, you’ll ensure their healthy growth and increase the chances of a bountiful harvest. With time, patience, and consistent care, your seedlings will develop into mature blackberry plants laden with delicious fruits.
Next up, we’ll explore the option of transplanting your blackberry seedlings into larger planting trays or containers, if desired.
Step 7: Transplant seedlings (optional)
Transplanting your blackberry seedlings into larger planting trays or containers is an optional step that can help promote further growth and development before they are planted in their final growing location. Here’s how you can transplant your blackberry seedlings:
- Select suitable containers: Choose containers that are at least 1 gallon in size and have adequate drainage holes to prevent waterlogging. Ensure the containers are clean and sterilized before use.
- Prepare the planting medium: Fill the containers with a well-draining potting mix, preferably one that is rich in organic matter. Avoid compacting the soil excessively to allow for proper root growth.
- Transplant the seedlings: Carefully remove the seedlings from the seed trays or pots, being cautious not to disturb the delicate roots. Gently loosen the soil around the roots and transplant them into the prepared containers, ensuring they are at the same depth as they were previously planted.
- Water thoroughly: After transplanting, water the seedlings thoroughly to settle the soil and eliminate any air pockets around the roots. Ensure the soil is evenly moist, but not overly saturated.
- Place in a suitable location: Position the containers in a location that receives full sunlight and has good air circulation. If growing indoors, continue to provide artificial light or place them near a bright window.
- Monitor and care for the transplanted seedlings: Keep a close eye on the transplanted seedlings and provide them with regular care. Water them when the soil starts to dry out, fertilize them with a balanced organic fertilizer, and continue to monitor for pests or diseases.
- Monitor root growth: Over time, check the root growth of the seedlings. If the roots start to fill the container and become crowded, it may be time to transplant them into larger containers or prepare them for planting in the garden.
The option to transplant your blackberry seedlings allows you to nurture them in a controlled environment while they continue to develop. It’s particularly useful if you want to extend the growing season or if the weather conditions outside are not yet optimal for planting.
If you choose not to transplant, you can directly plant your blackberry seedlings into their final growing location after they have acclimated to outdoor conditions and reached an appropriate size. The next step will cover troubleshooting common issues that may arise during the growing process.
Step 8: Troubleshooting common issues
While growing blackberry plants from seeds can be a rewarding experience, it’s not uncommon to encounter certain challenges along the way. Here are some common issues you may face during the growing process and how to address them:
- Poor germination: If you notice low germination rates, check the viability of your seeds. Ensure that they are fresh, scarified, and have undergone the necessary pre-planting treatments. Adjusting the moisture levels and providing consistent warmth can also improve germination.
- Damping off: Damping off is a fungal disease that causes seedlings to collapse, rot, or die. To prevent this, ensure proper air circulation, avoid overwatering, use sterile soil and containers, and maintain cleanliness in your growing area.
- Inadequate growth: If your seedlings are not growing as expected, assess their growing conditions. Ensure they are receiving sufficient light, water, and nutrients. Adjust the temperature and humidity levels if necessary and consider providing additional fertilization.
- Pest infestation: Common pests that may affect blackberry plants include aphids, spider mites, and Japanese beetles. Keep an eye out for any signs of pest infestation, such as distorted leaves or visible insects. Use organic pest control methods such as neem oil or insecticidal soap to manage the issue.
- Leaf discoloration or wilting: Discolored or wilting leaves may indicate nutrient deficiencies, overwatering, or root problems. Review your watering practices and ensure proper drainage. Adjust the pH of the soil if necessary and provide adequate fertilization to address nutrient deficiencies.
- Disease susceptibility: Blackberry plants can be susceptible to diseases such as powdery mildew and fungal infections. To prevent these diseases, ensure good air circulation, avoid overhead watering, and remove any infected plant parts promptly. Consider using organic fungicides if the problem persists.
Remember that prevention is key when it comes to common issues. Maintaining good gardening practices, providing optimal growing conditions, and being vigilant for signs of trouble can greatly reduce the likelihood of encountering problems.
If you’re unsure about the cause of any issue or need further assistance, don’t hesitate to reach out to local gardening experts, extension services, or online gardening communities for guidance. With proper troubleshooting and intervention, you can overcome challenges and continue to nurture your blackberry plants towards a successful harvest.
Finally, we’re getting closer to the exciting part – harvesting and enjoying the delicious fruits of your labor. Let’s proceed to the next step.
Step 9: Harvesting and enjoying your blackberries
After dedicating time and effort to growing your blackberry plants from seeds, the moment you’ve been waiting for has arrived: it’s time to harvest and enjoy the fruits of your labor! Here’s what you need to know about harvesting and savoring your blackberries:
- Timing: Blackberries are typically ready for harvest in the summer, usually from June to August, depending on your specific climate and variety. The berries should be fully ripe, plump, and easily detach from the plant.
- Harvesting technique: Gently grasp the blackberry between your thumb and fingers and give it a slight twist. Ripe berries will come off easily, while unripe ones will remain on the plant. Harvest the berries regularly, as they do not continue to ripen after picking.
- Storage: If you can’t consume all the blackberries immediately, store them in the refrigerator. Place them in a shallow container lined with paper towels to absorb excess moisture. Use them within a few days for the best flavor and texture.
- Culinary delights: Blackberries can be enjoyed in various ways. Eat them fresh as a healthy snack, add them to breakfast cereals or smoothies, use them in baking delicious pies, cobblers, or jams, or even freeze them for later use in recipes. The possibilities are endless!
- Plant care post-harvest: After harvesting, continue to care for your blackberry plants. Remove any fallen or diseased berries and maintain regular watering and fertilization. Prune and train the canes according to the recommended techniques for your specific variety.
- Annual maintenance: As blackberries are perennial plants, they require annual maintenance. Prune the canes in late winter or early spring to remove old, nonproductive canes and encourage new growth. Mulch around the base of the plants to suppress weeds and retain moisture.
By harvesting your blackberries at the peak of ripeness and properly caring for the plants, you can enjoy a bountiful harvest year after year. Remember to savor the flavors and take pride in knowing that you have nurtured these delicious fruits from seed to table.
As you continue your edible gardening journey, don’t hesitate to experiment with different blackberry varieties, explore new recipes, and share your gardening knowledge with others. Happy harvesting and bon appétit!
Conclusion
Embarking on the journey of planting blackberry seeds and growing your own blackberry plants can be a fulfilling and rewarding experience. From gathering the necessary materials to harvesting and enjoying the delicious fruits, each step has its own significance and contributes to the overall success of your edible gardening endeavor.
By following the steps outlined in this guide, you can confidently navigate the process of planting blackberry seeds. Remember to provide the proper care, such as watering, fertilizing, and controlling pests, to ensure the healthy growth of your seedlings.
Throughout the growing season, be on the lookout for any potential issues and apply appropriate troubleshooting techniques to address them promptly. With patience, persistence, and a little bit of knowledge, you can overcome common challenges and nurture your blackberry plants towards a successful harvest.
Finally, the moment arrives when you can reap the fruits of your labor by harvesting the ripe blackberries. Enjoy the bounty of nature by incorporating them into your favorite recipes or indulging in their juicy sweetness straight from the plant.
Edible gardening offers a unique opportunity to connect with nature, appreciate the benefits of homegrown produce, and satisfy your taste buds. As you continue on your gardening journey, explore new varieties, techniques, and culinary creations, and share your knowledge and experiences with others.
So, whether you’re a green thumb or a novice in the garden, planting blackberry seeds and tending to the plants can provide endless joy and satisfaction. Take pride in your edible garden and relish the flavors of your homegrown blackberries year after year.
Happy gardening and happy harvesting!