Home>Types of Gardening>Ornamental Gardening>How To Harvest Hibiscus Seeds
Ornamental Gardening
How To Harvest Hibiscus Seeds
Modified: January 22, 2024
Learn how to harvest hibiscus seeds for your ornamental gardening needs. Follow our step-by-step guide to ensure successful seed collection.
(Many of the links in this article redirect to a specific reviewed product. Your purchase of these products through affiliate links helps to generate commission for Chicagolandgardening.com, at no extra cost. Learn more)
Table of Contents
Introduction
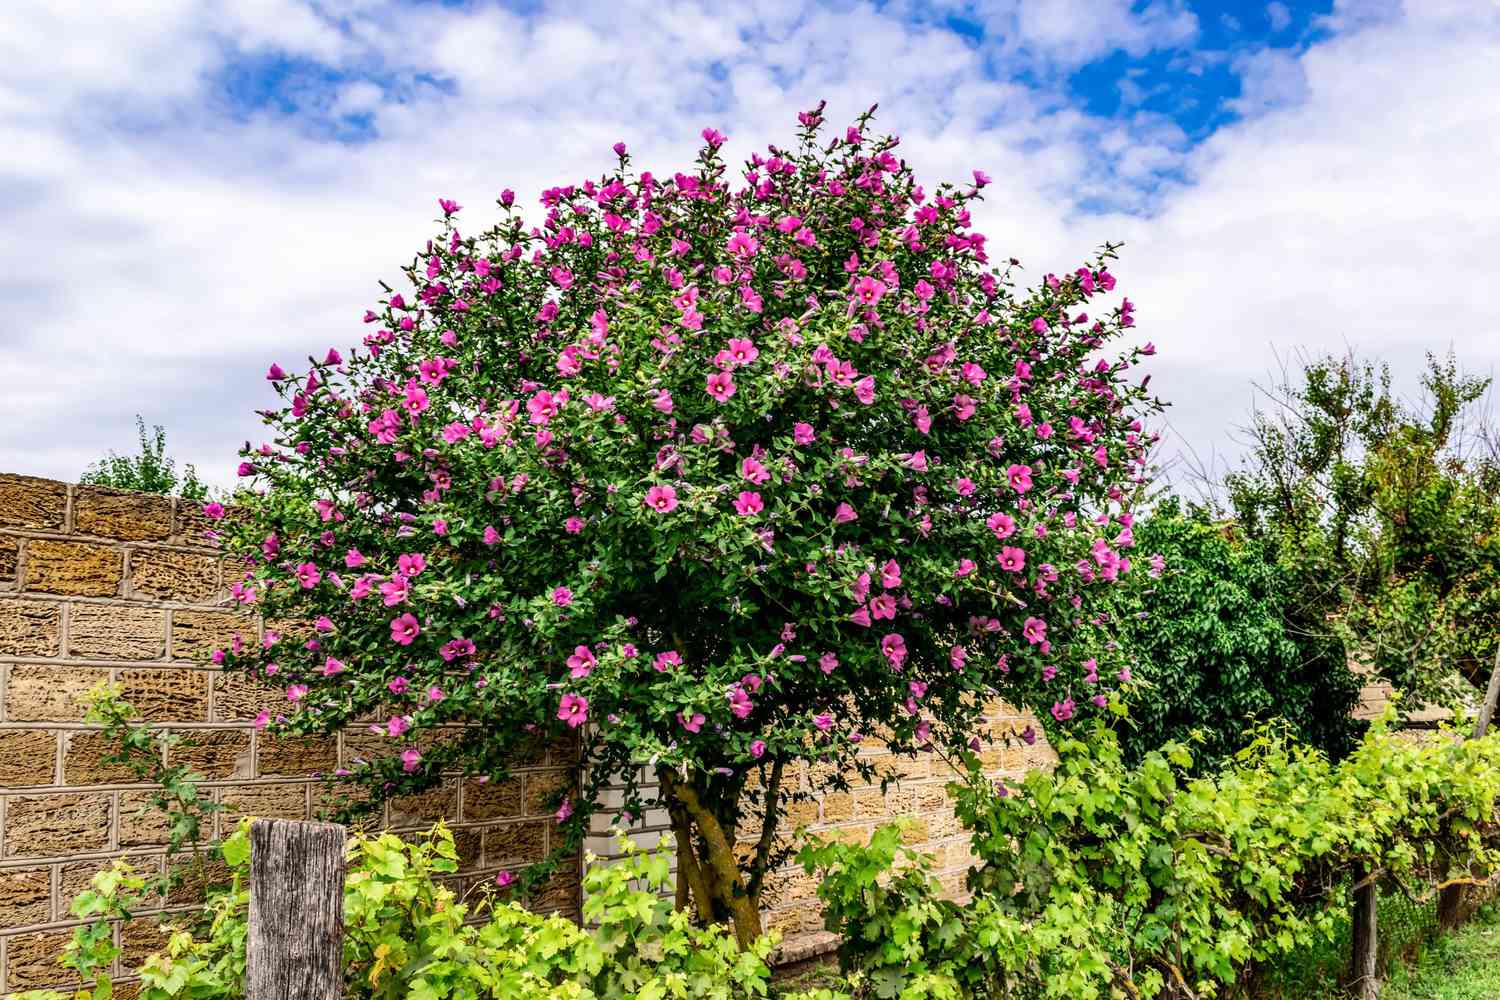
Ornamental gardening is a delightful pastime that allows us to cultivate beautiful flowers and plants in our outdoor spaces. One such flowering plant that captures the attention of garden enthusiasts is the hibiscus. Known for its vibrant blooms and lush foliage, the hibiscus adds a touch of tropical paradise to any garden.
While most gardeners appreciate the beauty of hibiscus flowers, many are unaware of the fascinating process of harvesting hibiscus seeds. As the flowers fade away, they give way to seed pods containing the potential for new hibiscus plants. By collecting and planting these seeds, you can propagate your hibiscus collection and share the joy of gardening with others.
This article will guide you through the process of harvesting hibiscus seeds, from selecting the right plant to properly storing the seeds for future growth. Whether you’re a seasoned gardener or just starting to explore the world of ornamental gardening, this article will provide you with valuable insights and techniques to successfully harvest and grow hibiscus seeds.
Join us on this hibiscus seed harvesting journey as we unlock the secrets to ensuring a bountiful harvest and experiencing the satisfaction of growing these stunning flowers from seed. Let’s dive in!
Understanding Hibiscus Seed Harvesting
Before embarking on the journey of hibiscus seed harvesting, it’s essential to understand the process and the factors that contribute to successful seed collection. Hibiscus seeds are the product of pollination, where the male part of the flower, the stamen, fertilizes the female part, the pistil. Once fertilization occurs, the hibiscus flower transforms into a seed pod that contains the seeds.
When it comes to hibiscus seed harvesting, timing is crucial. It’s important to allow the flower to naturally complete its cycle and develop fully before attempting to harvest the seeds. Harvesting too early may result in immature or non-viable seeds, hindering successful germination.
Another factor to consider for successful hibiscus seed harvesting is the hibiscus variety. There are various species and hybrids of hibiscus, each with its own unique characteristics and growing requirements. Some varieties produce seeds more abundantly, while others may produce fewer or no seeds at all. It’s essential to research and select a hibiscus variety known for its seed production if your goal is to collect seeds.
Additionally, environmental factors can impact the success of hibiscus seed harvest. Factors such as temperature, humidity, and sunlight can influence the growth and development of the plant, which in turn affects seed formation. Generally, hibiscus thrives in warm and tropical climates, but certain varieties can adapt to different conditions.
Now that we have a basic understanding of the process and factors involved in hibiscus seed harvesting, we can move on to the practical aspects of selecting the right hibiscus plant in the next section. With the right knowledge and techniques, you’ll soon be on your way to harvesting and growing your very own hibiscus plants from seeds.
Selecting a Mature Hibiscus Plant
When it comes to hibiscus seed harvesting, it’s crucial to select a mature plant that is capable of producing viable seeds. Choosing the right hibiscus plant will increase the chances of a successful harvest and ensure the quality of the seeds. Here’s what you need to consider when selecting a mature hibiscus plant for seed harvesting.
Firstly, look for a hibiscus plant that is at least two years old. Younger plants may not have reached the maturity needed for seed production. Older plants, on the other hand, may have declining seed production as they age. A two to four-year-old hibiscus plant is generally an ideal candidate for seed harvesting.
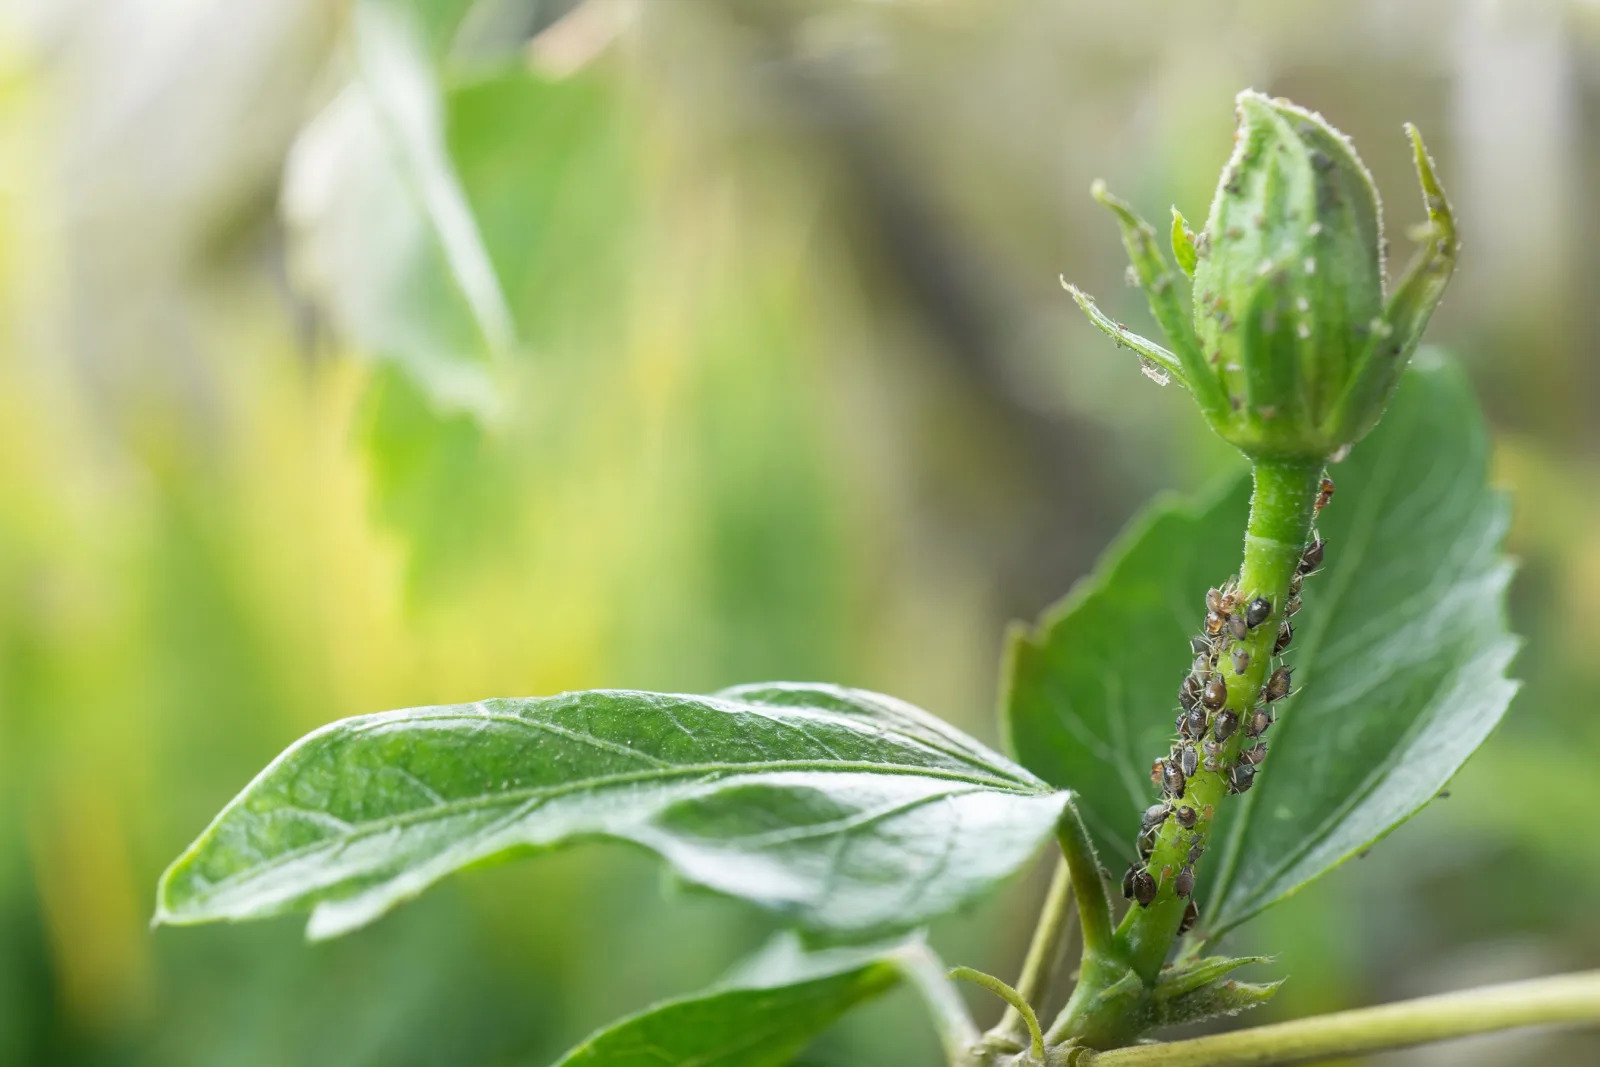
Inspect the plant for healthy growth and vitality. Ensure that the hibiscus plant has a robust stem, full foliage, and is free from any signs of disease, pests, or stress. Healthy plants are more likely to produce viable seeds that will germinate successfully.
Consider the blooming season of the hibiscus plant. Some hibiscus varieties bloom prolifically, while others may have a shorter blooming period. It’s advisable to choose a plant that consistently produces flowers throughout the growing season. This indicates that the plant is vigorous and will likely produce a good number of seed pods.
Examine the flowers of the hibiscus plant. Look for blooms with vibrant colors, as this is an indication of pollination and potential seed formation. Ideally, you want to select a plant with flowers that have fully developed and started to fade. This stage signals that the seed pods are beginning to form and are on their way to maturity.
Lastly, consider the location and growing conditions of the hibiscus plant. Ensure that it has been grown in an optimal environment with proper sunlight, well-draining soil, and regular irrigation. A plant that has been well-cared for will have the best chance of producing healthy and viable seeds.
By carefully selecting a mature hibiscus plant, you set a solid foundation for successful seed harvesting. The next step is identifying the ripe seed pods, which we will explore in the following section.
Identifying Ripe Hibiscus Seed Pods
Once you have selected a mature hibiscus plant for seed harvesting, the next step is to identify the ripe seed pods. Harvesting the seeds at the right time ensures that they are fully developed and ready for successful germination. Here are some key characteristics to look for when identifying ripe hibiscus seed pods.
Firstly, observe the color of the seed pods. Ripe hibiscus seed pods often turn brown or dark in color. This is an indicator that the seeds inside have reached maturity and are ready for harvesting. Avoid picking seed pods that are still green or yellow, as the seeds may not have fully developed and might not be viable for germination.
Another characteristic to consider is the size and shape of the seed pods. Ripe hibiscus seed pods tend to be firm and plump. They should have a rounded or oval shape, indicating that the seeds inside have reached their full size. Avoid seed pods that appear shriveled or misshapen, as they may contain underdeveloped or damaged seeds.
Gently squeeze the seed pods to determine their readiness for harvest. Ripe seed pods will feel firm and slightly resistant to pressure. If the seed pods easily collapse or feel squishy, they may not be fully matured, and the seeds inside may not be viable.
Inspect the outer covering of the seed pods. Ripe hibiscus seed pods often have dry, papery, or brittle outer coverings. When the seed pods are mature, they will start to split open naturally, revealing the seeds inside. If the seed pod is still tightly closed with no signs of splitting, it may not be ready for harvesting.
Additionally, check the area where the hibiscus flowers were once attached. Ripe seed pods will have a dried-out and brownish area at the base, indicating that they were once attached to the flower. This is another visual clue that the seed pods are ready for harvesting.
By observing these characteristics, you will be able to identify and harvest ripe hibiscus seed pods effectively. The next step is to prepare for seed harvesting, which we will explore in the following section.
Preparing for Seed Harvesting
Before diving into the process of harvesting hibiscus seeds, it’s essential to prepare yourself and gather the necessary tools and materials. This preparation will help ensure a smooth and efficient seed harvesting experience. Here’s what you need to do to get ready for seed harvesting.
1. Get your gardening gloves: Hibiscus seed pods can be prickly and may cause skin irritation, so it’s advisable to wear gardening gloves to protect your hands while handling the seed pods.
2. Prepare a clean and sterile working area: Set up a clean and clear workspace where you can safely handle and process the seed pods. Ensure that the area is free from any debris or potential contaminants that may affect the quality of the seeds.
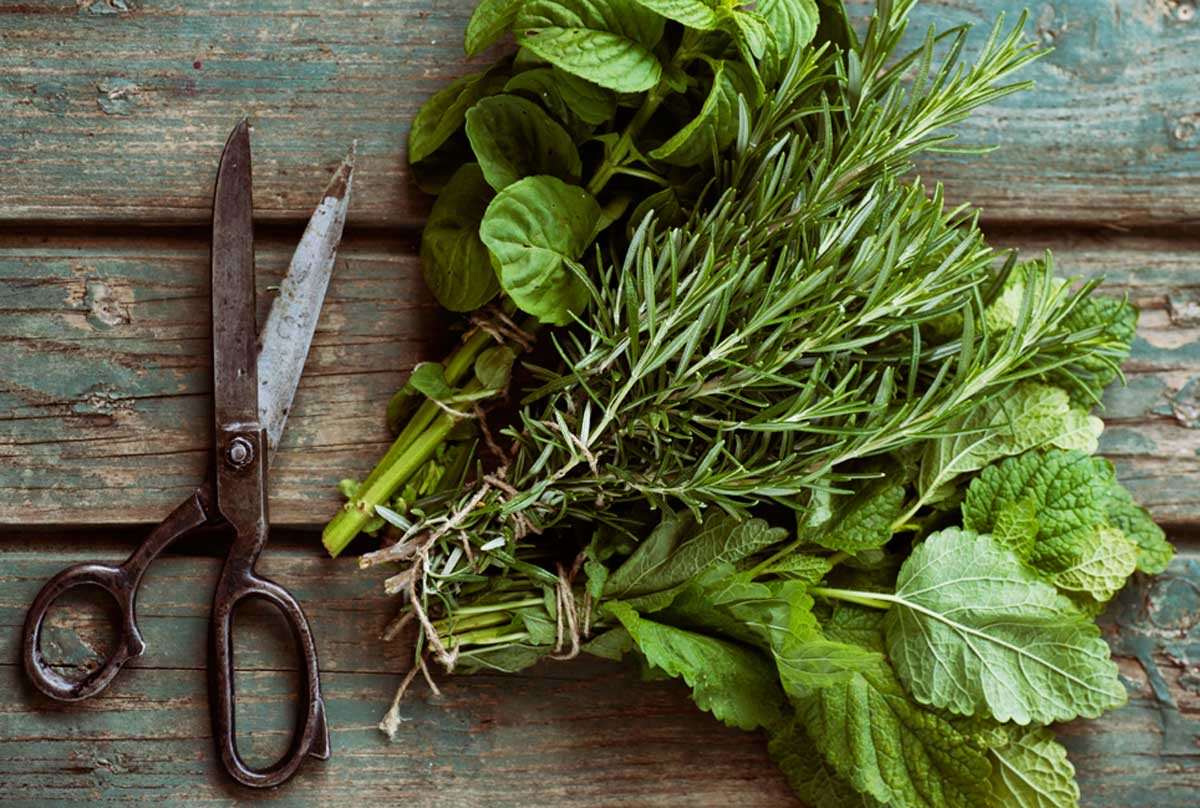
3. Gather your tools: Some essential tools for hibiscus seed harvesting include pruning shears or sharp scissors for cutting the seed pods, a clean container or bowl to collect the harvested pods, and a paper bag or envelope for seed storage.
4. Provide ample lighting: Good lighting is crucial for accurately assessing the ripeness of the seed pods. Make sure you have sufficient natural or artificial light to clearly see the color, size, and condition of the seed pods.
5. Take note of labeling and organization: If you have multiple hibiscus plants or different varieties, it’s essential to label and organize the seed pods accordingly. This will help you keep track of the parent plants and ensure that you can easily identify and grow the seeds in the future.
By taking the time to prepare and gather the necessary tools, you’ll be well-equipped to embark on the seed harvesting process. With everything ready, it’s time to proceed to the exciting part of actually harvesting the hibiscus seeds, which we will explore in the next section.
Harvesting Hibiscus Seeds
Now that you’re prepared to harvest hibiscus seeds, it’s time to put your tools to use and collect the matured seed pods. Here is a step-by-step guide to harvesting hibiscus seeds:
- Identify ripe seed pods: Using the criteria mentioned earlier, locate the seed pods that have turned brown, are firm to the touch, and have begun to naturally split open.
- Cut the seed pods: With clean pruning shears or sharp scissors, carefully cut the seed pods from the plant. Make clean cuts to avoid damaging the seeds inside.
- Collect the seed pods: Place the harvested seed pods into a clean container or bowl. Handle them gently to prevent any damage or premature seed release.
- Separate the seeds: Once you have harvested a sufficient number of seed pods, open them carefully using your fingers or a small knife. Extract the seeds and separate them from the remaining plant material. Remove any debris or excess pulp.
- Rinse the seeds: To remove any remaining pulp or plant residue, gently rinse the seeds under cool running water. Be careful not to apply too much pressure, as this can damage the delicate seeds.
- Drain and dry the seeds: After rinsing, place the seeds on a clean towel or paper towel to absorb excess moisture. Allow them to air-dry in a well-ventilated area for a day or two, ensuring they are completely dry before proceeding.
By following these steps, you can successfully harvest hibiscus seeds from the matured seed pods. The next crucial step is to clean and dry the seeds properly, which we’ll cover in the next section.
Cleaning and Drying the Seeds
After harvesting hibiscus seeds, it’s essential to clean and dry them properly to ensure their viability for future growth. Cleaning and drying the seeds remove any remaining plant material and moisture, preventing the growth of mold or bacteria that can harm the seeds. Here’s how to clean and dry hibiscus seeds:
- Prepare a clean workspace: Set up a clean and dry area where you can work on the seed cleaning process. Ensure that the workspace is free from any contaminants and has good air circulation.
- Remove any remaining debris: Examine the harvested seeds and remove any remaining plant material or shell fragments. Use a pair of tweezers or your fingers to carefully separate and discard these unwanted particles.
- Wash the seeds (optional): If there is still debris or pulp stuck to the seeds, you can gently wash them in a bowl of cool water. Swish the seeds around to loosen any remaining residue, then drain the water and repeat the process if necessary. Be gentle to avoid damaging the seeds.
- Drain and air dry: After washing, place the seeds onto a clean and absorbent paper towel or screen. Spread them out in a single layer and allow them to air dry completely. Avoid exposing the seeds to direct sunlight or excessive heat, as this can damage their viability.
- Periodically check for moisture: Check the seeds throughout the drying process to ensure they are completely dry. Moisture can lead to mold or rot, so it’s crucial to make sure the seeds are fully dried before moving forward.
- Store the dried seeds: Once the seeds are thoroughly dried, place them in a clean and dry container. It’s advisable to use airtight containers, such as small glass jars or sealable plastic bags, to protect the seeds from humidity and pests. Label the container with the date and hibiscus variety for easy identification.
By following these steps, you can effectively clean and dry hibiscus seeds after harvesting. Properly cleaned and dried seeds have a better chance of successful germination and healthy growth when it’s time to sow them. Now, let’s move on to the final section, where we will discuss the proper storage of hibiscus seeds.
Storing Hibiscus Seeds
Proper storage of hibiscus seeds is crucial to maintain their viability and ensure successful germination in the future. By following the right storage techniques, you can preserve the freshness and quality of the seeds for an extended period. Here’s how to store hibiscus seeds:
- Ensure the seeds are dry: Before storing hibiscus seeds, make sure they are completely dry. Any remaining moisture can lead to mold or decay during storage. If the seeds are not adequately dried, continue the drying process until they are moisture-free.
- Choose appropriate storage containers: Select containers that are airtight and can keep out moisture and pests. Small glass jars or sealable plastic bags work well for storing hibiscus seeds. Make sure the containers are clean and dry before transferring the seeds.
- Label and date the containers: It’s important to label the containers with the hibiscus variety and the date of seed harvest. This will help you keep track of the different types of seeds and ensure you use the oldest seeds first for sowing.
- Store in a cool, dry, and dark place: Find a storage location that is cool, dry, and away from direct sunlight. Extreme temperatures or fluctuations can affect seed viability. A cool basement, pantry, or refrigerator (with proper seed storage precautions) are suitable options.
- Check and rotate the seeds: Periodically check the stored hibiscus seeds to make sure they remain dry and free from mold or pests. If any seeds show signs of deterioration, remove them immediately to prevent contamination. Additionally, it’s a good practice to rotate the seeds every year, using up older seeds first.
By following these storage guidelines, you can extend the longevity of hibiscus seeds and increase their chances of successful germination when you decide to plant them. Proper storage ensures that you always have a fresh supply of hibiscus seeds to grow beautiful and vibrant plants in your garden.
With the knowledge of how to harvest, clean, dry, and store hibiscus seeds, you are now equipped to embark on a rewarding journey of propagating these stunning flowering plants. Enjoy the process and the joy that comes with growing your own hibiscus plants from seeds!
Conclusion
Growing hibiscus from seeds is a fascinating and rewarding experience for any ornamental gardener. By understanding the process of hibiscus seed harvesting and following the necessary steps, you can successfully collect, clean, dry, and store hibiscus seeds for future planting.
From selecting a mature hibiscus plant and identifying ripe seed pods to preparing for the seed harvesting process, each step plays a vital role in ensuring the quality and viability of the seeds. The cleaning and drying process is crucial for removing any residue and moisture that could hinder seed germination. Finally, storing the seeds in the proper conditions, such as cool and dry environments, helps to maintain their freshness and viability over time.
Remember, hibiscus seed harvesting requires patience and attention to detail. It’s essential to carefully observe the plants, select the ripe seed pods, and handle the seeds with care. With practice, you will become more adept at recognizing the signs of ripeness and successfully harvesting hibiscus seeds.
So why not embark on this hibiscus seed harvesting journey? Grow your own vibrant and beautiful hibiscus plants, and share the joy of gardening with others. With the knowledge gained from this article, you are well-equipped to harvest and propagate hibiscus seeds, bringing the tropical beauty of these stunning flowers into your garden for years to come.
Happy hibiscus seed harvesting!