Home>Gardening Techniques>DIY Projects>How To Make Paper Sunflowers
DIY Projects
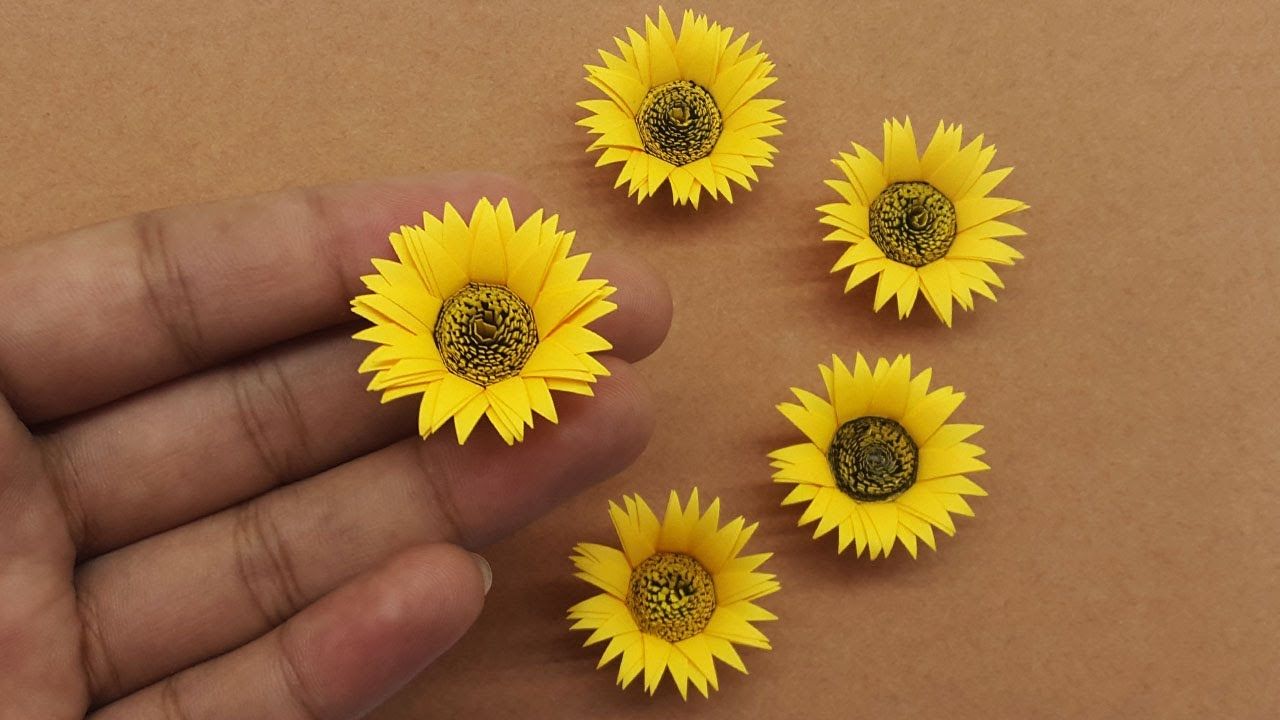
How To Make Paper Sunflowers
Published: December 17, 2023
Learn how to make beautiful paper sunflowers with this DIY project guide. Create stunning floral decorations with easy step-by-step instructions. Perfect for crafting enthusiasts!
(Many of the links in this article redirect to a specific reviewed product. Your purchase of these products through affiliate links helps to generate commission for Chicagolandgardening.com, at no extra cost. Learn more)
Table of Contents
Introduction
Welcome to the wonderful world of DIY paper crafts! Today, we're diving into the delightful realm of creating beautiful and vibrant paper sunflowers. Whether you're a seasoned crafter or a newcomer to the world of DIY projects, making paper sunflowers is a fantastic way to unleash your creativity and add a touch of natural beauty to your home decor.
In this step-by-step guide, we'll walk through the process of crafting stunning paper sunflowers that will brighten up any room and bring a smile to your face. With just a few simple materials and a dash of creativity, you'll be amazed at the gorgeous results you can achieve.
So, grab your crafting supplies, clear a space on your table, and get ready to embark on a fun and rewarding journey of crafting your very own paper sunflowers. Whether you're creating these sunflowers as a solo project or as a fun activity to enjoy with friends or family, the joy of crafting these lovely blooms is sure to leave you feeling inspired and accomplished.
Let's dive in and learn how to make paper sunflowers that will add a sunny touch to your home decor and brighten up your day!
Materials Needed
Before we begin our crafting adventure, let’s gather the essential materials required to bring our paper sunflowers to life. Here’s what you’ll need:
- Yellow and brown craft paper: These will form the petals and the center of the sunflower, respectively.
- Scissors: A reliable pair of scissors will be essential for cutting the paper into the required shapes.
- Glue or adhesive tape: This will be used to assemble the various parts of the sunflower together.
- Green floral wire or pipe cleaners: These will serve as the stems of the paper sunflowers.
- Green crepe paper or floral tape: This will be used to cover the wire or pipe cleaners, adding a realistic touch to the stems.
- Ruler: A ruler will come in handy for measuring and cutting the paper with precision.
- Pencil: This will be used for tracing and marking the paper before cutting.
- Optional: A hot glue gun can be used for a more secure and durable assembly, especially if you plan to display the sunflowers for an extended period.
With these materials at your disposal, you’re all set to embark on this delightful crafting journey. Feel free to add your own creative touches or explore alternative materials to personalize your paper sunflowers and make them uniquely yours.
Step 1: Cutting the Paper
Now that we have our materials ready, it’s time to dive into the first step of creating our stunning paper sunflowers. This step will focus on cutting the paper into the necessary shapes to form the petals and center of the sunflower.
Begin by selecting the yellow craft paper, which will be used for the petals. Using a ruler and pencil, carefully measure and mark the paper to create square pieces of the desired size. The size of the squares will determine the overall size of your sunflowers, so feel free to experiment with different dimensions to achieve the look you desire.
Once you have your squares marked, use the scissors to cut them out with precision. The number of squares you’ll need will depend on the fullness and size of your sunflowers, so be sure to prepare an ample amount to bring your blossoms to life.
Next, it’s time to work on the brown craft paper, which will form the center of the sunflower. Using the ruler and pencil, mark and cut small circular pieces from the brown paper. These pieces will serve as the centers of your paper sunflowers, adding a touch of realism and depth to the finished blooms.
As you cut the paper, take your time to ensure clean and accurate shapes, as this will contribute to the overall polished appearance of your paper sunflowers. With the cutting stage complete, you’re now ready to move on to the next exciting step of crafting the petals for your beautiful blossoms.
Step 2: Making the Petals
With the paper cut to the appropriate sizes, we can now delve into the creative process of shaping the petals for our paper sunflowers. This step will bring the blossoms to life, adding depth and texture to our delightful creations.
To begin, take a square piece of yellow craft paper and fold it diagonally to create a triangle. Then, fold the resulting triangle in half once more to form a smaller triangle. This will provide the foundation for shaping the petals of the sunflower.
Next, using the scissors, carefully cut a curved edge along the open ends of the folded triangle. This will create the distinctive petal shape, with the folded edge serving as the base of the petal. Repeat this process for each square of yellow craft paper, creating a set of petals for each sunflower you plan to craft.
Once the petals are cut, gently unfold each one to reveal its full shape. You’ll notice the natural curve and dimension that bring the petals to life, adding a realistic and charming quality to your paper sunflowers.
After unfolding the petals, you can further enhance their appearance by gently curling the edges using a pencil or your fingers. This subtle detail adds a touch of elegance and movement to the petals, mimicking the graceful curvature found in real sunflower blooms.
As you work through this step, embrace the creative process and allow your artistic instincts to guide you. Experiment with different petal shapes and sizes, and consider varying the curvature to create a diverse and visually captivating array of sunflower petals.
With the petals now beautifully shaped and ready to adorn our paper sunflowers, we’re poised to move on to the next step of assembling these delightful blooms.
Step 3: Assembling the Sunflower
With the petals elegantly crafted, it’s time to bring our paper sunflowers to life by assembling these delightful blooms. This step will see the individual components come together to form the iconic and vibrant appearance of sunflowers.
Begin by taking one of the brown circular pieces, which will serve as the center of the sunflower. Apply a small amount of glue to the center of the brown circle and carefully attach the base of each petal to it. As you do so, ensure that the petals are evenly spaced around the center, creating a harmonious and balanced appearance.
Continue this process, gradually layering the petals around the center to build up the full and luscious appearance of the sunflower. As you add each layer of petals, offset them slightly from the previous layer to create a natural and realistic look, mimicking the spiral arrangement found in real sunflower blooms.
As the layers of petals come together, take a moment to admire the emerging beauty of your paper sunflower. The intricate layers and vibrant yellow hues will undoubtedly bring a sense of joy and accomplishment as you witness your creation taking shape.
Once all the petals are secured around the center, gently fluff and adjust them to achieve the desired fullness and dimension. This step allows you to personalize the appearance of your paper sunflowers, creating a unique and captivating display of floral artistry.
As you assemble each sunflower, consider experimenting with different arrangements and petal quantities to craft a varied collection of blooms, each with its own distinct charm and character. Embrace the creative freedom to express your unique style and vision through these delightful paper creations.
With the sunflower petals now assembled into radiant blooms, we’re ready to move on to the final step of adding the stems, which will complete the lifelike appearance of our paper sunflowers.
Step 4: Adding the Stem
As we near the completion of our paper sunflowers, it’s time to add the finishing touch that will bring these charming blooms to life—the stems. This step will infuse our creations with a sense of natural realism, allowing us to display our paper sunflowers in a variety of ways, from vibrant bouquets to individual floral accents.
Begin by taking a length of green floral wire or a green pipe cleaner, which will serve as the stem of the sunflower. If using floral wire, you can create a more substantial stem by twisting multiple strands together. Alternatively, a single pipe cleaner can provide a flexible and sturdy stem for your paper sunflower.
Once you have the stem prepared, carefully attach it to the back of the paper sunflower using glue or adhesive tape. Position the stem at the base of the sunflower, ensuring that it is securely attached and aligned with the center of the bloom. This will provide stability and support, allowing you to display your paper sunflowers with ease.
If you’re using floral wire as the stem, consider covering it with green crepe paper or floral tape to add a natural and polished appearance. This step will further enhance the lifelike quality of your paper sunflowers, creating a cohesive and visually appealing presentation.
With the stems in place, take a moment to admire the transformation of your paper sunflowers into charming floral creations. The addition of the stems not only completes the lifelike appearance of the blooms but also opens up a myriad of display options, from arranging them in vases to incorporating them into various craft projects and decor arrangements.
As you complete this step for each of your paper sunflowers, consider experimenting with varying stem lengths and styles to create a diverse and captivating collection of floral accents. Embrace the opportunity to personalize each sunflower, infusing them with your unique creative flair.
With the stems securely attached, our paper sunflowers are now ready to grace any space with their radiant beauty, bringing a touch of nature’s splendor into our homes and hearts.
Conclusion
Congratulations on crafting your own stunning paper sunflowers! Through each step of this creative journey, you’ve brought together simple materials and a touch of imagination to create vibrant and lifelike floral accents that will brighten any space.
As you admire your completed paper sunflowers, consider the endless possibilities for showcasing these delightful blooms. From adorning your living spaces with cheerful bouquets to incorporating them into special events and celebrations, your handmade sunflowers are versatile and sure to captivate the hearts of all who behold them.
Embrace the opportunity to share your newfound crafting expertise with friends and family, inviting them to join in the joy of creating these charming paper blossoms. Whether as a solo project or a group activity, crafting paper sunflowers offers a delightful way to connect, create, and celebrate the beauty of nature’s wonders.
As you continue your crafting endeavors, remember that the skills and techniques you’ve honed through this project can be applied to a wide range of paper flower creations. From daisies to roses, the world of paper floristry is rich with possibilities, inviting you to explore, experiment, and infuse your surroundings with the enchanting allure of handmade blooms.
So, let your creativity bloom, and may your paper sunflowers serve as a reminder of the joy that comes from crafting with your own hands. Whether displayed as a charming centerpiece or gifted to brighten someone’s day, your paper sunflowers are a testament to the beauty and artistry that can be achieved through the simple act of crafting.
Thank you for joining us on this delightful crafting adventure, and may your paper sunflowers continue to inspire creativity and bring smiles wherever they are showcased.