Home>Gardening Techniques>Seasonal Gardening>How To Prepare Perennials For Winter
Seasonal Gardening
How To Prepare Perennials For Winter
Modified: February 8, 2024
Learn how to prepare your perennials for winter with our seasonal gardening tips. Ensure your plants survive the cold weather and thrive next year.
(Many of the links in this article redirect to a specific reviewed product. Your purchase of these products through affiliate links helps to generate commission for Chicagolandgardening.com, at no extra cost. Learn more)
Table of Contents
Introduction
Welcome to the world of seasonal gardening! As a gardener, you are undoubtedly aware of the joys and challenges that each season brings. Just as the arrival of spring brings a burst of new growth and vibrant blooms, the onset of winter signals a time for gardeners to prepare their beloved plants for the cold months ahead. In particular, perennials, those hardy plants that come back year after year, require special attention to ensure their survival and thrive in the coming seasons.
Preparing perennials for winter is a crucial step in maintaining the health and beauty of your garden. By taking the time to properly winterize your perennials, you are setting them up for success and ensuring their longevity. This article will guide you through the steps necessary to winterize your perennials effectively.
Before diving into the specifics, it’s important to understand the nature of perennials. Unlike annuals, which complete their life cycle in one growing season, perennials have the remarkable ability to survive the winter and come back year after year. This resilience is rooted in their ability to store energy in their roots, underground stems, and woody tissue during the dormant season.
By applying a few simple techniques, you can help your perennials survive the harsh conditions of winter and thrive in the following growing seasons. Throughout this article, we will discuss how to assess the health of your perennials, clean up perennial beds, cut back plants, mulch beds, protect plants from cold and frost, and even divide and transplant perennials before winter. With these tips and tricks, your perennials will be well-prepared to face the challenges of winter and emerge strong and vibrant when spring comes.
So, let’s dive in and explore the world of winterizing perennials, ensuring your garden remains beautiful and full of life year-round!
Understanding Perennials
Before we delve into the process of winterizing perennials, it’s important to have a good understanding of these resilient plants. Perennials are a diverse group of flowering plants that have the ability to live for multiple years. Unlike annuals that complete their life cycle in one growing season, perennials will continue to grow and bloom for several years, provided they receive the proper care and maintenance.
Perennials come in a wide array of shapes, sizes, and colors, offering endless options for gardeners to create stunning landscapes. Some popular examples of perennials include peonies, daylilies, hostas, and lavender. What sets perennials apart from other types of plants is their ability to survive the winter and re-emerge in the spring from their dormant state.
Perennials have various strategies for surviving the colder months. Some have extensive root systems that store energy and nutrients. Others have woody stems or underground rhizomes that help them withstand the freezing temperatures. It’s important to note that the level of cold tolerance can vary among different perennial species and cultivars.
When selecting perennials for your garden, it’s essential to consider your specific climate and the hardiness zone in which you reside. Different perennials have different temperature requirements, and choosing varieties that are well-suited to your climate will increase their chances of survival. Consult the USDA Plant Hardiness Zone Map or seek advice from local nurseries and gardening experts to ensure you choose perennials that are appropriate for your region.
Another characteristic of perennials is their growth habit. Some perennials are clump-forming, meaning they grow in tight clusters, while others spread via underground rhizomes or stolons, creating large colonies. Understanding the growth habit of your perennials is important for maintenance and division, as it will inform you on when and how to divide or transplant them.
Perennials also have different bloom times, with some flowering in early spring, others in summer, and some even in late fall. By selecting a variety of perennials that bloom at different times, you can ensure a continuous display of color and interest in your garden throughout the growing season.
Now that we have a solid understanding of perennials, including their ability to survive the winter and their various growth habits and bloom times, we are ready to dive into the specifics of winterizing these exceptional plants.
Assessing Perennial Health
Before getting started with the process of winterizing your perennials, it’s important to assess their overall health. This step will help identify any issues or potential concerns that need to be addressed before the onset of winter.
Begin by closely examining each perennial plant in your garden. Look for signs of disease, insect damage, or any other abnormalities. Check the foliage, stems, and flowers for discoloration, spots, wilting, or any visible signs of stress. If you notice any issues, it’s crucial to take prompt action to prevent the problem from worsening and potentially spreading to other plants.
Next, assess the overall vigor and growth of your perennials. Are they producing abundant foliage and blooms? Or do they appear weak and sparse? A healthy perennial will have strong stems, vibrant foliage, and ample blooms. If you notice any signs of weakness or poor growth, it may indicate underlying nutrient deficiencies, improper soil conditions, or overcrowding.
Additionally, evaluate the root system of your perennials. Healthy roots are essential for absorption of water, nutrients, and overall plant stability. Gently dig around the base of each plant and examine the roots. They should be firm, white or cream-colored, and have a fibrous appearance. If you notice any signs of rot, decay, or excessive root damage, it’s important to address these issues before winter arrives.
Take note of any plants that may have outgrown their designated space or are overcrowding others. Overcrowded perennials can compete for resources and lead to poor growth and increased susceptibility to diseases. If necessary, consider dividing or transplanting overcrowded plants to ensure their long-term health and vitality.
Lastly, consider the overall performance of your perennials throughout the growing season. Did they bloom as expected? Did they exhibit any signs of stress, such as wilting during prolonged dry periods? Understanding how your perennials have fared during the year will help you better anticipate and address any potential issues come winter.
By carefully assessing the health of your perennials, you can identify and address any problems or deficiencies before winter arrives. This proactive approach will help ensure that your perennials enter the dormant season in the best possible condition, maximizing their chances of survival and thriving in the following growing season.
Cleaning Up Perennial Beds
As the gardening season comes to an end and winter approaches, it’s time to clean up your perennial beds. Cleaning up your garden beds not only improves the appearance of your landscape but also plays a crucial role in preventing diseases and pests from overwintering and causing problems in the coming seasons.
Start by removing any fallen leaves, dead plant debris, and weeds from your perennial beds. Decaying organic matter can harbor pests and diseases, so it’s important to clear them out. You can use a rake or your hands to gently remove this debris, being careful not to damage any emerging or existing perennials.
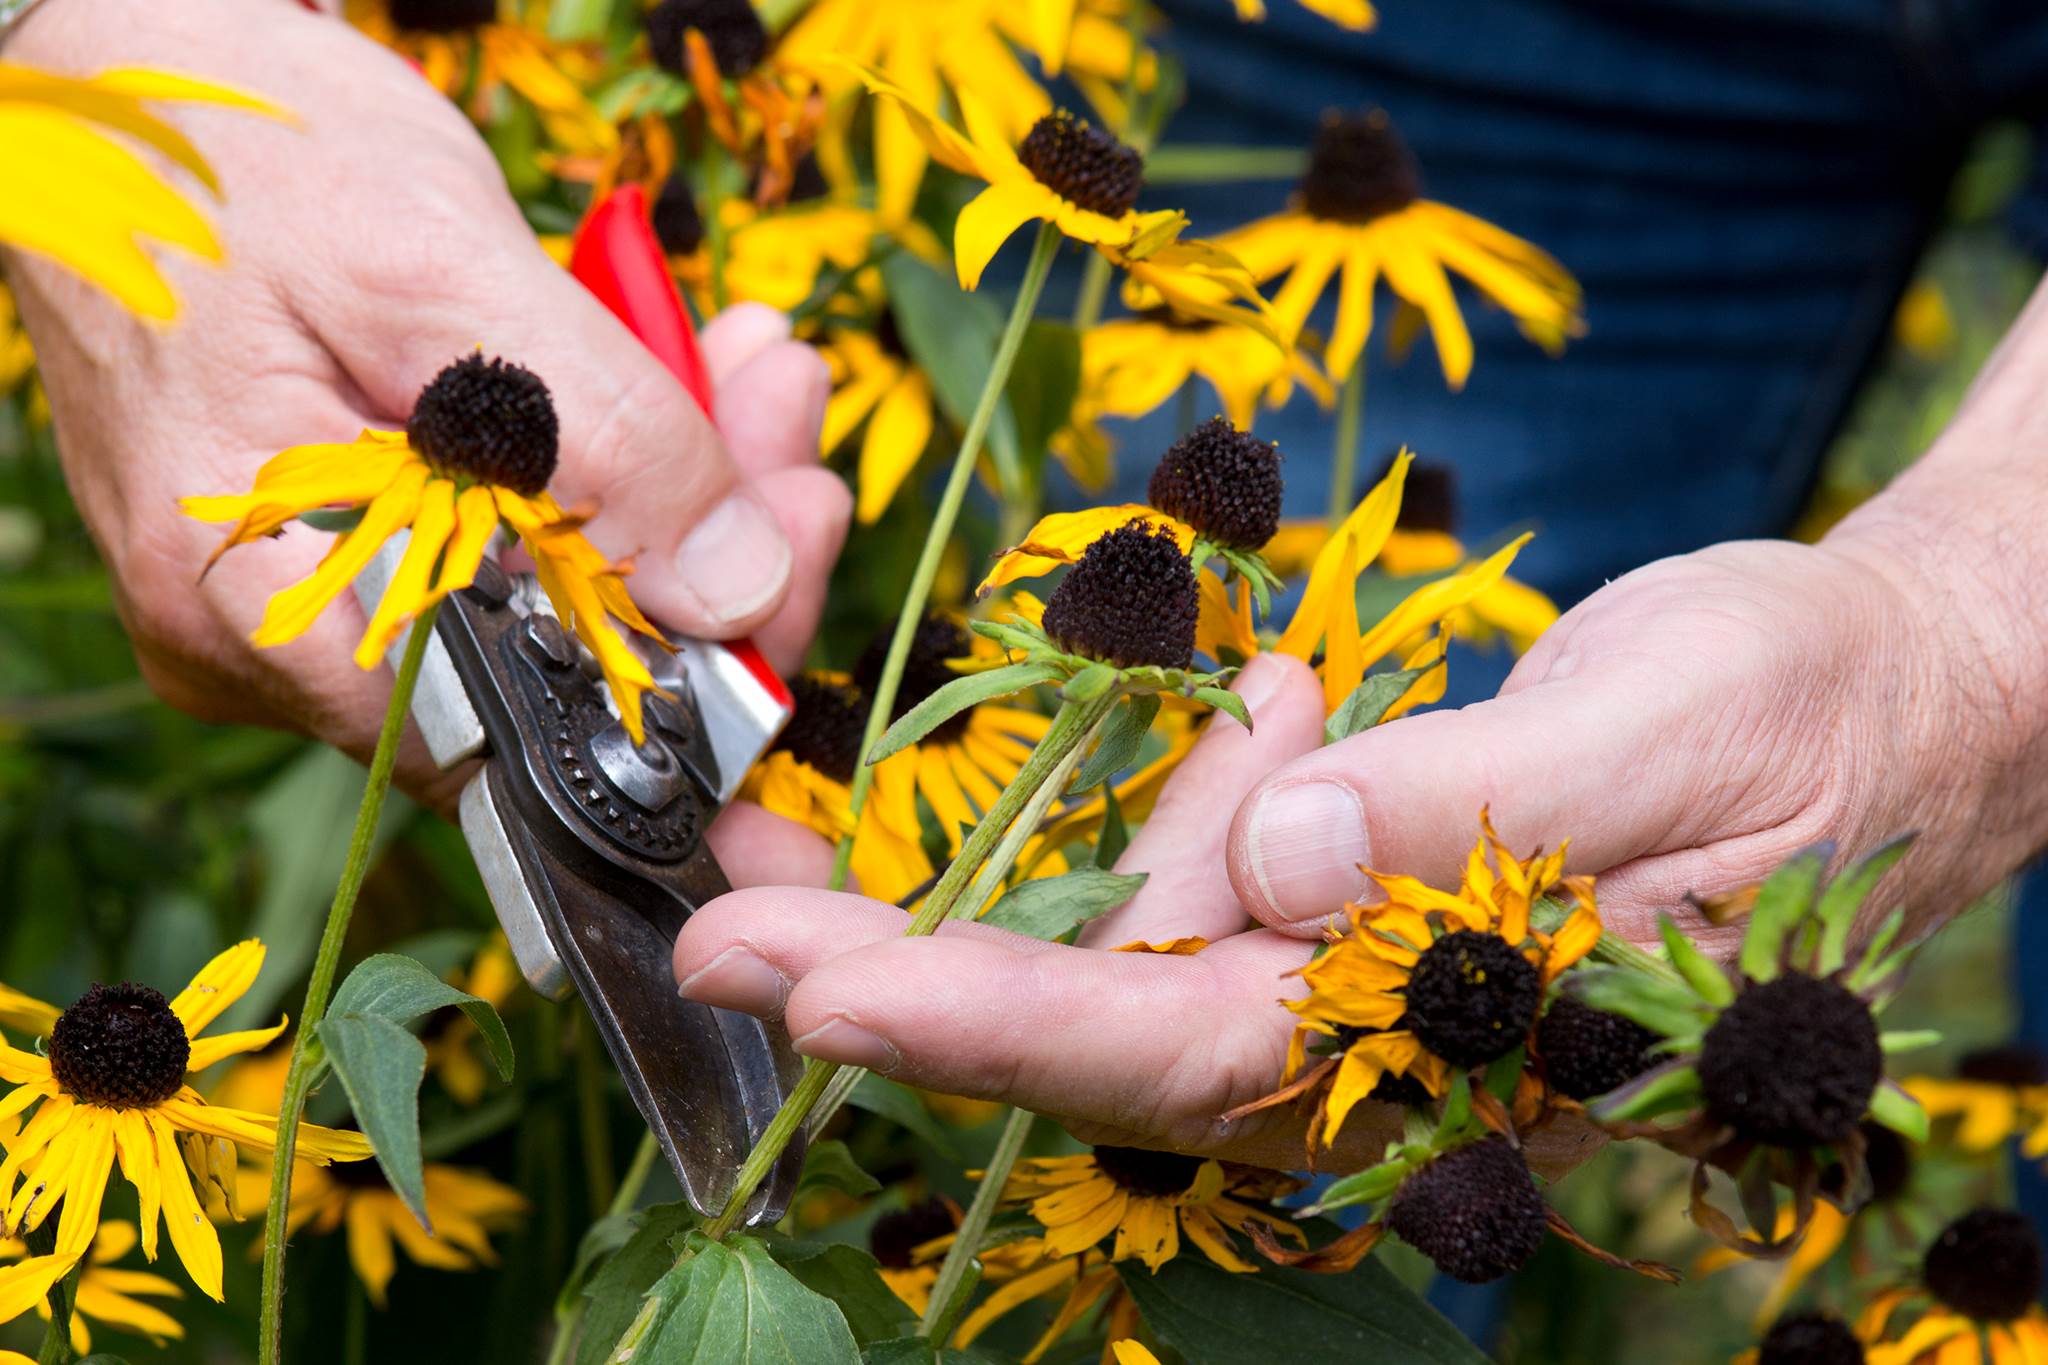
Once the debris is cleared, assess the overall condition of the plants. Remove any spent flower stalks or stems, as they can become breeding grounds for pests and diseases. Cut them back to the base, using clean and sharp pruning shears. This will also help redirect the plant’s energy towards root development during the winter months.
If any perennials have developed diseases or pests, consider removing the affected plant parts or, in severe cases, the entire plant. Proper disposal of infected plant material is crucial to prevent spreading diseases to other healthy plants. Bag and discard the diseased plant material or consider burning it if permitted in your area.
Trim back any overgrown or sprawling perennials, making sure to leave enough foliage to protect the crown of the plant. Prune back any long or straggly branches to maintain a compact and tidy appearance. This will also help prevent wind damage during winter storms.
After cleaning up your perennial beds, consider applying a layer of compost or organic mulch. This will help improve soil fertility, retain moisture, and provide insulation to the plant roots during the cold months. Spread a 2-3 inch layer around the base of the plants, being careful not to bury them too deeply.
Remember to remove any weeds from the bed before mulching. Weeds can compete with your perennials for nutrients and space, so it’s important to keep them under control. Hand pull or use a garden tool to remove weeds, making sure to get the entire root system to prevent regrowth.
Cleaning up your perennial beds not only improves the aesthetic appeal of your garden but also helps create a healthier environment for your plants. By removing debris, cutting back spent stems, and applying mulch, you set the stage for a successful winter dormancy period and a vibrant garden in the upcoming growing season.
Cutting Back Perennials
One important step in preparing your perennials for winter is cutting back the plants. While it may seem counterintuitive to trim back healthy foliage and stems, it’s a necessary measure to promote plant health and tidiness during the dormant months.
Begin by assessing each perennial individually and determining the appropriate height to cut it back. Some perennials benefit from a complete removal of foliage, while others only require a partial trim. Consider the specific needs of each plant and the recommended pruning guidelines for that particular species or cultivar.
For many perennials, cutting them back to about 3-4 inches above ground level is sufficient. This allows the plant to retain some foliage to collect sunlight for energy production and protects the crown of the plant from harsh winter weather.
Take care to use clean and sharp pruning shears or secateurs when cutting back your perennials. Dull blades can cause damage to the plant tissue, increasing the risk of disease or pest infestation. It’s also important to sanitize your pruning tools between each cut to prevent the spread of any potential diseases.
When cutting back the stems, remove any spent or damaged foliage and flowers. These can become sources of disease or provide overwintering shelter for pests. By removing them, you eliminate potential threats and pave the way for fresh growth in the spring.
Some perennials benefit from a gradual, staggered approach to cutting back. For example, if you have a perennial with multiple stems or branches, you can cut back a third of the plant in one pass and wait a week or two before pruning the remaining portions. This can help provide some winter interest in your garden while still allowing for a thorough cleanup.
It’s important to note that not all perennials require cutting back. Some varieties, such as ornamental grasses and perennials with attractive seed heads or winter interest, are best left unpruned. These plants can add structure, texture, and visual interest to your winter garden and provide food and shelter for wildlife.
By cutting back your perennials, you not only maintain a tidy appearance in your garden but also remove potential disease sources and improve overall plant health. This practice allows the plants to conserve energy during the dormant season and prepares them for a strong and vigorous growth in the following spring.
Mulching Perennial Beds
One of the most important steps in winterizing your perennial beds is applying mulch. Mulching provides a layer of insulation that helps protect the plant roots from extreme temperatures and fluctuations, prevents weed growth, retains moisture, and adds organic matter to the soil. Proper mulching is crucial for the overall health and winter survival of your perennials.
Start by cleaning up your perennial beds, removing any debris or weeds. This will ensure that the mulch is applied to a clean and weed-free surface. If necessary, water the plants thoroughly before applying the mulch to provide adequate moisture for the winter months.
Choose an organic mulch material that is suitable for your perennials. Popular options include shredded bark, wood chips, straw, or compost. Avoid using heavy or compacted mulches, such as gravel or decorative stones, as they can prevent airflow and trap excessive moisture around the plant roots.
Apply a layer of mulch around the base of your perennials, creating a blanket that covers the root zone. The thickness of the mulch layer should be around 2-3 inches, taking care not to pile it up against the plant stems. Mulching too close to the stems can create a moist environment and increase the risk of rot or disease.
Ensure that the entire root zone is covered with the mulch, extending the layer beyond the drip line of the plant. This will help insulate a larger area and protect a wider range of roots. However, be cautious not to smother the plant by applying an excessively thick layer of mulch.
While mulching, pay attention to any specific needs of certain perennials. Some plants, especially those that prefer drier conditions, may benefit from a thinner layer of mulch or no mulch at all. Always research the specific requirements of your perennials to provide them with the best possible care.
Throughout the winter, regularly check the mulch layer to ensure it remains intact and has not shifted or thinned out. Add additional mulch if necessary to maintain the desired thickness and coverage.
In the spring, as the weather warms up and the threat of frost diminishes, you can gradually remove some of the mulch to allow the emerging perennials to receive more sunlight and air circulation. However, leave a thin layer of mulch around the plants to help control weeds and retain moisture during the growing season.
Mulching your perennial beds provides numerous benefits and is a vital step in winterizing your garden. With proper mulching, your perennials will be protected from extreme temperatures, retain moisture, and enjoy a healthier growing environment, leading to stronger and more vibrant plants in the coming seasons.
Protecting Perennials from Cold and Frost
As winter settles in, it’s important to take measures to protect your perennials from the cold temperatures and frost that can damage or even kill these resilient plants. By implementing some simple strategies, you can help your perennials survive the winter and emerge strong in the spring.
One effective method of protecting perennials from cold and frost is by providing additional insulation around the plants. This can be done by creating protective barriers using materials such as burlap, frost blankets, or even old sheets. Erect these barriers around your perennials, loosely covering them to allow for adequate airflow while still providing insulation.
Another technique is to apply a layer of straw or leaves around the base of your perennials. This acts as an additional layer of insulation and helps regulate soil temperature. Avoid using materials such as hay or fresh grass clippings, as they can generate heat as they decompose and potentially cause damage to the plants.
In areas with particularly harsh winters, consider using horticultural fleece or floating row covers to provide extra protection. These materials allow light, water, and air to pass through while still safeguarding the plants from frost and cold winds. Secure the covers in place, ensuring there is enough space between the covers and the foliage for proper circulation.
It’s important to note that perennials in containers or pots are more susceptible to cold temperatures, as the roots are not as well-insulated as those in the ground. Consider moving these containers to a sheltered location, such as a garage or basement, where they can benefit from milder temperatures during the winter months.
Watering plays a crucial role in protecting perennials from cold and frost damage. Before the first frost, thoroughly water the perennials to ensure they are adequately hydrated. Moist soil retains heat better than dry soil, reducing the risk of freeze damage to the roots. However, be cautious not to overwater, as excess moisture can lead to root rot and other issues.
Another aspect to consider is providing wind protection for your perennials. Cold winds can strip away moisture and increase the risk of desiccation. Creating windbreaks using natural barriers, such as fences or evergreen shrubs, can help reduce the impact of harsh winds on your plants. Additionally, placing a layer of mulch around the base of the plants can serve as a wind barrier and prevent soil erosion.
Regularly monitor weather forecasts and be prepared to take additional protective measures if temperatures dip unexpectedly or a severe frost is expected. Stay vigilant and adjust your protective strategies accordingly.
By implementing these protection techniques, you can give your perennials the best chance of surviving the chilling winter temperatures and emerging healthy in the spring. Remember that different plants have varying levels of cold tolerance, so be sure to research the specific requirements of your perennials and tailor your protective measures accordingly.
Dividing and Transplanting Perennials before Winter
Dividing and transplanting perennials is an essential task that should be done before winter sets in. It not only helps maintain the health and vitality of your plants but also provides an opportunity to propagate and expand your garden. By dividing and transplanting perennials, you can rejuvenate overcrowded plants, create new garden beds, and share your favorites with fellow gardeners.
The ideal time to divide and transplant perennials is typically in the late summer or early fall when the weather is cooler, and the plants are entering their dormant period. This allows the roots to settle in and establish themselves before the ground freezes and provides the best chance for successful transplantation.
Before dividing your perennials, prepare the new planting area by amending the soil with compost or well-rotted organic matter. Dig the holes to accommodate the size and root structure of the individual plants you will be transplanting. This will ensure that the perennials have the best start in their new location.
To divide the perennials, start by gently digging around the plant, taking care not to damage the roots. Lift the entire clump out of the ground and use a sharp garden knife or spade to separate the clump into smaller sections. Each section should have a portion of the root system and several healthy shoots or buds.
As you divide the perennials, inspect the root system and remove any dead or damaged roots. This will encourage new root growth and ensure the plants have the best chance of thriving in their new location.
Transplant the divided sections into their new prepared holes, making sure they are at the same level as they were in the original planting area. Fill in the soil around the roots, gently firming it to eliminate air pockets. Water the transplants thoroughly to help settle the soil around the roots and provide them with moisture before winter.
It’s important to note that not all perennials should be divided every year. Some plants benefit from being left undisturbed for several years, while others may need dividing more frequently to maintain their vigor. Research the specific requirements of each perennial to determine the appropriate timing and frequency of division.
After transplanting, monitor the newly divided perennials closely, especially during the winter months. Water as needed, ensuring the soil remains moist but not overly saturated. Mulching around the transplants can provide additional protection from temperature fluctuations and freezing.
Dividing and transplanting perennials before winter is a rewarding and beneficial practice for both the plants and the gardener. It helps maintain the health and vitality of your perennials, allows you to expand your garden, and provides an opportunity to share the beauty of your plants with others. With proper care and attention, your divided perennials will establish themselves and flourish in their new locations come spring.
Additional Tips for Winterizing Perennials
While the previous sections have covered some of the fundamental steps for winterizing perennials, there are a few additional tips that can further enhance the survival and success of your plants during the winter months. Consider implementing these practices to give your perennials the best chance for a thriving spring comeback.
First and foremost, ensure that your perennials are properly hydrated before winter arrives. Water the plants deeply a few days before the first frost to help them enter the dormant phase with adequate moisture. However, be cautious not to overwater, as excess moisture can lead to rot or other root-related issues.
Apply a layer of organic compost or well-rotted manure around the base of your perennials before the ground freezes. This will not only provide a slow-release source of nutrients but also protect the roots from extreme temperature fluctuations. As the compost breaks down, it will enrich the soil and provide essential organic matter.
Consider using an anti-desiccant spray, also known as an anti-transpirant, on your more sensitive perennials. This spray forms a thin, protective coating on the foliage, reducing moisture loss through the leaves and helping prevent winter damage. Follow the instructions on the product label and apply the spray when temperatures are above freezing.
Be mindful of the wildlife in your garden during the winter months. Certain animal species may view your perennials as a food source. Protect vulnerable plants by installing fencing, netting, or other deterrents. This will help prevent damage to your perennials while still allowing the animals to find food elsewhere.
Regularly inspect your perennials during the winter to check for any signs of pest infestations or disease. Although pests and diseases are less active during the colder months, they can still cause damage and spread. If you notice any signs of trouble, take appropriate measures to address the issue promptly.
Consider keeping a garden journal to track the performance and observation of your perennials during winter. Note any changes in growth patterns, successful winterization strategies, or areas for improvement. This information will prove invaluable for future reference and help refine your winterization techniques for the following seasons.
Lastly, resist the urge to tidy up your garden too early in the spring. Perennials often provide critical habitat and food sources for overwintering wildlife. Keep the stems and seed heads intact until the threat of frost has passed, and the warmer weather signals the beginning of the new growing season.
By following these additional tips and combining them with the fundamental winterization practices, you can create a nurturing environment for your perennials during the winter. These additional steps will contribute to the overall success and resilience of your plants, setting the stage for a spectacular spring garden.
Conclusion
As the winter approaches, it’s time to prepare your perennials for the cold months ahead. Winterizing your perennials is essential for their survival and future growth. By following the steps outlined in this article, you can ensure that your beloved plants weather the winter and emerge stronger and more vibrant in the spring.
Start by assessing the health of your perennials, addressing any issues or concerns before winter sets in. Clean up your perennial beds, removing debris and cutting back spent stems and foliage. Apply a layer of mulch to provide insulation and retain moisture in the soil. Protect your perennials from cold temperatures and frost by providing barriers, windbreaks, and additional insulation. Consider dividing and transplanting overcrowded perennials, rejuvenating them and expanding your garden’s beauty.
By implementing these practices, along with the additional tips provided, you can enhance the winter survival of your perennials. Pay attention to the specific needs of each plant, watering appropriately, and using disease prevention measures. Keep an eye on your garden during the winter months and adjust protective strategies as needed.
Remember, the world of seasonal gardening is a continuous journey of learning and experimentation. Each season brings new challenges and rewards. By making the effort to properly winterize your perennials, you are investing in the long-term health and success of your garden.
So, as the temperatures drop and the snow begins to fall, take the time to care for your perennials. With a little effort and attention to detail, your garden will flourish year after year, bringing you joy and beauty throughout the changing seasons.