Home>Garden Design>How To Redo A Backyard
Garden Design
How To Redo A Backyard
Published: August 5, 2023
Learn how to transform your backyard with stunning landscape design ideas. Enhance your outdoor space and create a beautiful, functional environment.
(Many of the links in this article redirect to a specific reviewed product. Your purchase of these products through affiliate links helps to generate commission for Chicagolandgardening.com, at no extra cost. Learn more)
Table of Contents
Introduction
Transforming your backyard into a beautiful and functional space can greatly enhance the overall appeal and value of your property. Whether you’re looking to create a tranquil oasis for relaxation or a vibrant outdoor entertainment area for hosting gatherings, a backyard makeover is the perfect solution. With the right approach and proper planning, you can completely revamp your backyard and turn it into a stunning landscape that suits your style and needs.
Redoing a backyard may seem like a daunting task, but with the right guidance, you can navigate through the process seamlessly. In this article, we will provide you with a step-by-step guide on how to redo your backyard, from assessing the space to adding the finishing touches. Whether you have a large or small backyard, these tips and techniques will help you create a space that you’ll love for years to come.
When embarking on a backyard redo project, it’s important to have a clear vision of what you want to achieve. Consider the purpose of your outdoor space – do you want a space for gardening, entertaining, or simply for relaxation? Understanding your goals will help you make informed decisions throughout the process.
Moreover, take into account the existing layout and features of your backyard. Assess any existing structures, plants, or elements that you want to keep, as well as any issues or limitations that need to be addressed. This will form the foundation of your redesign plan.
Now that you have a general idea of what needs to be done, let’s dive into the detailed steps of redoing your backyard and creating the outdoor haven of your dreams.
Step 1: Assessing the Backyard
Before diving into any major changes, it’s crucial to assess your backyard thoroughly. This step will help you understand the current state of your outdoor space and identify any areas that require attention or improvement. Here are some key points to consider:
- Space and Layout: Evaluate the available space and take note of the dimensions and shape of your backyard. Consider how you want to utilize the space and whether you need specific areas for activities such as dining, lounging, or gardening. This assessment will guide your design choices.
- Existing Features: Take note of any existing features or structures in your backyard that you want to keep or integrate into your new design. This could include trees, shrubs, fences, patios, or existing pathways. Understanding what elements can be repurposed will help you make the most of your resources.
- Lighting and Shade: Observe the natural light and shade patterns in your backyard throughout the day. This will influence where you place seating areas, plants, and other features. Additionally, consider adding artificial lighting to enhance the functionality and ambiance of your outdoor space, especially for evening gatherings.
- Drainage and Irrigation: Check for any drainage issues or areas that tend to accumulate water. Proper drainage is important to avoid waterlogging and damage to your plants and structures. Assess the existing irrigation system and decide if it needs to be updated or adjusted to accommodate your new design.
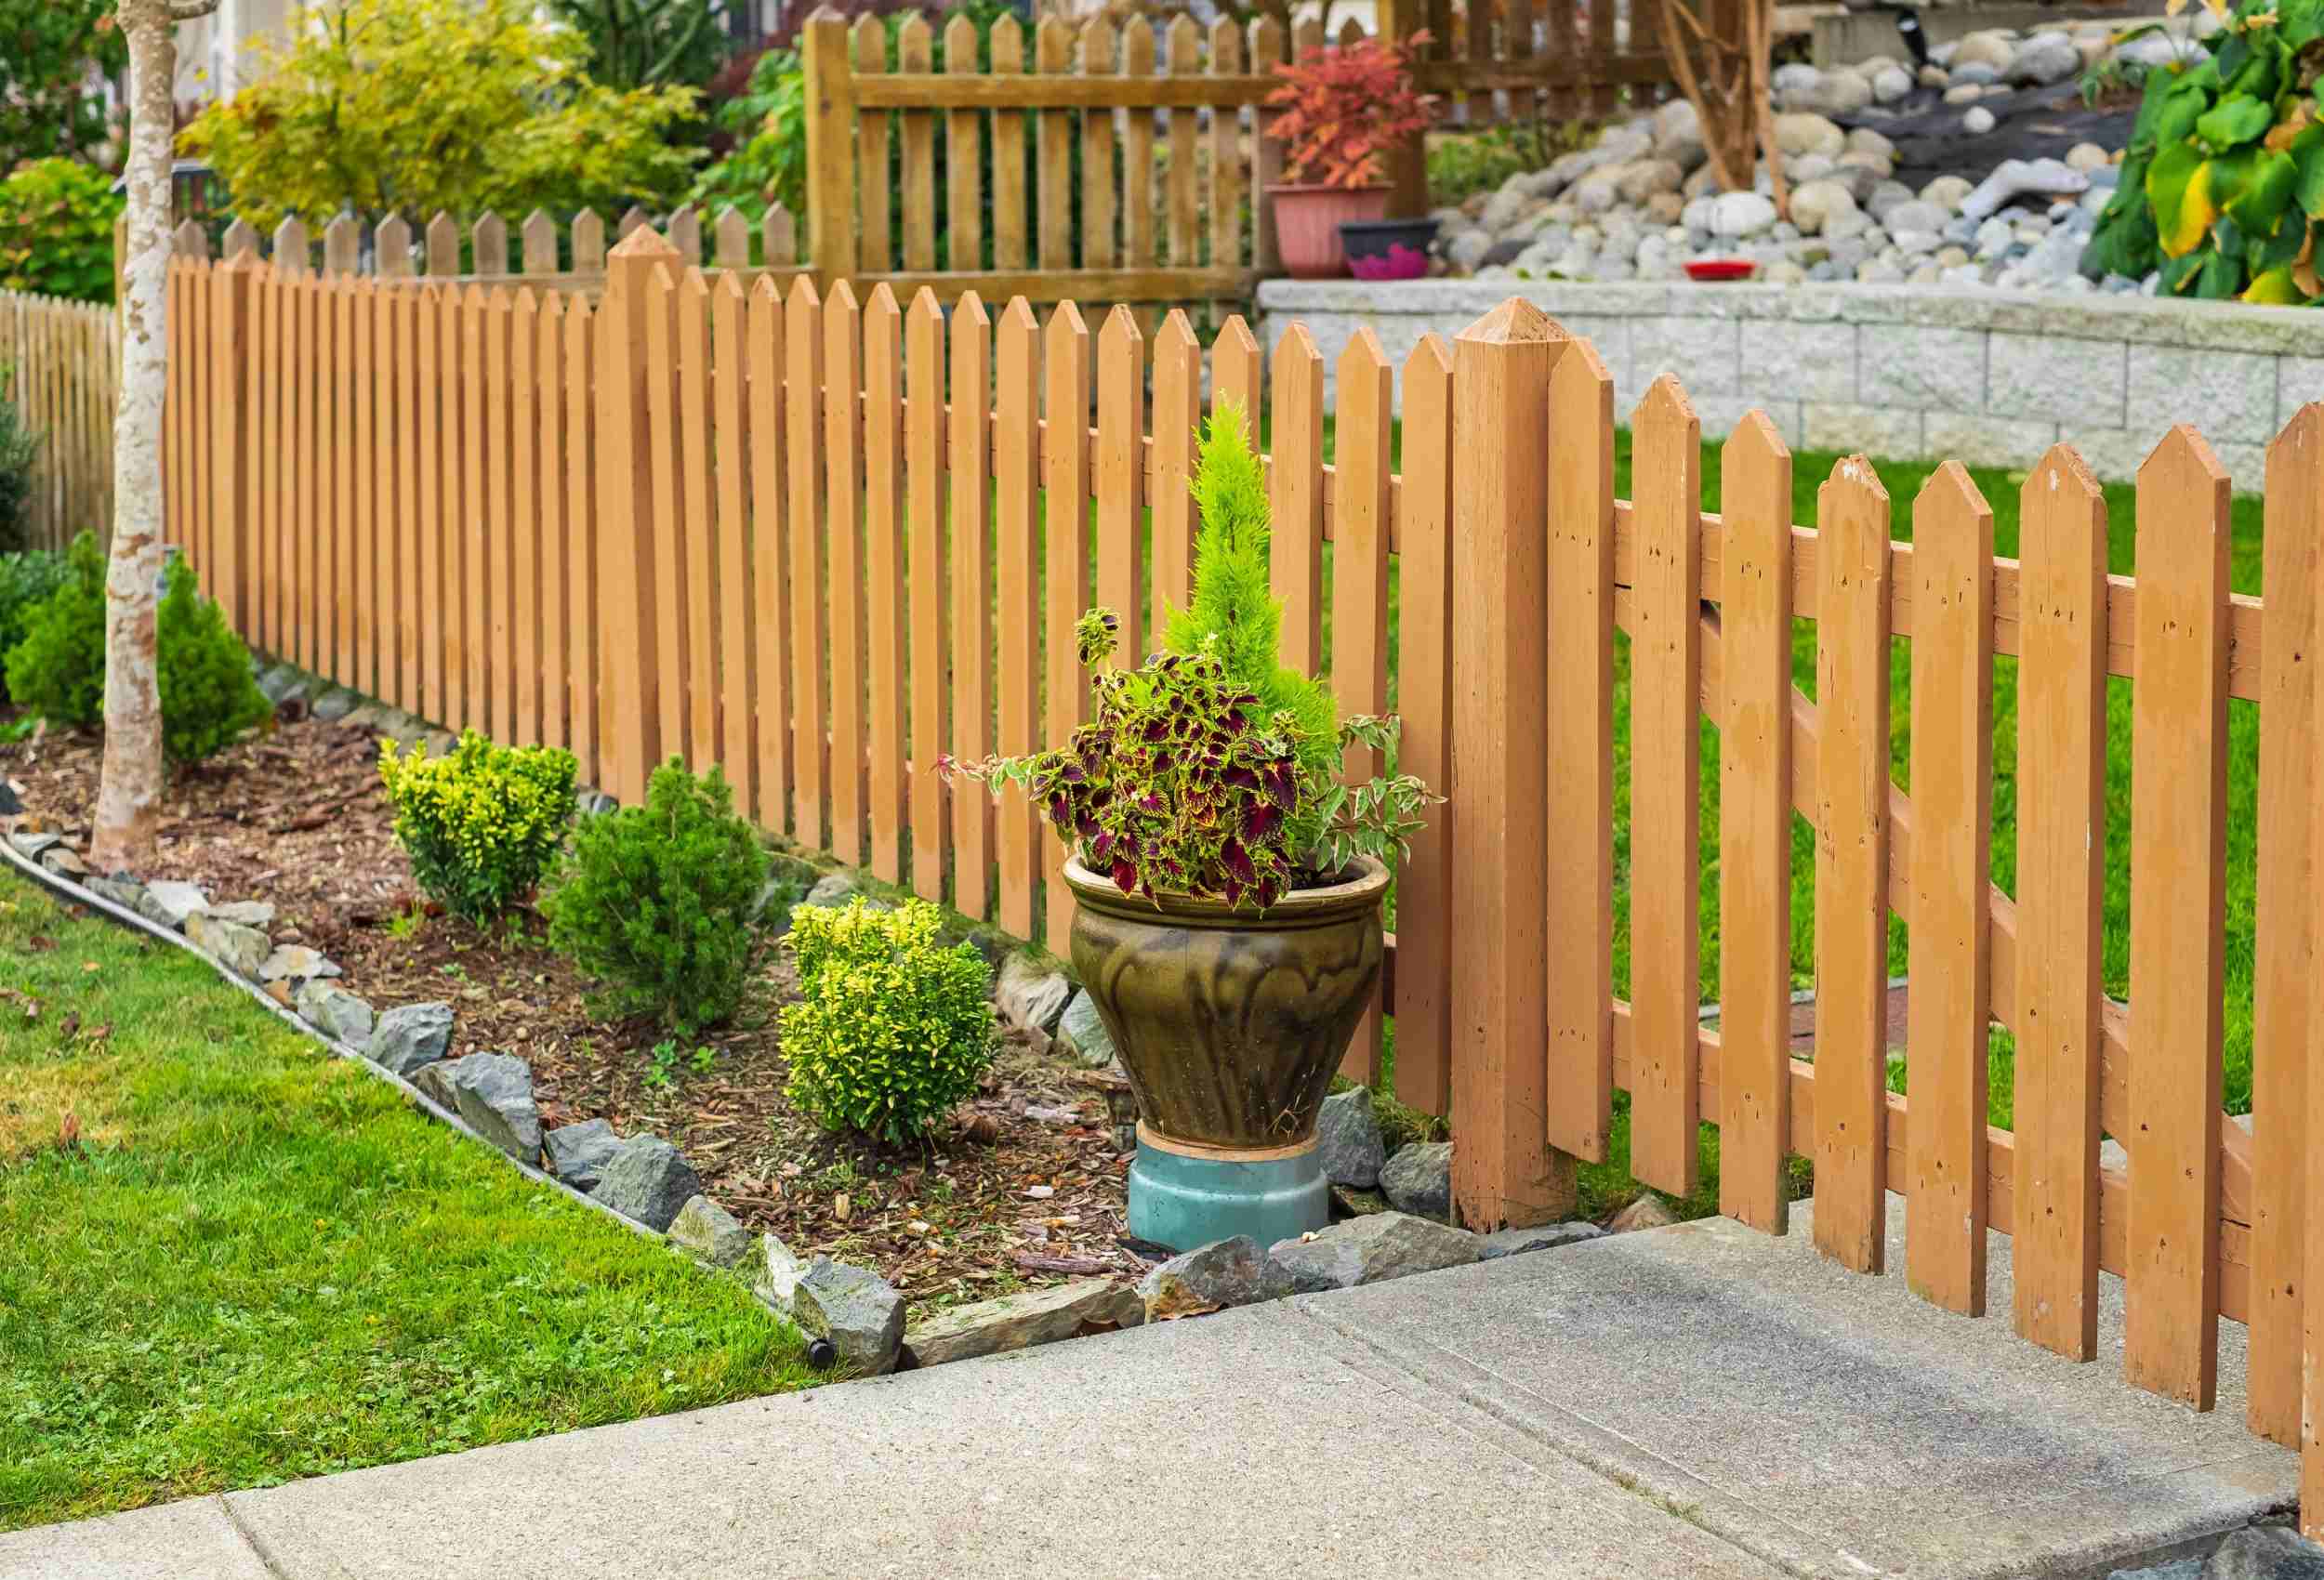
- Safety and Privacy: Consider the level of privacy you desire in your backyard. Determine if you need fencing, hedges, or strategic placement of plants and structures to create a secluded space. Ensure that your backyard is safe and child-friendly by examining potential hazards and making necessary modifications.
By thoroughly assessing your backyard at the beginning of your project, you’ll have a clearer understanding of its strengths and limitations. This will inform your design choices and help you create a backyard that is both practical and aesthetically pleasing. Now that you have a solid assessment of your space, let’s move on to the next step: clearing the existing area.
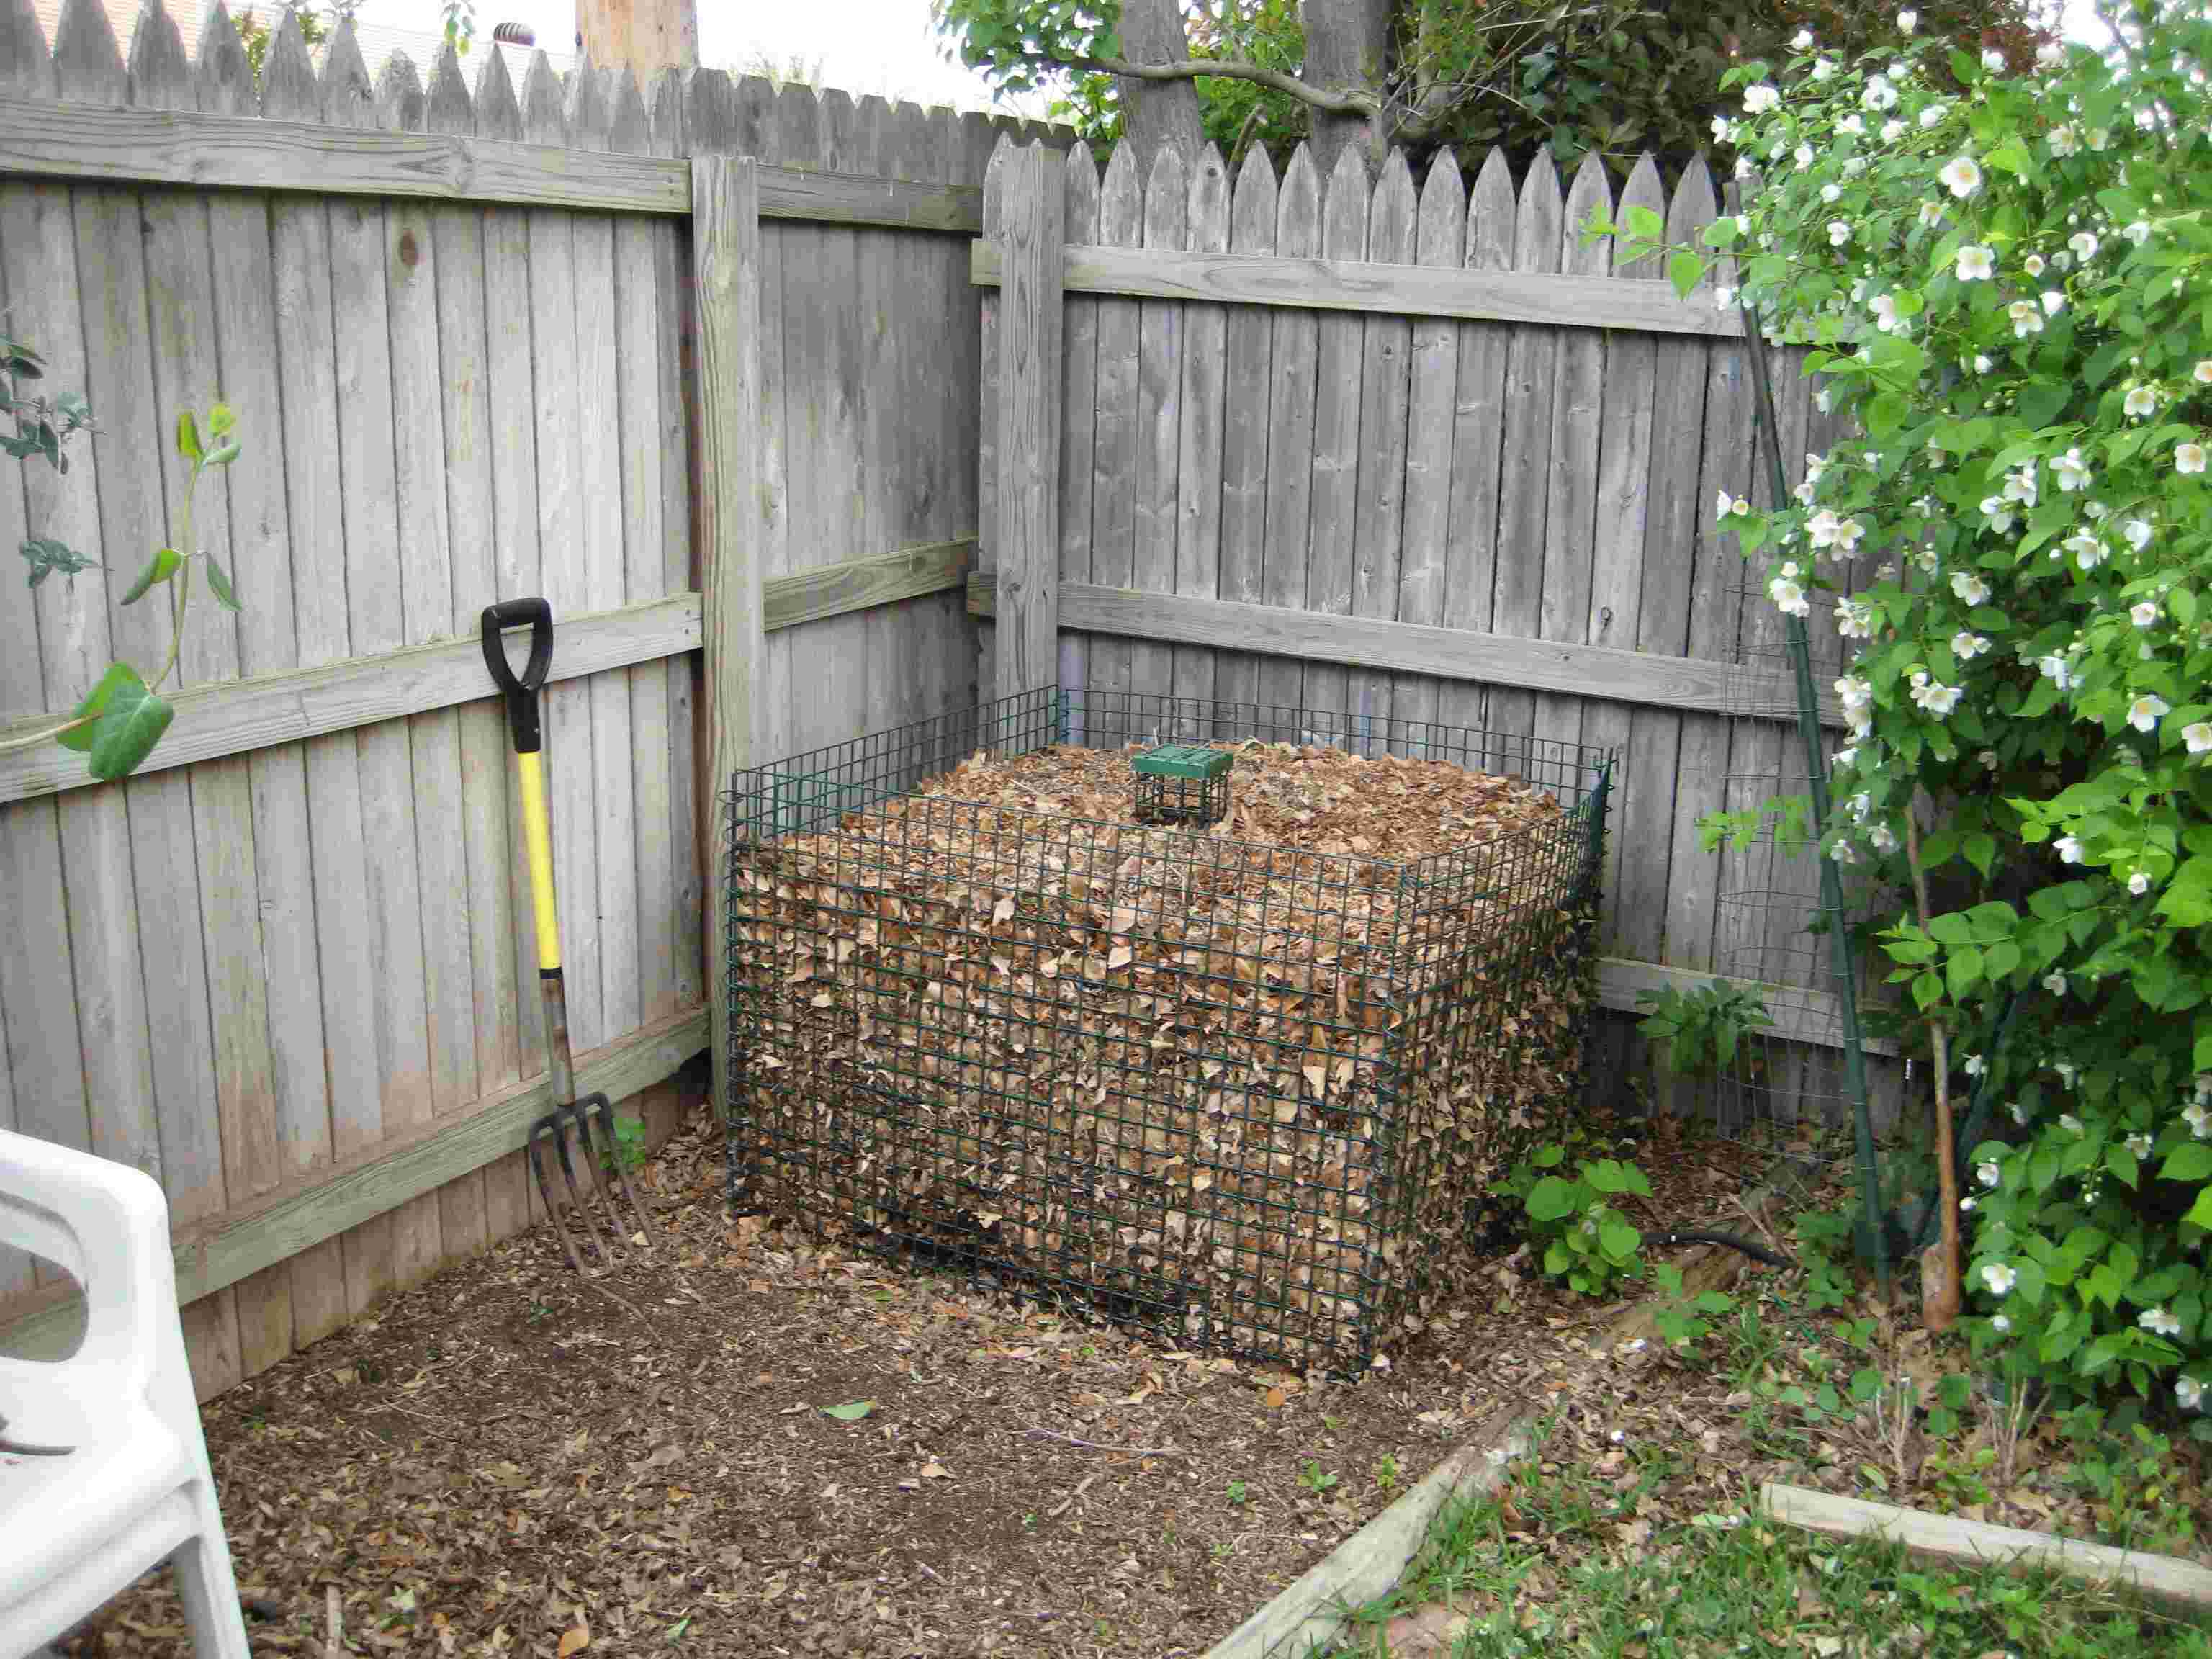
Step 2: Clearing the Existing Space
Once you have assessed your backyard and have a clear vision for your redesign, it’s time to clear the existing space and prepare it for the new elements you’ll be adding. Clearing the area can be a physically demanding task, but it’s a crucial step towards achieving your desired backyard transformation. Here’s what you need to do:
- Remove Debris and Unwanted Vegetation: Clear out any debris, such as fallen branches, leaves, or old furniture, that may have accumulated in your backyard. Additionally, identify and remove any unwanted vegetation, such as weeds or overgrown plants, to create a clean slate for your new design.
- Prune and Trim Existing Plants: If you plan to keep any existing plants, carefully prune and trim them to promote healthy growth and shape. Remove any dead or diseased branches and ensure proper spacing between plants for optimal growth and aesthetics.
- Clear Out and Relocate Structures: If you have any structures that need to be removed or relocated, such as old sheds, playsets, or garden beds, make arrangements to do so. This will open up space for new features and ensure a clutter-free backyard.
- Consider Tree Removal: If there are any trees that pose a safety risk or hinder your design plans, consult with an arborist to determine if they need to be removed. Ensure that you comply with local regulations and obtain the necessary permits before carrying out any tree removal.
- Level the Ground: Evaluate the topography of your backyard and make any necessary adjustments to create a level surface. This may involve removing or adding soil to achieve the desired grade and ensure proper drainage.
Clearing the existing space can be a labor-intensive process, so consider enlisting the help of professionals if needed. By starting with a clean and well-prepared space, you’ll have a solid foundation for implementing your new backyard design. With step two complete, you’re ready to move on to the next exciting phase: designing the layout of your dream backyard.
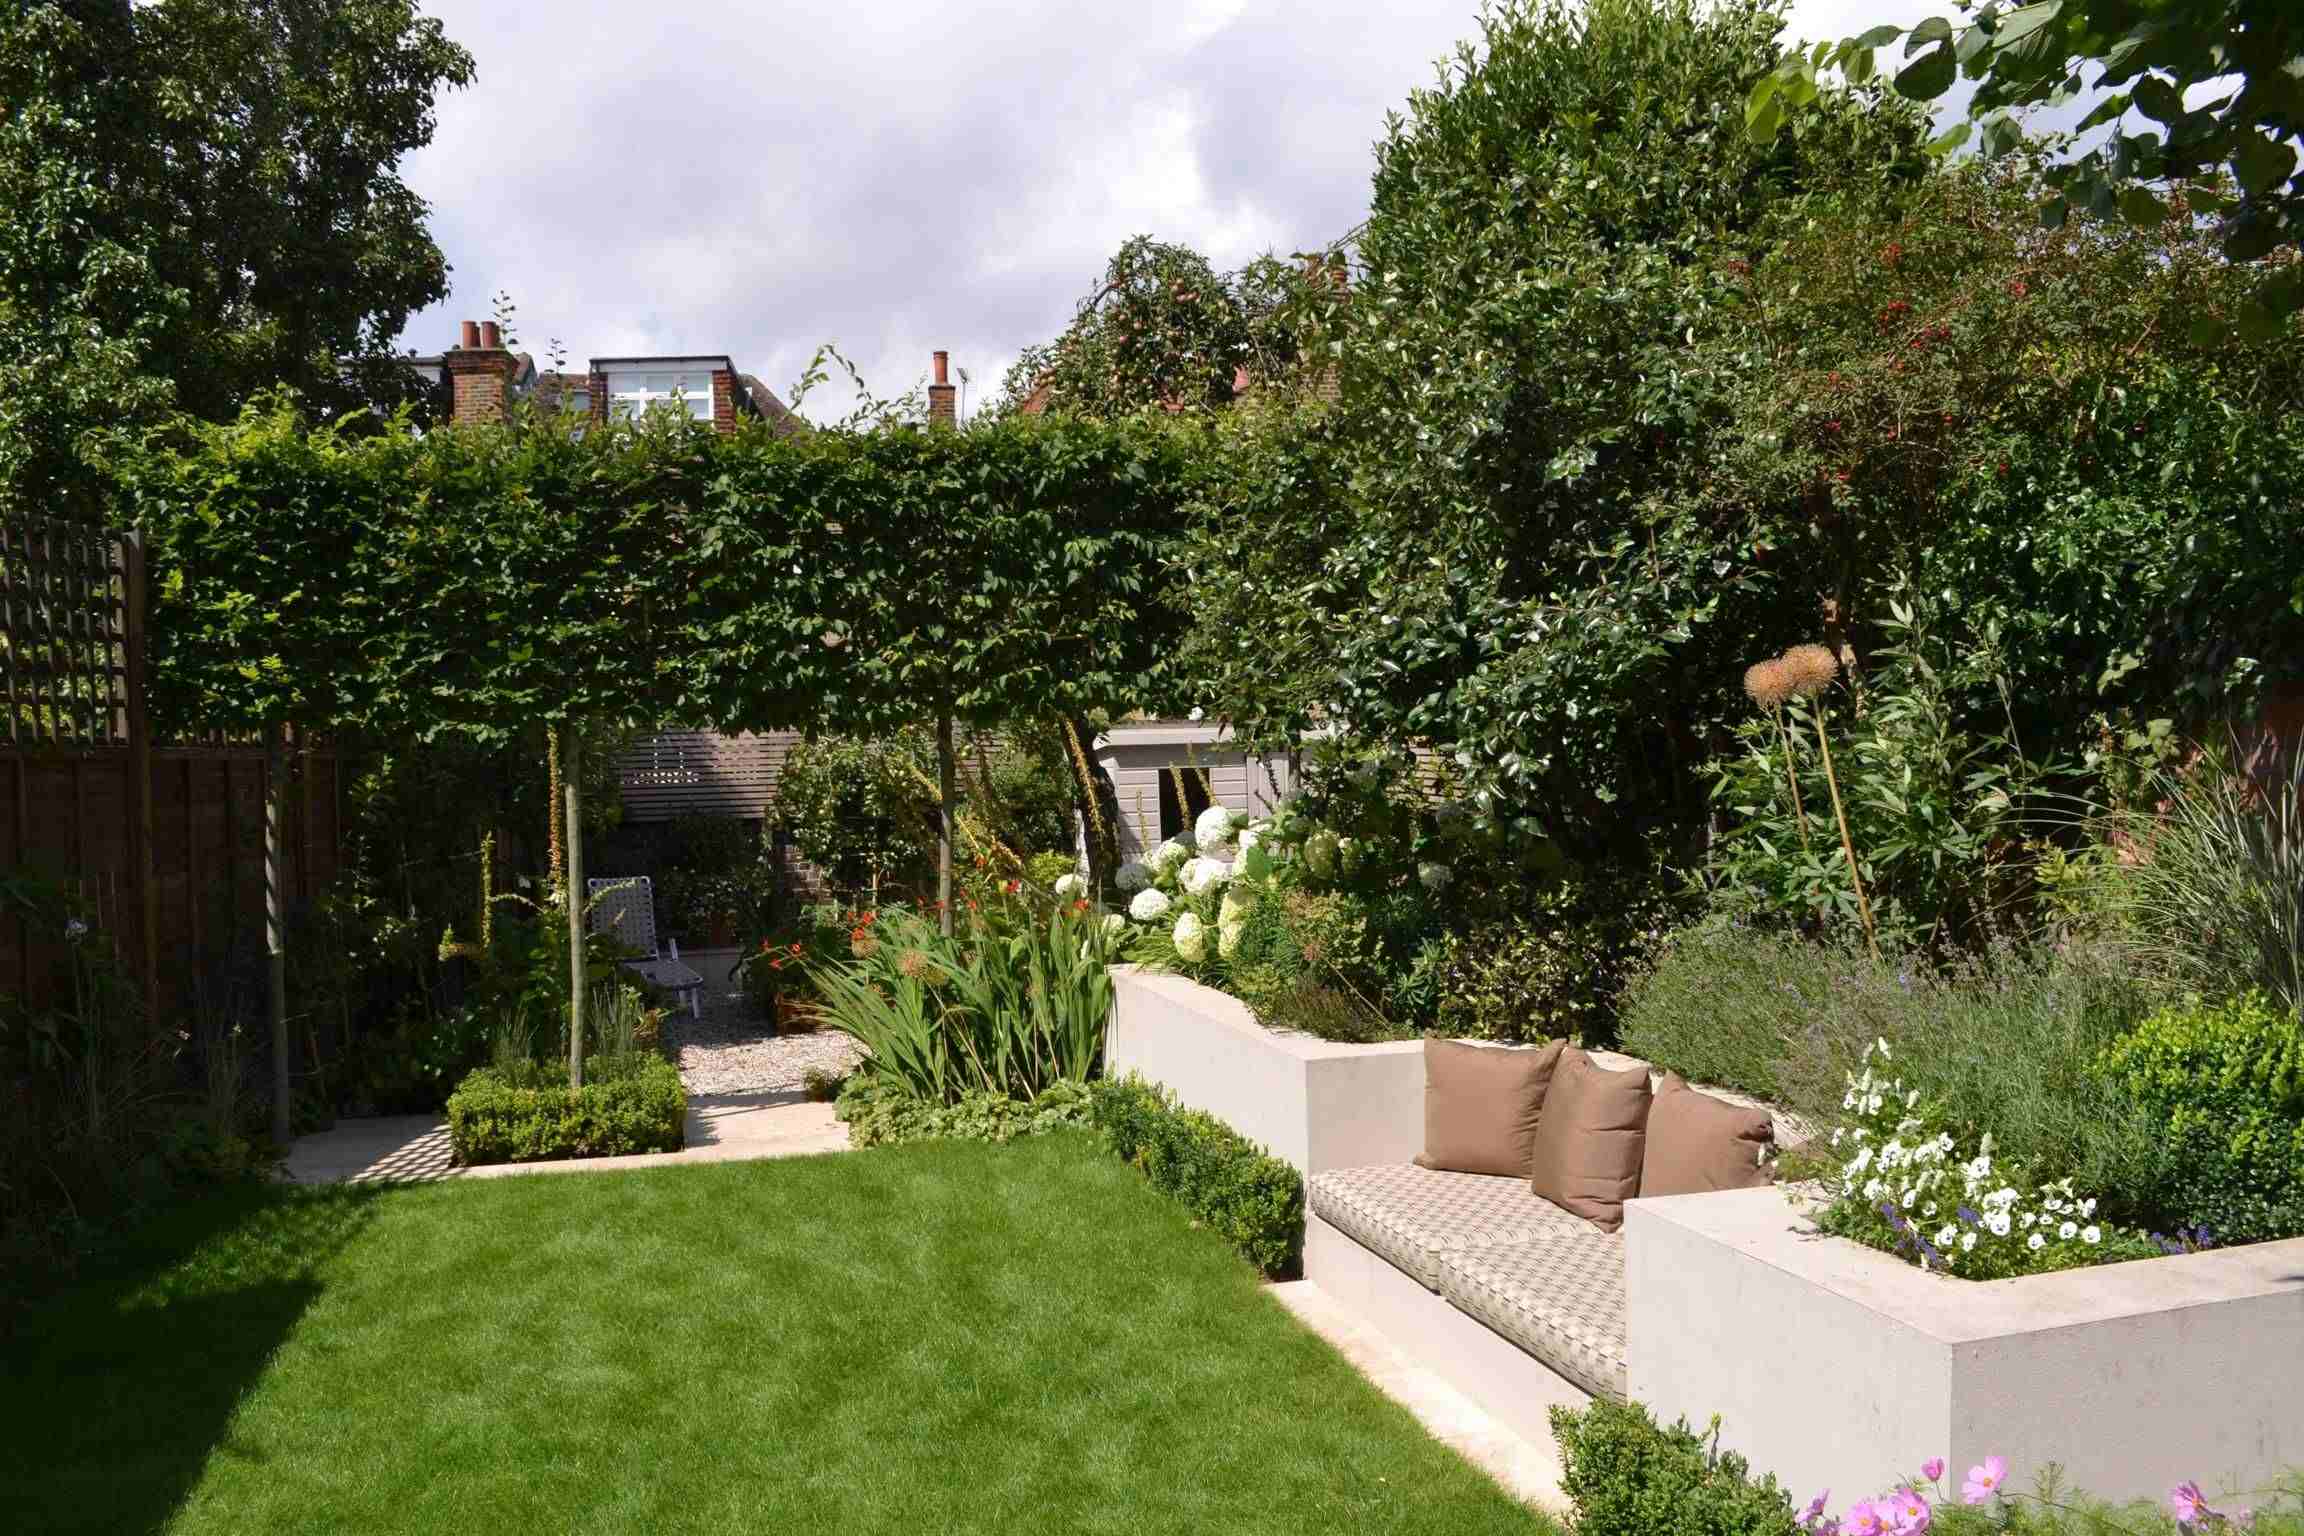
Step 3: Designing the New Backyard Layout
The design phase is where your vision for your new backyard comes to life. It’s an opportunity to create a blueprint that combines functionality, aesthetics, and your personal style. Here are the key steps to follow when designing the layout of your dream backyard:
- Create a Rough Sketch: Start by sketching a rough layout of your backyard on paper or using a design software. Consider the various areas you want to incorporate, such as seating areas, dining spaces, pathways, and gardens. This initial sketch will act as a guide for the detailed design process.
- Define Activity Zones: Identify specific zones within your backyard for different activities based on your needs and preferences. For example, designate an area for outdoor cooking and dining, a space for relaxation and lounging, and a separate area for kids to play. This will help you allocate space efficiently and ensure a cohesive design.
- Consider Flow and Accessibility: Plan for smooth and convenient movement within your backyard by creating logical pathways and connections between different areas. Pay attention to potential bottlenecks or obstacles that may hinder accessibility. Strive for a seamless flow that allows for easy navigation throughout the space.
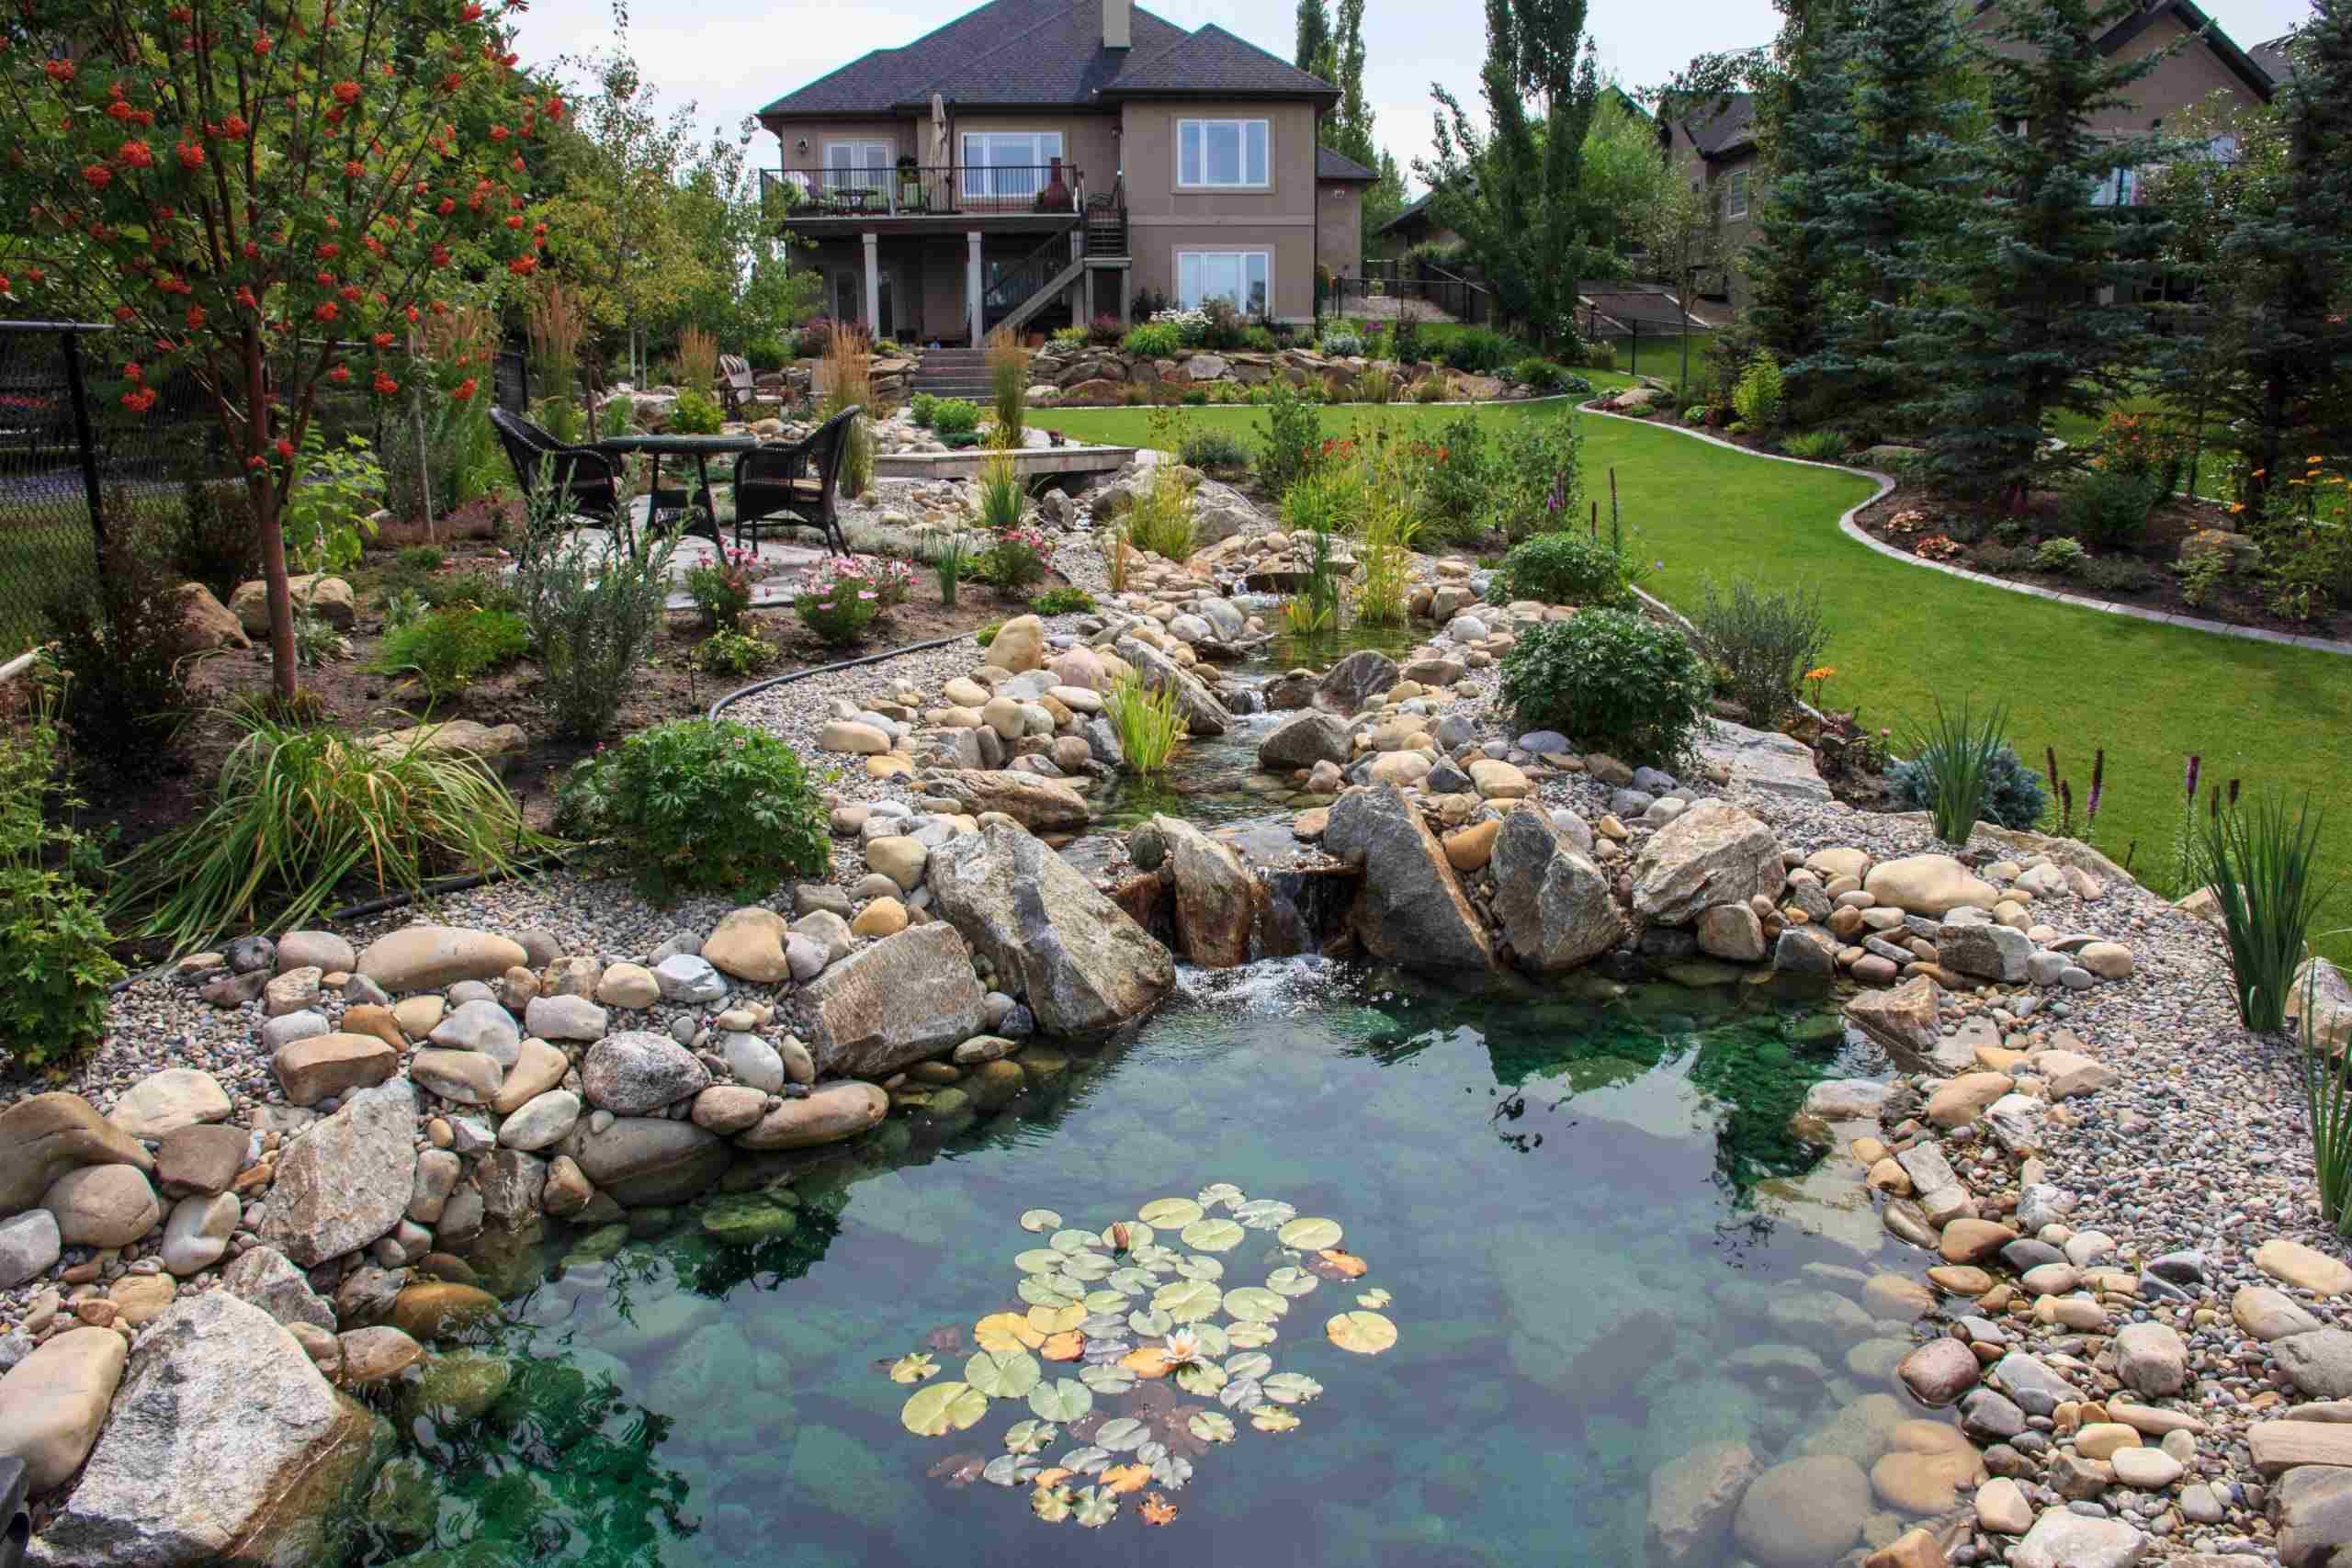
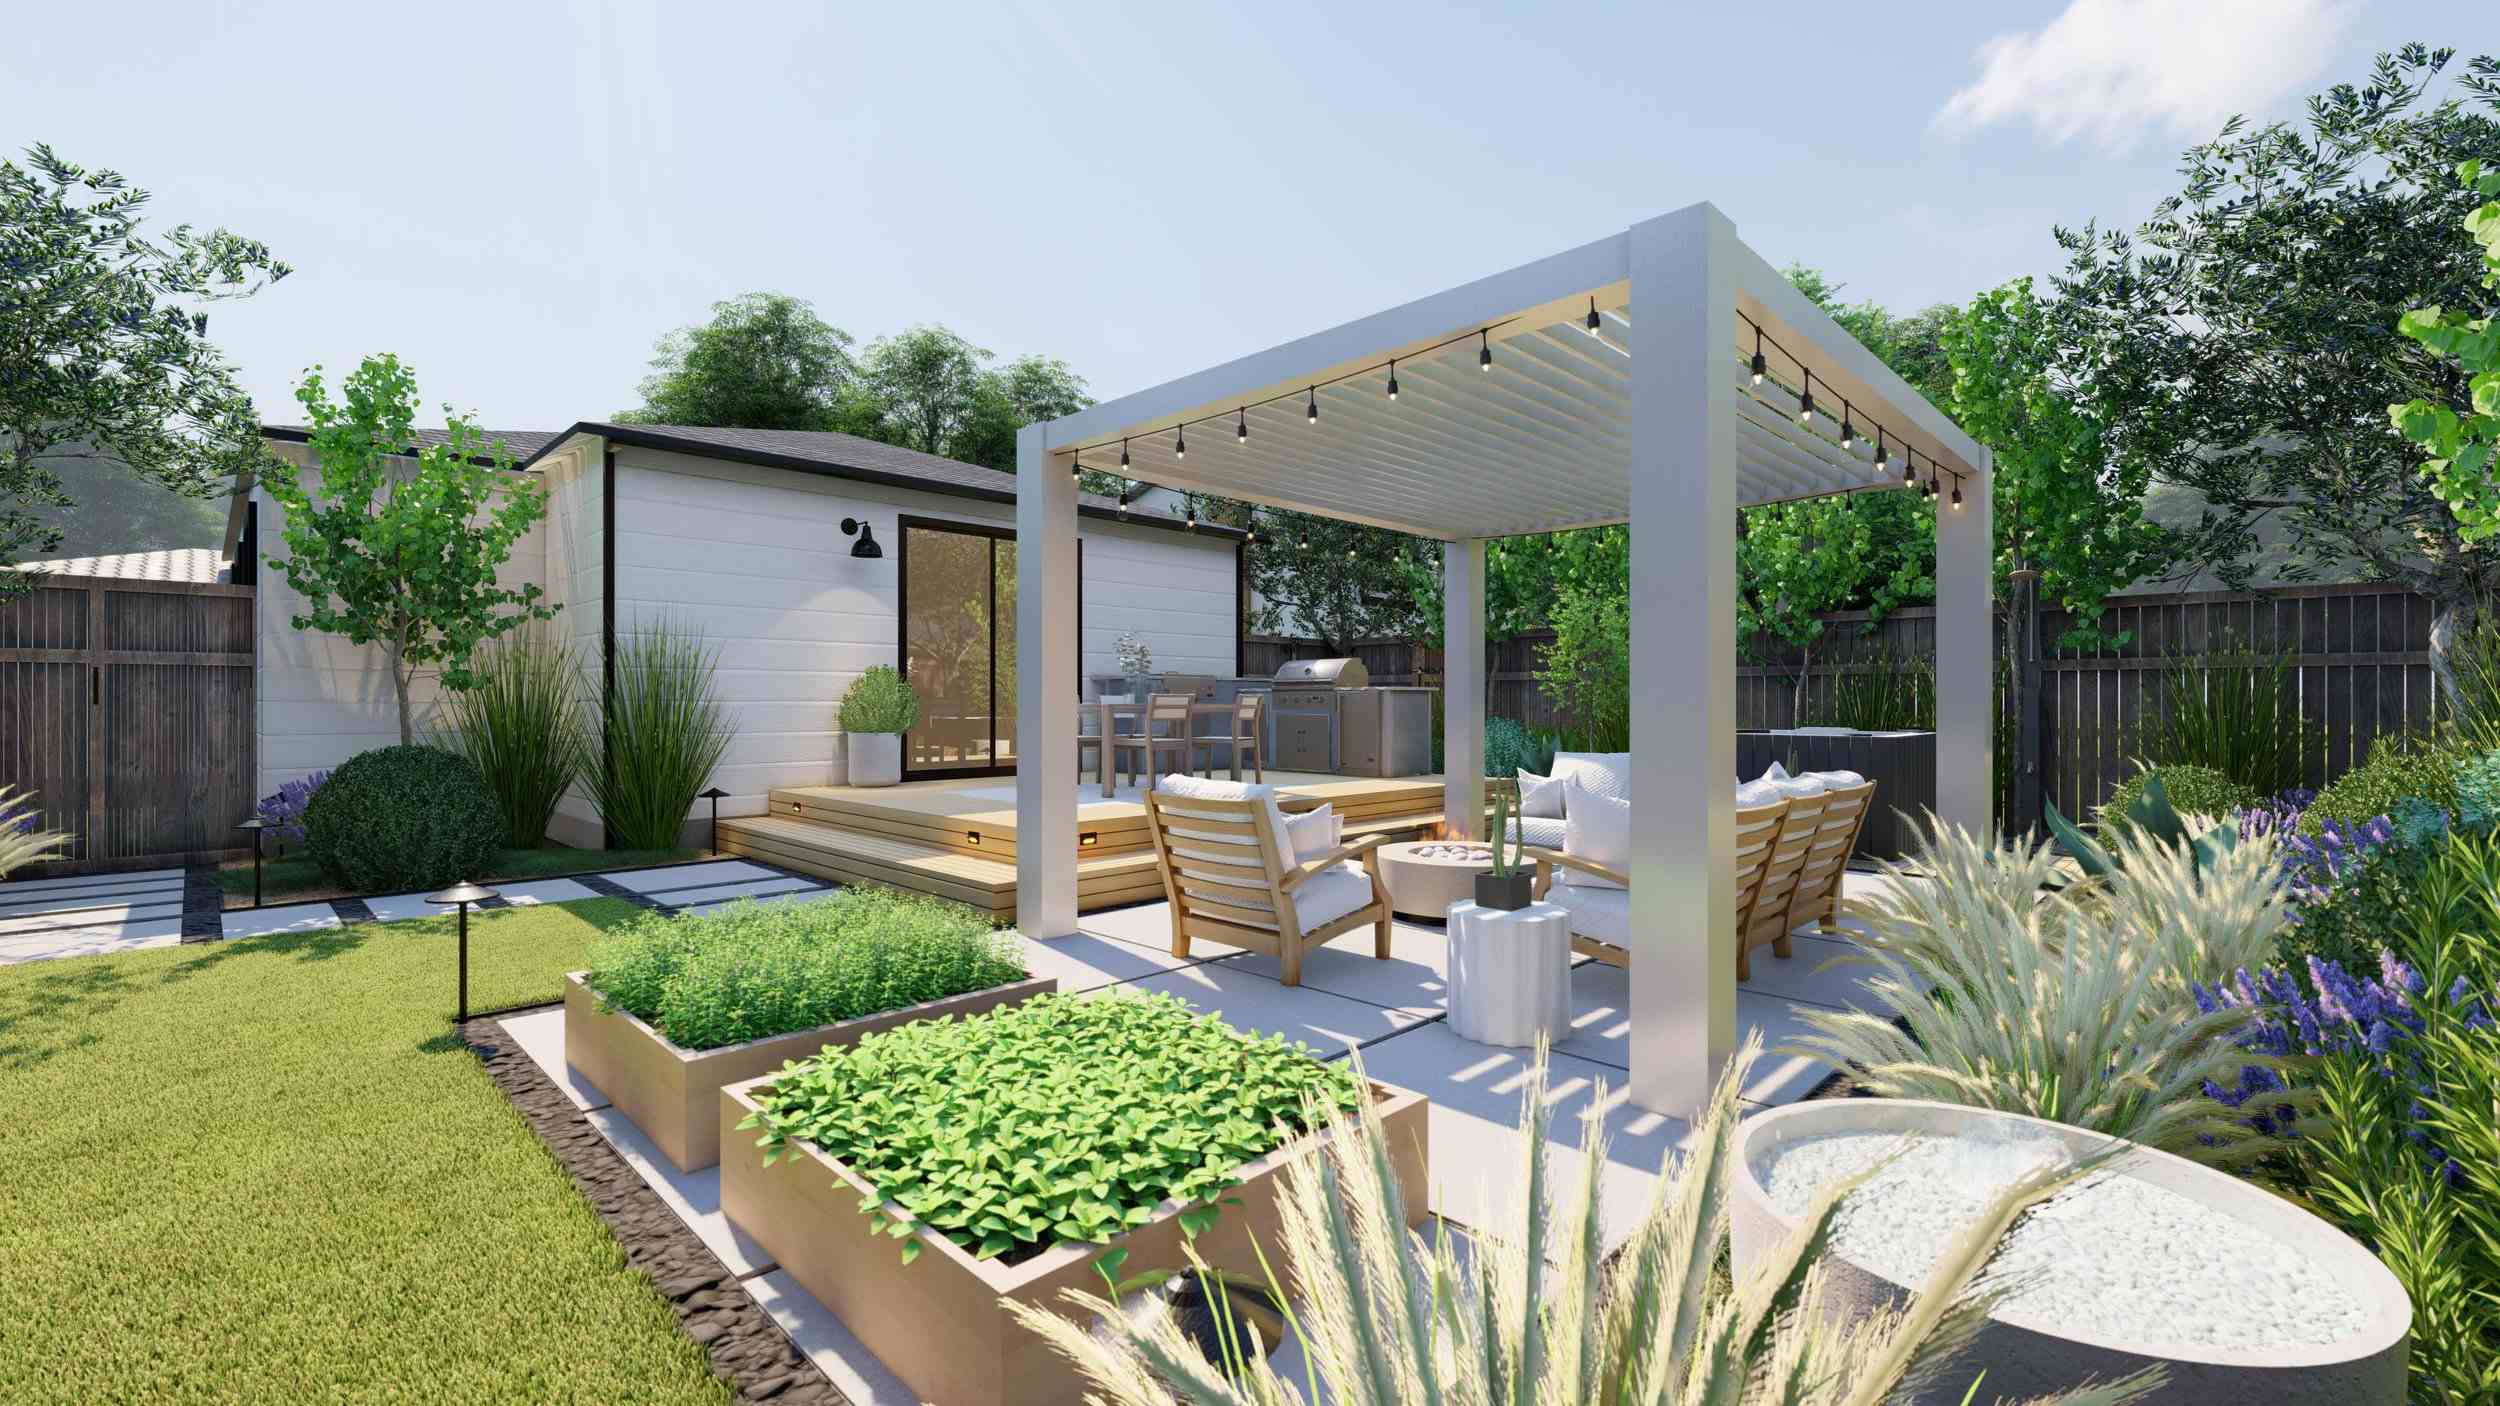
- Integrate Focal Points and Features: Choose focal points and features that will add visual interest and enhance the overall appeal of your backyard. This could include water features, fire pits, pergolas, or sculptures. Incorporating these elements strategically will create a sense of balance and harmony in your design.
- Select Hardscape Materials: Decide on the materials you’ll use for hardscape elements like pathways, patios, and retaining walls. Consider factors such as durability, aesthetics, and compatibility with your overall design theme. Materials like natural stone, pavers, or wood can bring a touch of elegance to your outdoor space.
- Balance Softscape Elements: Choose a variety of plants that will thrive in your climate and suit your design preferences. Consider factors like color, texture, and height to create a visually appealing and well-balanced landscape. Incorporate a mix of trees, shrubs, flowers, and groundcovers to add depth and dimension.
Remember to consider the scale and proportion of each element to ensure they harmonize with the overall design. Take measurements, consult with landscaping professionals if necessary, and make adjustments to your rough sketch until you’re satisfied with the layout. With a well-thought-out design in place, you’re ready to move on to the next step: choosing and preparing the materials for your new backyard.
Step 4: Choosing and Preparing the Materials
Choosing the right materials is crucial for bringing your backyard design to life and ensuring its longevity. From hardscape materials to plants and lighting, careful selection and preparation are key. Here’s how to choose and prepare the materials for your new backyard:
- Hardscape Materials: Select materials for your pathways, patio, retaining walls, and other hardscaping features. Consider factors such as durability, aesthetics, and functionality. Popular options include natural stone, concrete pavers, or composite materials. Research different suppliers and compare prices to find the best options for your budget.
- Plant Selection: Choose plants that are suitable for your climate, soil type, and sunlight conditions. Consider factors such as color, texture, height, and bloom time to create a visually appealing landscape. Visit local nurseries or consult with a landscape designer to get recommendations for plants that thrive in your area.
- Preparation: Prepare the planting areas by removing any existing vegetation, loosening the soil, and improving drainage if needed. Amend the soil with organic matter to improve its fertility and structure. This will create a healthy environment for your plants to thrive.
- Lighting: Plan for outdoor lighting to enhance the ambiance and functionality of your backyard. Consider different types of lighting, such as spotlights, pathway lights, and string lights, to create the desired mood. Install outdoor electrical outlets and make any necessary adjustments to your electrical system to accommodate the new lighting elements.
- Furniture and Accessories: Choose outdoor furniture and accessories that are durable, weather-resistant, and aligned with your design aesthetic. Consider factors such as comfort, functionality, and maintenance requirements. Add in features like cushions, umbrellas, and outdoor rugs to create a comfortable and inviting gathering space.
- Watering and Irrigation: Determine the appropriate watering and irrigation system for your plants. Consider options such as drip irrigation, sprinklers, or a combination of both. Install the necessary equipment and ensure it is functioning properly before planting.
Before purchasing materials, create a detailed list and budget to ensure you stay on track. Take accurate measurements of your backyard to calculate the quantity of materials required. Furthermore, consider the overall design aesthetic and ensure that all materials complement each other for a cohesive look.
Once you have gathered all the necessary materials, proceed with the preparation process. Follow the instructions provided by manufacturers or consult with professionals, if needed, to ensure proper installation and preparation. With step four complete, you’re one step closer to enjoying your newly transformed backyard.
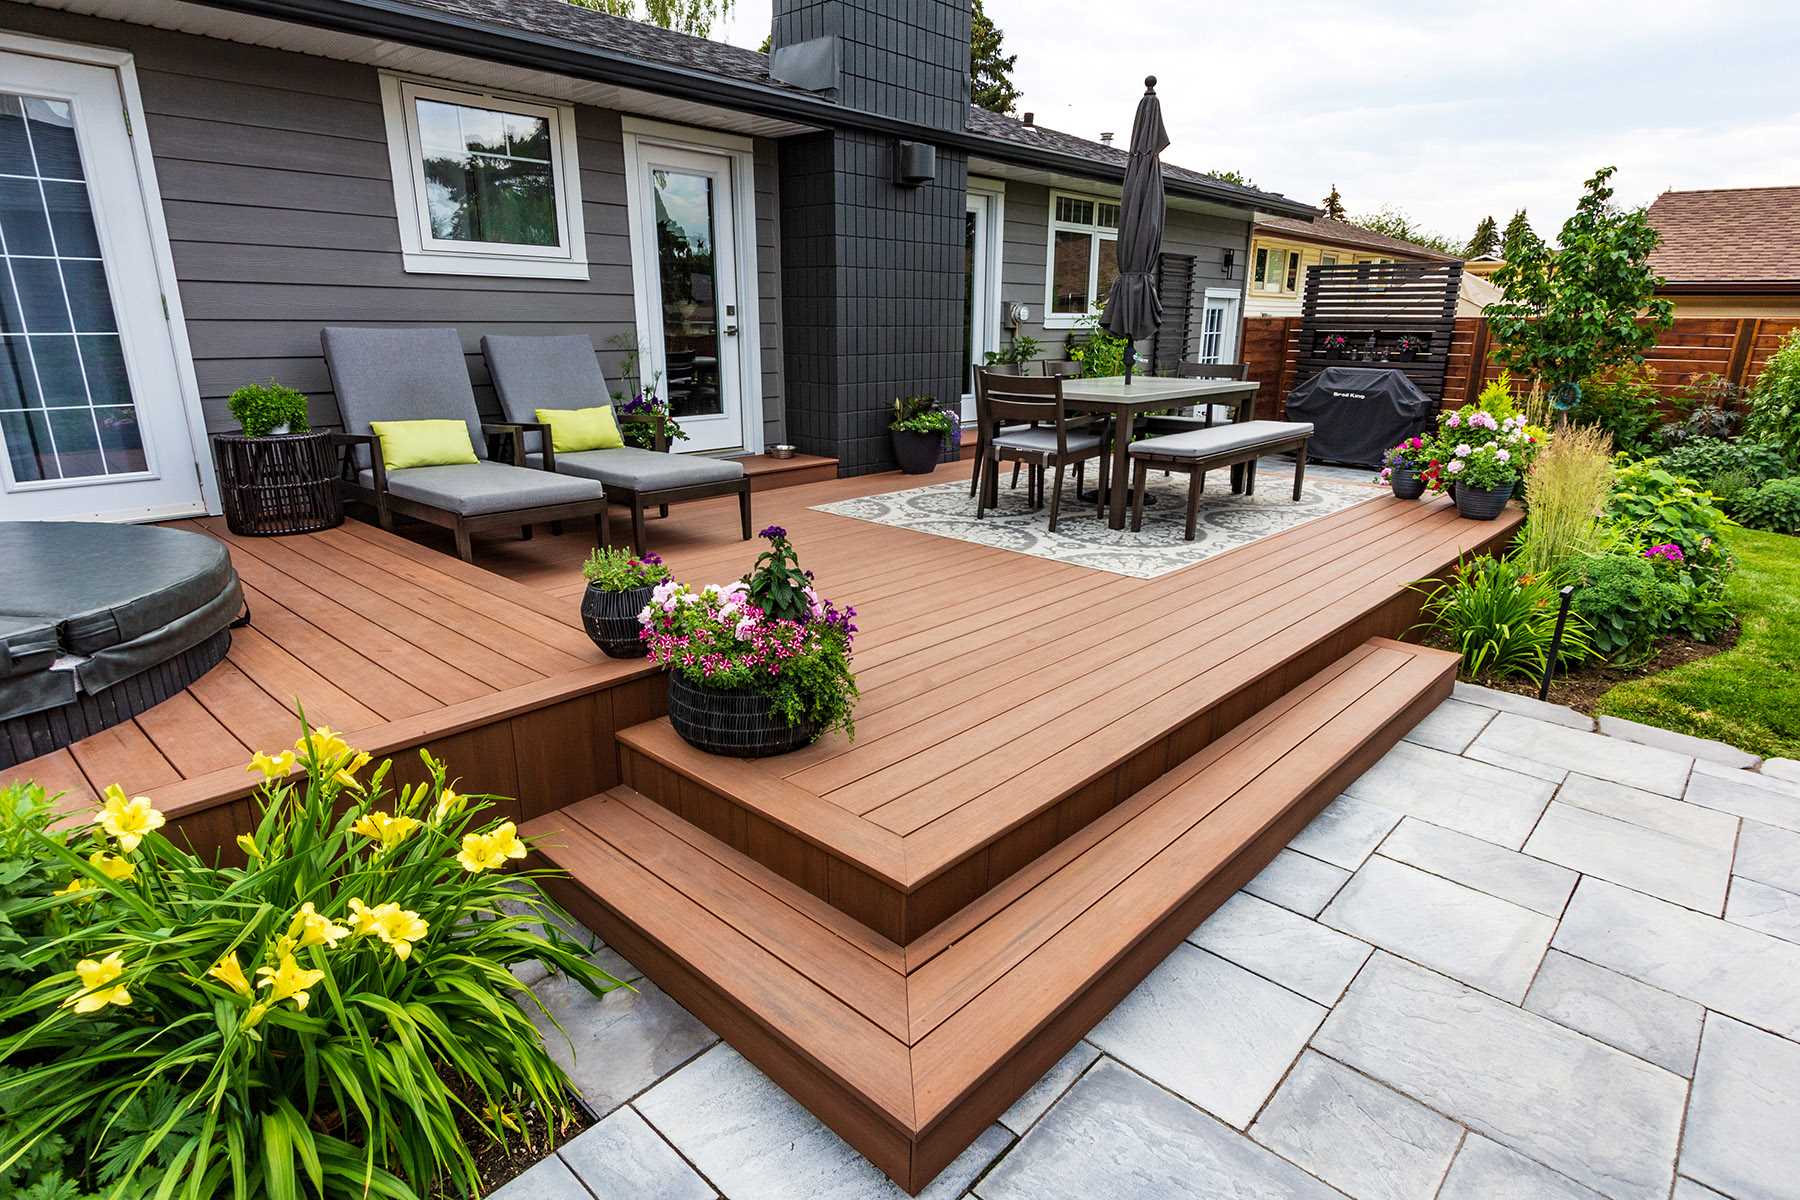
Step 5: Installing New Features and Structures
Now that you have your materials ready, it’s time to start installing the new features and structures that will bring your backyard design to life. This step is where all the planning and preparation come together, creating a space that aligns with your vision. Here’s how to proceed with installing new features and structures:
- Hardscaping: Begin with the installation of your hardscape elements, such as pathways, patios, and retaining walls. Follow the manufacturer’s instructions and consider consulting with professionals if needed. Ensure that everything is properly leveled and securely in place.
- Structures: If you’re including structures like pergolas, gazebos, or outdoor kitchens, follow the provided assembly instructions to ensure a sturdy and safe construction. Consider factors such as stability, longevity, and functionality when installing these features.
- Water Features: If you’ve chosen to incorporate water features like fountains, ponds, or waterfalls, carefully follow the installation instructions to ensure proper functionality and prevent leaks. Take into account any necessary electrical or plumbing connections and consult with experts if needed.
- Outdoor Lighting: Install your chosen outdoor lighting fixtures in accordance with the design plan. Ensure that all wiring is safely installed and connected to a proper power source. Consider installing timers or smart lighting systems for added convenience and energy efficiency.
- Planting: Begin planting your carefully chosen plants, considering their spacing, sunlight requirements, and growth habits. Follow proper planting techniques and provide adequate water and mulch around the plants to promote healthy growth. Consider adding compost or fertilizer to provide additional nutrients.
- Furniture and Accessories: Set up your outdoor furniture and accessories in their designated areas. Arrange seating areas strategically to encourage comfortable conversation and traffic flow. Install additional accessories, such as umbrellas or outdoor heaters, to enhance the functionality and comfort of the space.
Throughout the installation process, it’s essential to pay attention to detail and ensure that everything is properly assembled, installed, and secured. If you’re unsure about any aspect of the process, consult professionals or seek assistance from experienced individuals. Taking the time to properly install new features and structures will ensure their longevity and functionality in your backyard.
With step five complete, you can now move on to the next stage: planting and landscaping your new backyard.
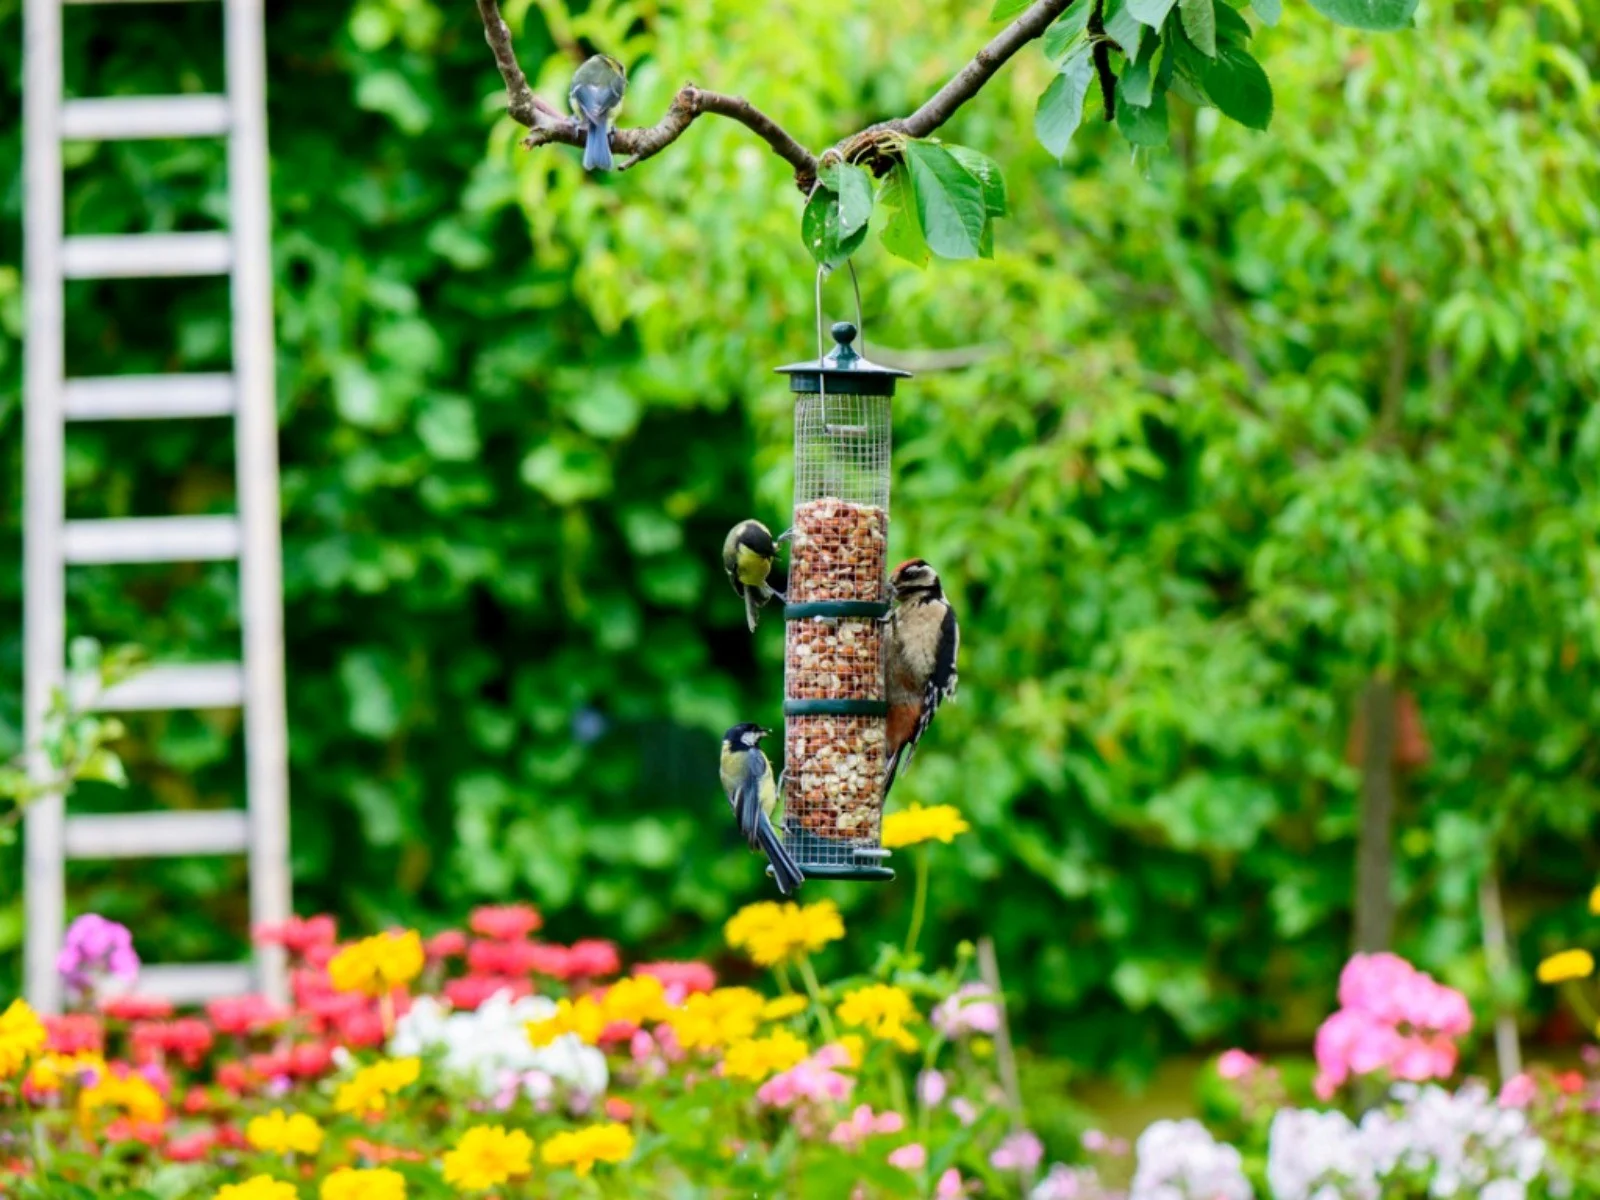
Step 6: Planting and Landscaping
Step six of redoing your backyard involves the exciting task of planting and landscaping. This is where the greenery and natural elements come together, creating a vibrant and inviting outdoor space. Follow these steps to ensure successful planting and landscaping:
- Select Plants: Begin by planting your chosen plants according to your design plan. Consider factors such as sunlight requirements, growth habits, and height to create a visually appealing arrangement. Group plants with similar needs together to make watering and maintenance more efficient.
- Planting Techniques: Dig proper-sized holes for each plant, ensuring they are deep enough to accommodate the roots. Loosen the root ball gently and place the plant in the hole, backfilling with soil. Firmly press the soil around the base of the plant to secure it in place.
- Watering: Water the newly planted vegetation thoroughly to help settle the soil and establish root growth. Follow a regular watering schedule and adjust it according to weather conditions and the needs of different plants. Consider installing a drip irrigation system for efficient and targeted watering.
- Mulching: Apply a layer of organic mulch around your plants to help retain moisture, suppress weed growth, and regulate soil temperature. Spread the mulch evenly, leaving a small space around the base of each plant to prevent moisture buildup and potential rotting.
- Pruning and Maintenance: Regularly prune and trim your plants to maintain their health, shape, and size. Remove any dead or diseased branches, and thin out crowded areas to encourage air circulation. Stay proactive in pest control and address any issues promptly to keep your plants thriving.
- Landscaping: Enhance your backyard with additional landscaping elements such as decorative rocks, pebbles, or garden ornaments. Use them strategically to create focal points, pathways, or borders. Consider adding groundcovers or edging plants to soften borders and add texture.
- Monitor and Adjust: Observe how your planted vegetation adapts to its new environment. Take note of any plant growth, flowering patterns, or potential issues. Adjust your watering or maintenance practices accordingly to ensure the ongoing health and beauty of your landscape.
Remember to research the specific care requirements of each plant, as different species may have unique needs. Stay informed about proper fertilization, disease control, and seasonal maintenance practices for the plants in your backyard.
With step six completed, you are nearing the final stages of your backyard redo. The transformation is almost complete as you move on to the next step: adding the finishing touches.
Step 7: Adding Finishing Touches
As you near the completion of your backyard redo, it’s time to add those final touches that will elevate the overall look and feel of your outdoor space. These finishing touches will add character, comfort, and personalized flair to your newly transformed backyard. Here are some ideas on how to put the finishing touches:
- Outdoor Decor: Enhance the ambiance of your backyard by adding decorative elements such as wind chimes, outdoor artwork, or hanging planters. Choose pieces that reflect your personal style and blend well with the overall design aesthetic.
- Colorful Accessories: Incorporate colorful accessories like throw pillows, outdoor rugs, or table linens to add pops of color and create a vibrant atmosphere. Select colors that complement your design palette and create a cohesive look.
- Comfortable Seating: Arrange comfortable and inviting seating areas using plush cushions, outdoor sofas, or lounge chairs. Ensure there is enough seating to accommodate your guests and provide relaxation for you and your family.
- Container Gardens: Add additional greenery and interest by incorporating container gardens. Use decorative pots or planters to house your favorite flowers or herbs. This allows for flexibility in moving and rearranging plants based on seasonal changes or personal preferences.
- Outdoor Lighting: Install additional lighting features such as string lights, lanterns, or pathway lights to enhance the ambiance and functionality of your backyard during the evening hours. Well-placed lighting can create a cozy and inviting atmosphere for outdoor gatherings.
- Fire Pit or Patio Heater: Incorporating a fire pit or patio heater allows you to extend the use of your backyard into the cooler months. Gather around the warmth and coziness of a fire, enjoying the outdoors even on chilly evenings.
- Vertical Gardening: If you have limited space, consider implementing vertical gardening techniques using trellises, hanging baskets, or living walls. This allows you to maximize the use of space, add visual interest, and grow more plants.
Remember to personalize your backyard with elements that reflect your style and preferences. Don’t be afraid to experiment and make adjustments until you achieve the desired look and atmosphere. The finishing touches will truly make your backyard feel like a personalized sanctuary.
With step seven complete, you have successfully transformed your backyard into a beautiful and functional space. Take a step back and admire the fruits of your labor. Your new outdoor haven is now ready for you to enjoy and create countless memories with family and friends.
Conclusion
Redoing your backyard is a rewarding and transformative process that allows you to create a space that meets your needs and reflects your personal style. By following the step-by-step guide outlined in this article, you can successfully undertake a backyard makeover and turn it into a stunning outdoor oasis. From assessing the space and clearing the existing area to designing the new layout, choosing materials, installing features, and adding the finishing touches, each step is crucial in creating a cohesive and functional backyard design.
By assessing your backyard, you gain a deeper understanding of its strengths and limitations, allowing you to plan effectively. Clearing the existing space creates a blank canvas for your design vision. Designing the layout ensures a well-organized and functional space. Choosing and preparing the materials set the foundation for the visual and structural aspects of your backyard. Installing new features and structures brings your design to life. Planting and landscaping add greenery and vibrancy, while the finishing touches add personal flair and comfort.
Throughout the process, it’s important to balance your design goals with practical considerations such as climate, maintenance requirements, and budget. Remember to research and seek guidance when needed, and enlist the help of professionals for tasks that require expertise.
As you complete each step, rejoice in the progress you’ve made and envision the final outcome. Your backyard transformation is a journey that combines creativity, hard work, and patience. The end result will be a backyard that truly reflects your personal style and provides a relaxing and enjoyable outdoor space for you and your loved ones to cherish for years to come.