Home>Types of Gardening>Edible Gardening>How To Plant Tomato Seeds Indoors
Edible Gardening
How To Plant Tomato Seeds Indoors
Modified: January 22, 2024
Learn the best practices for planting tomato seeds indoors and start your edible gardening journey. Find step-by-step instructions and tips from expert gardeners.
(Many of the links in this article redirect to a specific reviewed product. Your purchase of these products through affiliate links helps to generate commission for Chicagolandgardening.com, at no extra cost. Learn more)
Table of Contents
- Introduction
- Benefits of Planting Tomato Seeds Indoors
- Choosing Tomato Varieties
- Selecting the Right Containers
- Preparing the Potting Mix
- Sowing Tomato Seeds
- Providing Proper Lighting
- Maintaining Optimal Temperature and Humidity
- Watering and Fertilizing Tomato Seedlings
- Transferring Seedlings to Larger Containers
- Hardening off Tomato Seedlings
- Transplanting Tomato Seedlings Outdoors
- Conclusion
Introduction
Welcome to the exciting world of edible gardening! If you have a green thumb and a passion for growing your own food, then planting tomato seeds indoors is a great way to kickstart your edible garden. Not only does it give you a head start on the growing season, but it also allows you to have a wider selection of tomato varieties to choose from. In this article, we will guide you through the process of planting tomato seeds indoors, from selecting the right tomato varieties to transplanting the seedlings outdoors.
Planting tomato seeds indoors offers numerous benefits for both novice and experienced gardeners. By starting your seeds indoors, you can give them a safe and controlled environment to germinate and grow before facing the unpredictable weather conditions outside. This way, you can extend the growing season and have a greater chance of a successful harvest. Additionally, growing tomatoes from seeds allows you to choose from a vast range of tomato varieties that may not be readily available as seedlings at your local nursery. From classic beefsteaks to small cherry tomatoes, you can experiment with different flavors, colors, and sizes to suit your taste preferences.
When it comes to selecting the right tomato varieties, consider factors such as taste, disease resistance, and the space available in your garden. Determinate varieties, which grow to a certain height and produce fruit over a short period, are ideal for smaller gardens or containers. Indeterminate varieties, on the other hand, continue to grow and produce fruit throughout the season, requiring more room and support. Popular tomato varieties include ‘Better Boy,’ ‘Roma,’ ‘Brandywine,’ and ‘Sun Gold.’ Choose the ones that suit your culinary needs and gardening goals.
Before sowing your tomato seeds, it is essential to choose the right containers. Opt for pots or trays that provide adequate drainage and sufficient space for the growing seedlings. You can use seed-starting trays, peat pots, or recycled containers, as long as they are clean and have drainage holes. It’s also helpful to have a transparent cover or plastic wrap for creating a greenhouse-like environment that retains moisture and warmth.
Now that you have a basic introduction to the benefits of planting tomato seeds indoors, let’s dive into the detailed steps of the process. Remember, the journey from seed to harvest requires patience, care, and attention to detail. So roll up your sleeves and get ready to embark on a rewarding gardening adventure!
Benefits of Planting Tomato Seeds Indoors
Planting tomato seeds indoors offers a range of advantages for both new and experienced gardeners. By starting your tomato plants from seeds indoors, you can enjoy the following benefits:
- Extended Growing Season: Planting tomato seeds indoors allows you to get a head start on the growing season. By germinating the seeds indoors, you can ensure that your plants are well-established and ready to thrive once it’s time to transplant them outdoors. This means you’ll be able to harvest tomatoes earlier and have a longer growing season overall.
- Greater Variety Selection: When you plant tomato seeds indoors, you have access to a much wider variety selection than what is typically available as seedlings at your local nursery. This opens up a world of possibilities, allowing you to choose from a wide range of flavors, sizes, colors, and textures. Whether you prefer traditional beefsteak tomatoes or want to try unique heirloom varieties, starting from seeds gives you the freedom to experiment with different tomato types.
- Cost Savings: Starting your tomato plants from seeds can be more cost-effective than buying seedlings. While seed packets may initially seem more expensive, they contain numerous seeds, giving you the ability to grow multiple plants at a fraction of the cost. Additionally, you’ll have the satisfaction of knowing exactly where your plants came from and how they were grown.
- No Exposure to Outdoor Elements: Planting tomato seeds indoors protects them from sudden changes in weather, pests, and diseases. When you start seeds indoors, you have complete control over the growing conditions, ensuring that your plants will get the best possible start. This can help minimize the risk of seedling loss due to unexpected weather fluctuations or pests devouring your plants before they have a chance to grow.
- Greater Gardening Experience: Planting tomato seeds indoors allows you to be involved in every stage of the growing process, from germination to harvest. This hands-on experience can deepen your understanding of how plants grow and develop. You’ll have the opportunity to witness the miracle of a tiny seed transforming into a thriving tomato plant, which can be extremely rewarding for any gardener.
Now that you are aware of the benefits of planting tomato seeds indoors, you can confidently embark on your edible gardening journey. Remember to choose the right tomato varieties, prepare the proper containers, and provide the ideal growing conditions to ensure successful seed germination and healthy tomato plants. Happy gardening!
Choosing Tomato Varieties
When it comes to choosing tomato varieties to plant indoors, there are a few factors to consider. The wide array of tomato varieties available can seem overwhelming, but with a little guidance, you can select the perfect ones for your needs. Here are some tips to help you choose the right tomato varieties:
- Taste: Consider the flavor profile you prefer in tomatoes. Some varieties have a sweet and mild taste, while others are more acidic and tangy. Determining your taste preferences will help you narrow down the options.
- Disease Resistance: Some tomato varieties are bred to be resistant to common diseases, such as tomato blight or fusarium wilt. If you want to minimize the risk of your plants succumbing to these diseases, look for varieties that have disease resistance traits.
- Growth Habit: Tomato plants can have different growth habits, categorized as determinate or indeterminate. Determinate varieties grow to a certain height and produce fruit over a concentrated period, making them suitable for smaller gardens or container gardening. Indeterminate varieties continue to grow and produce fruit throughout the season and require more space and support.
- Size and Use: Consider the size of the tomatoes you prefer and their intended use. If you enjoy slicing tomatoes for sandwiches and salads, look for larger varieties, like beefsteak or heritage varieties. If you prefer smaller tomatoes for snacking or adding to recipes, cherry or grape varieties are a great choice.
- Ripening Time: Tomato varieties can vary in their ripening time. Some mature earlier, while others take longer to produce ripe fruit. Take note of the average days to maturity listed on the seed packet to ensure the tomatoes will ripen within your desired timeframe.
Popular tomato varieties that are well-suited for indoor planting include:
- Cherry Tomatoes: Sweet 100, Sungold, Black Cherry
- Beefsteak Tomatoes: Brandywine, Mortgage Lifter, Beefmaster
- Determinate Tomatoes: Celebrity, Roma, Rutgers
- Container-Friendly Tomatoes: Tiny Tim, Patio Princess, Pixie
- Heirloom Tomatoes: Cherokee Purple, Green Zebra, Brandywine Pink
Consider your personal preferences, gardening space, and intended use for the tomatoes when selecting the varieties. Remember, experimenting with different tomato varieties can add excitement and variety to your indoor gardening experience.
Now that you have a better understanding of how to choose the right tomato varieties, you can confidently proceed to the next step: selecting the right containers for your tomato seedlings.
Selecting the Right Containers
Choosing the right containers for your tomato seedlings is crucial for their successful growth and development. The containers you select should provide adequate space for the roots to grow, excellent drainage to prevent waterlogging, and be sturdy enough to support the weight of the mature plants. Here are some factors to consider when selecting containers for your tomato seedlings:
- Size: Tomatoes have a vigorous root system, so it’s important to choose containers that are deep and wide enough to accommodate their growth. A container with a minimum depth of 10-12 inches is recommended for indeterminate varieties, while determinate varieties can do well in slightly smaller containers. Remember, larger containers will require less frequent watering as they retain more moisture.
- Drainage: Proper drainage is vital to prevent waterlogged soil, which can lead to root rot and other issues. Choose containers with drainage holes at the bottom to allow excess water to escape. If you’re repurposing containers, make sure to drill drainage holes if they don’t already have them.
- Material: Containers can be made from various materials, including plastic, terracotta, ceramic, or fabric. Plastic containers are lightweight, affordable, and retain moisture well. Terracotta or ceramic containers are more breathable but can dry out faster, requiring more frequent watering. Fabric containers are a great option as they provide excellent drainage and air circulation for the roots.
- Number of Plants: Determine how many tomato plants you plan to grow and choose containers accordingly. Each plant requires adequate space for its root system to develop without being overcrowded. If space is limited, consider using larger containers or growing fewer plants to ensure optimal growth and fruit production.
- Mobility: If you plan to move your tomato plants outdoors once the weather warms up, consider using containers with handles or wheels for easy transport. This enables you to position the plants in the best possible sunlight and protect them during unfavorable weather conditions.
In addition to traditional pots, there are specialized containers available specifically for growing tomatoes, such as grow bags and self-watering containers. These containers provide excellent drainage and airflow, promoting healthy root development and reducing the risk of overwatering. Self-watering containers have a reservoir that supplies water to the plants as needed, making them a convenient option for busy gardeners.
Remember to clean and sanitize containers before use to prevent the risk of diseases that can affect your tomato seedlings. Rinse the containers with a dilute bleach solution or use a garden disinfectant to ensure they are free from any pathogens.
Now that you have learned about selecting the right containers for your tomato seedlings, you can move on to preparing the potting mix, which plays a vital role in the successful growth of your plants.
Preparing the Potting Mix
The quality of the potting mix you use for your tomato seedlings can greatly impact their growth and overall health. A well-prepared potting mix provides the necessary nutrients, moisture retention, and aeration for optimal root development. Here are some steps to prepare a suitable potting mix for your tomato seedlings:
- Use a Seed Starting Mix: Start by using a high-quality seed starting mix or a soilless potting mix. These mixes are lightweight, sterile, and provide excellent drainage. Avoid using garden soil as it can be too heavy and may contain pathogens, weeds, or pests that can harm your seedlings.
- Add Organic Matter: To enrich the potting mix with nutrients, incorporate organic matter such as compost or well-rotted manure. This helps improve the soil structure, provides essential nutrients, and enhances moisture retention. Mix in a small amount of organic matter, about 20-30% by volume, into the seed-starting mix.
- Include Perlite or Vermiculite: To improve aeration and drainage, add perlite or vermiculite to your potting mix. These lightweight materials help prevent the potting mix from becoming too compacted and improve water drainage, reducing the risk of overwatering. Aim to add about 10-20% perlite or vermiculite to the mix.
- Adjust pH and Nutrient Levels: Tomato plants thrive in slightly acidic soil with a pH level between 6.0 and 6.8. Use a pH testing kit to check the pH of your potting mix and make adjustments if necessary. Additionally, consider incorporating slow-release organic fertilizers into the potting mix to provide essential nutrients for the seedlings’ initial growth stages.
- Moisten the Mix: Before filling your containers with the potting mix, moisten it to the appropriate moisture level. The mix should be damp but not soggy. Add water gradually while mixing the materials until it reaches the desired consistency. Avoid compacting the mix too tightly as it can hinder root growth and drainage.
It’s essential to ensure your potting mix is well-mixed and free from any clumps or large particles. This will provide an even distribution of nutrients to the growing seedlings and promote healthy root development.
Remember, the potting mix needs to provide a suitable environment for the seedlings to germinate and establish their roots. It should be loose enough to allow roots to penetrate easily, yet retain enough moisture to prevent them from drying out. Monitoring the moisture levels and adjusting watering accordingly is crucial for the success of your tomato seedlings.
Now that you have learned how to prepare the ideal potting mix, you are ready to sow your tomato seeds and start the exciting journey of indoor tomato seedling growth.
Sowing Tomato Seeds
Sowing tomato seeds is the first step in the journey of growing your own fresh tomatoes indoors. Properly sowing the seeds will ensure healthy germination and vigorous growth. Here’s how to sow tomato seeds:
- Prepare Seed Trays or Pots: Fill seed trays or pots with the pre-moistened potting mix you have prepared. Ensure that the containers have drainage holes to prevent waterlogging.
- Plant the Seeds: Make shallow indents or small holes in the potting mix, about a quarter to a half-inch deep. Space the indents or holes around two inches apart to provide adequate room for each seedling. Drop one or two tomato seeds into each indent or hole, then gently cover them with a thin layer of potting mix.
- Label and Water: Label your trays or pots with the tomato varieties you have sown. This will help you keep track of different varieties. Water the seeds gently using a spray bottle or a watering can with a fine rose attachment. Ensure that the mix is moist, but be cautious not to overwater, as excessive moisture can lead to seed rot.
- Provide Warmth: Tomato seeds require warmth to germinate. Place the trays or pots in a warm location, ideally between 70°F and 80°F (21°C – 27°C), such as on a heated propagating mat or near a heat source like a radiator. You can also cover the containers with plastic wrap to create a mini greenhouse effect that retains warmth and moisture.
- Monitor and Maintain Moisture: Check the trays or pots regularly to ensure that the potting mix remains consistently moist. Avoid letting the mix dry out completely, as this can negatively affect the germination process. Use a spray bottle or a mister to mist the surface with water when needed. Be cautious not to overwater, as overly wet conditions can lead to damping-off disease.
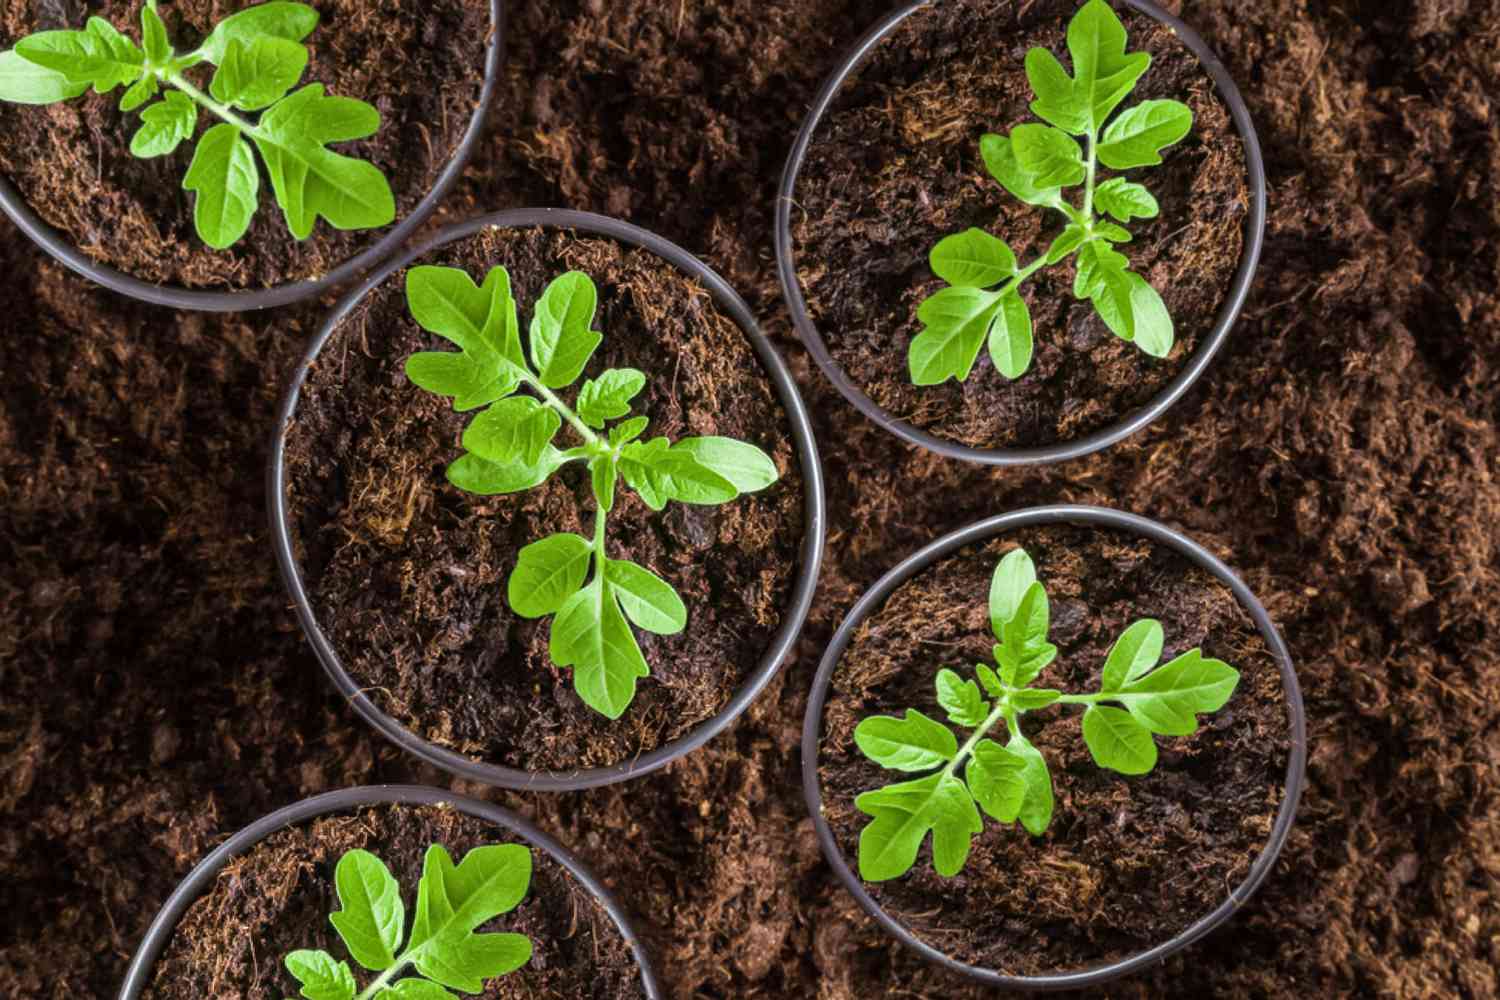
- Provide Adequate Light: Once the seeds have germinated and the seedlings start to emerge, it’s crucial to provide them with adequate light. Place the trays or pots in a location where they receive bright, indirect sunlight for at least six to eight hours a day. If natural light is insufficient, you can use artificial grow lights to supplement the light requirements of your seedlings.
Within 7 to 14 days, you should start to see the tomato seedlings emerging from the potting mix. As soon as the seedlings have developed their first true leaves, which are the leaves that appear after the initial seed leaves, it’s time to start thinking about providing them with additional care, such as temperature control, adequate watering, and regular fertilization.
Now that you have successfully sown your tomato seeds, you are well on your way to growing your own indoor tomato garden. The next step will focus on providing proper lighting to ensure the healthy growth of your tomato seedlings.
Providing Proper Lighting
Proper lighting is crucial for the healthy growth of your tomato seedlings. As they emerge from the potting mix, they require adequate light to develop properly. Follow these guidelines to provide the right lighting conditions for your indoor tomato seedlings:
- Optimal Light Intensity: Tomato seedlings require bright, indirect light for at least 14 to 16 hours a day. While natural sunlight is the best light source, it may not always be sufficient, especially in areas with limited sunlight or during the winter months. In such cases, you can use artificial grow lights specifically designed for plants.
- Choosing Grow Lights: When selecting grow lights, opt for fluorescent or LED lights that emit a full spectrum of light, including both blue and red wavelengths. Blue light promotes leaf and stem growth, while red light stimulates flowering and fruiting. Avoid using regular incandescent lights as they generate excessive heat and can burn the delicate seedlings.
- Placement and Distance: Position the grow lights approximately 6 to 12 inches above the tops of the seedlings. As the seedlings grow, adjust the lights accordingly, maintaining a distance of 2 to 4 inches from the top of the foliage. This ensures that the seedlings receive an even amount of light and minimizes the risk of leggy growth due to insufficient light intensity.
- Lighting Duration: Tomato seedlings require 14 to 16 hours of light each day. To provide consistent light, consider using a timer to automatically turn the grow lights on and off. This helps mimic natural daylight and ensures that the seedlings receive the right amount of light for healthy growth.
- Rotate Seedlings: To ensure uniform growth, rotate the seed trays or pots every few days. This prevents the seedlings from leaning towards the light source, promoting straight and robust growth. Rotating the seedlings also helps expose all sides of the plants to light, preventing uneven growth patterns.
- Monitor Light Intensity: Pay attention to the intensity and quality of the light provided. Insufficient light can lead to leggy, weak seedlings, while too much direct light can cause scorching and stunted growth. Adjust the distance between the seedlings and the grow lights as necessary to maintain optimal light intensity.
It’s important to note that providing proper lighting is crucial throughout the entire indoor growing process, from germination to transplanting. Keeping a close eye on your tomato seedlings’ growth and appearance will help you determine if they are receiving the right amount of light. Healthy seedlings should display strong, green foliage and compact growth.
Now that you understand the importance of providing proper lighting for your tomato seedlings, you can move forward with maintaining optimal temperature and humidity levels to support their overall growth and development.
Maintaining Optimal Temperature and Humidity
Maintaining the optimal temperature and humidity levels is crucial for the successful growth of your indoor tomato seedlings. Tomatoes are warm-season plants that thrive in specific environmental conditions. Here are some guidelines to help you maintain the ideal temperature and humidity for your tomato seedlings:
- Temperature: Tomato seedlings prefer daytime temperatures between 70°F and 75°F (21°C – 24°C) and nighttime temperatures between 65°F and 70°F (18°C – 21°C). Keep the temperature as stable as possible to prevent stress on the seedlings. Avoid exposing them to cold drafts, as this can hinder their growth and development.
- Heating: If the ambient temperature is consistently below the desired range, consider using a heating mat specifically designed for seed starting. This helps provide gentle and consistent bottom heat, promoting optimal germination and early growth of the seedlings. Place the heating mat beneath the seed trays or pots and monitor the temperature regularly.
- Humidity: Tomato seedlings thrive in a moderately humid environment. Aim for a humidity level of around 50% to 70%. If the air in your indoor environment is dry, you can increase humidity by using a humidifier or placing a tray filled with water near the seedlings. Avoid placing the trays directly beneath the seedlings to prevent waterlogging the pots or trays.
- Ventilation: Good air circulation is essential to prevent the development of fungal diseases and strengthen the seedlings. Place a small fan near the seedlings to provide gentle air movement. This helps increase transpiration, reduce the risk of damp conditions, and strengthen the seedlings’ stems for better support and growth.
- Monitoring: Regularly monitor the temperature and humidity levels in the growing area. Use a thermometer and hygrometer to keep track of these parameters. In addition, observe the seedlings’ appearance and behavior. If they appear weak, pale, or droopy, it may be an indication of unsuitable temperature or humidity conditions.
- Adjustments: Make necessary adjustments to the temperature and humidity levels based on the behavior and growth of your tomato seedlings. For example, if the seedlings appear leggy or stretched, it can indicate insufficient light or excessively warm temperatures. In contrast, if the leaves begin to look droopy or yellow, it may be a sign of overwatering or high humidity.
By maintaining the optimal temperature and humidity levels, you create a favorable environment for robust growth and development of your tomato seedlings. Remember, consistency is key, so regularly check and make adjustments to provide the most suitable growing conditions.
Now that you are equipped with the knowledge of maintaining optimal temperature and humidity, let’s move on to the next important aspect of caring for your indoor tomato seedlings: watering and fertilizing.
Watering and Fertilizing Tomato Seedlings
Proper watering and fertilizing are essential for the healthy growth and development of your indoor tomato seedlings. These practices provide the necessary nutrients and moisture for the plants to thrive. Here are some guidelines to help you water and fertilize your tomato seedlings effectively:
- Watering: Tomato seedlings require consistent moisture for optimal growth, but it’s important not to overwater them. Allow the top inch of the potting mix to dry out slightly before watering again. Use a watering can with a fine rose attachment or a spray bottle to water the seedlings gently, aiming at the base of the plants to avoid wetting the foliage excessively. Avoid standing water, as it can lead to root rot.
- Moisture Level: Maintaining consistent, slightly moist potting mix is important for the seedlings’ root development. Too much moisture can lead to damping-off disease, while too little can cause stunted growth. Regularly check the moisture level by inserting your finger into the potting mix. If it feels dry at the depth of an inch, it’s time to provide water.
- Frequency: The frequency of watering depends on various factors, such as environmental conditions, pot size, and the growth stage of the seedlings. As a general guideline, water the tomato seedlings every 2-3 days, adjusting as necessary based on the moisture level. Be observant and avoid allowing the potting mix to become overly dry or waterlogged.
- Fertilizing: Tomato seedlings benefit from a balanced fertilizer that provides essential nutrients. Start fertilizing the seedlings once they develop their first true leaves. Use a diluted, water-soluble fertilizer with an N-P-K ratio specifically formulated for seedlings or young plants. Follow the instructions on the fertilizer package for mixing and application rates.
- Timing: For young tomato seedlings, fertilize them every 2-3 weeks, gradually increasing the strength of the fertilizer as the plants grow. As the seedlings approach the stage of transplanting outdoors, reduce the frequency of fertilizing to avoid overfeeding.
- Application Method: Apply the diluted fertilizer solution directly to the soil around the base of the seedlings. Avoid getting the fertilizer on the leaves, as it can cause leaf burn. After applying the fertilizer, water the seedlings lightly to help distribute the nutrients evenly and prevent any potential fertilizer buildup.
Remember, it’s important to closely monitor the seedlings’ response to watering and fertilizing. Overwatering can lead to yellowing leaves and root rot, while under-watering may cause wilting and stunted growth. Adjust your watering and fertilizing practices accordingly as you observe the growth and overall health of the tomato seedlings.
Now that you have learned how to properly water and fertilize your tomato seedlings, you are well-equipped to provide them with the necessary care for healthy and robust growth. The next step will cover the process of transferring the seedlings to larger containers as they outgrow their current pots.
Transferring Seedlings to Larger Containers
As your tomato seedlings grow and their root systems develop, it’s important to upsize their containers to provide ample space for continued growth. Transferring the seedlings to larger containers, also known as potting up or repotting, ensures healthy root development and prevents the plants from becoming root-bound. Here’s how to transfer your tomato seedlings to larger containers:
- Timing: It’s generally recommended to transplant tomato seedlings to larger containers when they have developed their second set of true leaves and are about 3-4 inches tall. This usually occurs 3-4 weeks after germination, but can vary depending on the growing conditions and variety.
- Prepare Larger Containers: Select containers that are at least 12-18 inches in diameter and have drainage holes. Fill the larger containers with fresh potting mix, leaving enough space at the top to accommodate the seedlings and facilitate watering.
- Watering: Before removing the seedlings from their current pots, water them thoroughly. This helps loosen the potting mix and makes it easier to remove the seedlings without damaging their delicate roots.
- Loosening the Seedlings: Gently loosen the potting mix around the base of the seedlings with a small trowel or spoon. Carefully lift the seedlings by their leaves or the root ball, avoiding pulling them by the stems. Handle them with care to prevent any damage or breakage.
- Planting in Larger Containers: Create a hole in the center of the new container that’s slightly larger than the root ball of the seedling. Place the seedling in the hole, making sure that the stem is at the same depth as it was in the previous pot. Fill the gaps around the seedling with potting mix, gently pressing it down to secure the plant. Water the newly potted seedling to settle the soil.
- Providing Support: As tomato plants grow, they require support to keep the stems upright. Insert a sturdy plant support, such as a bamboo stake or tomato cage, into the container to provide support as the plant grows. Be mindful not to damage the roots while inserting the support.
- Placement: Place the newly potted seedlings in a location with ample light and proper temperature. Avoid placing them in direct sunlight immediately after transplanting, as it can stress the plants. Gradually acclimate them to outdoor conditions if you plan to move them outside eventually.
Transferring the seedlings to larger containers allows the roots to spread out and access more nutrients and water. This promotes healthy growth, higher fruit yields, and reduces the risk of plants becoming root-bound, which can hinder growth and affect overall plant vigor.
Now that you know how to transplant your tomato seedlings to larger containers, you can continue providing them with care, such as hardening off and eventually transplanting them outdoors for a bountiful harvest.
Hardening off Tomato Seedlings
Hardening off is a crucial step in the process of preparing your tomato seedlings for life outdoors. During this phase, the seedlings are gradually exposed to the outdoor conditions, allowing them to adjust and become more resilient before transplanting them into the garden. Here’s how to harden off your tomato seedlings:
- Timing: Start the hardening off process about a week or two before you plan to transplant the seedlings into the garden. This typically corresponds to when the danger of frost has passed and temperatures are consistently mild.
- Incremental Exposure: Begin by placing the seedlings outdoors in a sheltered location for a few hours each day, preferably during the mild morning or evening hours. Choose a spot that is protected from strong winds and direct sunlight.
- Gradually Increase Exposure: Over the course of 7-10 days, gradually increase the amount of time the seedlings spend outdoors. Extend the duration each day and expose them to slightly more sunlight. This process helps the seedlings acclimate to outdoor temperatures, wind, and direct sunlight.
- Monitor Weather Conditions: Pay attention to the weather forecast during the hardening off period. Avoid exposing the seedlings to extreme weather conditions, such as strong winds, heavy rain, or sudden temperature drops.
- Protect from Cold Weather: If there is a possibility of a late frost or cold snap, take precautions to protect your seedlings. Bring them indoors overnight or cover them with a frost cloth or row cover to shield them from the cold temperatures.
- Observe Seedling Response: During the hardening off process, closely observe the response of your seedlings. Look for signs of stress, such as wilting or curling leaves. If you notice any signs of stress, reduce the duration or intensity of exposure to outdoor conditions to give the seedlings more time to adjust.
- Transplanting: Once your tomato seedlings have successfully gone through the hardening off process, they are ready for transplanting into the garden. Choose a location in your garden that receives at least 6-8 hours of direct sunlight per day and prepare the soil with compost or organic matter before planting the seedlings.
Hardening off gradually exposes your tomato seedlings to the outdoor environment, allowing them to strengthen their stems, develop thicker leaves, and adapt to the elements. This process helps reduce transplant shock and increases the likelihood of successful growth and fruit production.
Now that you understand the importance of hardening off, you can confidently proceed with transplanting your tomato seedlings into the garden, where they will continue to thrive and provide you with a bountiful harvest.
Transplanting Tomato Seedlings Outdoors
Transplanting your tomato seedlings outdoors is an exciting step in the journey of growing your own tomatoes. This process involves safely moving your seedlings from their indoor containers to the garden, where they will continue to grow and produce delicious fruits. Here’s how to transplant your tomato seedlings outdoors:
- Choose the Right Time: Wait until all danger of frost has passed and the soil has warmed before transplanting your tomato seedlings. Typically, this is when temperatures consistently stay above 50°F (10°C) at night.
- Select a Suitable Location: Choose a sunny spot in your garden with well-draining soil. Tomatoes thrive in full sun, so select an area that receives a minimum of 6-8 hours of direct sunlight each day.
- Prepare the Soil: Prior to transplanting, prepare the soil in the planting area by incorporating compost or well-rotted organic matter. This improves soil fertility, drainage, and moisture retention.
- Transplanting Technique: Dig holes in the prepared soil that are slightly larger than the root balls of the seedlings. Carefully remove the seedlings from their containers, making sure to keep the root balls intact. Place each seedling in a hole, burying it up to the first set of true leaves. Gently firm the soil around the base of the seedlings.
- Spacing: Space the tomato plants according to the recommended spacing for the variety you are growing. Generally, tomatoes should be spaced 18-36 inches apart, allowing room for air circulation and ample growth.
- Watering: Water the transplanted seedlings immediately after planting to help settle the soil and eliminate any air pockets around the roots. Provide a thorough, deep watering to encourage the roots to establish in the new soil.
- Support: Tomato plants require support as they grow to prevent the heavy branches from breaking and to keep the fruits off the ground. Install sturdy stakes or cages around each seedling, positioning them carefully to avoid damaging the roots.
- Mulching: Apply a layer of organic mulch, such as straw or wood chips, around the base of the plants. This helps conserve moisture, suppress weeds, and maintain more stable soil temperatures around the roots.
- Regular Care: Once your tomato seedlings are transplanted, continue to provide them with regular care. Monitor soil moisture levels and water when necessary, ensuring the soil remains consistently moist but not soggy. Incorporate fertilizers or organic compost as needed to provide essential nutrients for healthy growth.
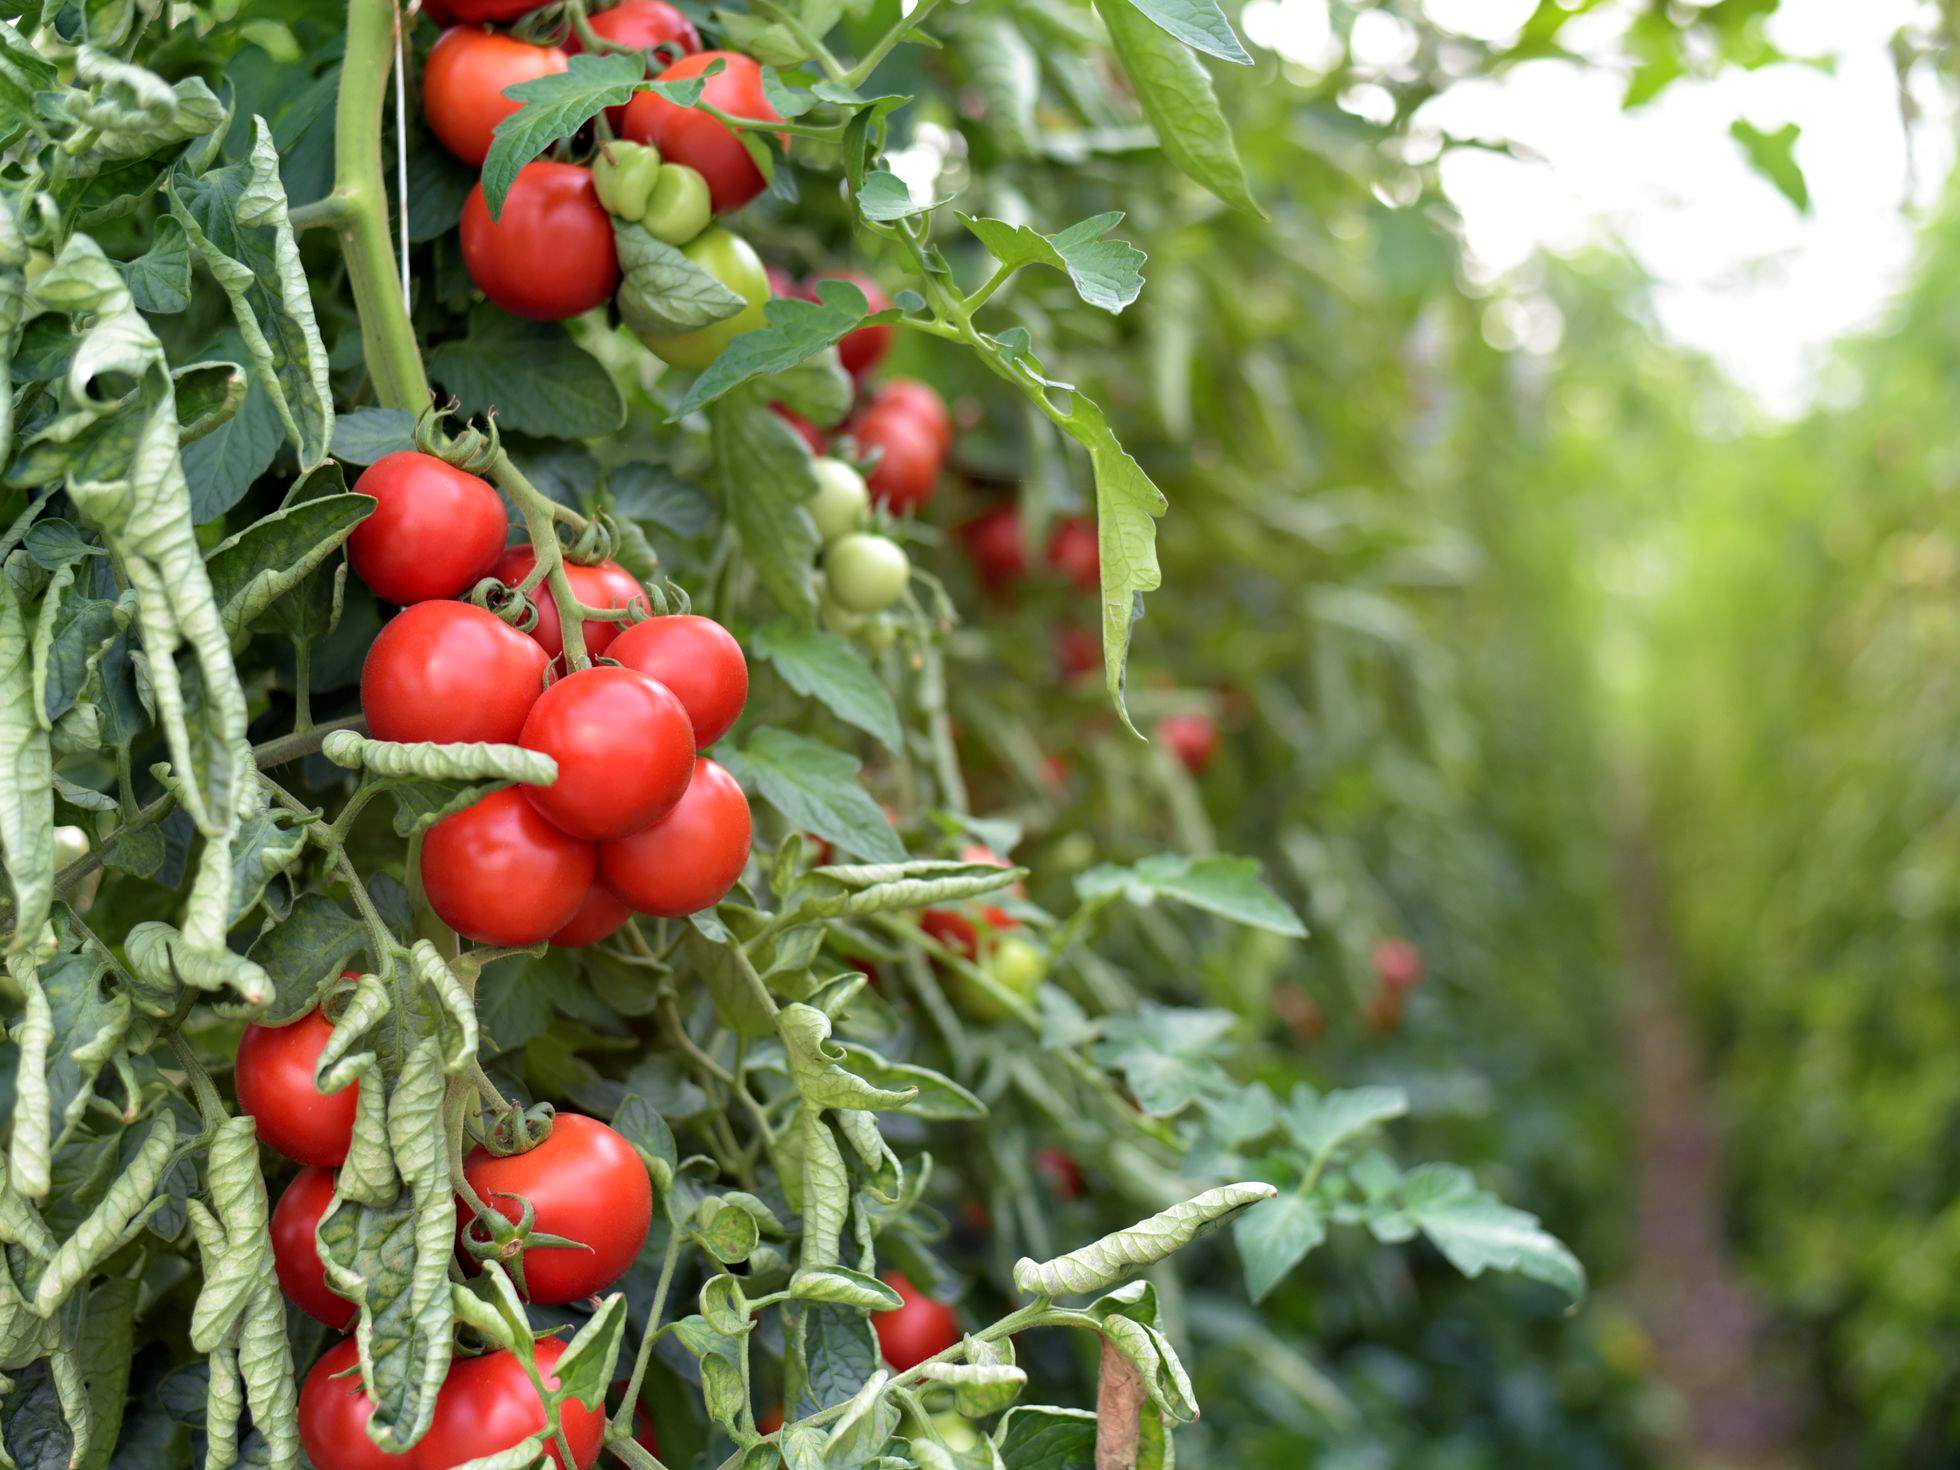
Transplanting your tomato seedlings outdoors marks a significant milestone in the gardening process. With proper care, your seedlings will continue to grow, develop strong root systems, and eventually reward you with an abundant harvest of homegrown tomatoes.
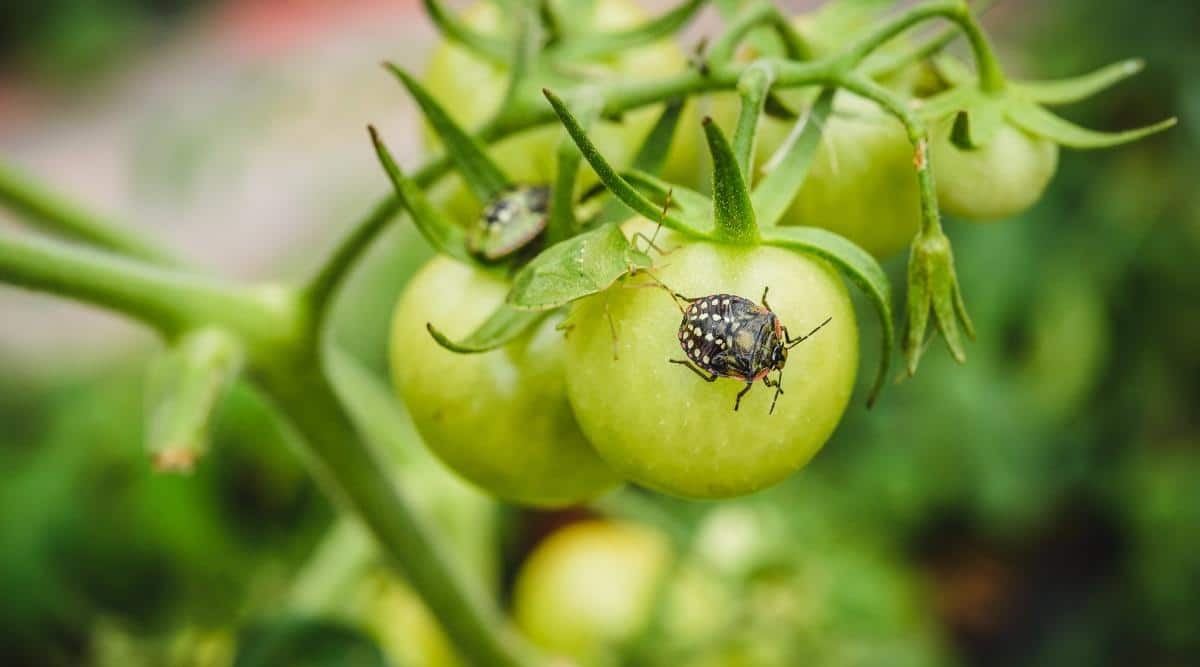
Now that you have successfully transplanted your tomato seedlings, it’s time to maintain consistent care, including regular watering, fertilizing, and monitoring for pests and diseases. With a little patience and dedication, you’ll soon be enjoying the fruits of your labor.
Conclusion
Congratulations! You have completed the journey of planting tomato seeds indoors and successfully transplanting the seedlings outdoors. By starting your tomato plants from seeds, you have gained a deeper appreciation for the growth process and the satisfaction of growing your own food. Throughout this process, you have learned key steps, from choosing the right tomato varieties and containers to preparing the potting mix and providing optimal lighting, temperature, and humidity.
With each step, you have nurtured your seedlings, ensuring they have the best chance of thriving and producing delicious tomatoes. Remember to continue providing proper care, including regular watering, fertilizing, and monitoring for pests and diseases. Keep in mind that each tomato variety may have specific needs, so adjust your care accordingly.
As your tomato plants grow, you will enjoy watching them develop into robust and fruitful plants. Soon enough, you will be able to harvest your very own homegrown tomatoes, filled with flavor and satisfaction. From fresh salads to flavorful sauces, your kitchen will be filled with the delicious bounty of your hard work.
As you continue your journey in edible gardening, don’t be afraid to experiment with new tomato varieties, growing techniques, and recipes. Gardening is both an art and a science, so embrace the opportunity to learn and grow as a gardener. Share your experiences and knowledge with others, and foster a sense of community around the joy of growing your own food.
Remember that with every seed you plant, you contribute to a sustainable and self-sufficient lifestyle. Whether you have a small balcony or a spacious backyard, growing your own tomatoes brings a sense of empowerment and connection to nature. So, continue to cultivate your edible garden, knowing that you are making a positive impact on your health, the environment, and your overall well-being.
Enjoy the journey, savor the flavors, and happy gardening!