Home>Types of Gardening>Ornamental Gardening>How To Germinate Seeds For Hydroponics With Rockwool
Ornamental Gardening
How To Germinate Seeds For Hydroponics With Rockwool
Modified: January 22, 2024
Learn how to germinate seeds for hydroponics using rockwool in this comprehensive guide for ornamental gardening.
(Many of the links in this article redirect to a specific reviewed product. Your purchase of these products through affiliate links helps to generate commission for Chicagolandgardening.com, at no extra cost. Learn more)
Table of Contents
- Introduction
- What is Rockwool?
- Benefits of Using Rockwool for Germinating Seeds in Hydroponics
- Step 1: Soaking the Rockwool
- Step 2: Preparing the Seed
- Step 3: Planting the Seed in Rockwool
- Step 4: Providing the Ideal Conditions for Germination
- Step 5: Transferring the Germinated Seed to the Hydroponic System
- Conclusion
Introduction
Welcome to the world of hydroponics, where gardening goes beyond the traditional soil-based methods. Hydroponics is a revolutionary approach to growing plants, using water-based nutrient solutions instead of soil. It offers numerous advantages, including faster growth, higher yields, and the ability to grow plants in any season or climate. One essential aspect of hydroponics is germinating seeds, and in this article, we will explore how to germinate seeds for hydroponics using rockwool.
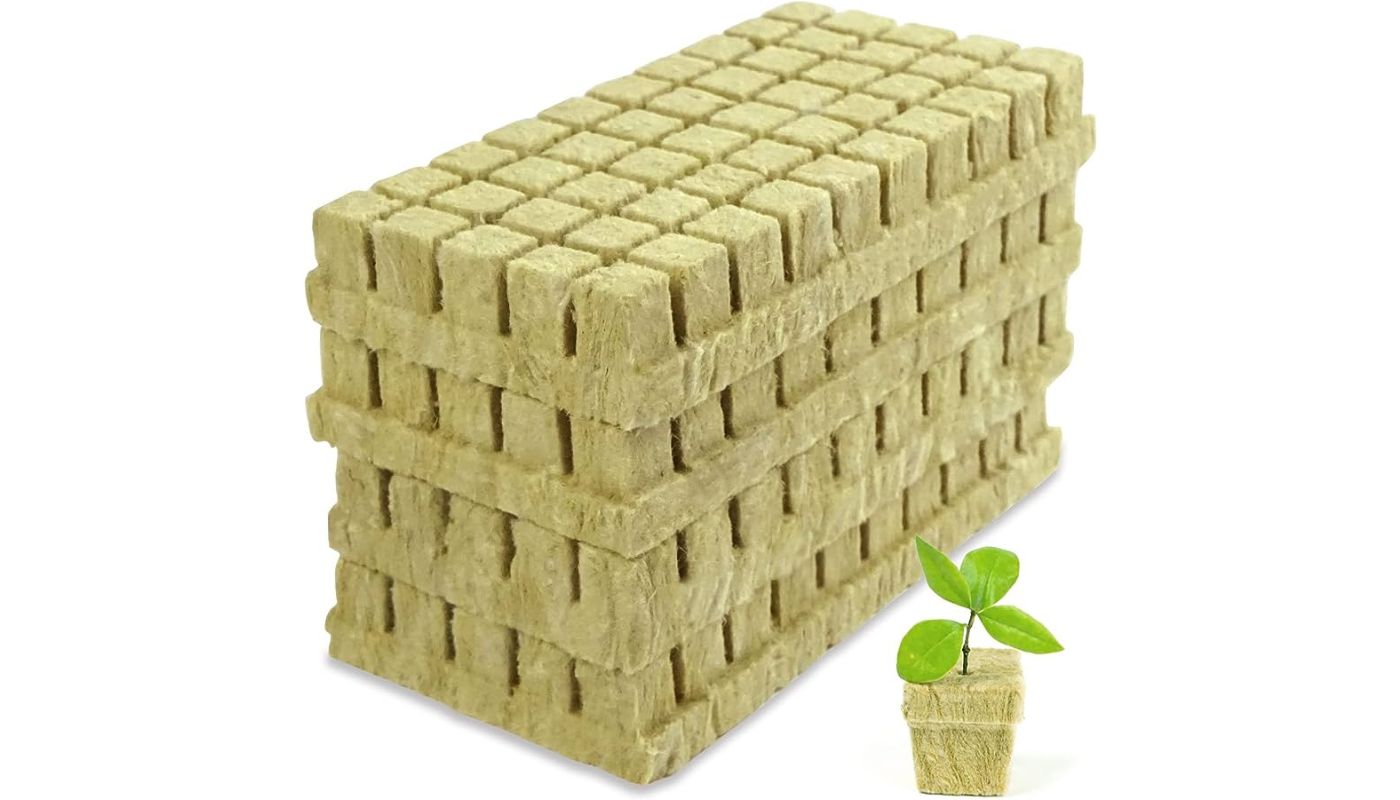
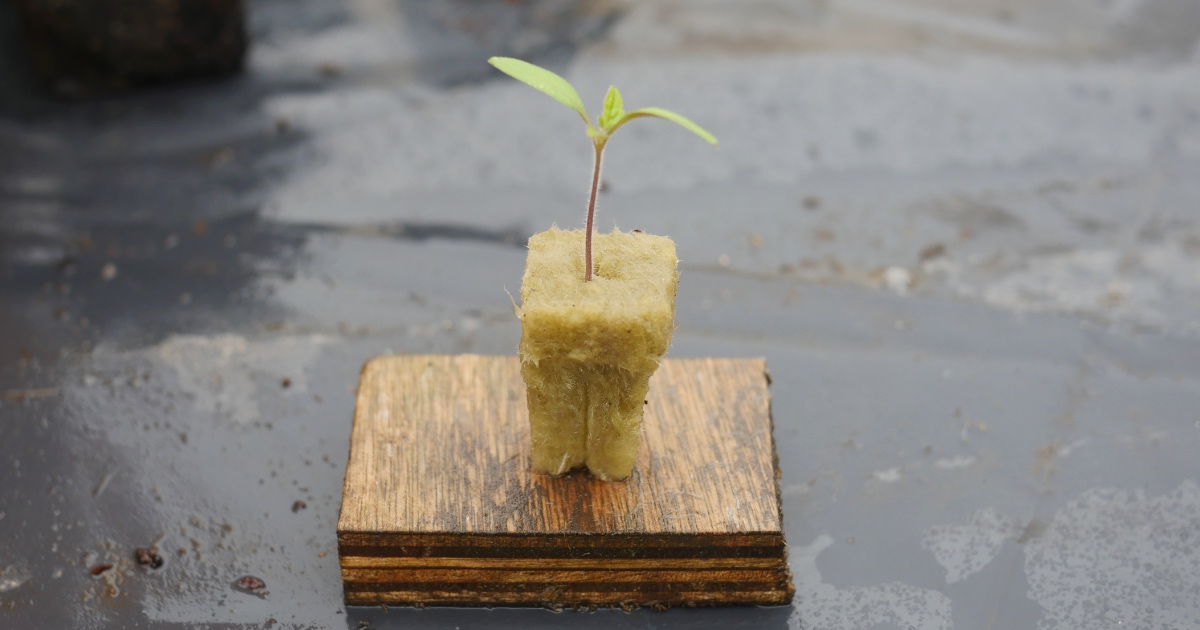
Rockwool, also known as stone wool or mineral wool, is a popular germination medium in hydroponics. It is made from molten rock, primarily basalt or limestone, and is spun into fibers to create a lightweight and highly absorbent material. Its structure provides excellent aeration and moisture retention, making it ideal for seed germination.
Using rockwool for germinating seeds in hydroponics offers several benefits. Firstly, it provides a sterile and disease-free environment for the seeds, reducing the risk of infections or pests. Additionally, rockwool’s pH-neutral nature ensures that the seeds receive the optimal nutrient availability, supporting healthy growth. Its ability to hold water helps maintain a consistent moisture level, promoting successful germination. Furthermore, rockwool is reusable, making it a cost-effective choice for long-term hydroponic gardening.
If you’re new to hydroponics or just starting out with seed germination, this article will guide you through the step-by-step process of using rockwool. By following these instructions, you’ll be well on your way to growing vibrant and healthy plants in your hydroponic system.
What is Rockwool?
Rockwool, also known as stone wool or mineral wool, is a versatile and widely-used material in various industries, including horticulture and hydroponics. It is a man-made substance created by melting and spinning natural rock fibers. The most common rocks used in rockwool production are basalt and limestone, chosen for their high melting points and abundance.
The process of manufacturing rockwool involves melting the rocks at extremely high temperatures, then spinning them into thin fibers. These fibers are then bonded together to form different products, including insulation materials for construction and, in our case, growing mediums for hydroponics. The result is a lightweight and porous material with excellent moisture retention and aeration properties.
In the realm of hydroponics, rockwool serves as an ideal medium for seed germination. Its unique qualities make it a popular choice among gardeners and commercial growers alike. Rockwool’s structure allows for excellent water distribution and retention, ensuring consistent moisture levels for optimum seed germination. The fibers also provide ample oxygenation to the seeds, promoting healthy root development and preventing root rot.
One key advantage of rockwool is its pH neutrality. This means that it has a balanced acidity level, which is crucial for plant growth. Unlike some other growing mediums, rockwool does not alter the pH of the nutrient solution, allowing for precise control of the plant’s nutrient intake. This enables growers to provide the ideal conditions for their plants’ development, leading to faster and healthier growth.
Furthermore, rockwool is an inert material, meaning it does not contain any nutrients or substances that could affect plant growth. This makes it a clean and sterile medium, minimizing the risk of pests, diseases, and other contaminants that can hinder seed germination and plant growth. Moreover, rockwool is also reusable, making it an environmentally friendly choice for hydroponic systems.
In summary, rockwool is a synthetic growing medium made from natural rock fibers. It offers excellent water retention, aeration, and pH neutrality, making it an ideal material for germinating seeds in hydroponics. Its sterile and reusable nature adds to its appeal, making it a favorite medium among hydroponic gardeners. With its numerous benefits, rockwool is a valuable tool in hydroponic gardening and an essential component in successful seed germination.
Benefits of Using Rockwool for Germinating Seeds in Hydroponics
Rockwool is a popular choice for germinating seeds in hydroponics due to its numerous benefits. Let’s explore some of the advantages of using rockwool as a germination medium:
- Excellent Moisture Retention: Rockwool has a high water-holding capacity, ensuring that seeds have a constant supply of moisture for germination. This helps prevent dehydration and provides the ideal conditions for successful seed sprouting.
- Optimal Aeration: The fibrous structure of rockwool allows for proper air circulation around the seeds, ensuring they receive enough oxygen for healthy root development. This prevents suffocation and promotes robust seedling growth.
Rockwool has a neutral pH, which means it does not alter the pH levels of the nutrient solution in hydroponic systems. This enables precise control over the nutrient uptake by the germinating seeds, leading to optimal growth and development. - Sterile Growing Environment: Rockwool is an inert and sterile material, free from pests, diseases, and weed seeds. This reduces the risk of contamination and provides a clean environment for seeds to germinate. It eliminates competition for nutrients and ensures a higher germination success rate.
- Reusable: Rockwool can be reused for multiple cycles of seed germination, making it a cost-effective choice for hydroponic gardeners. After harvesting the plants, the rockwool can be cleaned and sterilized, ready to be used again for the next batch of seeds.
- Lightweight and Easy to Handle: Rockwool is a lightweight material that is easy to work with. It comes in various sizes and shapes, making it adaptable to different hydroponic setups and seedling trays. Its lightweight nature also simplifies transplanting seedlings to the main hydroponic system.
- Versatility: Rockwool can be used with a wide range of plant species, making it a versatile choice for germinating seeds in hydroponics. Whether you’re growing leafy greens, herbs, or even flowering plants, rockwool provides the necessary support and environment for successful seed germination.
The benefits listed above make rockwool a popular and reliable choice for hydroponic gardeners when it comes to germinating seeds. Its moisture retention, aeration capabilities, and pH neutrality create an ideal environment for seeds to sprout and develop into healthy seedlings. Additionally, its sterility and reusability contribute to a clean and cost-effective germination process. With rockwool, you can ensure consistent and successful seed germination, setting the stage for a thriving hydroponic garden.
Step 1: Soaking the Rockwool
Before using rockwool for germinating seeds in hydroponics, it is essential to properly prepare the medium. Soaking the rockwool helps ensure that it is fully saturated with water, creating an ideal environment for seed germination. Follow these steps to soak the rockwool:
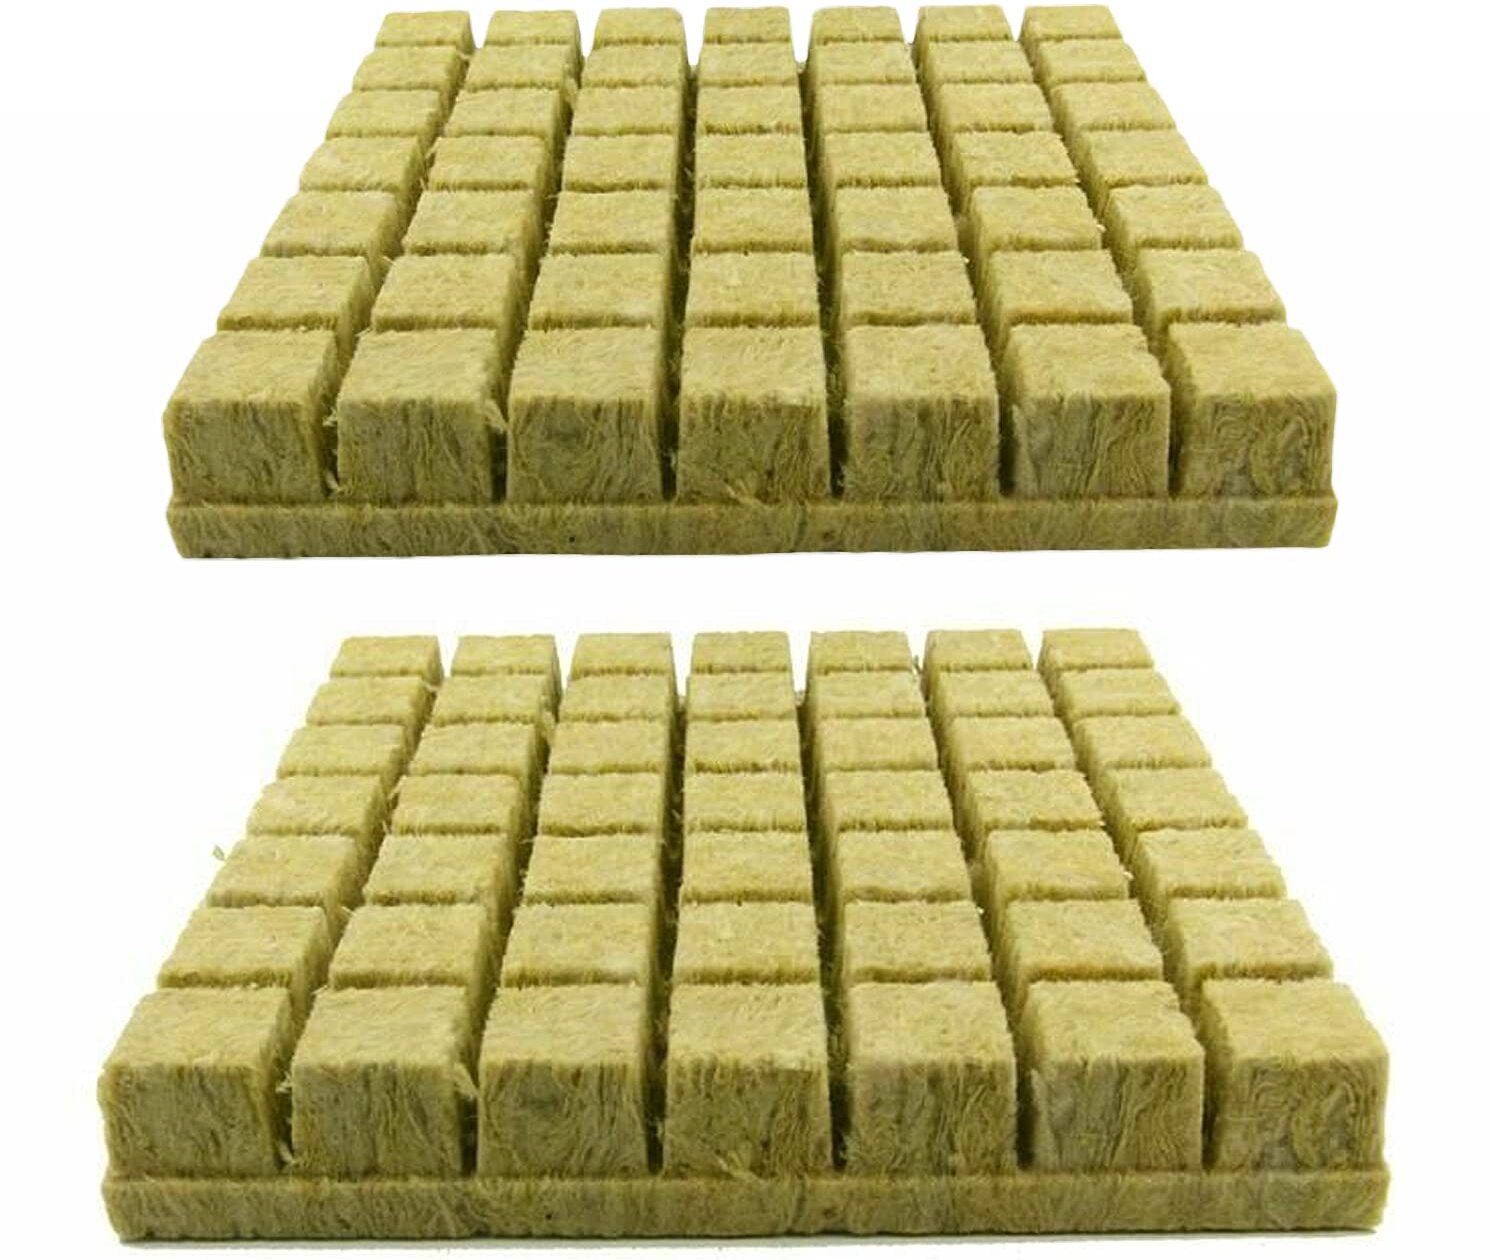
- Choose the Right Size: Select rockwool cubes or slabs that are appropriate for the size of your seeds or seedlings. Cubes are typically used for smaller seeds, while slabs are better suited for larger seeds or transplants.
- Preparation: Prior to soaking the rockwool, rinse it with clean water to remove any dust or loose fibers. This helps create a clean and sterile environment for the seeds.
- Immersing the Rockwool: Place the rockwool cubes or slabs in a tray or container that is large enough to accommodate them. Fill the tray with clean, pH-balanced water, preferably at room temperature. Submerge the rockwool completely in the water, allowing it to soak for about 30 minutes to an hour.
- Avoid Over-Soaking: It is important not to over-soak the rockwool, as excessive water retention can lead to oxygen deprivation and hinder seed germination. After the recommended soaking time, remove the rockwool from the water and allow any excess to drain off.
- Moisture Check: Gently squeeze the rockwool to check for moisture levels. It should be evenly moist throughout, without excessive dripping or dry spots. Adjust the soaking time accordingly to achieve the desired moisture content.
- Reusing Soaked Rockwool: If you are reusing rockwool from a previous crop, it is important to clean and sterilize it before soaking. Rinse the used rockwool thoroughly to remove any debris or residual nutrients. Then, soak it in a clean water solution with a mild disinfectant for a few hours. Rinse it again with water to remove any traces of disinfectant before proceeding with the soaking process.
Soaking the rockwool prior to seed germination helps ensure that it is properly hydrated and ready to provide the necessary moisture and support for the seeds. By following these steps, you can start your hydroponic gardening journey on the right foot, setting the stage for successful seed germination and healthy plant growth.
Step 2: Preparing the Seed
In order to maximize the chances of successful germination, it is important to properly prepare the seeds before planting them in rockwool for hydroponics. Follow these steps to ensure the seeds are adequately prepared:
- Seed Selection: Choose high-quality seeds from reputable sources. Look for seeds that are fresh, viable, and suited to your desired plant variety. It’s also essential to consider the specific requirements of the plant, such as light preferences, temperature ranges, and germination times.
- Seed Treatment (optional): Some seeds may benefit from pre-germination treatments to enhance germination rates. This can include scarification (scratching the seed coat) or soaking the seeds in water or a mild hormone solution. Research the specific requirements for your chosen plant species to determine if any pre-germination treatments are recommended.
- Hydration: If your seeds require pre-soaking or hydration, follow the recommended instructions. Some seeds benefit from soaking in water for a few hours or even overnight before planting.
- Seed Surface Cleaning (optional): In some cases, seeds may have a protective coating or enzyme inhibitors that can hinder germination. To improve germination rates, you can gently rub the seeds with fine sandpaper or a nail file to remove any coatings or inhibitors. This process is commonly referred to as scarification.
- Timing: Consider the optimal time to plant your seeds. Some seeds require a period of stratification, which involves subjecting them to specific temperature conditions to break dormancy. Research the germination requirements for your selected plant species to determine if any specific timing or conditions are necessary.
- Labeling: It’s crucial to label the seeds to keep track of plant varieties and planting dates. Use plant labels or a marker to note down important information on the seed packet or a separate label. Clear labeling helps avoid confusion and allows you to monitor the progress of each plant.
Properly preparing the seeds before planting them in rockwool sets the stage for successful germination and healthy plant growth. Following these steps ensures that the seeds are in optimal condition to take advantage of the rich and nurturing environment provided by the rockwool medium.
Step 3: Planting the Seed in Rockwool
Once the rockwool is soaked and the seeds are prepared, it’s time to plant the seeds in the rockwool for germination in your hydroponic system. Follow these steps to ensure a successful planting process:
- Selecting the Seed Site: Identify a suitable spot on the rockwool for planting the seed. Gently press your fingertip or a small tool into the rockwool to create a small indentation, approximately 1/4 to 1/2 inch deep. This provides a secure and snug spot for the seed to rest.
- Placing the Seed: Place one seed into each indentation, ensuring they are centered and positioned at the appropriate depth. This may vary depending on the seed variety, so refer to the seed packet or planting instructions for the recommended planting depth. For smaller seeds, you can scatter them evenly over the surface of the rockwool.
- Covering the Seed (optional): Some seeds require darkness to germinate, while others require light. If your seed variety prefers darkness, lightly cover the seed with a thin layer of moist rockwool or vermiculite to create a dark environment. If your seed prefers light, leave the seed uncovered.
- Spacing: Maintain appropriate spacing between seeds to allow for proper air circulation and growth. This will help prevent overcrowding and competition for nutrients as the seedlings develop. Refer to the recommended spacing guidelines for your specific plant species.
- Gentle Pressing: After placing the seed in the indentation, lightly press down on the rockwool surface to ensure good seed-to-medium contact. This promotes effective water absorption and seed germination.
- Maintaining Moisture: After planting the seeds, it is important to keep the rockwool consistently moist. Check the moisture levels regularly and if needed, lightly mist the rockwool with clean water to maintain proper hydration. Avoid over-watering, as excessive moisture can lead to rotting or fungal growth.
By planting the seeds correctly in the rockwool, you create an ideal environment for germination and seedling development. Each seed has its own requirements, so it’s important to follow the specific instructions provided for the plant species you are growing. With proper care and attention, you are on your way to witnessing the wonder of seeds sprouting and seedlings emerging from the rockwool in your hydroponic system.
Step 4: Providing the Ideal Conditions for Germination
Creating the ideal conditions for seed germination is crucial for the successful growth of your hydroponic plants. By providing the appropriate environment, you can maximize germination rates and ensure healthy seedling development. Follow these steps to provide the ideal conditions for germination:
- Temperature: Maintain the optimal temperature for seed germination. Different plant species have varying temperature preferences, so refer to the seed packet or plant-specific guidelines. Generally, a temperature range of 70-75°F (21-24°C) is suitable for most seeds to germinate successfully.
- Humidity: Seeds require an adequate level of moisture to germinate. Maintain a humid environment by covering the rockwool tray with a humidity dome or placing it in a propagator. This helps retain moisture and create a microclimate conducive to germination. Monitor the humidity levels and adjust as needed to prevent excessive drying or condensation.
- Light: Determine if your seeds require light for germination or if they prefer darkness. Some seeds need exposure to light to trigger germination, while others prefer darkness. Check the seed packet or consult plant-specific resources for light requirements. If light is needed, place the rockwool tray under grow lights or in a well-lit area.
- Air Circulation: Proper air circulation is essential to prevent the development of mold or fungal growth. Ensure that there is adequate ventilation around the germination area while maintaining a stable environment. Avoid placing the germination tray in a drafty area that may cause temperature fluctuations.
- Monitoring: Regularly check the rockwool for moisture levels, ensuring it remains moist but not overly saturated. Monitor the temperature, humidity, and light conditions to ensure they are within the recommended range for the specific plant species. Keep a close eye on the germination progress and make any necessary adjustments to maintain optimal conditions.
- Patience: Remember that germination times can vary depending on the plant species. Some seeds may sprout within a few days, while others may take several weeks. Be patient and resist the urge to disturb the seeds or prematurely remove them from the germination environment. Provide consistent and optimal conditions, and the seeds will germinate at their own pace.
By providing the ideal conditions for germination, you create an environment that encourages seeds to sprout and seedlings to emerge vigorously. Understanding the specific requirements of your plant species and maintaining consistent monitoring will result in high germination rates and healthy early-stage growth. Now, sit back and watch as your seeds transform into thriving seedlings in your hydroponic system.
Step 5: Transferring the Germinated Seed to the Hydroponic System
Once the seeds have germinated and started to develop into healthy seedlings, it’s time to transfer them from the rockwool into your hydroponic system. Follow these steps to ensure a smooth and successful transplanting process:
- Prepare the Hydroponic System: Ensure that your hydroponic system is clean and set up with the appropriate nutrient solution for the specific plant variety you are growing. Double-check that all necessary equipment, such as air pumps or water pumps, are functioning properly.
- Gently Remove the Seedling from the Rockwool: Carefully remove the seedlings from the rockwool, ensuring that the delicate roots remain intact. You can use a pair of tweezers or your fingers to carefully loosen and lift the seedlings from the rockwool cubes. Be gentle to avoid damaging the fragile roots.
- Prepare the Planting Site: Identify the desired location in your hydroponic system to plant the seedlings. This may involve placing them in net pots, growing channels, or other appropriate containers. Ensure that the planting site is securely positioned in the hydroponic system and can support the weight of the seedlings.
- Securely Plant the Seedling: Gently place the seedling’s roots into the planting site, ensuring that they are fully covered with the hydroponic medium (such as clay pebbles or perlite). Gently press the medium around the roots to provide stability. Be careful not to damage the delicate roots during this process.
- Water the Transplanted Seedlings: After planting the seedlings, provide them with a thorough watering using the hydroponic nutrient solution. This helps settle the seedlings into their new growing environment and ensures that they have immediate access to the necessary nutrients. Avoid overwatering, as this can lead to waterlogged roots and hinder plant growth.
- Monitor and Adjust: Keep a close eye on the transplanted seedlings in their new hydroponic environment. Monitor the water and nutrient levels, pH, and overall plant health. Make any necessary adjustments to ensure optimal growing conditions. Provide regular care, such as maintaining proper lighting, temperature, and nutrient levels, to support the healthy growth of the transplanted seedlings.
Transferring the germinated seedlings from the rockwool into your hydroponic system marks a significant milestone in your hydroponic gardening journey. By following these steps carefully, you ensure that the delicate roots are handled with care and that the seedlings are planted securely in the hydroponic medium. From here, observe and tend to your seedlings as they continue to develop and flourish in the hydroponic system, ultimately leading to bountiful harvests of your favorite crops.
Conclusion
Congratulations on learning the essential steps for germinating seeds in hydroponics using rockwool! By following these guidelines, you can create an optimal environment for seed germination, ensuring healthy and thriving seedlings for your hydroponic garden.
Rockwool has proven to be an excellent germination medium in hydroponics, providing benefits such as moisture retention, aeration, and pH neutrality. It offers a sterile and reusable option, reducing the risk of diseases and pests while being cost-effective in the long run.
Remember, the key steps in using rockwool for seed germination include soaking the rockwool, preparing the seeds, planting them in the rockwool, providing ideal germination conditions, and then transferring the germinated seedlings to the hydroponic system.
Throughout the process, it’s important to carefully monitor and adjust factors such as temperature, humidity, light, air circulation, and moisture levels. By ensuring these conditions are maintained, you give your seeds the best chance of successful germination and healthy seedling development.
Hydroponic gardening offers you the opportunity to grow plants all year round, regardless of the outside climate. It also allows you to maximize space and resources while achieving higher yields. With the right techniques and knowledge, you can enjoy the benefits of fresh and nutritious homegrown produce.
As you continue your hydroponic gardening journey, remember to explore and experiment with different plant varieties, nutrient solutions, and hydroponic systems. Each plant species may have unique requirements, so adapt your approach to suit their specific needs.
Now, armed with the knowledge of rockwool seed germination, go forth and plant your favorite vegetables, herbs, and flowers in your hydroponic system. Embrace the beauty and productivity of this innovative gardening method, and enjoy the pleasures of cultivating your very own thriving hydroponic garden!