Home>Gardening Techniques>DIY Projects>How To Build A Mini Golf Course In Your Backyard
DIY Projects
How To Build A Mini Golf Course In Your Backyard
Published: August 5, 2023
Learn how to create your very own DIY mini golf course right in your backyard with our step-by-step guide. Get ready for endless fun and entertainment with this exciting DIY project!
(Many of the links in this article redirect to a specific reviewed product. Your purchase of these products through affiliate links helps to generate commission for Chicagolandgardening.com, at no extra cost. Learn more)
Table of Contents
- Introduction
- Step 1: Planning and Design
- Step 2: Gathering Materials and Tools
- Step 3: Clearing and Leveling the Area
- Step 4: Building the Foundation
- Step 5: Installing the Putting Surface
- Step 6: Creating Obstacles and Hazards
- Step 7: Adding Decorative Features
- Step 8: Installing Lighting (Optional)
- Step 9: Maintenance and Upkeep
- Conclusion
Introduction
Welcome to the exciting world of mini golf! Whether you’re a golf enthusiast looking to practice your short game or simply want to create a fun and engaging activity for your family and friends, building a mini golf course in your backyard can be a rewarding and enjoyable project. Imagine having your own little oasis where you can challenge your putting skills and unleash your creativity by designing unique obstacles and hazards.
Building a mini golf course may seem like a daunting task, but with proper planning and the right materials, you can turn your backyard into a miniature golf paradise. In this article, we will guide you through the step-by-step process of building your own mini golf course, from planning and design to installation and maintenance.
Not only will a mini golf course add value and entertainment to your home, but it also provides an opportunity for quality time with family and friends. It’s a great way to disconnect from technology and enjoy some outdoor fun. Plus, designing and building your own course allows you to customize it to your preferences and skill level.
Whether you’re a seasoned DIY enthusiast or a beginner, this guide will provide you with all the information you need to create a mini golf course that will impress and entertain everyone. So, let’s tee off and get started on this exciting journey of creating your very own backyard mini golf course!
Step 1: Planning and Design
The first step in building your backyard mini golf course is to plan and design your layout. This is where your creativity can shine as you envision the various holes and obstacles that will make up your course. Here are some considerations to keep in mind during the planning and design phase:
- Space: Assess the available space in your backyard and determine how many holes you can comfortably accommodate. Consider factors such as the shape of your yard, any existing landscaping or structures, and the overall size of your desired course.
- Theme: Decide on a theme or concept for your mini golf course. This can be anything from a tropical paradise to a haunted graveyard. The theme will guide your design choices and add an element of fun and cohesion to the overall experience.
- Hole Layout: Sketch out the layout of each hole, including the position of the tee-off area, the path of the ball, and the location of obstacles and hazards. Experiment with different configurations to ensure a good flow and variety throughout the course.
- Obstacles and Hazards: Brainstorm creative and challenging obstacles to incorporate into your course. From windmills and tunnels to water features and ramps, the possibilities are endless. Consider the level of difficulty you want to provide and balance it with fun and accessibility.
- Materials: Begin researching and gathering the materials you will need. This may include synthetic turf for the putting surfaces, plywood for constructing obstacles, PVC pipes for tunnels, and various decorative elements to enhance the theme of your course.
Remember, the planning and design phase is your opportunity to bring your vision to life, so take your time to ensure you’re satisfied with the overall layout and theme of your mini golf course. Once you have finalized your plans, you can proceed to the next step of gathering materials and tools.
Step 2: Gathering Materials and Tools
Now that you have finalized your mini golf course design, it’s time to gather all the necessary materials and tools. Here’s a list of items you will need:
- Synthetic turf: Purchase enough synthetic turf to cover the putting surfaces of your mini golf course. Measure the area of each hole and add a little extra for trimming and fitting. Look for high-quality artificial grass that resembles the texture and appearance of real grass.
- Plywood or boards: Use plywood to construct the obstacles and hazards for your course. Cut the plywood into various shapes and sizes, depending on your design plans. You may also need boards for creating ramps or raised platforms.
- PVC pipes: PVC pipes can be used to create tunnels or obstacles that the golf ball can pass through. Measure and cut the PVC pipes to the desired lengths and angles, ensuring they are secure and stable.
- Decorative elements: Enhance the theme of your mini golf course with decorative elements such as rocks, plants, statues, or signage. These elements will add visual interest and bring your course to life.
- Tools: Gather a variety of tools such as a circular saw, jigsaw, hammer, drill, screws, measuring tape, and level. These tools will be essential for constructing the obstacles, securing the turf, and any other necessary tasks.
Make a comprehensive shopping list and visit your local home improvement stores or search online for the best deals on the materials and tools you need. Consider checking with local mini golf facilities or courses to see if they have any used materials or equipment available for purchase.
As you gather your materials, keep your design plans in mind to ensure that everything will come together cohesively. Once you have all the necessary items, you’re ready to move on to the next step of clearing and leveling the area where your mini golf course will be installed.
Step 3: Clearing and Leveling the Area
Before you can begin building your mini golf course, it’s essential to clear and level the area where the course will be installed. This step ensures a smooth and even playing surface. Here’s how to accomplish this:
- Remove any existing vegetation: Start by clearing away any grass, weeds, or bushes from the area. Use a lawn mower, weed eater, or hand tools to make the process more manageable. It’s important to have a clean slate to work with.
- Smooth out the soil: Once the area is clear, use a shovel or a rake to level out the soil. Remove any large rocks, roots, or debris that may obstruct the surface. Take your time to ensure an even and flat playing area.
- Compact the soil: To create a stable foundation for your mini golf course, compact the soil using a lawn roller or hand tamper. This step will help prevent uneven settling and improve the longevity of your course.
- Consider drainage: If you live in an area with heavy rainfall, it’s important to plan for proper drainage on your mini golf course. Grade the area slightly to allow water to flow away from the playing surface. You can also install underground drains or create swales to direct water runoff.
It’s crucial to take your time with this step, as a well-prepared surface will greatly enhance the performance and durability of your mini golf course. Once you have cleared and leveled the area, you’re ready to move on to the next step of building the foundation.
Step 4: Building the Foundation
The foundation of your mini golf course is vital for stability and longevity. It is important to create a solid base to support the synthetic turf and ensure a smooth playing surface. Here’s how you can build the foundation:
- Mark the perimeter: Use stakes and string to mark the boundaries of each hole and the overall layout of the course. This will serve as a guide for building the foundation accurately.
- Add a layer of crushed stone: Start by spreading a layer of crushed stone or gravel over the marked area. This will help with drainage and create a stable base for the foundation. Use a rake or a shovel to evenly distribute the crushed stone and ensure a consistent thickness.
- Compact the crushed stone: Use a plate compactor or a hand tamper to firmly compact the crushed stone. This step is crucial for creating a solid and level base. Move the compactor or tamper in a back-and-forth motion across the entire area until the crushed stone is compacted and stable.
- Add a layer of sand: Once the crushed stone is compacted, spread a layer of sand over the entire area. The sand layer will provide a smooth surface for laying the synthetic turf. Use a rake or a board to level the sand layer and achieve an even thickness.
- Compact the sand: Similar to the crushed stone, compact the sand layer using a plate compactor or a hand tamper. This will help create a level surface, remove any air pockets, and ensure stability.
It’s essential to periodically check the levelness of the foundation using a level tool and make any necessary adjustments. A properly built and leveled foundation will contribute to the overall quality and playability of your mini golf course. Once the foundation is in place, you can proceed to the next step of installing the putting surface.
Step 5: Installing the Putting Surface
Now that you have built a solid foundation, it’s time to install the putting surface of your mini golf course. The putting surface is where players will aim and putt their golf balls towards the holes. Follow these steps to install the putting surface:
- Roll out the synthetic turf: Start by unrolling the synthetic turf over the prepared foundation. Position it carefully to ensure a snug fit and align it with the markings of each hole. Make any necessary adjustments to achieve a smooth and even surface.
- Trim and secure the turf: Use a utility knife to trim any excess turf around the edges of each hole, ensuring a clean and tidy appearance. Secure the edges of the turf using landscape spikes or nails. Space the spikes or nails evenly to hold the turf in place.
- Smooth out the turf: Use a broom or a power brush to gently brush the turf and remove any wrinkles or visible seams. This step will help achieve a visually appealing and consistent putting surface for optimal play.
- Add fringe turf (optional): If you want to enhance the aesthetics and functionality of your mini golf course, you can add fringe turf around the edges of the putting surface. This will create a defined border and a seamless transition between the green and the surrounding area.
Installing the putting surface requires attention to detail and precision to ensure a professional-looking and playable area. Take your time during this step to ensure a high-quality finish. Once the putting surface is installed, you can move on to the next step of creating obstacles and hazards for added challenge and excitement.
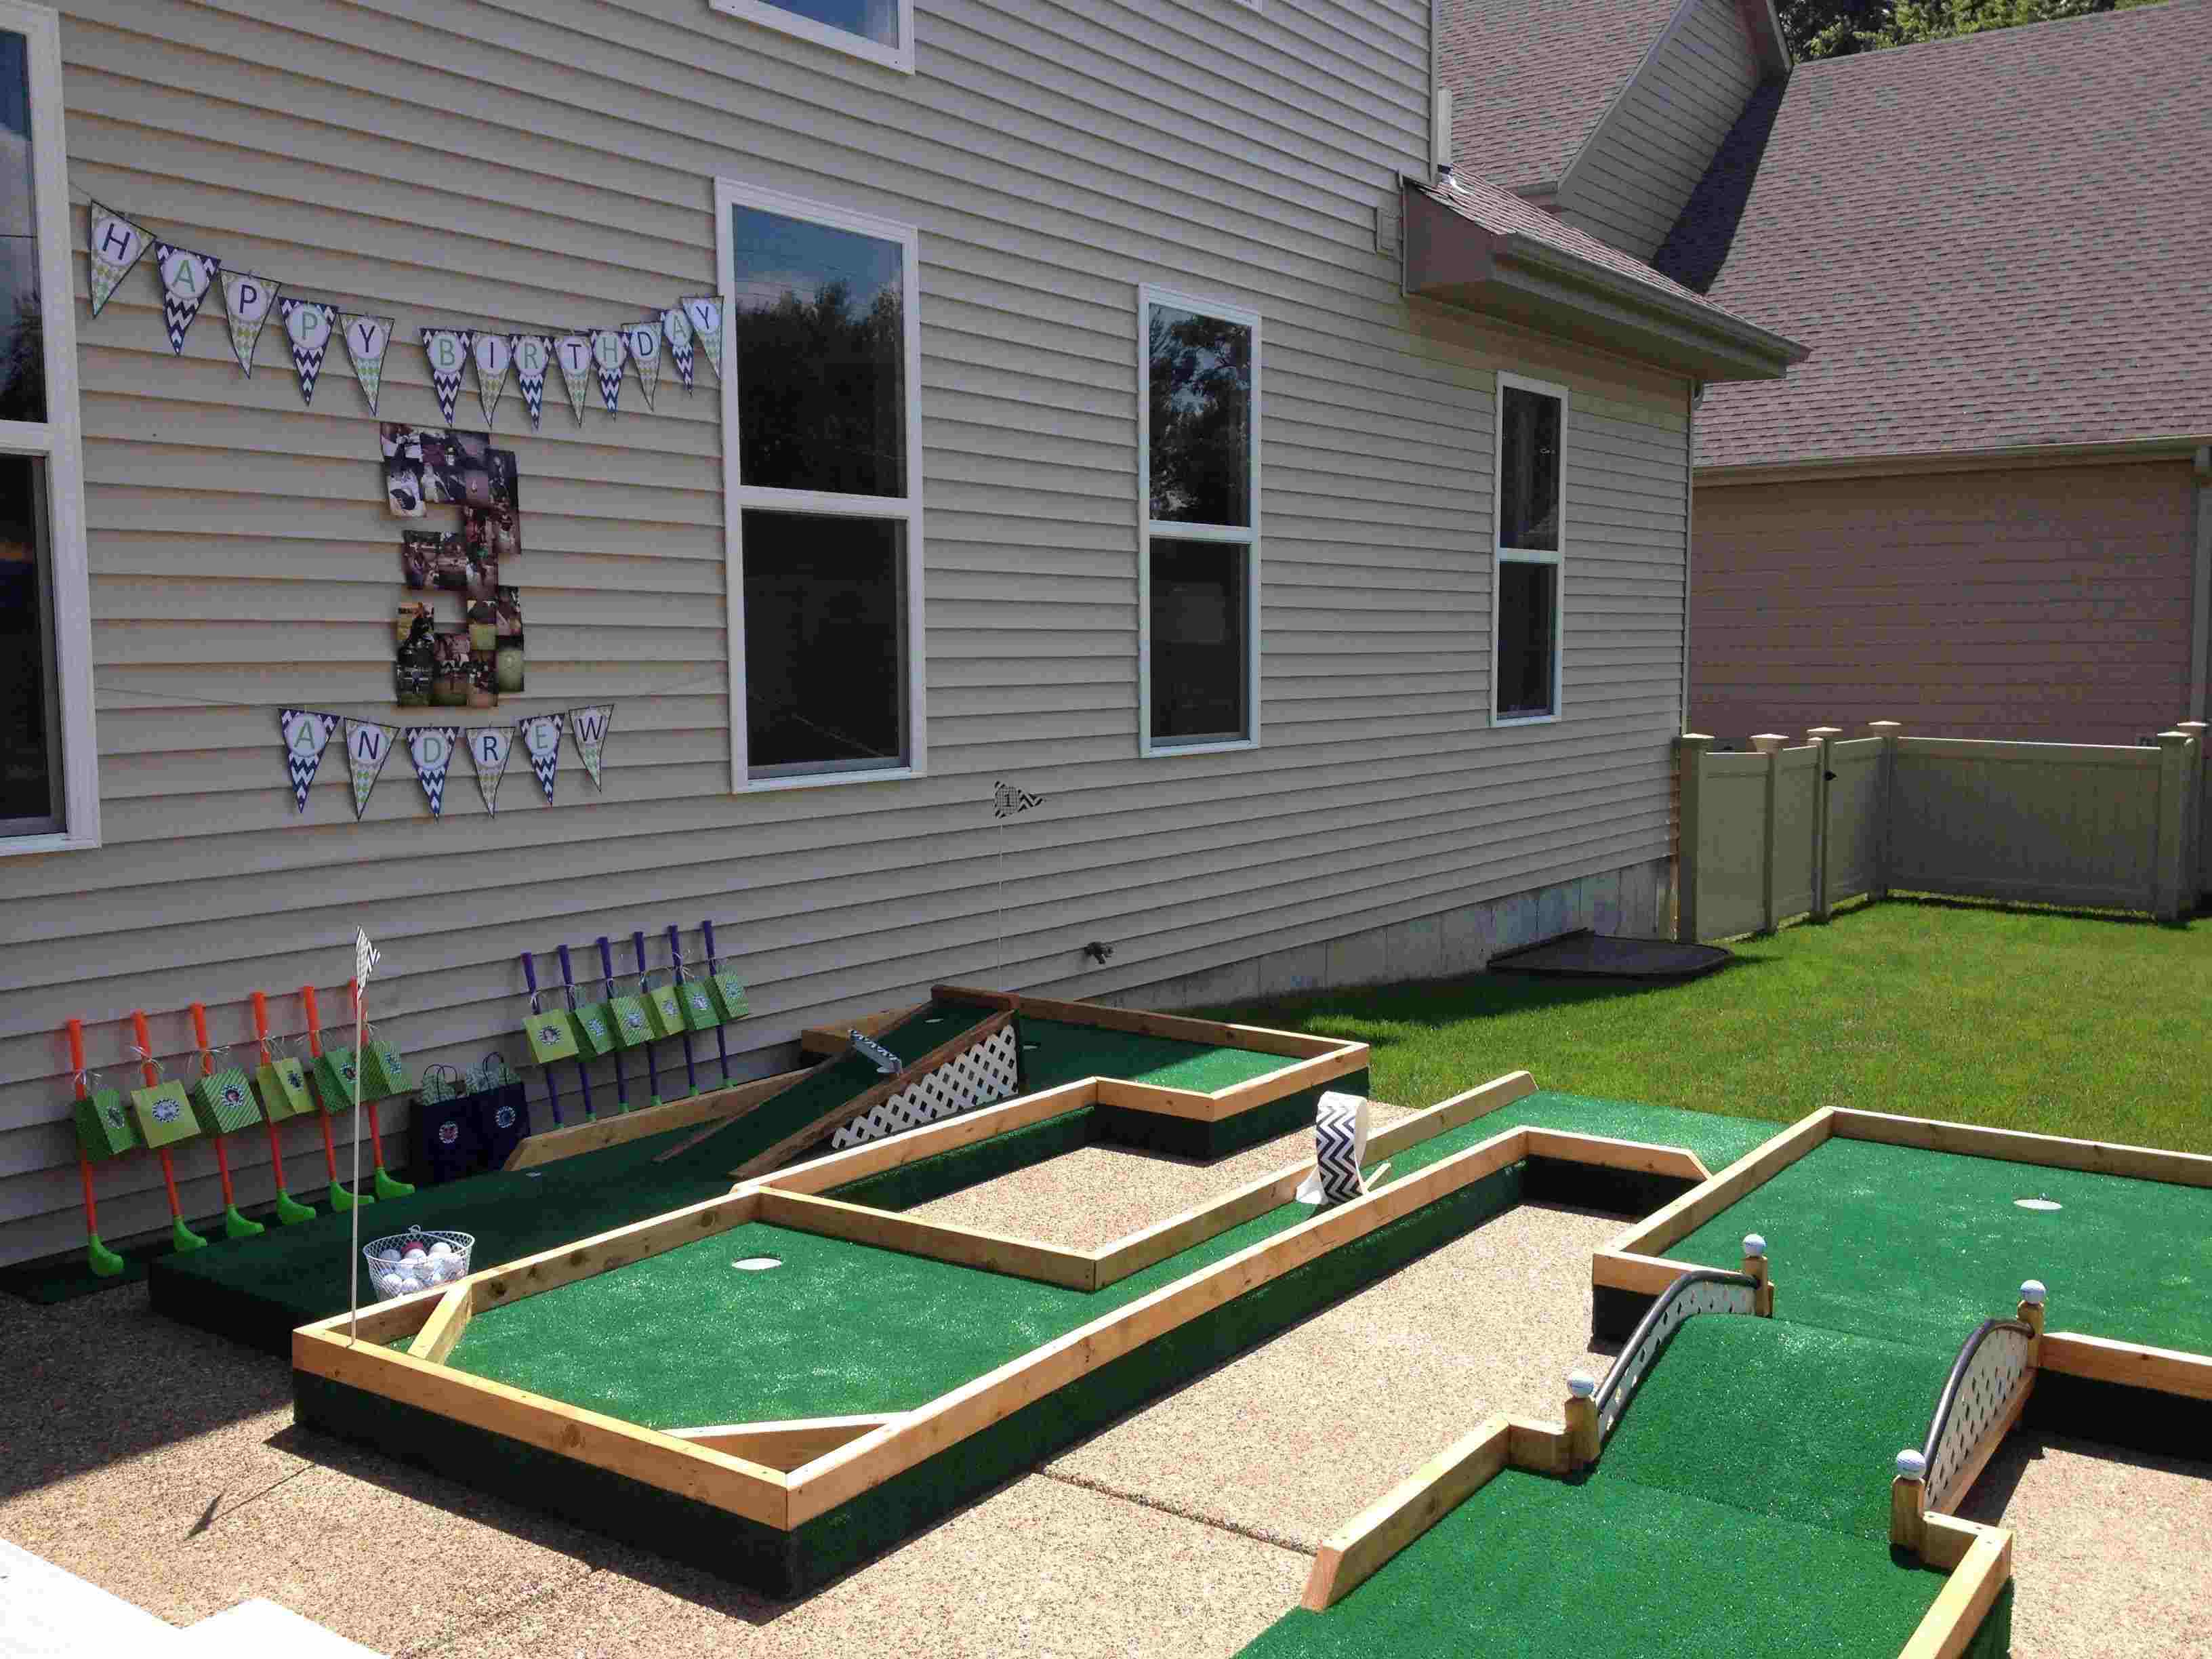
Step 6: Creating Obstacles and Hazards
One of the most fun and creative aspects of building a mini golf course is designing and constructing obstacles and hazards. These features add challenge, excitement, and a sense of adventure to your course. Follow these steps to create obstacles and hazards:
- Refer to your design plans: Review your initial design plans and decide where each obstacle or hazard will be placed. Consider the size, shape, and difficulty level of each element and how it will impact the gameplay.
- Construct obstacles: Use the plywood or boards you gathered earlier to build your chosen obstacles. Cut them into the desired shapes and sizes, such as ramps, tunnels, or barriers. Ensure they are sturdy and secure by using screws or nails to attach them together.
- Add features: Enhance your obstacles by adding decorative elements. For example, you can attach synthetic grass or turf to ramps to mimic a grassy incline. You can also paint or decorate the obstacles to match the theme of your course.
- Create hazards: Introduce hazards such as water features, sand traps, or slopes to challenge players and increase the gameplay difficulty. Be creative and use materials such as plastic liners, sand, rocks, or gravel to construct these hazards.
- Ensure safety: As you create obstacles and hazards, prioritize player safety. Make sure there are no sharp edges or protruding parts that may cause injury. Additionally, consider the stability of the obstacles and hazards to avoid any potential accidents.
Remember, the obstacles and hazards you create should blend seamlessly with the overall theme and layout of your mini golf course. They should provide a fair challenge while still allowing players to have fun. Take your time with this step to ensure that your obstacles and hazards are well-designed and constructed. Once they are ready, you can proceed to the next step of adding decorative features to further enhance your mini golf course.
Step 7: Adding Decorative Features
Adding decorative features to your mini golf course is the final touch that will bring your creation to life and enhance the overall ambiance. Here are some ideas on how you can add decorative elements:
- Themed décor: Take your chosen theme or concept and incorporate decorative elements that align with it. For example, if you have a tropical theme, add palm trees, tiki torches, or beach-inspired signage. Let your imagination guide you to create a visually cohesive and immersive experience.
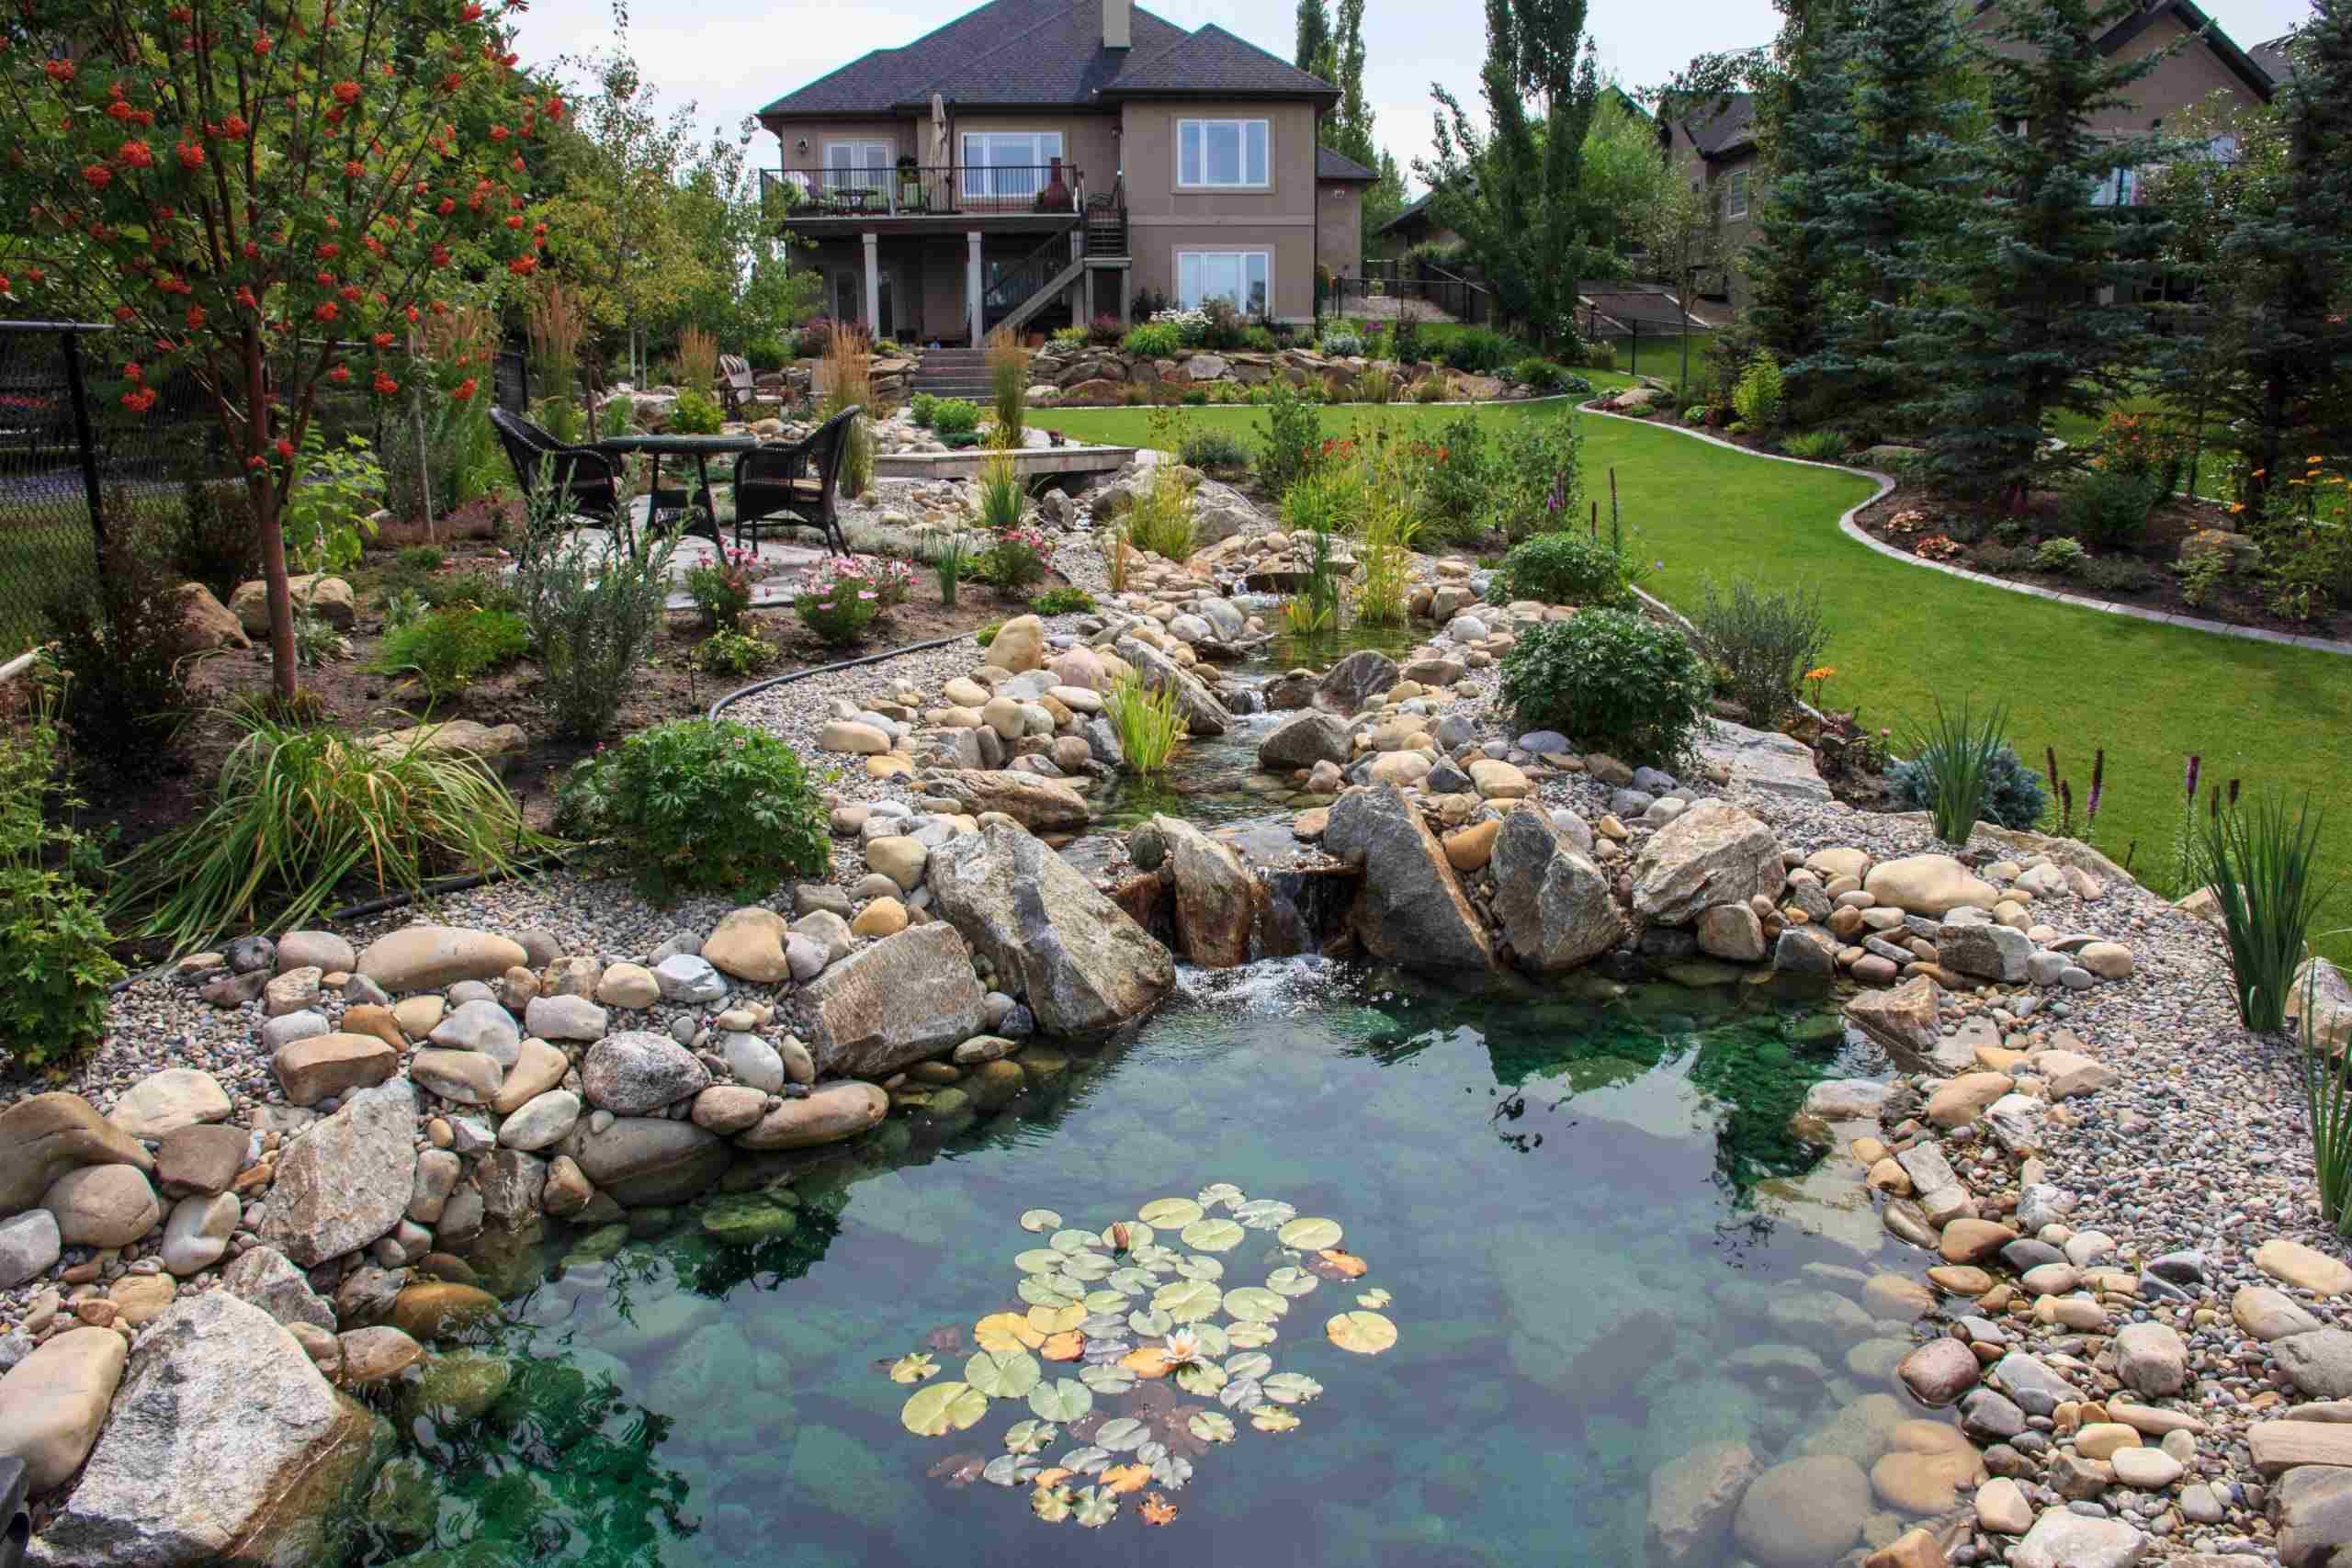
- Landscaping: Utilize plants and foliage to enhance the aesthetics of your mini golf course. Plant flowers, shrubs, or small trees strategically around the holes to create a sense of natural beauty. Consider the maintenance requirements of the plants you choose to ensure they remain healthy and vibrant.
- Pathways and walkways: Install pathways or walkways that connect each hole and create a clear route for players. Use stepping stones, pavers, or gravel to add texture and visual interest. You could also consider incorporating themed elements into the pathways, such as colored tiles or patterned designs.
- Lighting: Illuminate your mini golf course with strategic lighting to extend playtime into the evening and create a magical atmosphere. Install solar-powered lights along the pathways, around obstacles, and near the holes to create a captivating glow. This will enhance visibility and add a touch of enchantment to the overall experience.
- Signage: Design and place signage throughout the course to guide players and provide information about each hole. Use creative and colorful signs that match your theme to add an extra layer of charm.
When adding decorative features, remember to strike a balance between aesthetics and functionality. Ensure that the decorative elements do not obstruct gameplay or pose safety hazards. Regularly maintain and update the décor to keep your mini golf course looking fresh and appealing.
With the addition of these decorative features, your mini golf course will be transformed into a visually stunning and immersive experience that will impress players of all ages. Next, consider installing lighting to extend playtime and enhance the atmosphere even further.
Step 8: Installing Lighting (Optional)
While not essential, installing lighting in your mini golf course can enhance the playing experience and create a captivating atmosphere, especially during evening or nighttime play. Follow these steps to install lighting for your mini golf course:
- Evaluate the lighting needs: Determine which areas of your mini golf course would benefit from lighting. Consider illuminating the pathways, obstacles, and putting surfaces to ensure visibility and enhance the overall ambiance.
- Choose the right lighting: Select lighting fixtures that are suitable for outdoor use and can withstand various weather conditions. LED lights are a popular choice for their energy efficiency and long lifespan. Opt for low voltage lighting systems to minimize energy consumption.
- Plan the lighting layout: Strategically position the lighting fixtures to provide adequate illumination. Consider the direction of the light, shadows it may cast, and the overall aesthetics. Aim to create a balance between functional lighting and a visually appealing display.
- Install the lighting fixtures: Follow the manufacturer’s instructions for installing the lighting fixtures. This may involve securely mounting them to the ground, walls, or other suitable surfaces. Ensure that the fixtures are positioned and angled correctly for optimal illumination.
- Connect the wiring: If your lighting system requires wiring, carefully connect the cables following electrical safety guidelines. Consider hiring a licensed electrician for this step to ensure proper installation and compliance with local electrical codes.
- Test and adjust the lighting: Once the lighting fixtures are installed, test them to ensure they are functioning properly. Make any necessary adjustments to the placement or angles of the lights to achieve the desired effect.
Properly installed lighting can transform your mini golf course into a dazzling spectacle, adding excitement and enchantment to the gameplay experience. It allows players to enjoy the course even after daylight hours and creates a memorable atmosphere.
Remember to regularly inspect and maintain the lighting system to ensure that it continues to function effectively. Replace any faulty bulbs or damaged fixtures promptly to maintain the desired lighting effects.
With the installation of the lighting system, your mini golf course is now complete and ready to provide countless hours of entertainment and enjoyment for family and friends. Maintain and upkeep your course to ensure it remains in top condition for years to come.
Step 9: Maintenance and Upkeep
Once your mini golf course is built, it’s important to establish a regular maintenance routine to ensure its longevity and optimal performance. Here are some tips for maintaining and upkeeping your mini golf course:
- Regular cleaning: Sweep or blow off leaves, dirt, and debris from the putting surfaces and pathways regularly. Clear any obstructions from drains or water features to promote proper drainage.
- Inspect for damage: Regularly inspect the synthetic turf, obstacles, and hazards for any signs of wear, tear, or damage. Repair or replace any damaged components promptly to prevent further deterioration.
- Keep the turf clean: Gently brush the synthetic turf periodically to remove any dirt or debris that may accumulate. Use a mild detergent and water solution for more thorough cleaning if needed.
- Check the lighting system: If you have installed lighting, regularly inspect the fixtures for any damaged bulbs or wiring. Replace any faulty components to maintain proper illumination.
- Maintain the landscaping: Trim plants, replace dead foliage, and regularly water the landscaping elements around your mini golf course to keep them vibrant and well-maintained.
- Address drainage issues: Monitor and address any drainage issues promptly. Clear clogged drains, adjust grading, or install additional drainage systems as needed to prevent water accumulation and damage to the course.
- Repair and maintain obstacles: Inspect and repair any obstacles or hazards that may become loose or damaged over time. Secure loose screws or nails, and replace any broken or weakened components.
- Monitor safety: Regularly check the course for any potential safety hazards. Inspect the pathways, lighting fixtures, and any other elements that may pose a risk. Take steps to correct any issues to ensure a safe playing environment.
- Engage in seasonal maintenance: Adjust your maintenance routine to address specific seasonal needs. For example, during colder months, take steps to protect the turf from frost or snow buildup.
By implementing a regular maintenance schedule and addressing issues promptly, you can extend the lifespan of your mini golf course and ensure that it remains in top condition for years of enjoyment. Regular upkeep will also enhance the safety and playability of the course.
Remember to periodically assess the course and make any necessary updates or improvements to keep it fresh and exciting. With proper maintenance, your mini golf course will continue to provide countless hours of fun and entertainment for everyone who plays on it.
Conclusion
Congratulations! You have reached the end of your journey in building your own mini golf course in your backyard. Through careful planning, design, and execution, you have transformed a simple patch of land into a captivating and entertaining oasis.
Building a mini golf course requires creativity, patience, and attention to detail. From the initial planning and design phase to the installation of the putting surface, the creation of obstacles and the addition of decorative features, every step contributes to the overall success of your mini golf course.
Remember to regularly maintain and upkeep your course to ensure that it remains in top condition for years of enjoyment. Cleaning, inspecting for damage, keeping the turf clean, and addressing any issues promptly will help prolong its lifespan and preserve its playability.
Now take a moment to bask in the joy and satisfaction of your accomplishment. Your mini golf course is ready to delight family, friends, and guests with hours of fun, friendly competition, and memorable experiences.
So, gather your putters and golf balls, invite your loved ones, and let the games begin! Enjoy the excitement, laughter, and camaraderie that your backyard mini golf course will bring.
May your mini golf course be a source of endless enjoyment and cherished memories for years to come. Happy putting!