Home>Gardening Techniques>Plant Care>How To Plant Green Pepper Seeds
Plant Care
How To Plant Green Pepper Seeds
Modified: February 9, 2024
Learn how to successfully plant green pepper seeds and ensure proper care for your plants with our comprehensive guide. Discover expert tips and tricks for optimal growth and harvest.
(Many of the links in this article redirect to a specific reviewed product. Your purchase of these products through affiliate links helps to generate commission for Chicagolandgardening.com, at no extra cost. Learn more)
Table of Contents
Introduction
Welcome to the wonderful world of planting and caring for green pepper seeds! Whether you’re a seasoned gardener or just starting out with your green thumb, growing your own green peppers can be a rewarding and fulfilling experience. Not only do they add flavor and crunch to your favorite dishes, but they also provide a vibrant pop of color to your garden or indoor space.
In this article, we will guide you through the step-by-step process of planting and caring for green pepper seeds, ensuring that you have all the knowledge and skills needed to succeed. From preparing the soil to harvesting your bountiful crop, we’ve got you covered. So grab your gardening gloves and let’s get started!
Planting green pepper seeds is not only an enjoyable task but also a great way to become more self-sufficient. Instead of relying on store-bought peppers, you can take pride in growing your own, knowing exactly where they came from and how they were grown. Plus, there’s nothing quite like the taste of freshly picked green peppers – the freshness and crispness elevate your culinary creations to a whole new level.
Not only are green peppers delicious, but they are also packed with essential nutrients. Rich in vitamins A and C, green peppers provide antioxidants that help boost your immune system and promote healthy skin. They also contain fiber, vitamin K, and various minerals that contribute to overall well-being.
One of the beauties of planting green pepper seeds is that it can be done in a variety of settings. Whether you have a spacious backyard garden, a small balcony, or even a sunny windowsill, you can successfully grow green peppers. With a little bit of planning and care, you’ll be able to enjoy a fresh and steady supply of green peppers right at your fingertips.
In the upcoming sections, we will walk you through the necessary materials, step-by-step instructions, and all the tips and tricks you need to know to ensure your green pepper seeds flourish. So let’s dive in and set the foundation for a successful green pepper garden!
Materials Needed
Before you begin planting green pepper seeds, it’s important to gather all the necessary materials. Having everything ready beforehand will ensure a smooth and efficient planting process. Here’s a list of materials you’ll need:
- Green Pepper Seeds: Start by selecting high-quality green pepper seeds. You can find them at your local garden center or order them online. Opt for organic and non-GMO seeds whenever possible.
- Pots or Seed Trays: Choose pots or seed trays that are at least 3-4 inches deep with drainage holes at the bottom. This will allow excess water to escape and prevent root rot.
- Seed Starting Mix: Use a well-draining seed starting mix to provide the perfect growing medium for your green pepper seeds. Avoid using regular garden soil, as it may compact and impede seed germination.
- Watering Can or Spray Bottle: To water your seeds gently without disturbing them, have a watering can with a fine-rain nozzle or a spray bottle on hand.
- Garden Trowel or Seedlings Dibber: A garden trowel or seedlings dibber will help you make holes in the soil for planting the seeds and transplanting seedlings later on.
- Plant Labels: Labeling your pots or trays will help you keep track of the different varieties of green pepper seeds you’ve planted. Use waterproof labels and a permanent marker for durability.
- Clear Plastic Dome or Plastic Wrap: Creating a humid environment for the seedlings can help speed up germination. A clear plastic dome or plastic wrap can be used to cover the pots or trays until the seeds sprout.
- Grow Lights or Sunny Location: Green pepper seeds need ample sunlight or artificial grow lights to thrive. If you don’t have access to a sunny location, invest in fluorescent or LED grow lights to provide the necessary light spectrum.
- Organic Fertilizer: Once your seedlings have sprouted, you will need an organic fertilizer to nourish them. Look for a balanced fertilizer specifically formulated for vegetables.
- Gardening Gloves: Protect your hands during the planting process by wearing gardening gloves. They’ll shield your skin from any potential irritants or sharp edges.
Having these materials ready before you start planting will save you time and ensure that you have everything you need at your fingertips. Now that you’ve gathered your materials, let’s move on to the next step: preparing the soil.
Step 1: Preparing the Soil
Preparing the soil is a crucial step in ensuring the success of your green pepper seeds. The right soil conditions provide the essential nutrients and drainage necessary for the seeds to germinate and the seedlings to thrive. Follow these steps to prepare the soil:
- Select a Suitable Location: Choose a sunny location for your green pepper plants. They require at least six to eight hours of direct sunlight each day. Ensure that the location is sheltered from strong winds, as they can damage the delicate plants.
- Clear the Area: Remove any weeds, rocks, or debris from the planting area. These can interfere with the growth of your green pepper plants and compete for nutrients.
- Loosen the Soil: Use a garden fork or a tiller to loosen the soil to a depth of 8-10 inches. This will improve aeration and drainage, allowing the roots to penetrate easily.
- Amend the Soil: Green peppers thrive in fertile, well-draining soil. If your soil is clayey or compacted, mix in organic matter such as compost, well-rotted manure, or peat moss. This will improve the soil structure and provide essential nutrients.
- Test the pH: Green peppers prefer a slightly acidic soil with a pH level between 6.0 and 6.8. You can perform a soil test using a pH testing kit or send a sample to a local agricultural extension service for analysis. Adjust the pH level if needed by adding amendments, such as lime to raise pH or sulfur to lower it.
- Water the Soil: Before planting, thoroughly water the soil to ensure it’s evenly moist. This will help the seeds settle and promote germination.
By following these steps, you’ll create an optimal environment for your green pepper seeds to establish strong roots and grow into healthy plants. Now that the soil is ready, let’s move on to the next step: choosing the seeds.
Step 2: Choosing the Seeds
Choosing the right green pepper seeds is an important decision that will affect the quality and characteristics of your future plants. Here are some factors to consider when selecting your green pepper seeds:
- Variety: There are various varieties of green peppers available, each with its own unique flavor, size, and shape. Consider the specific characteristics you desire, such as sweet or spicy peppers, large or small fruit, and whether you prefer a particular color like green, red, or yellow.
- Climate: Take into account your local climate and growing conditions. Some green pepper varieties are more tolerant of heat or cold, while others require specific temperature ranges to thrive. Choose seeds that are suitable for your specific climate to ensure successful cultivation.
- Seed Source: Purchase seeds from reputable sources to ensure their quality and authenticity. Look for certified organic or non-GMO seeds to support sustainable and healthy gardening practices.
- Days to Maturity: Check the estimated “days to maturity” information provided on the seed packet. This will give you an idea of when you can expect to start harvesting your ripe green peppers. Consider the length of your growing season and select a variety with an appropriate maturation period.
- Seed Viability: It’s important to choose fresh, viable seeds with a high germination rate. Check the expiration date on the seed packet or verify the viability of the seeds through the seed supplier. Older or poorly stored seeds may have reduced germination rates.
By carefully considering these factors, you can choose the green pepper seeds that best suit your preferences and growing conditions. Remember to read the seed packet for specific instructions and additional information on the selected variety. Now that you have your seeds, it’s time to move on to the exciting part: planting them!
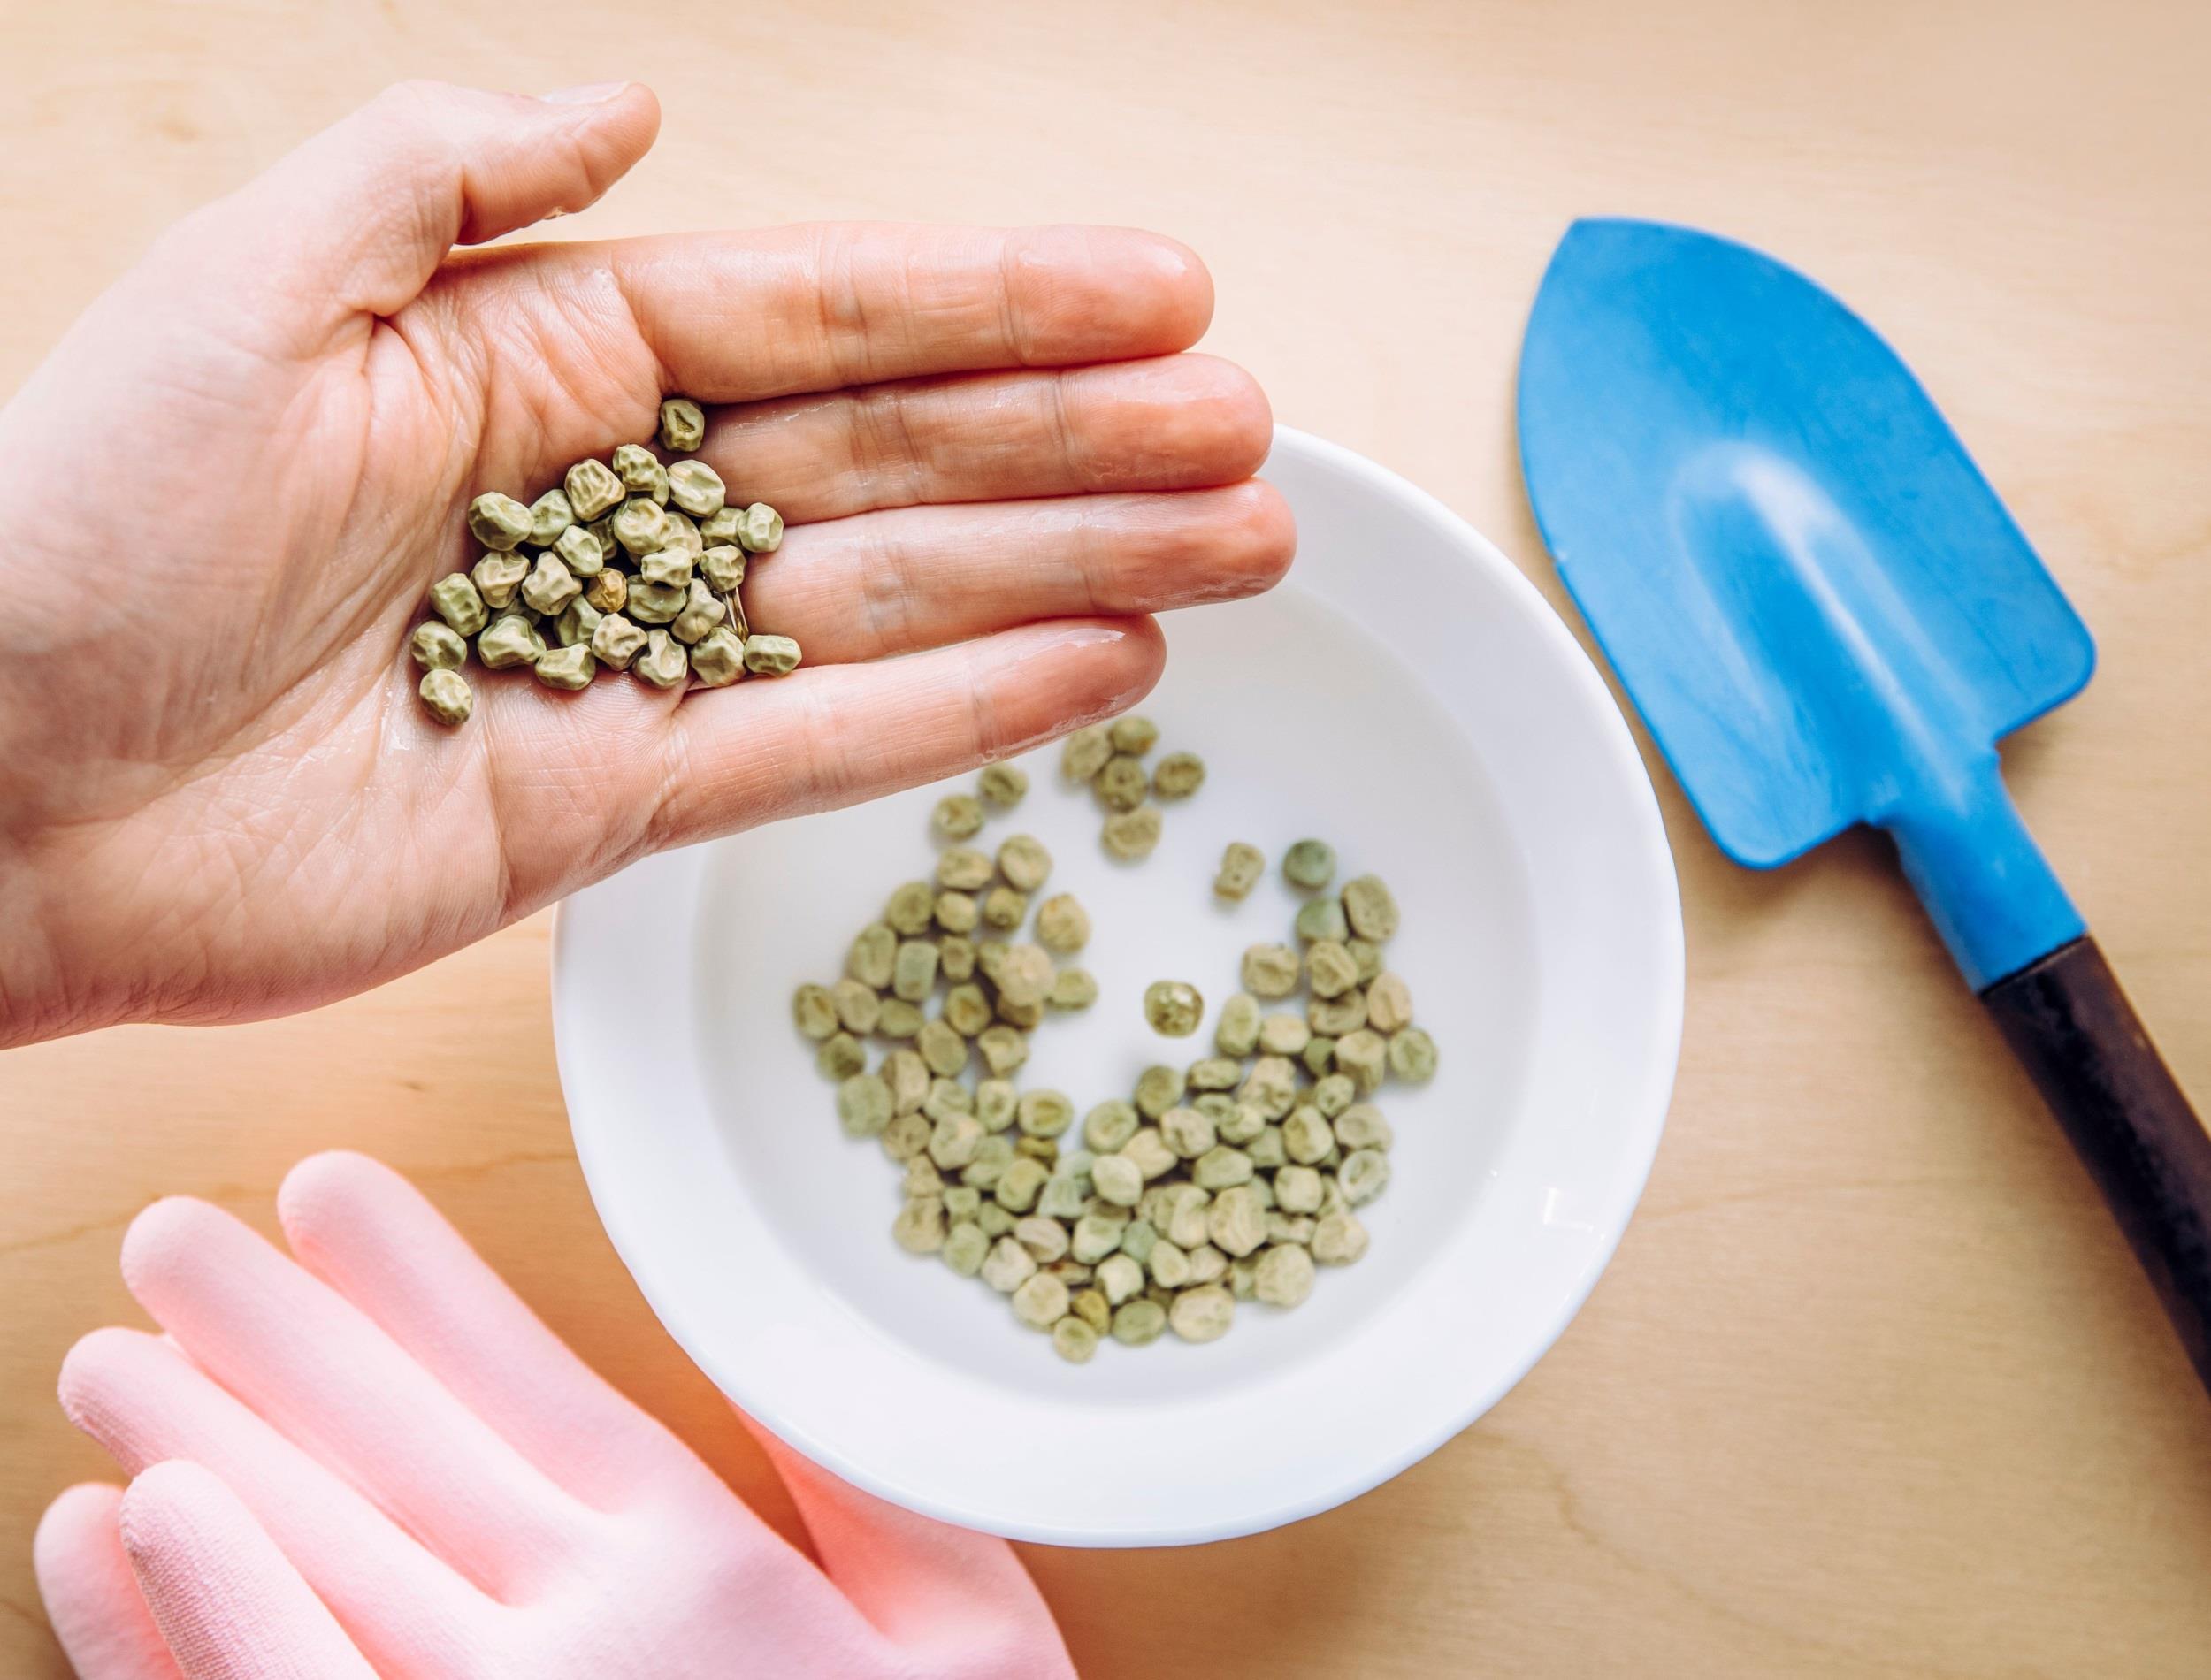
Step 3: Planting the Seeds
Now that you have your green pepper seeds and the soil is prepared, it’s time to plant them. Follow these steps to ensure successful seed planting:
- Fill the Pots or Seed Trays: Fill your chosen pots or seed trays with a well-draining seed starting mix, leaving about half an inch of space at the top. Firm the soil gently to create a level surface.
- Plant the Seeds: Make a small hole in the soil for each seed, approximately ¼ to ½ inch deep. Place one seed in each hole and cover it with soil, gently pressing down to ensure good seed-to-soil contact.
- Label the Pots or Trays: Use plant labels to mark the variety of green pepper seeds you’ve planted in each pot or tray. This will help you keep track of different varieties as they grow.
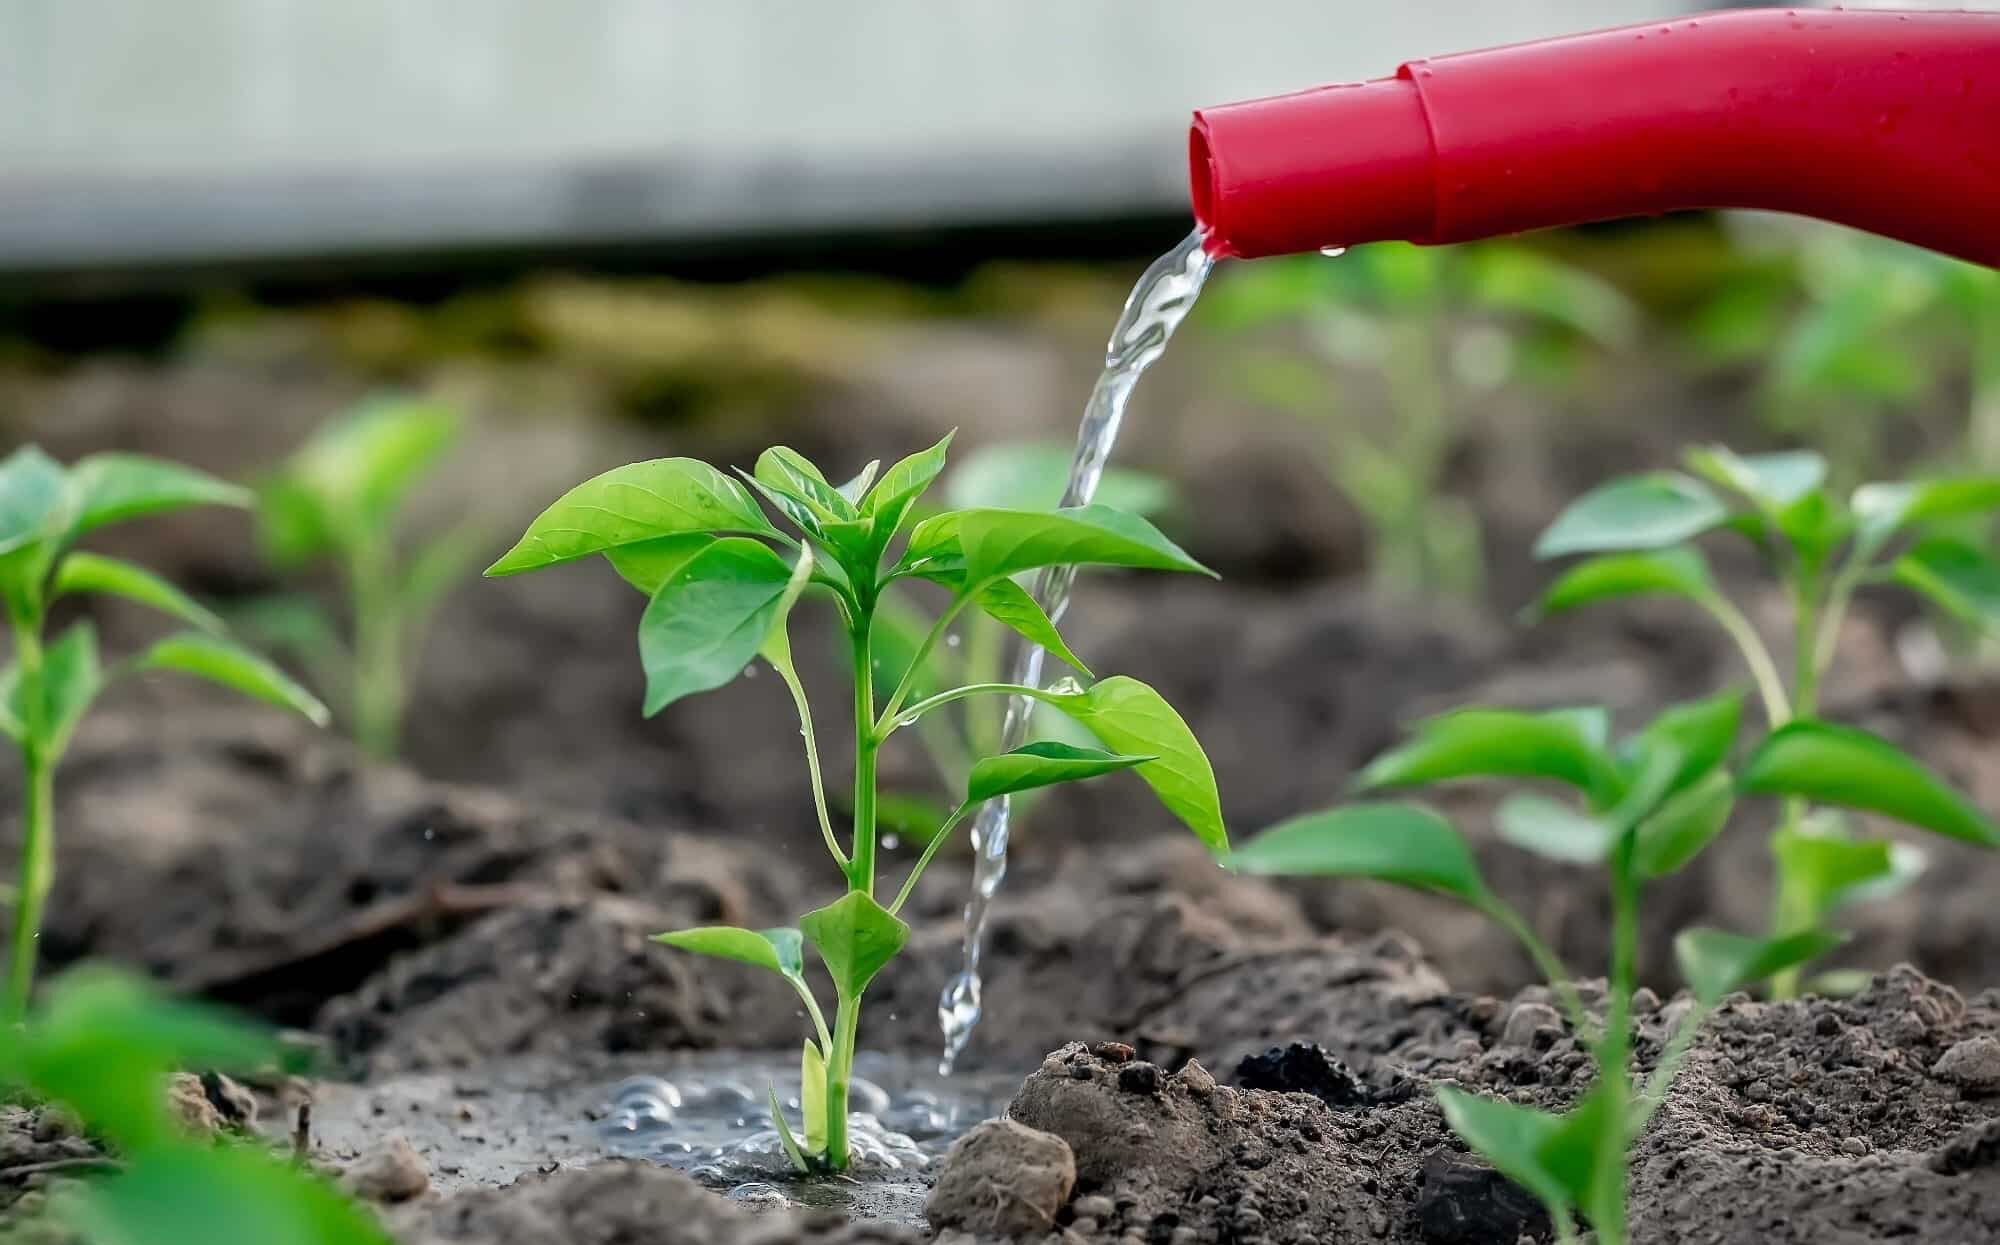
- Water the Seeds: Water the pots or trays carefully, using a watering can with a gentle spray or a spray bottle. Ensure that the soil is evenly moist, but avoid overwatering, as it can lead to mold or rot.
- Create a Humid Environment: To promote seed germination, cover the pots or trays with a clear plastic dome or plastic wrap. This will help create a humid environment that encourages the seeds to sprout. Keep the cover on until the seeds start germinating.
- Provide Adequate Light: Place the pots or trays in a warm location with access to bright, indirect sunlight. If you’re using artificial grow lights, position them about 6-8 inches above the seedlings to provide adequate light intensity.
- Maintain Soil Moisture: Check the soil moisture regularly and water as needed to keep it evenly moist. Be mindful of not overwatering, as this can lead to damping-off disease or root rot.
By following these steps, you’ll give your green pepper seeds the best chance of germinating and sprouting into healthy seedlings. Be patient, as germination can take anywhere from 7 to 14 days, depending on the variety and environmental conditions. Once the seedlings have sprouted and developed a few sets of true leaves, it’s time to move on to the next step: watering and caring for the young plants.
Step 4: Watering and Caring for the Seeds
Proper watering and care are essential for the growth and development of your green pepper seedlings. Follow these guidelines to ensure your young plants receive the right amount of water and attention:
- Monitor Soil Moisture: Check the moisture level of the soil regularly. Stick your finger about an inch into the soil to assess if it feels dry. If the soil is dry at this depth, it’s time to water.
- Watering Technique: When watering your green pepper seedlings, aim to keep the soil evenly moist but not waterlogged. Use a watering can with a fine-rain nozzle or a spray bottle to water gently near the base of the plants, avoiding splashing water on the leaves.
- Watering Frequency: Young seedlings typically require watering every 2-3 days, depending on environmental conditions and the moisture retention of the soil. Adjust the frequency based on the soil moisture levels.
- Avoid Overwatering: Overwatering can lead to root rot or other fungal diseases. Ensure proper drainage in the pots or trays to prevent waterlogging, and never let the seedlings sit in standing water.
- Provide Adequate Light: Place the seedlings in a location with access to bright, indirect sunlight or under the grow lights. Green pepper seedlings require at least 12-14 hours of light per day for healthy growth.
- Rotate the Pots or Trays: To ensure even growth, rotate the pots or trays every few days. This helps prevent the seedlings from leaning or growing towards the light source.
- Thin Out Seedlings (if necessary): If you have multiple seedlings sprouting in one pot or tray, thin them out once they have developed a few sets of true leaves. Carefully remove the weakest seedlings, leaving only one healthy and robust seedling per pot or spacing them according to the recommended distance on the seed packet.
- Apply Organic Fertilizer: Once the seedlings have developed a few sets of true leaves, you can begin fertilizing them. Apply an organic fertilizer according to the recommended dosage on the package. Follow the instructions carefully to avoid overfertilization, as this can damage the plants.
- Monitor for Pests and Diseases: Keep a close eye on your green pepper seedlings for any signs of pests or diseases. Common pests include aphids, spider mites, and flea beetles. Treat any infestations promptly with organic pest control methods to protect your plants.
By following these watering and care guidelines, you’ll provide the optimal conditions for your green pepper seedlings’ growth. As they continue to develop, they’ll soon be ready for the next step: transplanting into larger containers or your garden.
Step 5: Transplanting the Seedlings
Once your green pepper seedlings have grown strong and developed a few sets of true leaves, it’s time to transplant them into larger containers or your garden. Follow these steps to ensure a successful transplanting process:
- Choose the Right Containers: Select containers that are at least 10-12 inches deep and have drainage holes to provide adequate space for the growing root system.
- Prepare the Transplanting Site: If you’re transplanting to your garden, prepare the soil in advance by removing any weeds, loosening it, and incorporating organic matter to enrich its fertility.
- Water the Seedlings: Before you begin transplanting, water the seedlings thoroughly. This will help minimize stress and make it easier to remove them from their current containers.
- Gently Remove the Seedlings: Carefully loosen the seedlings from their pots or trays by using a small trowel or your fingers. Be gentle to avoid damaging the roots.
- Plant at the Proper Depth: Dig a hole in the new container or garden bed that is slightly larger than the root ball of the seedling. Plant each seedling at the same depth it was growing previously, ensuring that the soil level is just below the leaves.
- Backfill and Firm the Soil: Fill the hole with soil and gently firm it around the base of the seedling. Avoid over-packing the soil, as it can restrict root growth.
- Water Thoroughly: Once all the seedlings are transplanted, water them deeply to settle the soil around the roots. This will help minimize transplant shock and encourage the seedlings to establish themselves.
- Provide Sun Protection: If your transplanted seedlings are exposed to direct sunlight, provide temporary shade using a shade cloth or lightweight fabric for a few days to protect them from excessive heat and sunlight.
- Continue to Care for the Transplants: After transplanting, continue to provide regular watering, adequate light, and appropriate fertilization as the seedlings adjust and continue to grow in their new containers or garden bed.
By following these steps, you’ll ensure a smooth transition for your green pepper seedlings from their previous containers to their new growing environment. Transplanting strengthens the root system and allows the plants to access more nutrients and space for future growth. Now that your seedlings are settled, it’s time to maintain and care for your green pepper plants.
Step 6: Maintaining the Plants
Maintaining your green pepper plants is crucial to their overall health and productivity. By providing the right care and attention, you can ensure a bountiful harvest of delicious green peppers. Here are some key steps to maintain your plants:
- Watering: Green peppers require consistent moisture to thrive. Water the plants deeply when the top inch of soil feels dry. Avoid overhead watering to prevent foliage diseases. Water at the base of the plants, near the soil level.
- Mulching: Apply a layer of organic mulch, such as straw or wood chips, around the base of your plants. Mulching helps retain moisture, suppresses weeds, and regulates soil temperature.
- Staking or Supporting: Green pepper plants can become top-heavy with the weight of their fruit. To prevent them from sprawling or breaking, provide support by staking them or using a tomato cage. This will ensure better air circulation and reduce the risk of damage.
- Fertilizing: Regularly feed your green pepper plants with a balanced organic fertilizer. Follow the package instructions for application rates and timing. Avoid over-fertilizing, as excessive nitrogen can result in lush foliage but fewer fruits.
- Weed Control: Regularly remove weeds from around your green pepper plants. Weeds compete for nutrients, water, and light, which can hinder the growth and health of your plants. Use hand pulling or mulching to keep weeds in check.
- Pest and Disease Management: Keep an eye out for common pests like aphids, flea beetles, and hornworms. If necessary, use organic pest control methods like neem oil or insecticidal soaps. Monitor your plants for signs of diseases such as powdery mildew or bacterial spot, and promptly address any issues to prevent further spread.
- Pruning: As your green pepper plants grow, you may need to prune them to encourage better airflow and fruit development. Trim away any dead or diseased leaves and branches. Also, consider removing some of the lower leaves to improve air circulation and reduce the risk of diseases.
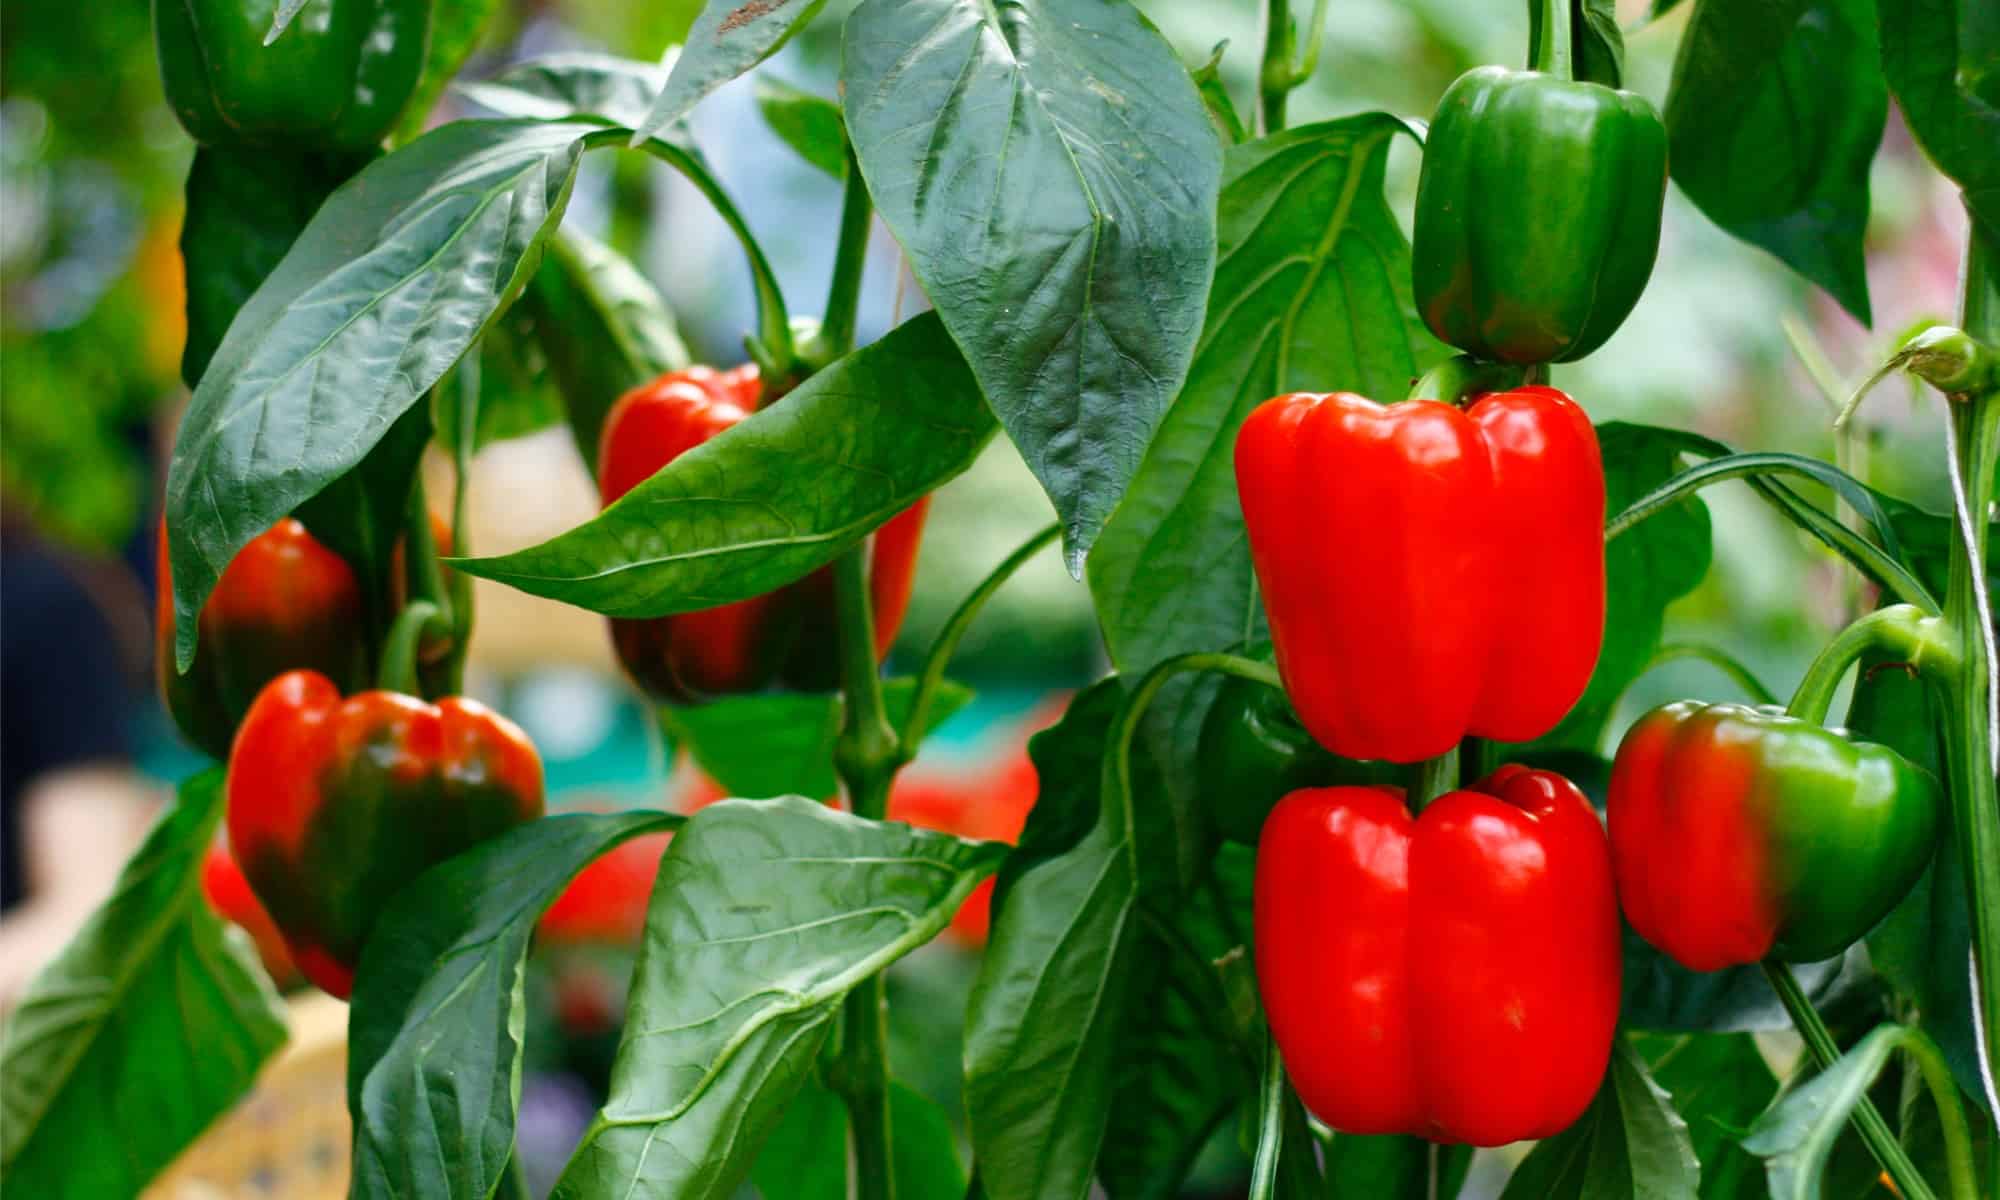
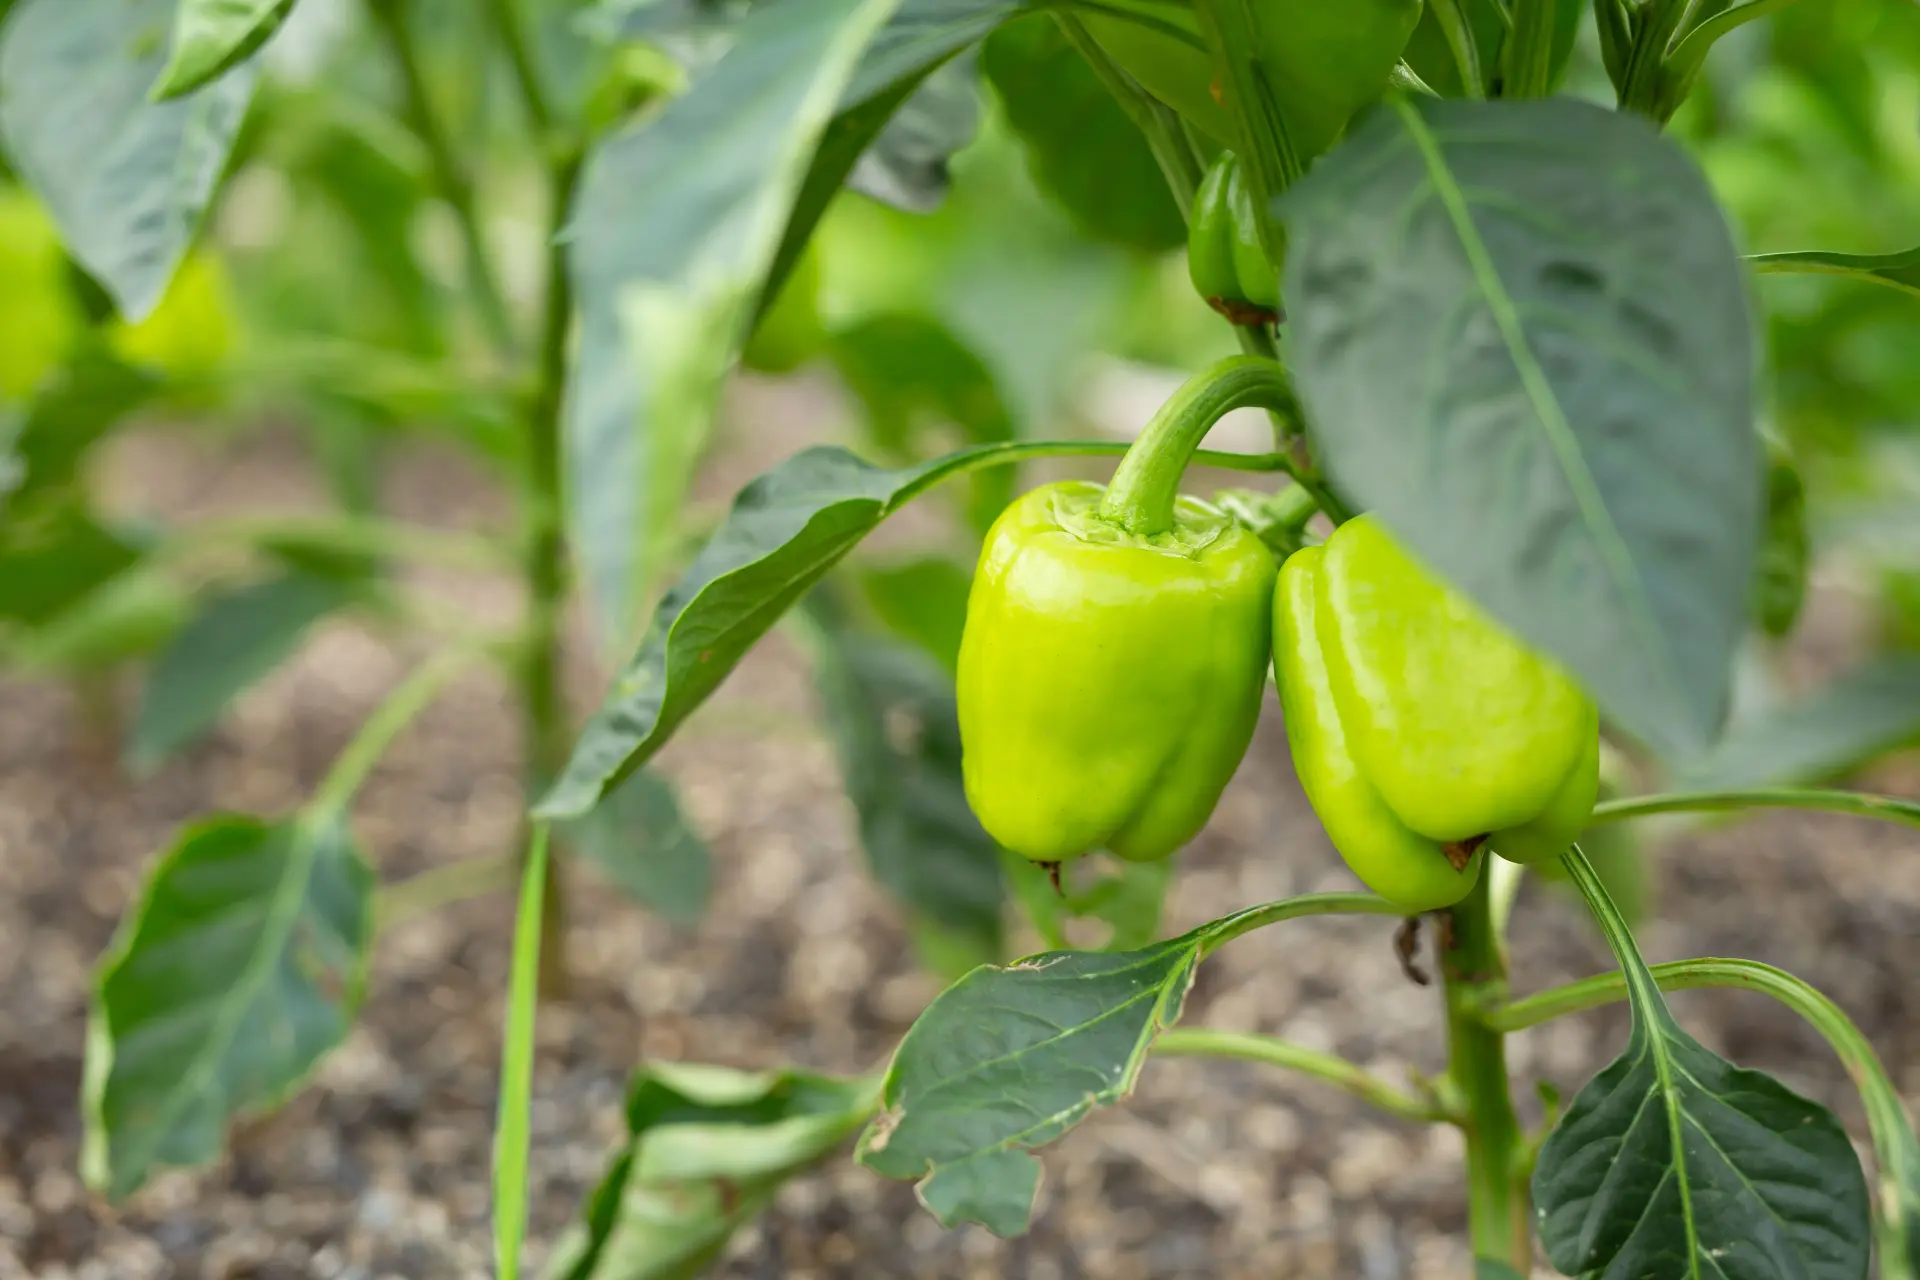
- Harvesting: Green peppers are ready for harvesting when they reach their desired size and color. Use sharp garden shears or a knife to cut the peppers from the plant, leaving a short stem. Harvest regularly to encourage continuous fruit production.
- Winter Protection: Green peppers are sensitive to cold temperatures. Before the first frost, harvest any remaining green peppers and consider covering the plants or bringing potted plants indoors if you live in a cold climate.
By following these maintenance practices, you’ll provide the optimal growing conditions for your green pepper plants, maximize their productivity, and prolong their lifespan. With proper care, you’ll be rewarded with a plentiful harvest of delicious green peppers to enjoy in your culinary creations.
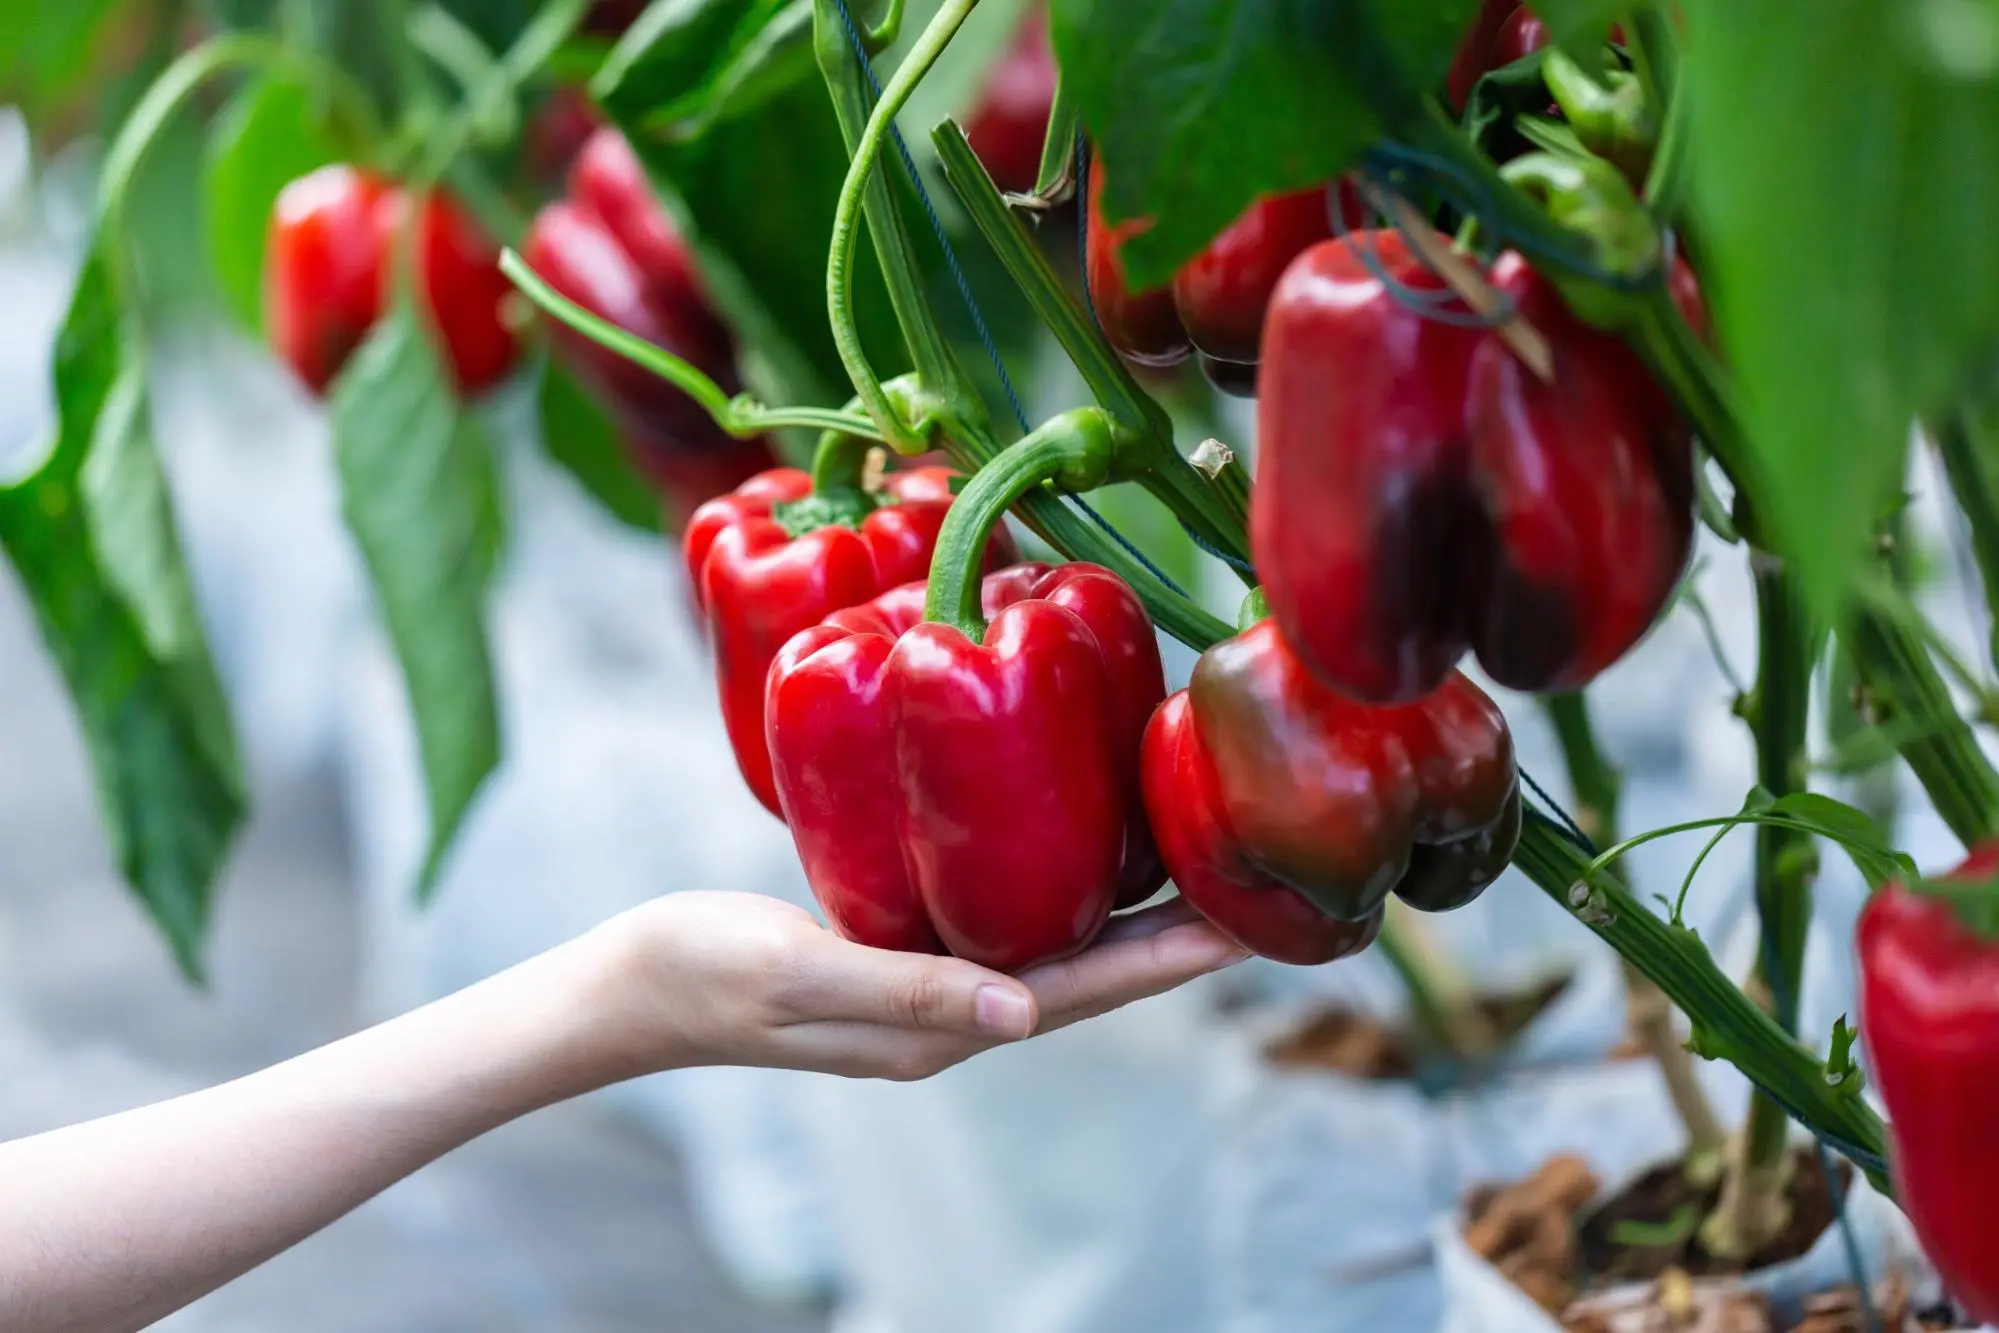
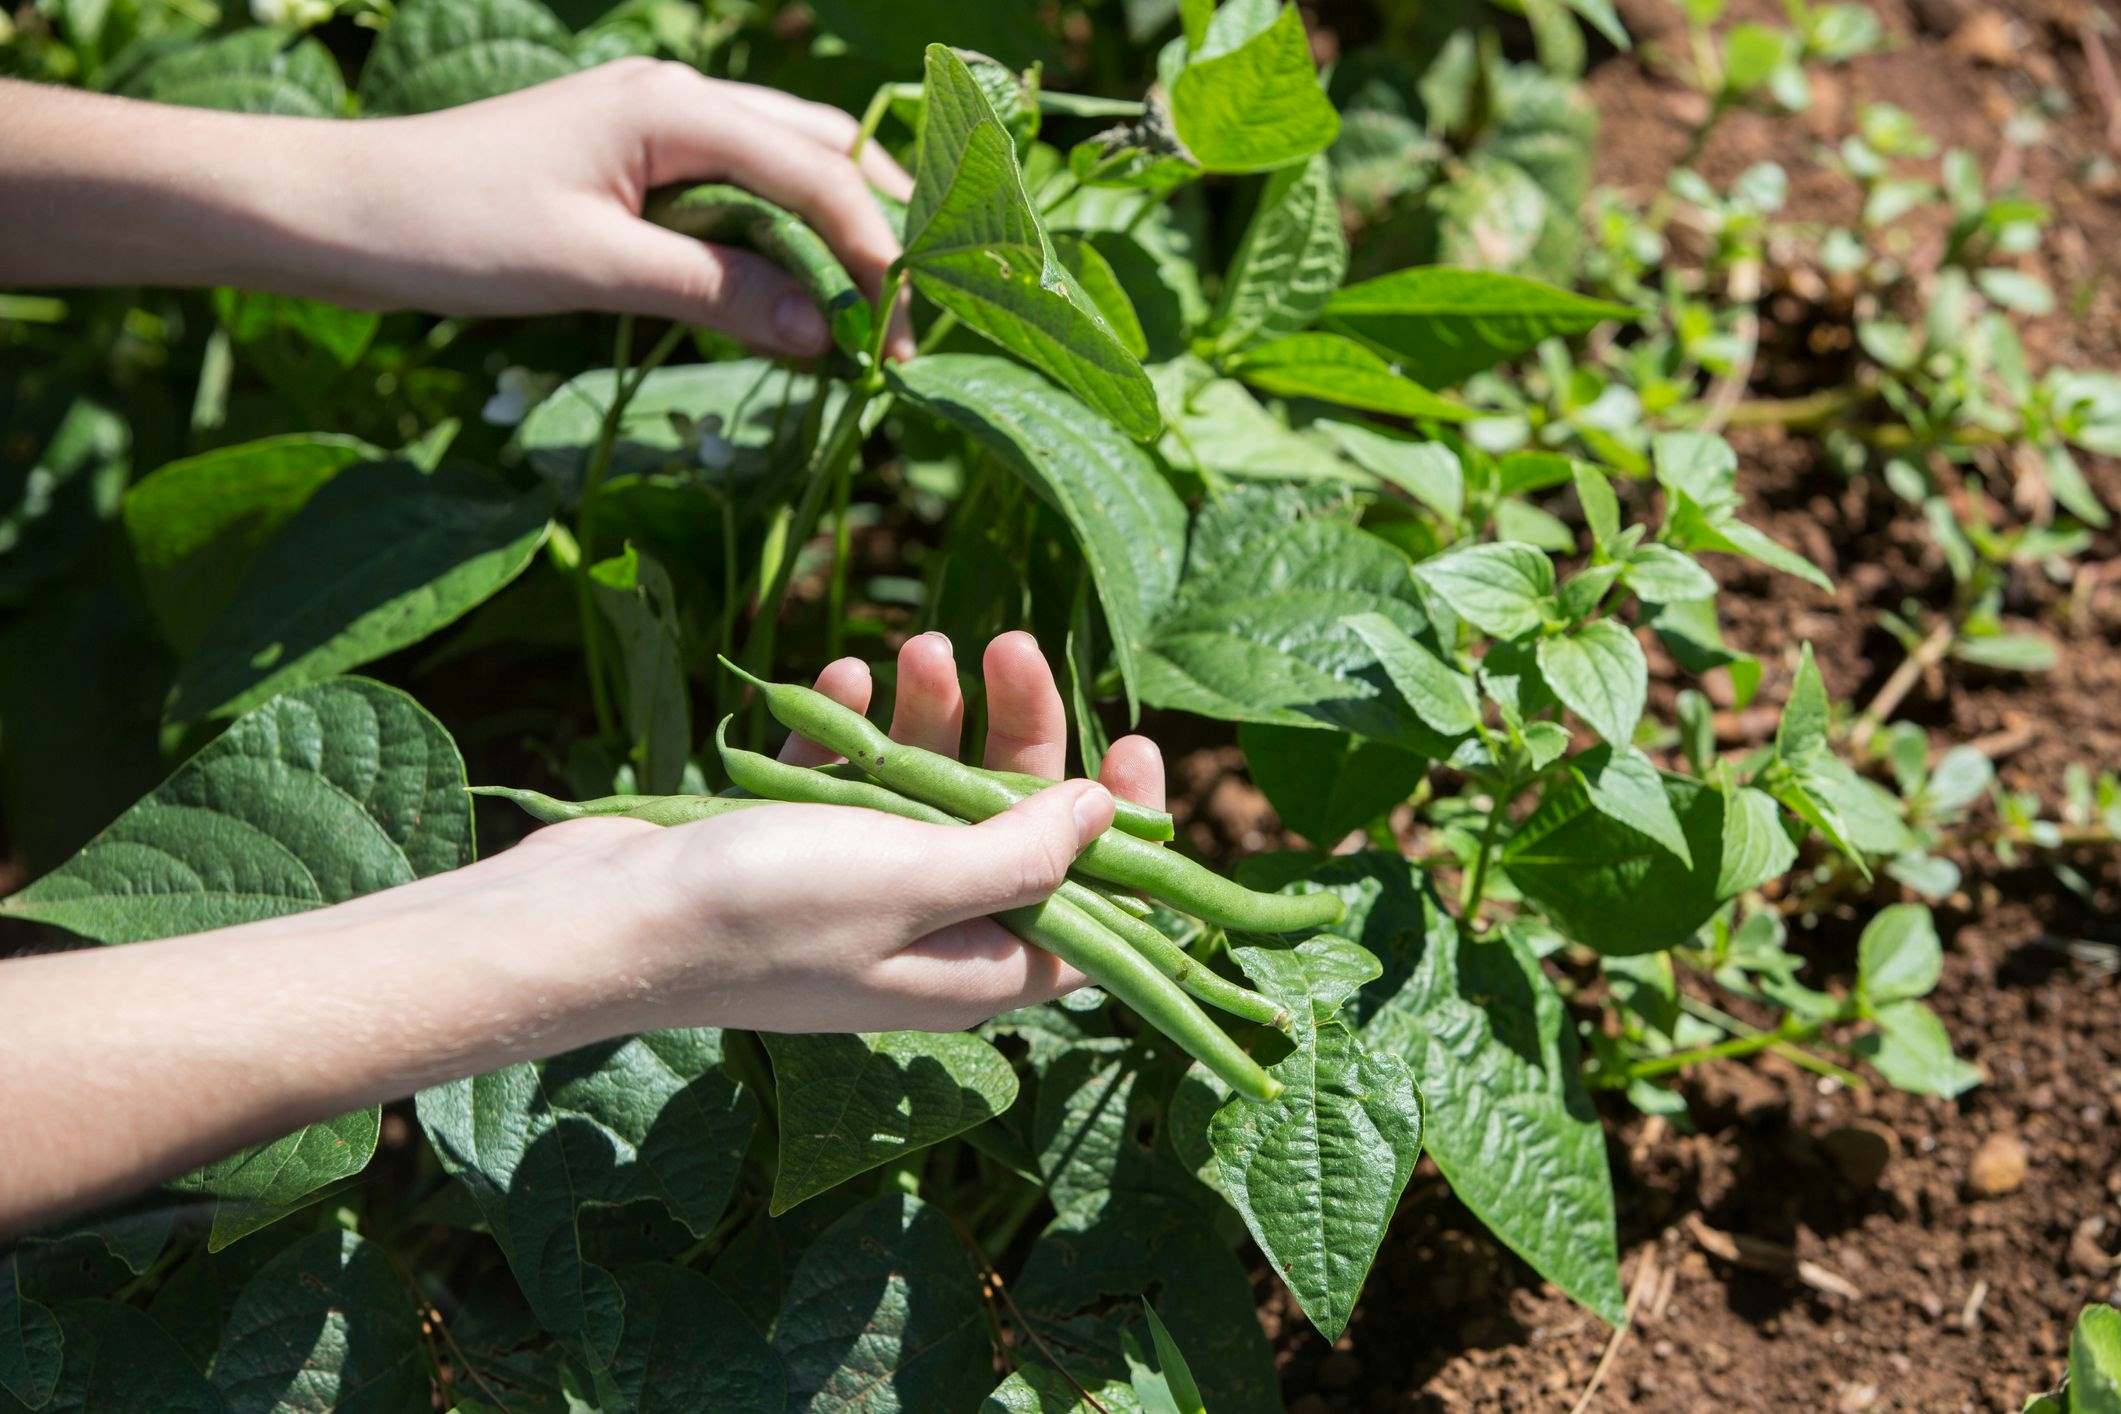
Step 7: Harvesting the Green Peppers
Harvesting green peppers at the right time is crucial to ensure optimal flavor, texture, and nutritional value. Here are some guidelines to follow when harvesting your green peppers:
- Observe Maturity: Green peppers can be harvested at any stage, but for the classic green variety, wait until they reach their mature size and have a glossy, firm and bright green skin. The peppers should be fully formed but not yet changed color.
- Inspect for Ripeness: Carefully examine each pepper and ensure there are no signs of blemishes, soft spots or discoloration. The skin should be smooth and taut.
- Use Pruning Shears or a Knife: To harvest, use sharp pruning shears or a knife to cut the pepper off the plant. Leave a short stem attached to the pepper.
- Harvesting Techniques: Gently hold the pepper with one hand and make a clean cut just above the stem using your pruning shears or knife. Avoid twisting or pulling, as this can damage the plant.
- Continual Harvest: It’s best to harvest green peppers regularly to encourage continuous fruit production. Leaving peppers on the plant for too long can lead to overripening and may affect future yields.
- Handle with Care: Handle the harvested green peppers carefully to avoid bruising or damaging them. Place them in a container or basket lined with a soft cloth to prevent any unnecessary pressure.
- Storage: Green peppers are best when consumed fresh, but they can be stored for a short time. Keep them in a cool, dry place, such as a refrigerator, and use them within a week for optimal freshness.
- Enjoy the Harvest: Now that you’ve successfully harvested your green peppers, it’s time to enjoy them. Incorporate them into your favorite recipes or add them to salads, stir-fries, salsas, or grilled dishes for a pop of vibrant color and crisp flavor.
Remember, harvesting green peppers at their peak ensures the best taste and texture. The joy of growing your own peppers and harvesting them at just the right moment is a rewarding experience that adds freshness and flavor to your meals.
Conclusion
Congratulations on learning how to plant and care for green pepper seeds! By following the step-by-step process outlined in this article, you can successfully grow your own vibrant green pepper plants and enjoy a bountiful harvest of delicious peppers.
From preparing the soil to transplanting seedlings, watering, and maintaining the plants, each step plays a vital role in the growth and overall health of your green pepper plants. By providing them with the right conditions, including proper watering, adequate sunlight, organic fertilization, and regular monitoring for pests and diseases, you can ensure their success.
Remember to choose high-quality green pepper seeds, select a suitable growing location, and monitor the plants for any signs of stress or issues. With care and attention, you’ll be rewarded with a continuous supply of fresh, crisp green peppers that enhance the flavors of your favorite dishes.
Growing green peppers not only provides you with homegrown produce but also offers numerous benefits such as cost savings, sustainability, and the joy of connecting with nature. The process of nurturing seeds into thriving plants can be a fulfilling and rewarding experience for gardeners of all skill levels.
So why wait? Start your own green pepper garden today and embark on a journey of delicious flavors and abundant harvests. Enjoy the satisfaction of growing your own food and savor the taste of homegrown green peppers that add a touch of freshness to your culinary creations.