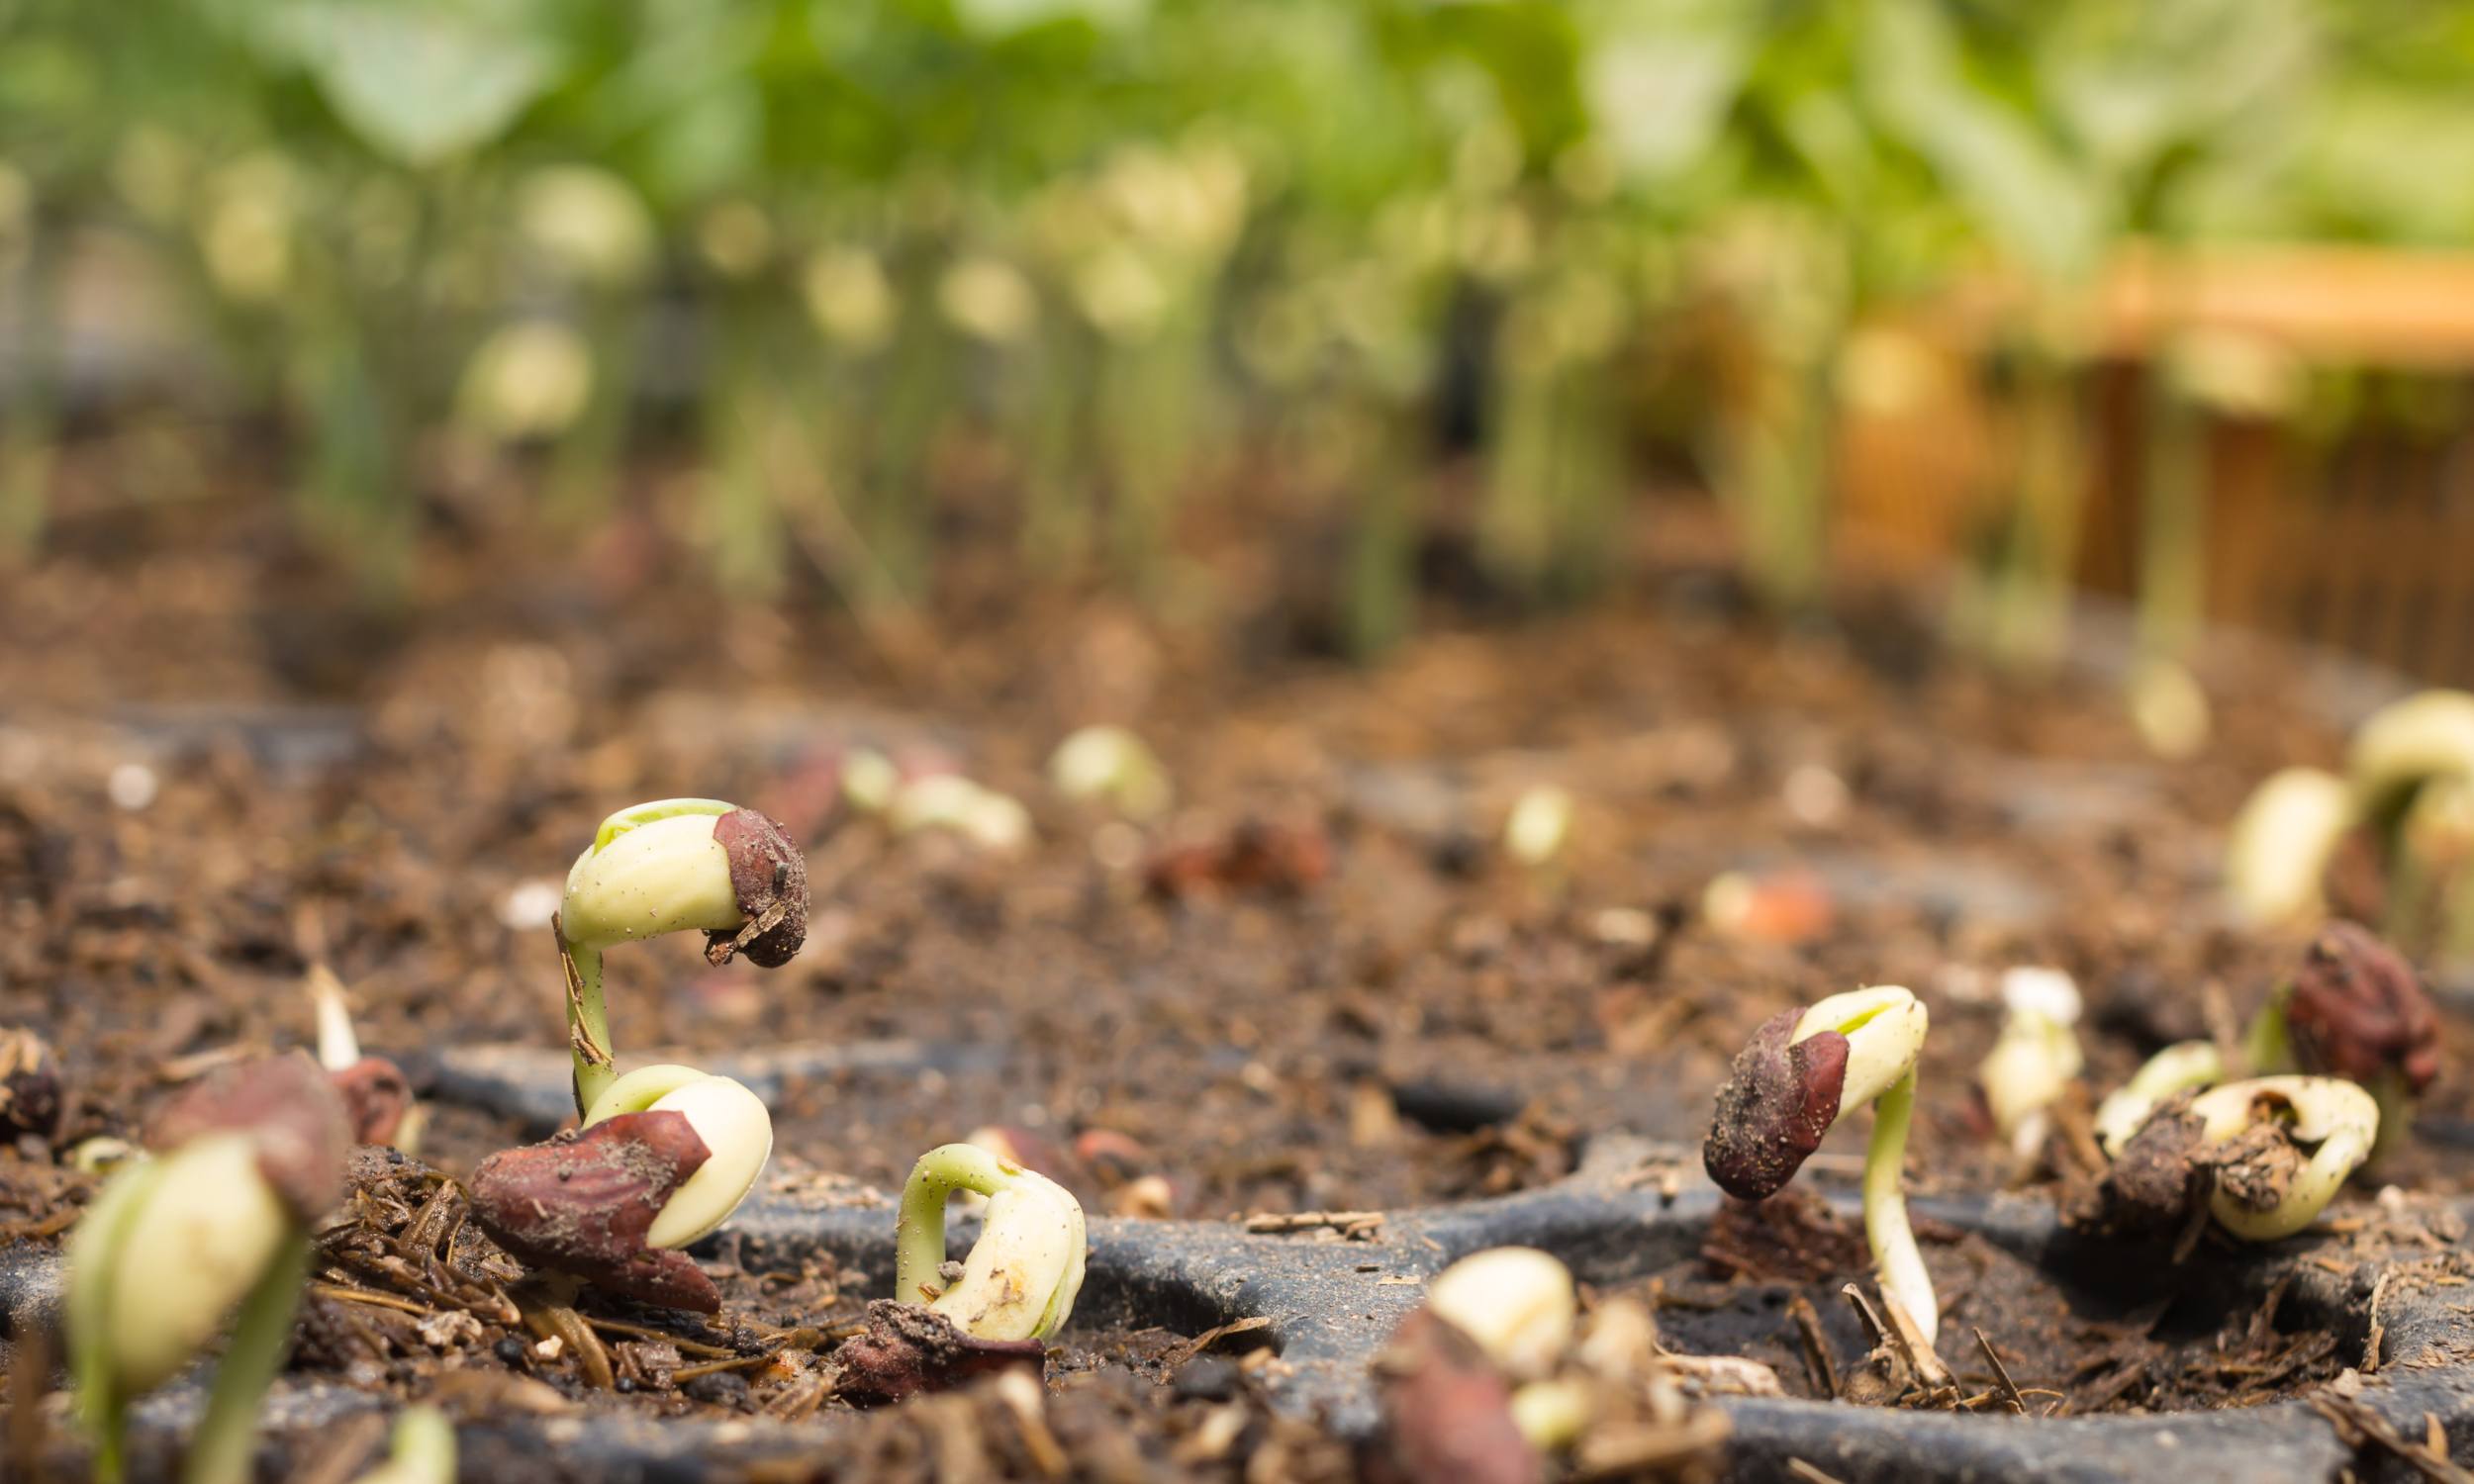
Home>Gardening Tips and Tricks>Problem Solving>What To Do If Seeds Don’t Germinate
Problem Solving
What To Do If Seeds Don’t Germinate
Modified: February 9, 2024
Learn effective problem-solving techniques to tackle the issue of non-germinating seeds. Discover how to troubleshoot and increase your success rate in seed germination.
(Many of the links in this article redirect to a specific reviewed product. Your purchase of these products through affiliate links helps to generate commission for Chicagolandgardening.com, at no extra cost. Learn more)
Table of Contents
- Introduction
- Possible Reasons for Seeds Not Germinating
- Importance of Proper Seed Starting Conditions
- Troubleshooting Techniques
- Method 1: Enhancing Germination Conditions
- Method 2: Seed Scarification
- Method 3: Stratification
- Method 4: Seed Soaking
- Method 5: Using Bottom Heat
- Method 6: Choosing Fresh Seeds
- Method 7: Testing Seed Viability
- Method 8: Adjusting pH Levels
- Method 9: Addressing Pest or Disease Issues
- Method 10: Seeking Professional Advice
- Conclusion
Introduction
Starting seeds is an exciting and rewarding experience for any gardener. However, it can be frustrating when your seeds don’t germinate as expected. There are several reasons why this might happen, ranging from improper seed starting conditions to poor seed viability. When faced with ungerminated seeds, it’s important not to lose hope. With the right troubleshooting techniques, you can increase the chances of successful germination and ensure a bountiful garden.
Seeds not germinating can be a common occurrence, especially for novice gardeners. Understanding the potential causes and knowing how to address them is crucial in overcoming this obstacle. This article will dive into the various reasons why seeds may fail to germinate and provide actionable solutions to improve germination rates.
Whether you’re starting seeds indoors or directly in the garden, providing optimal growing conditions is essential. Factors such as temperature, moisture, light, and soil quality greatly influence seed germination. Even the highest-quality seeds won’t sprout if the conditions aren’t right. By paying attention to these crucial parameters, you can set the stage for successful germination.
Additionally, it’s important to remember that different types of seeds have varying germination requirements. Some seeds may require specific conditions like scarification or stratification to break dormancy and germinate. Understanding the unique needs of each type of seed will help you troubleshoot and improve germination rates.
While it can be disheartening to see seed trays remaining barren, don’t give up just yet. In the following sections, we will explore a range of troubleshooting techniques to help you overcome the obstacles encountered in seed germination. These methods encompass various approaches, from enhancing germination conditions to testing seed viability and addressing possible pest or disease issues.
Possible Reasons for Seeds Not Germinating
There are several potential reasons why your seeds may not be germinating as expected. By understanding these reasons, you can take appropriate action to address the issues and improve your seed starting success rate.
1. Poor Seed Quality: The quality of the seeds you are using plays a vital role in germination. If you have acquired old or improperly stored seeds, their viability may be compromised, resulting in low germination rates. Always buy seeds from reputable sources and check the expiration date on the seed packet.
2. Incorrect Planting Depth: Planting seeds too deeply or too shallow can prevent them from receiving the right amount of oxygen and moisture required for germination. Always follow the recommended planting depth stated on the seed packet, as different seeds have varying requirements.
3. Unsuitable Temperatures: Seeds have specific temperature requirements for germination. If the temperature is too high or too low, germination may be inhibited. Some seeds prefer warmer temperatures, while others require a cold stratification period. Make sure to provide the appropriate temperature range for your seeds.
4. Inadequate Moisture: Seeds need moisture to soften their outer shell and initiate germination. If the soil is too dry, the seeds may not have sufficient moisture to begin the germination process. On the other hand, excessive watering can lead to waterlogged soil, drowning the seeds and preventing germination. Striking the right balance is crucial.
5. Lack of Light: While some seeds require darkness to germinate, others need light for proper germination. If you are starting seeds indoors, ensure that they receive the appropriate amount of light according to the specific requirements of the plant. Insufficient light can hinder germination and weaken seedlings.
6. Poor Soil Quality: Seeds rely on soil nutrients for initial growth. If the soil is lacking in essential nutrients, the seeds may struggle to germinate and establish themselves. Conduct a soil test to determine the soil’s condition and amend it with organic matter or fertilizer if necessary.
7. Pest or Disease Issues: Seedlings can be vulnerable to various pests and diseases that may inhibit germination. Keep a close eye on your seeds and seedlings, looking for signs of pest damage or disease. Take prompt action to address any issues and prevent further damage.
8. Seed Dormancy: Some seeds have built-in dormancy mechanisms to ensure germination occurs under optimal conditions. Breaking seed dormancy may be necessary for the germination process. This can involve scarification, stratification, or soaking the seeds before planting to break their dormancy and promote germination.
By identifying the potential reasons for your seeds not germinating, you can determine the best course of action to improve your germination rates. In the next sections, we will explore troubleshooting techniques that can help overcome these challenges and increase the chances of successful seed germination.
Importance of Proper Seed Starting Conditions
Providing optimal seed starting conditions is crucial for successful germination and the healthy establishment of seedlings. The conditions in which seeds are planted greatly influence their ability to sprout and grow. By paying attention to these factors, you can set the stage for successful germination and give your seeds the best chance of thriving. Here’s why proper seed starting conditions are essential:
1. Germination Success: Seeds have specific requirements for germination, including temperature, moisture, and light. By providing the optimal conditions, you create an environment that mimics nature and encourages seeds to break dormancy and initiate growth. When seeds experience the right combination of factors, they are more likely to germinate successfully.
2. Seedling Health: Seedlings that emerge from well-germinated seeds are stronger and healthier. Proper germination conditions ensure that the seedlings have access to the necessary nutrients and resources for growth. This leads to robust plants with better resistance to pests, diseases, and environmental stressors.
3. Time and Effort: By starting with strong and healthy seedlings, you save time and effort in later stages of plant development. When seeds fail to germinate due to unfavorable conditions, you may have to start the process over again, resulting in wasted time and resources. Providing optimal seed starting conditions from the beginning helps streamline the gardening process.
4. Consistency and Predictability: When you control the conditions in which seeds are started, you can create a consistent and predictable environment. This allows you to experiment and fine-tune your techniques, ensuring better success rates. By eliminating as many variables as possible, you can gain a deeper understanding of the germination process and improve your gardening skills.
5. Maximizing Seed Viability: Proper seed starting conditions preserve seed viability. Seeds have a finite shelf life, and their quality gradually declines over time. By providing the optimal conditions for germination, you give older seeds a better chance to sprout. This can be especially useful when working with heirloom or hard-to-find seeds.
6. Cost Savings: Starting plants from seeds is generally more cost-effective than purchasing seedlings or fully-grown plants. By ensuring proper seed starting conditions, you increase the likelihood of successful germination, reducing the need for additional plant purchases. This allows you to save money and have a wider variety of plants in your garden.
Remember that each type of seed has its own specific requirements. Some seeds may require cooler temperatures, while others may need higher humidity or a period of darkness. Understanding and providing these conditions will significantly increase your chances of success. In the following sections, we will explore troubleshooting techniques to help you optimize your seed starting conditions and improve germination rates.
Troubleshooting Techniques
When seeds fail to germinate, it can be disheartening for gardeners. However, there are several troubleshooting techniques you can employ to address the underlying issues and improve germination rates. By understanding and implementing these techniques, you can overcome common obstacles and enhance the success of your seed starting endeavors. Here are some effective troubleshooting techniques:
1. Enhancing Germination Conditions: Evaluate the temperature, moisture, light, and soil conditions for your seeds. Adjust the temperature to meet the specific requirements of the seeds you are planting. Provide adequate moisture, ensuring the soil is consistently damp but not waterlogged. Also, make sure your seeds are receiving the right amount and quality of light. Finally, ensure that the soil is well-draining and nutrient-rich to support germination and seedling growth.
2. Seed Scarification: Some seeds have hard outer coatings that can hinder germination. Scarification involves breaking or softening the seed coat to assist in water absorption and promote germination. This can be done by gently rubbing the seeds with sandpaper, soaking them in hot water, or nicking them with a sharp knife. Always research the specific requirements of the seeds before attempting scarification.
3. Stratification: Certain seeds, particularly those from plants that naturally grow in cold climates, require a period of cold stratification to break dormancy. This can be achieved by placing the seeds in a damp paper towel or in moistened vermiculite or peat moss in a sealed container and refrigerating them for the recommended duration. Once the stratification period is complete, the seeds can be planted to promote germination.
4. Seed Soaking: Soaking seeds before planting can help soften the seed coat and kickstart germination. Place the seeds in a container of lukewarm water and let them soak for the specified time. Be cautious not to over-soak, as this can cause damage or rotting. After soaking, plant the seeds immediately according to the recommended planting depth.
5. Using Bottom Heat: Heating the soil from the bottom can help stimulate root growth and enhance germination. You can use a seedling heat mat or place the seed trays on a warm surface, such as on top of a refrigerator or near a heat source. Remember to monitor the temperature to ensure it stays within the appropriate range for the seeds you are germinating.
6. Choosing Fresh Seeds: The viability of seeds diminishes over time. Using fresh seeds will greatly increase your chances of successful germination. Purchase seeds from reputable suppliers and check the expiration date on the seed packets. If you have stored seeds from previous seasons, perform a germination test to determine their viability before planting.
7. Testing Seed Viability: To determine the viability of stored seeds, conduct a simple germination test. Place a few seeds on a damp paper towel, seal them in a plastic bag, and keep them in a warm place for the recommended duration. Check the seeds periodically to see if they have germinated. If a low percentage of seeds germinate, it may be time to invest in fresh seeds.
8. Adjusting pH Levels: Some plants have specific pH requirements for optimal germination. Monitoring and adjusting the pH of the soil can ensure that your seeds have the right environment to germinate. Perform a soil test to determine the pH level, and make amendments as needed to achieve the desired pH range for the seeds you are planting.
9. Addressing Pest or Disease Issues: Pests and diseases can hinder seed germination and damage emerging seedlings. Regularly inspect your seeds and seedlings for signs of pests or diseases. If you notice any issues, take appropriate action to control the pests or treat the diseases. This can include using organic pest deterrents, practicing crop rotation, or consulting with a professional if the problem persists.
10. Seeking Professional Advice: If you have tried various troubleshooting techniques and are still experiencing issues with seed germination, don’t hesitate to seek advice from gardening experts or professionals. They can provide tailored recommendations based on your specific circumstances and help you overcome any persistent challenges.
By employing these troubleshooting techniques and adapting them to your specific situation, you can increase the likelihood of successful seed germination. Don’t be discouraged if you encounter setbacks along the way. Gardening is a continuous learning process, and with practice and patience, you will improve your seed starting skills and enjoy the rewards of bountiful plant growth.
Method 1: Enhancing Germination Conditions
Creating the optimal germination conditions for your seeds is essential for successful seed starting. By providing the right environment, you can greatly enhance the chances of germination and seedling establishment. Here are some key factors to consider when enhancing germination conditions:
1. Temperature: Different seeds have specific temperature requirements for germination. Some seeds prefer warmer temperatures, while others thrive in cooler conditions. Refer to the seed packet or do some research to determine the ideal temperature range for the seeds you are planting. Use a thermometer to monitor the temperature in the seed starting area and adjust it accordingly. Consider using a seedling heat mat or adjustable room heater to maintain consistent temperatures if needed.
2. Moisture: Proper moisture levels are crucial for seed germination. The soil should be evenly moist but not saturated. Dry soil can prevent seeds from absorbing enough water to trigger germination, while overly wet soil can lead to rotting. Water the soil gently and consistently to keep it at the optimal moisture level. Consider using a misting spray bottle or a drip irrigation system to provide controlled and uniform watering.
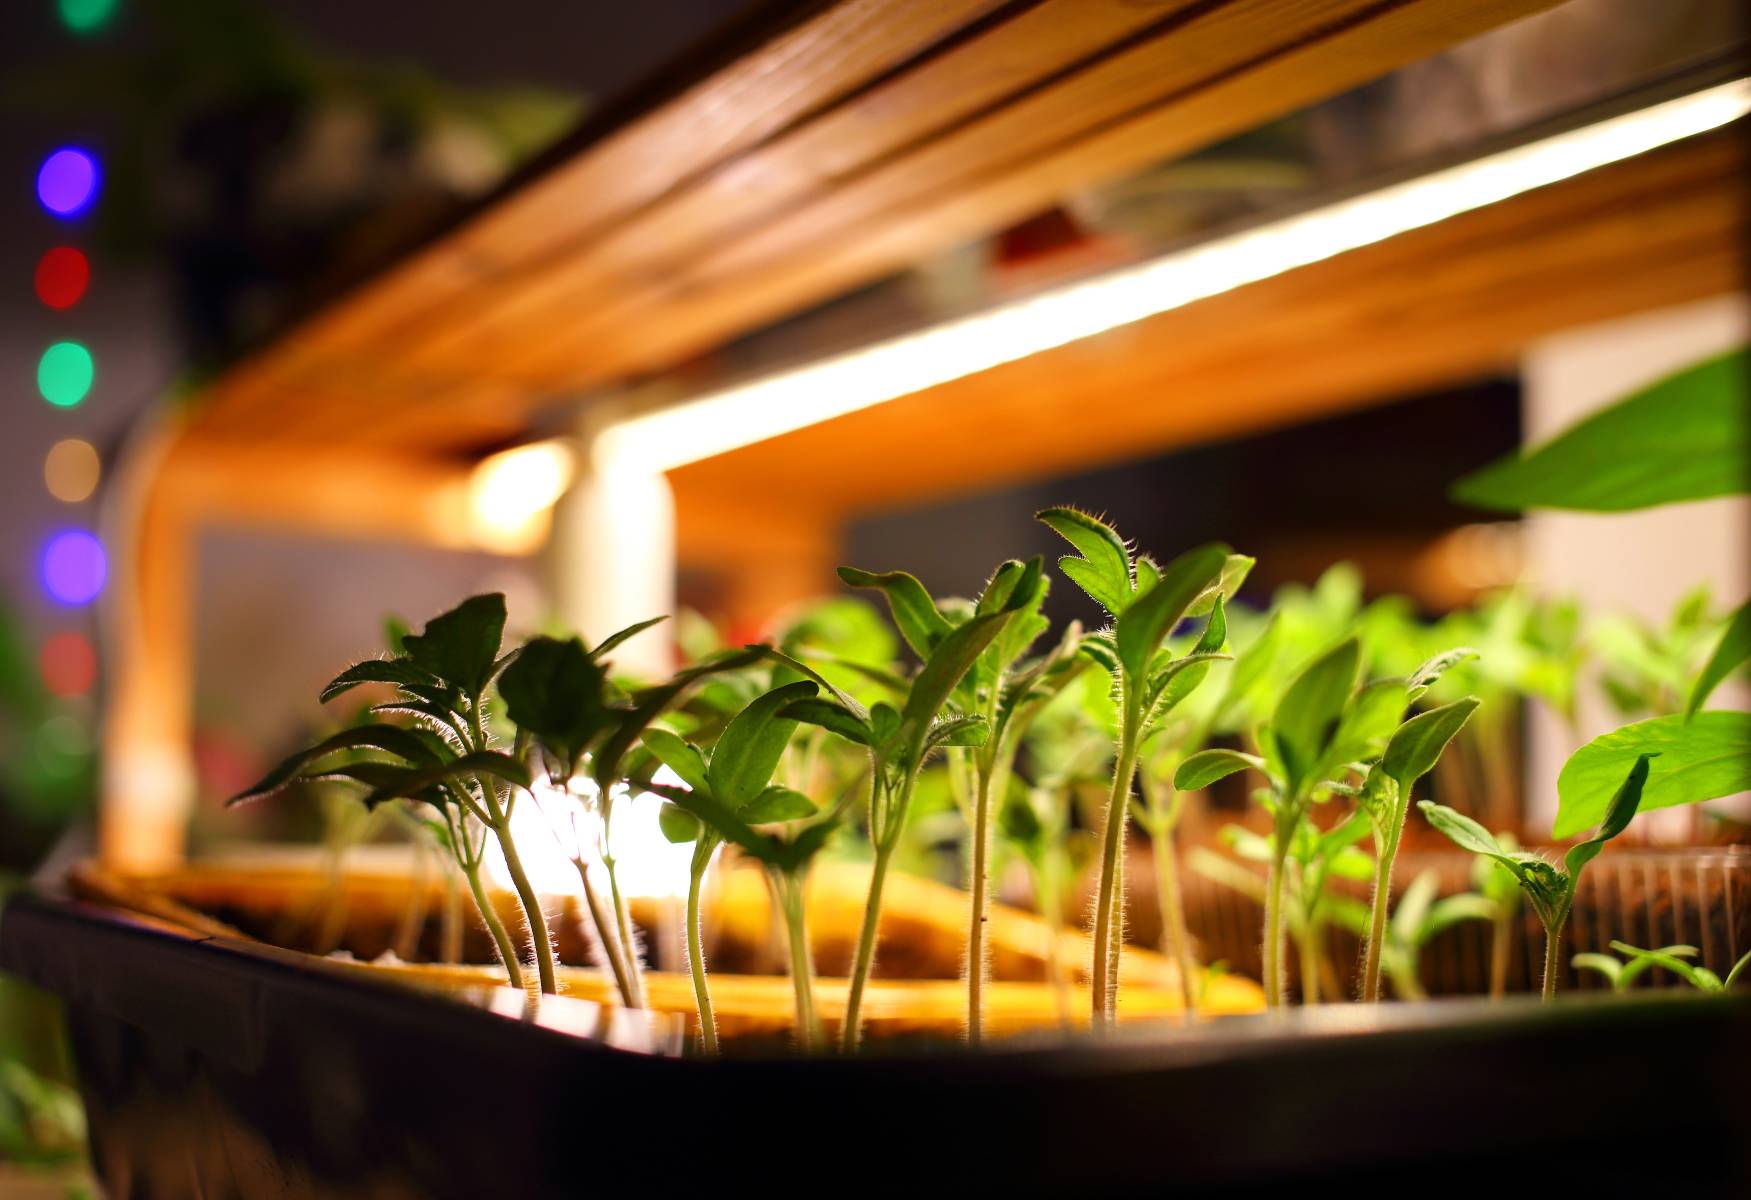
3. Light: Light is another critical factor for successful germination. While some seeds require darkness to germinate, most seeds need some level of light for proper growth. Place the seed trays near a sunny window or use artificial grow lights to provide adequate illumination. If using grow lights, position them at the appropriate distance from the seedlings to avoid burning.
4. Soil Quality: The quality of the soil greatly impacts seed germination and subsequent growth. Use a well-draining seed starting mix that is specifically formulated for seed germination. This type of soil is lightweight and sterile, providing the right balance of moisture retention and aeration. Avoid using garden soil, as it may contain pests, diseases, or heavy clay that can impede germination.
5. Air Circulation: Proper air circulation is important for preventing fungal diseases and ensuring healthy seedlings. Avoid crowding the seed trays and provide enough space between them for air to flow. If air circulation in your indoor growing area is limited, consider using a small fan on low setting to gently circulate the air around the seedlings.
6. Maintenance: Regular maintenance is crucial to ensure optimal germination conditions. Check the moisture levels in the soil daily and water as needed. Remove any dead or decaying plant matter from the seed trays to prevent the growth of mold or fungus. Monitor the temperature and adjust if necessary. Observing the seedlings closely allows you to address any issues promptly and proactively.
Remember that each type of seed has specific requirements. Research the individual needs of the plants you are growing to ensure the best germination conditions. By enhancing the temperature, moisture, light, soil quality, air circulation, and overall maintenance of your seed starting area, you create an environment in which seeds are more likely to germinate and thrive. Experiment, learn from your experiences, and make adjustments as needed to optimize your germination conditions.
Method 2: Seed Scarification
Seed scarification is a method used to break or soften the hard outer coat of certain seeds, allowing water to penetrate and promote germination. This technique is particularly useful for seeds with tough or impermeable seed coats. By scarifying the seeds, you create small openings or abrasions that facilitate water absorption and trigger the germination process. Here’s how you can scarify seeds:
1. Research Seed Requirements: Before attempting seed scarification, it’s important to understand the specific needs of the seeds you are working with. Not all seeds require scarification, and some may have specific scarification techniques that work best for them. Research the seed variety and determine if scarification is necessary or recommended.
2. Choose the Right Method: There are several methods you can use for seed scarification, and the choice depends on the seed’s characteristics. Common scarification techniques include rubbing the seeds on sandpaper, nicking the seed coat with a sharp knife or nail clippers, or soaking the seeds in hot water. Each method serves to break or soften the seed coat to promote hydration and germination.
3. Rubbing on Sandpaper: For larger seeds, such as beans or peas, gently rub the seeds back and forth on medium-grit sandpaper. Be careful not to apply excessive pressure that could damage the embryo inside. The goal is to remove the smooth outer layer of the seed coat, allowing water to penetrate and initiate germination.
4. Nicking the Seed Coat: For smaller seeds, use a sharp knife or nail clippers to make a small nick or cut on the seed coat. Focus on the opposite end of the seed from where the root will emerge. This small opening will help water penetrate the seed coat, signaling to the embryo that it’s time to start growing.
5. Hot Water Soaking: Some seeds have hard seed coats that require heat to break dormancy. Soaking these seeds in hot water can help soften and weaken the seed coat. Pour hot (but not boiling) water over the seeds and let them soak for a specified amount of time, typically 12-24 hours. The exact soaking time and water temperature vary depending on the seed variety, so be sure to follow the instructions for the specific seeds you are scarifying.
6. Proceed with Planting: After scarification, proceed with planting the scarified seeds according to the recommended sowing depth and spacing. Remember to provide the appropriate germination conditions in terms of temperature, moisture, light, and soil quality, as scarification alone does not guarantee successful germination.
7. Alternative Methods: In addition to the aforementioned techniques, there are alternative methods of scarification that can be used for specific seed types. For example, some seeds require exposure to acid or digesting enzymes to break down the outer coat. Research and follow the recommended method for the particular seeds you are scarifying.
It’s important to note that not all seeds require scarification, and some seeds may have more complex germination needs. Additionally, exercise caution when performing scarification to avoid damaging the delicate seed embryo. Always follow the specific instructions for the seeds you are working with to ensure the best results.
By using seed scarification techniques when appropriate, you can enhance germination rates for seeds with hard or impermeable seed coats. Experimenting with scarification and understanding the needs of different seed varieties will help you achieve higher success rates in germination and set the stage for a thriving garden.
Method 3: Stratification
Stratification is a method used to break seed dormancy by subjecting seeds to a period of cold and moist conditions. This technique is particularly beneficial for seeds from plants that naturally experience cold winters. By simulating the natural processes these seeds go through during winter, stratification helps to prepare them for successful germination. Here’s how you can stratify seeds:
1. Understand Seed Requirements: It is important to research the specific requirements of the seeds you are working with before attempting stratification. Not all seeds require stratification, and some may have specific stratification needs, such as duration and temperature. Understand the ideal stratification conditions for the seeds you have.
2. Choose the Right Method: There are two main methods for stratification: moist stratification and cold stratification. Moist stratification involves placing the seeds in a damp paper towel or vermiculite, while cold stratification requires placing the seeds in a refrigerator or cold environment. Determine which method is most suitable for the seeds you are stratifying.
3. Moist Stratification: For moist stratification, take a damp paper towel or vermiculite and place the seeds inside. Make sure the paper towel or vermiculite is damp but not soaking wet. Seal the seeds inside a plastic bag or container to maintain the moisture. Store the bag or container in a cool location such as a basement or root cellar for the recommended stratification period, usually a few weeks or months.
4. Cold Stratification: Cold stratification involves exposing the seeds to a period of cold temperatures. Place the seeds in a container or plastic bag with a moistened medium such as vermiculite or peat moss. Ensure the moisture level is adequate but not excessive. Seal the container or bag and place it in the refrigerator, which provides a controlled cold environment. Check the recommended duration for stratification, as it can vary depending on the seed variety.
5. Monitoring and Evaluation: Regularly check the moisture level of the stratifying seeds and ensure they remain damp. During the stratification period, it’s important to monitor the seeds for any signs of fungal growth or decay. If you notice any issues, adjust the moisture levels or remove any affected seeds. Regularly evaluate the seeds for signs of germination and development during the stratification period.
6. Transition to Planting: Once the stratification period is complete, transition the stratified seeds to the planting stage. Plant the seeds according to the recommended depth and spacing, ensuring they receive appropriate temperature and moisture conditions. Keep in mind that stratification does not guarantee germination, but it improves the conditions for successful germination by breaking dormancy.
Stratification is a valuable technique to break seed dormancy and promote germination in seeds that require cold treatment. It replicates the natural conditions these seeds experience in their native habitats and prepares them for optimal germination. By following the specific stratification requirements for your seeds, you can increase germination rates and establish healthy seedlings in your garden.
Method 4: Seed Soaking
Seed soaking is a technique that involves pre-soaking seeds in water to soften their outer coat and promote germination. This method is particularly useful for seeds with hard seed coats or those that have thickened membranes that inhibit water absorption. By soaking the seeds, you provide them with the moisture they need to initiate the germination process. Here’s how you can effectively use the seed soaking method:
1. Choose the Right Seeds: Not all seeds benefit from soaking, so it’s important to research and identify which seeds will benefit from this method. Seeds with hard seed coats, such as beans, peas, and morning glories, are commonly soaked to improve germination rates. Be sure to refer to the specific seed variety and its germination requirements.
2. Timing and Duration: Determine the appropriate timing and duration for seed soaking. Generally, soaking seeds for 12 to 24 hours is sufficient, but some seeds may require longer periods. It’s important not to exceed the recommended soaking time, as over-soaking can lead to damage or rotting. Follow the instructions provided for the specific seeds you are soaking.
3. Soaking Method: Place the seeds in a container, such as a jar or a bowl, and add enough lukewarm water to cover them. Avoid using hot water, as it can damage the seeds. The water should be at room temperature or slightly warm. Gently stir the seeds or lightly tap the container to ensure all seeds are submerged in the water.
4. Monitoring: During the soaking period, periodically check the water levels to ensure that the seeds remain submerged. If necessary, add more water to maintain the desired level. Observe any changes in the seeds, such as swelling or softening of the seed coat, as this indicates that the seeds are absorbing water.
5. Drain and Plant: After the designated soaking period, drain the water from the container and prepare to plant the soaked seeds. It’s essential to plant the seeds immediately after soaking to prevent them from drying out. Follow the recommended planting depth and spacing for the specific seeds.
6. Germination Conditions: Even though the seed coats have been softened through soaking, it’s important to continue providing optimal germination conditions such as temperature, light, and moisture. Ensure that the planting medium remains consistently moist but not waterlogged. Adjust the temperature and light conditions as required for the specific seeds.
Seed soaking can jumpstart the germination process by providing seeds with the necessary moisture to break dormancy and initiate growth. By softening the seed coats through soaking, you enhance the germination rates and speed up the overall germination process. However, not all seeds require soaking, so be sure to research the germination requirements for each seed variety before applying this method.
Method 5: Using Bottom Heat
Using bottom heat is a technique that can significantly improve seed germination rates, especially for seeds that require warmer temperatures for successful sprouting. By providing consistent heat from the bottom, you create an ideal environment for seed germination and promote faster and more uniform growth. Here’s how you can effectively use the method of bottom heat:
1. Choose the Suitable Seeds: Seeds that benefit from bottom heat include those that require warmer germination temperatures, such as peppers, tomatoes, and melons. Refer to the seed packet or do some research to determine if the specific seeds you are planting will benefit from bottom heat.
2. Seedling Heat Mat: A seedling heat mat is a specially designed mat that provides gentle and consistent heat from beneath the seed trays. It is an effective and convenient tool for maintaining optimal soil temperature for germination. Place the seed trays on top of the heat mat, ensuring that the mat covers the entire bottom surface of the trays.
3. Temperature Control: Different seeds have specific temperature requirements for germination. Research the ideal temperature range for the seeds you are working with and adjust the heat mat settings accordingly. Most seedling heat mats have adjustable thermostats that allow you to set and monitor the desired temperature.
4. Measure Soil Temperature: To ensure that the soil temperature is at the appropriate level, use a soil thermometer to measure the temperature of the soil in the seed trays. Insert the thermometer into the soil to a depth of about 1 inch (2.5 cm) to get an accurate reading. Adjust the heat mat settings as needed to maintain the desired soil temperature.
5. Monitoring and Adjustments: Regularly monitor the soil temperature and make any necessary adjustments to the heat mat settings. Keep in mind that the optimal temperature range may vary throughout the germination process. Once the seedlings have emerged, gradually reduce the bottom heat to prevent overheating and promote healthy growth.
6. Additional Considerations: It’s important to remember that bottom heat is just one aspect of providing optimal germination conditions. Proper lighting, moisture levels, and soil quality are still important factors for successful germination. Ensure that the seed trays receive adequate light, consistent moisture, and well-draining soil in addition to the bottom heat to support healthy seedling growth.
Using bottom heat can significantly improve germination rates and speed up the overall germination process for seeds that require warmer temperatures. By creating a warm and consistent environment at the seedling stage, you enhance the chances of successful sprouting and give your plants a strong start. However, it’s important to carefully monitor the temperature and provide balanced growing conditions to ensure the health and vitality of the seedlings.
Method 6: Choosing Fresh Seeds
The quality and viability of seeds play a crucial role in successful germination. Using fresh seeds ensures that you have the highest chance of achieving healthy and vigorous seedlings. When selecting seeds, it’s important to consider their age, storage conditions, and source. Here’s why choosing fresh seeds is essential for optimal germination:
1. High Germination Rates: Fresh seeds have a higher germination rate compared to older seeds. As seeds age, their viability naturally decreases, resulting in lower rates of successful germination. By choosing fresh seeds, you maximize the chances of achieving the desired germination success and a healthy start for your plants.
2. Better Seedling Vigor: Fresh seeds produce seedlings with better vigor and vitality. These young seedlings have the energy and resources needed to establish themselves and grow into robust plants. They are better equipped to handle environmental stresses, pests, and diseases, leading to stronger and more productive garden outcomes.
3. Increased Success in Specific Varieties: Certain plant varieties, such as hybrid or rare varieties, may have lower seed availability. By choosing fresh seeds, you have a better opportunity to obtain viable seeds for these specific varieties. This allows you to grow unique and desirable plants that may not be readily available through other means.
4. Genetic Integrity: Over time, seeds can become cross-pollinated or develop genetic changes that affect their performance. By starting with fresh seeds from a reliable source, you ensure the genetic integrity of your plants. This is particularly important for heirloom or open-pollinated varieties where maintaining the purity of the strain is essential.
5. Accurate Plant Traits: Fresh seeds hold the potential to express the true characteristics of the plant variety. When you use older seeds, the traits and characteristics of the resulting plants may be less accurate or inconsistent. By choosing fresh seeds, you have a better chance of growing plants that display the desired traits, such as color, flavor, and disease resistance.
6. Supplier Accountability: When you purchase fresh seeds from reputable suppliers, you have a higher level of accountability and assurance. Reputable seed companies or nurseries often provide information about the seed’s origin, age, and germination rates. This allows you to make informed decisions and increases the chances of successful germination.
7. Greater Availability: Fresh seeds have a wider availability compared to older seeds. Nurseries and seed companies tend to stock up on fresh seeds as they become available, ensuring you have a diverse selection to choose from. This availability allows you to explore new varieties, experiment with different plant types, and expand your gardening horizons.
When selecting seeds, always check the expiration or “packed for” date on the seed packet. This indicates the freshness of the seeds. Additionally, store seeds properly in cool, dry, and dark conditions to maintain their viability. Regularly assess your seed inventory and consider replenishing with fresh seeds to ensure ongoing success in your gardening endeavors.
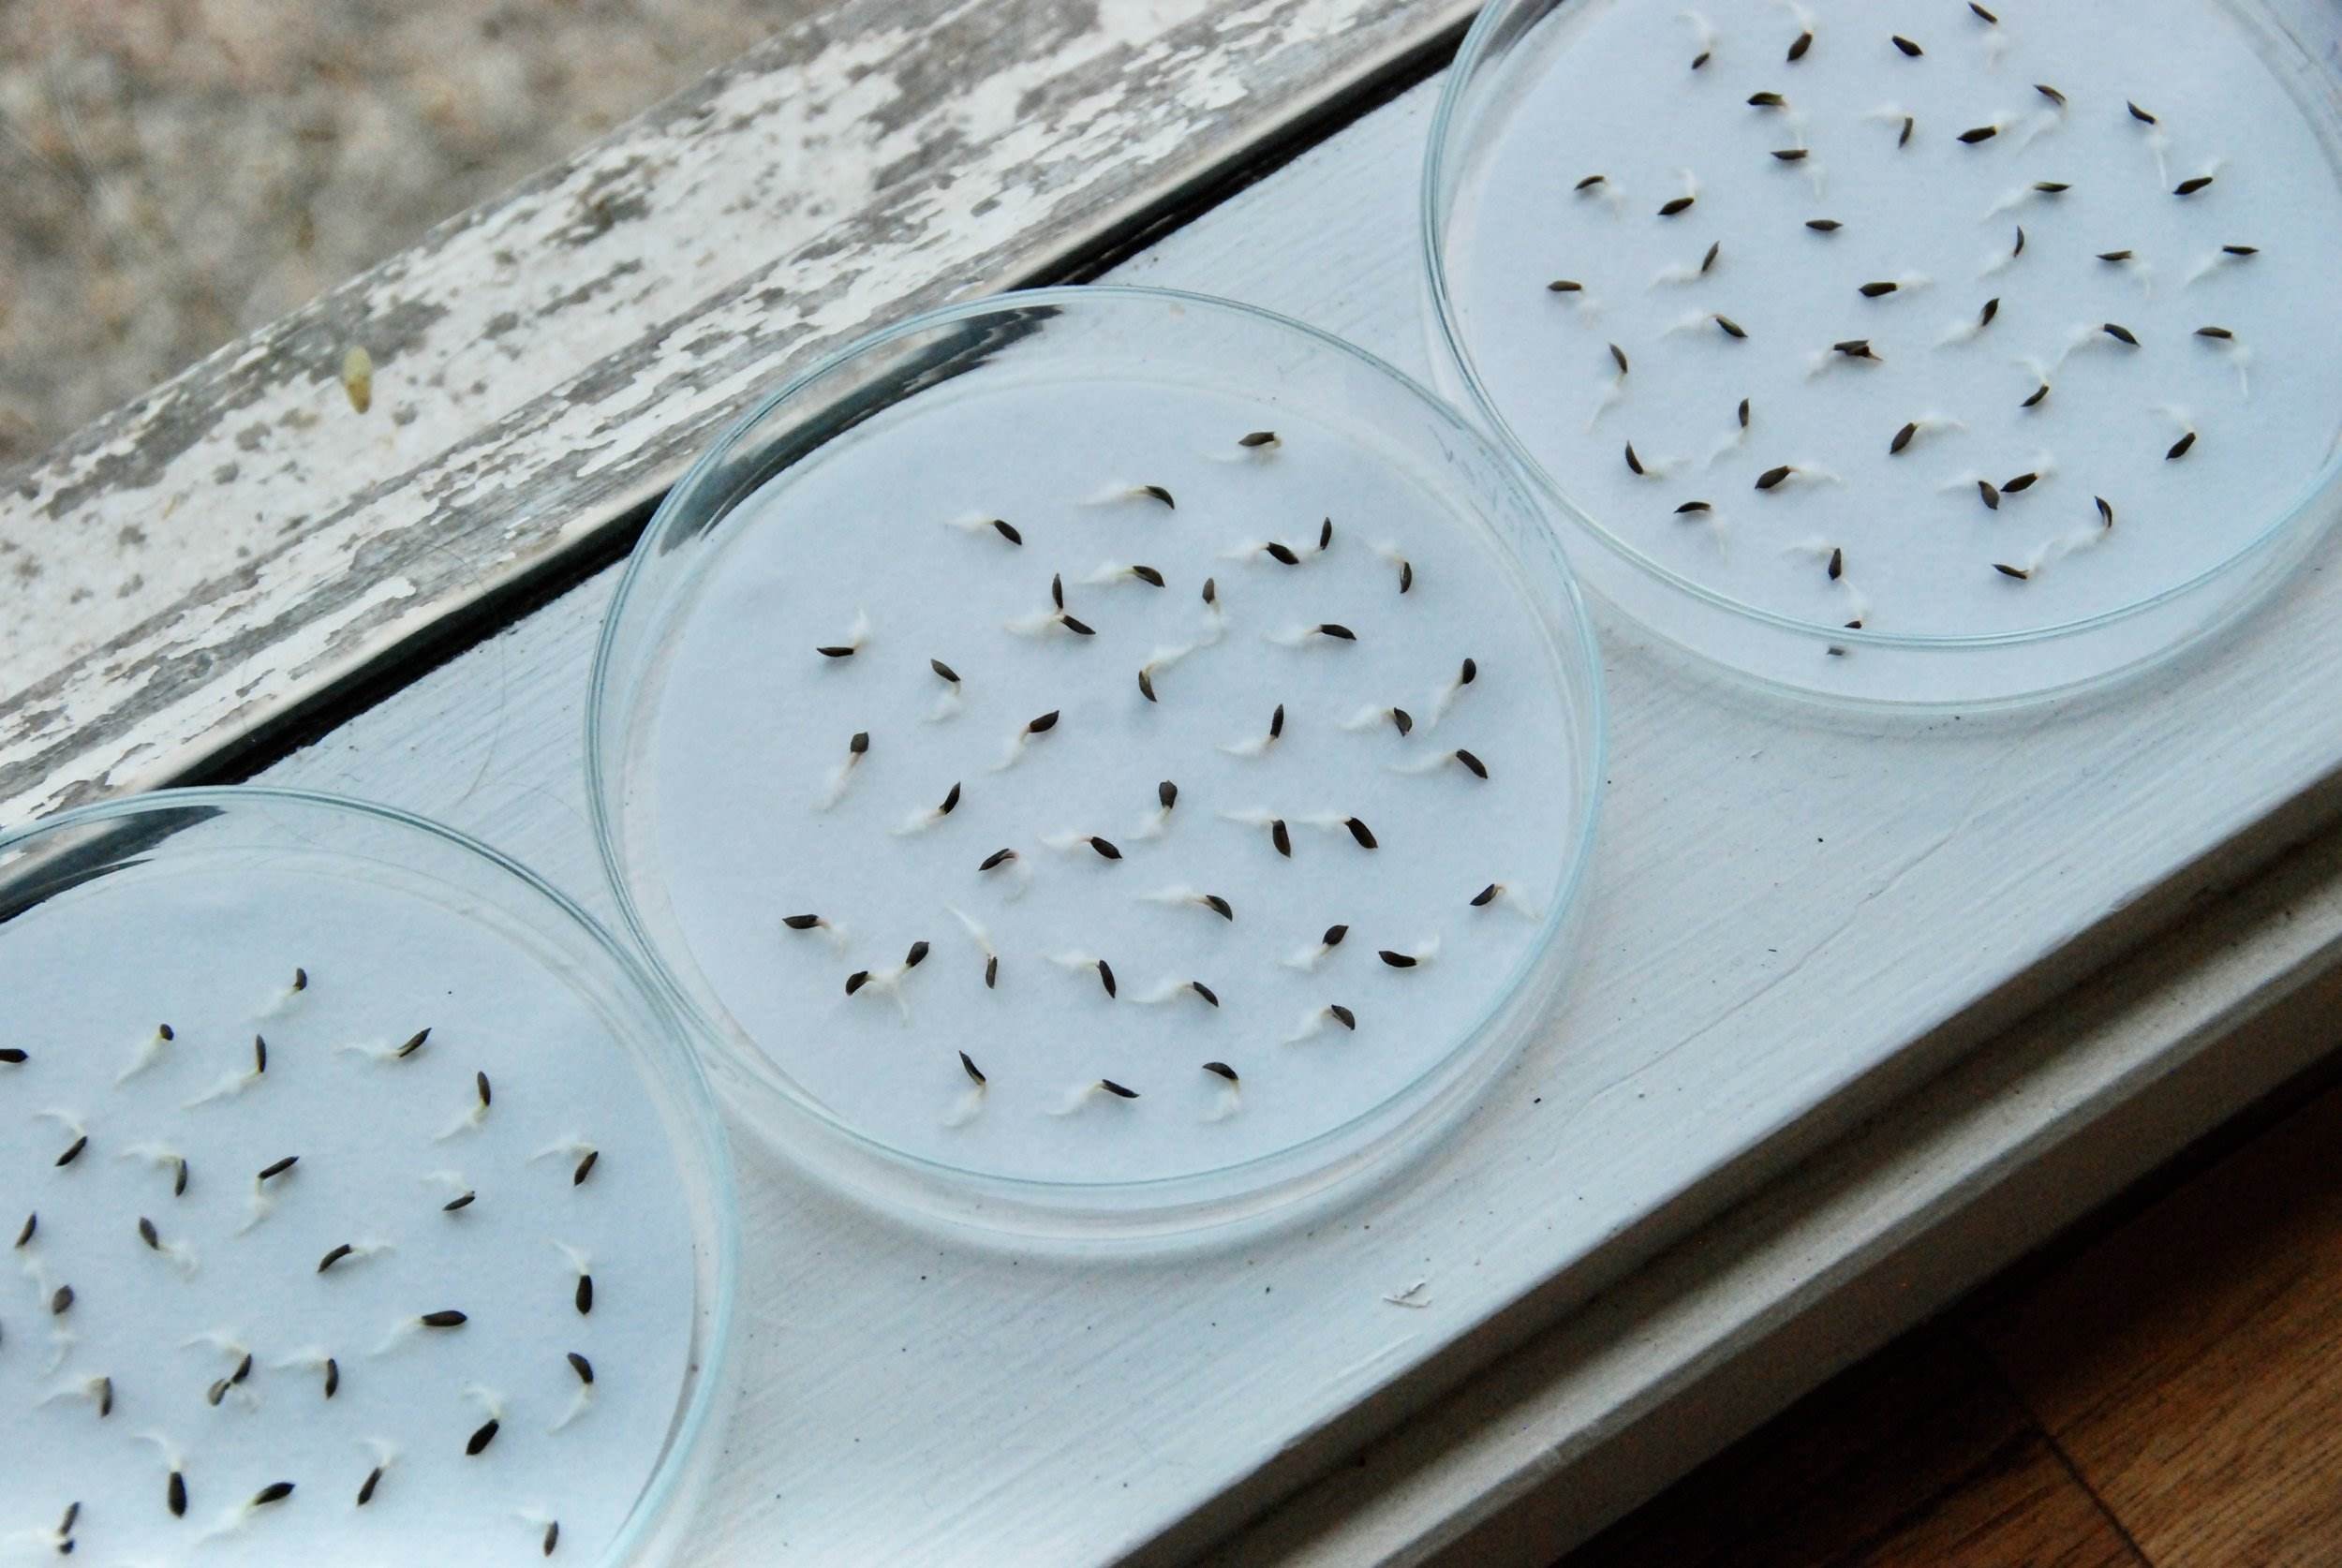
Method 7: Testing Seed Viability
Testing the viability of seeds is a valuable method to determine if they are still capable of germinating. Seed viability refers to the percentage of seeds in a batch that have the potential to germinate and produce healthy seedlings. By conducting a seed viability test, you can assess the quality of your seeds and make informed decisions about their use. Here’s how you can effectively test seed viability:
1. Gather Sample Seeds: Select a representative sample of seeds from the batch you wish to test. The size of the sample may vary depending on the seed quantity available, but aim for a statistically significant number to obtain accurate results. A sample size of 10 to 20 seeds is generally sufficient.
2. Conduct Germination Test: To determine seed viability, perform a germination test. Place the seeds on a damp paper towel or in a container with a germination medium such as vermiculite or soil. Ensure the medium remains consistently moist throughout the test period. Keep the seeds in a warm and well-lit location, ideally at the optimal germination temperature for each specific seed variety.
3. Monitor Germination Progress: Regularly check the seeds and monitor their germination progress. Observe if and when the seeds start to sprout or produce seedlings. Keep a record of the number of seeds that germinate and the time it takes for them to do so. This will help you determine the germination rate and overall seed viability.
4. Calculate Germination Rate: Calculate the germination rate by dividing the number of seeds that successfully germinate by the total number of seeds tested. For example, if 12 out of 20 seeds sprout, the germination rate is 60%. This percentage indicates the viability and potential success of the remaining untested seeds from the same batch.
5. Assess Seed Viability: Use the germination rate to assess the general viability of the seeds. Seeds with high germination rates, such as 80% or above, are considered highly viable and likely to produce healthy seedlings. Lower germination rates may indicate lower viability, and seeds below a certain threshold may be best discarded or used with caution.
6. Consider Seed Storage Condition: Seed viability can be affected by storage conditions. Seeds that have been stored under ideal conditions, such as cool and dry environments, have a higher chance of retaining their viability. However, seeds that have been stored improperly or for extended periods may experience a decrease in viability. Take the storage conditions into account when assessing seed viability.
8. Make Informed Decisions: Use the results of the seed viability test to make informed decisions about seed usage. Highly viable seeds can be confidently planted, while seeds with lower viability rates may require additional measures, such as increasing the number of seeds sown or using specialized germination techniques. Consider purchasing fresh seeds or seeking higher-quality alternatives if the viability test reveals low germination rates.
Seed viability tests are a valuable tool for gauging the quality and potential germination success of your seeds. By assessing seed viability, you can make informed decisions regarding seed selection, planting strategies, and maximizing your gardening success.
Method 8: Adjusting pH Levels
Adjusting pH levels is an important method to create an optimal growing environment for seeds. pH measures the acidity or alkalinity of the soil, and certain seeds have specific pH requirements for successful germination and growth. By adjusting the pH levels, you can provide the right conditions for nutrient availability and root development. Here’s how you can effectively adjust pH levels:
1. Test Soil pH: Before making any adjustments, it’s crucial to test the pH of the soil. Soil testing kits are readily available and provide a simple and affordable way to determine the current pH level. Follow the instructions on the testing kit to obtain an accurate reading of your soil’s pH.
2. Determine Desired pH Range: Different plants thrive in different pH ranges. Research the specific pH requirements for the seeds you are planting to determine their ideal pH range. Most common garden plants prefer slightly acidic to neutral soil, with a pH range of 6.0 to 7.0. However, there are exceptions, so be sure to tailor your pH adjustments to the specific needs of your seeds.
3. Acidify Soil: If your soil pH is too alkaline, meaning it is above the desired range, you can acidify the soil using organic materials. Incorporate materials such as peat moss, pine needles, or elemental sulfur into the soil. These materials gradually lower the pH and create a more acidic environment for the seeds. Follow the recommended application rates and guidelines for the specific materials you are using.
4. Alkalize Soil: If your soil pH is too acidic, meaning it is below the desired range, you can alkalize the soil using organic materials. Adding materials such as agricultural lime or wood ash can raise the pH and create a more alkaline environment. Again, carefully follow the recommended application rates for the specific materials you are using to avoid overcompensation and excessive pH adjustment.
5. Incorporate Organic Matter: Organic matter such as compost or well-rotted manure can help buffer soil pH and improve overall soil quality. Adding organic matter to the soil helps to maintain a more balanced and stable pH level. Mix well-aged compost or organic matter into the soil before planting, ensuring it is thoroughly incorporated.
6. Monitor pH Levels: After adjusting the pH, it’s important to regularly monitor the pH levels to ensure they remain within the desired range. Over time, soil pH can shift again due to natural processes or excessive rain. Use regular soil testing to track any changes and make further adjustments if necessary.
7. Consider Container Gardening: If adjusting the pH level of your soil proves challenging, consider container gardening. With container gardening, you have more control over the growing medium and can easily create the ideal pH environment for your seeds by choosing the appropriate potting mix or adjusting the mix manually.
Remember that adjusting soil pH is a gradual process, and it may take time to achieve and maintain the desired pH level. It’s important to be patient and avoid making drastic pH adjustments, as this can shock the plants and lead to other undesirable issues. Regular testing, monitoring, and gradual adjustments will help create an optimal pH environment for your seeds to germinate and grow.
Method 9: Addressing Pest or Disease Issues
Pests and diseases can pose significant obstacles to seed germination and can hinder the growth and health of emerging seedlings. It is important to address these issues promptly to ensure the successful establishment of your plants. By identifying and implementing appropriate pest and disease control measures, you can protect your seeds and seedlings. Here’s how you can effectively address pest or disease issues:
1. Identification: The first step in addressing pest or disease issues is to identify the specific problem. Observe your seeds and seedlings closely, looking for any unusual signs such as holes, chewed leaves, discoloration, or unusual growth patterns. Utilize online resources, gardening books, or consult with local gardening experts to help identify the pests or diseases affecting your plants.
2. Integrated Pest Management (IPM): Integrated Pest Management is a holistic approach that combines various tactics to control pests and diseases without relying solely on chemical treatments. Implement cultural practices such as crop rotation, soil sanitation, and proper garden hygiene to reduce pest and disease pressure. Use physical barriers like floating row covers or netting to exclude pests, and introduce beneficial insects to naturally control pest populations.
3. Organic Pest Control: If pest problems persist, consider using organic pest control methods. These include using insecticidal soaps or oil sprays, neem oil, diatomaceous earth, or other natural pest control products that target specific pests while minimizing harm to beneficial insects. Follow the instructions on product labels carefully to ensure effective and safe application.
4. Disease Management: Disease management often involves cultural practices such as planting disease-resistant varieties, providing adequate spacing between plants for good airflow, and avoiding overhead watering that can promote fungal diseases. Remove and destroy any diseased plant material promptly to prevent the spread of pathogens. Consider using organic fungicides or biocontrol agents if necessary.
5. Organic Soil Amendments: Some organic soil amendments, such as compost or compost tea, can boost the overall health and vigor of your plants, making them more resilient to pests and diseases. Healthy plants are better able to withstand pest attacks and recover from disease pressure. Incorporating organic matter into the soil helps promote beneficial microbial activity and improve plant immune systems.
6. Monitoring and Early Intervention: Regularly monitor your seeds and seedlings for any signs of pests or diseases. Early detection and intervention can prevent problems from escalating and reduce the impact on your plants. Inspect your plants daily, checking both the foliage and the soil around the seedlings. This practice allows you to address issues promptly and take appropriate action when necessary.
7. Consult Professionals: If pest or disease issues persist despite your best efforts, consider seeking assistance from professional gardeners or agricultural extension offices. They can provide expert advice, identify the specific issues, and recommend appropriate treatment methods tailored to your specific situation.
Remember that prevention is key when it comes to managing pests and diseases. Maintaining healthy growing conditions, practicing good plant hygiene, and using proper cultural practices can help prevent many issues from occurring in the first place. By being proactive and addressing pest and disease challenges, you can protect your seeds and seedlings and ensure their successful growth and development.
Method 10: Seeking Professional Advice
When all else fails, and you’ve exhausted your troubleshooting efforts, seeking professional advice can be invaluable in solving complex seed germination issues. Professional gardeners, horticulturists, or agricultural extension offices have the expertise and experience to assist with challenging problems that may be impeding successful seed germination. Here’s how seeking professional advice can help:
1. Expert Knowledge: Professionals in the gardening and horticulture industry possess extensive knowledge and experience in dealing with a wide range of plant-related issues. They can provide insights, strategies, and recommendations based on their expertise and understanding of seed germination and plant development. Their knowledge can help identify and address specific obstacles you may be facing.
2. Tailored Solutions: Every garden and seed germination scenario is unique. Professionals can provide personalized and tailored advice that takes into account your specific circumstances, including climate, soil conditions, plant variety, and pests or diseases prevalent in your region. Their recommendations can be better suited to your individual situation, increasing the chances of resolving the issues at hand.
3. Access to Resources: When seeking professional advice, you gain access to a wide range of resources that may not be readily available to the average gardener. These resources can include research papers, publications, diagnostic tools, and specialized testing services. By tapping into these resources, you can gather more information and insights to help identify the root cause of your seed germination challenges.
4. Pest and Disease Diagnosis: Professionals can accurately diagnose and identify specific pests, diseases, or other biotic factors that may be impacting your seed germination efforts. Through their expertise, they can help you differentiate between various pest or disease symptoms, provide appropriate control measures, and recommend specific treatments that target the identified issues.
5. Troubleshooting Guidance: In complex cases where multiple factors may be contributing to low seed germination rates, professionals can analyze and evaluate the interplay among environment, seed quality, soil conditions, and cultural practices. They can help you troubleshoot the various factors involved, pinpoint solutions, and develop an effective action plan to improve seed germination success.
6. Updated Information: Professionals stay up to date with the latest research, trends, and advancements in the gardening industry. They are aware of new techniques, products, and technologies that can enhance seed germination and overall plant health. Consulting with professionals enables you to access current and reliable information that can support your gardening endeavors.
7. Ongoing Support: Professionals can offer ongoing support and guidance throughout your seed germination journey. They can provide follow-up consultations, answer your questions, and offer troubleshooting advice as needed. Having someone to rely on during the process can boost your confidence and help you overcome challenges that may arise along the way.
Remember, seeking professional advice does not undermine your gardening abilities. Instead, it shows your commitment to excellence and your willingness to reach out for assistance when needed. By involving professionals, you can benefit from their knowledge and experience, making your seed germination journey more successful and rewarding.
Conclusion
Successful seed germination is an essential step in the journey of any gardener, but it can sometimes be challenging. However, by understanding the possible reasons for seeds not germinating and employing effective troubleshooting techniques, you can improve your germination rates and set the stage for a thriving garden.
Ensuring proper seed starting conditions, such as temperature, moisture, light, and soil quality, plays a vital role in successful germination. Adjusting these conditions to meet the specific requirements of your seeds helps create an ideal environment for their growth and development. Additionally, employing methods like seed scarification, stratification, seed soaking, and using bottom heat can provide targeted solutions to overcome specific challenges and enhance germination rates.
Choosing fresh seeds, testing seed viability, adjusting pH levels, and addressing pest or disease issues are crucial steps in maximizing seed germination success. These methods allow you to work with high-quality seeds, determine the viability of older seeds, create optimal growing conditions, and overcome obstacles that may impede germination and seedling growth.
When all else fails, seeking professional advice from gardening experts or agricultural extension offices can offer specialized knowledge, tailored solutions, and access to resources that can help you overcome complex seed germination issues.
Remember, seed germination is a journey that requires patience, experimentation, and a willingness to adapt. Successful seed starting is a mastery that evolves over time, and maintaining a positive and persistent attitude will ultimately lead to greater success.
So next time you encounter seeds that don’t germinate, don’t be discouraged. Instead, draw upon your problem-solving skills, employ effective troubleshooting techniques, and remain open to seeking guidance when necessary. By doing so, you’ll greatly increase your chances of successful seed germination and delight in a bountiful and flourishing garden.