Home>Gardening Techniques>DIY Projects>How To Set Up Garden Irrigation System
DIY Projects
How To Set Up Garden Irrigation System
Modified: January 22, 2024
Discover how to set up a garden irrigation system with this step-by-step guide. Perfect for those looking for DIY projects to enhance their gardening experience.
(Many of the links in this article redirect to a specific reviewed product. Your purchase of these products through affiliate links helps to generate commission for Chicagolandgardening.com, at no extra cost. Learn more)
Table of Contents
- Introduction
- Benefits of a Garden Irrigation System
- Types of Garden Irrigation Systems
- Choosing the Right System for Your Garden
- Basic Components of a Garden Irrigation System
- Step-by-Step Guide to Setting Up a Garden Irrigation System
- Installing Sprinklers or Drip Lines
- Setting Up a Water Source
- Installing a Timer or Controller
- Adjusting Watering Frequency and Duration
- Maintaining and Troubleshooting Your Garden Irrigation System
- Conclusion
Introduction
Welcome to the world of DIY garden projects! If you’re a gardening enthusiast looking to take your green space to the next level, setting up a garden irrigation system should be at the top of your list. A garden irrigation system is a fantastic addition to any backyard, providing a convenient and efficient way to water your plants, maintain soil moisture, and promote healthy growth.
In this comprehensive guide, we will take you through the process of setting up a garden irrigation system step by step. Whether you have a small vegetable patch or a sprawling flowerbed, having an irrigation system will save you time and effort in the long run. With the right system in place, you can automate the watering process and ensure that your plants receive the optimal amount of water they need to thrive.
Not only does a garden irrigation system make your gardening tasks easier, but it also offers several other benefits. By delivering water directly to the root zone of your plants, you can minimize water wastage and reduce the risk of overwatering. This not only saves water but also saves you money on your water bills. Additionally, a well-maintained irrigation system can help prevent the spread of diseases by keeping foliage dry and minimizing contact with water.
When it comes to choosing the right garden irrigation system, there are several options available. The two most common types are sprinkler systems and drip irrigation systems. Sprinkler systems are ideal for larger areas and are best suited for lawns and flowerbeds, while drip irrigation systems are more suitable for areas with individual plants and offer better water efficiency.
Setting up a garden irrigation system may seem daunting at first, but with the right guidance and tools, it can be a straightforward and rewarding DIY project. In this guide, we will explain the basic components of a garden irrigation system, provide a step-by-step installation process, and offer maintenance and troubleshooting tips to ensure your system continues to function smoothly.
So, grab your gardening gloves and let’s dive into the world of garden irrigation systems, where lush and thriving plants await!
Benefits of a Garden Irrigation System
A garden irrigation system offers numerous benefits for gardeners of all levels. Let’s explore some of the key advantages:
- Convenience: One of the biggest advantages of a garden irrigation system is the convenience it provides. Instead of manually watering your plants using a hose or watering can, an irrigation system allows you to automate the process. With just a push of a button or the setting of a timer, your plants will receive the right amount of water at the right time, even if you’re away from home.
- Water Savings: Unlike traditional methods of watering, such as sprinklers or hand watering, a garden irrigation system significantly reduces water wastage. By delivering water directly to the root zone of the plants, it minimizes evaporation and ensures that water is used efficiently. This not only helps conserve water but also saves you money on your water bills.
- Consistent Watering: Consistency is key when it comes to watering your plants. With a garden irrigation system, you can ensure that your plants receive a consistent water supply. This is especially important during dry spells or hot summer months when plants are more prone to stress. Consistent watering promotes healthy growth, prevents wilting, and enhances overall plant health.
- Time Savings: Setting up an irrigation system may require some initial time investment, but once it’s up and running, it will save you valuable time. You won’t have to spend hours each week manually watering your plants. Instead, you can focus on other gardening tasks or even sit back and enjoy your garden while the system takes care of the watering for you.
- Customizable and Efficient: A garden irrigation system can be customized to cater to the specific needs of your garden. You can adjust the watering frequency, duration, and even the type of irrigation method based on the plant’s requirements. This level of customization ensures that each plant receives the right amount of water, promoting optimal growth and minimizing water stress.
From convenience and water savings to consistent watering and time savings, a garden irrigation system offers a range of benefits for both novice gardeners and seasoned enthusiasts. It improves plant health, reduces water wastage, and simplifies your gardening routine, allowing you to enjoy a lush and thriving garden with minimal effort. So, let’s dive into the next section and explore the different types of garden irrigation systems available!
Types of Garden Irrigation Systems
When it comes to choosing a garden irrigation system, there are several types available, each with its own unique features and benefits. Understanding the different options will help you determine the best system for your garden. Here are the two most common types of garden irrigation systems:
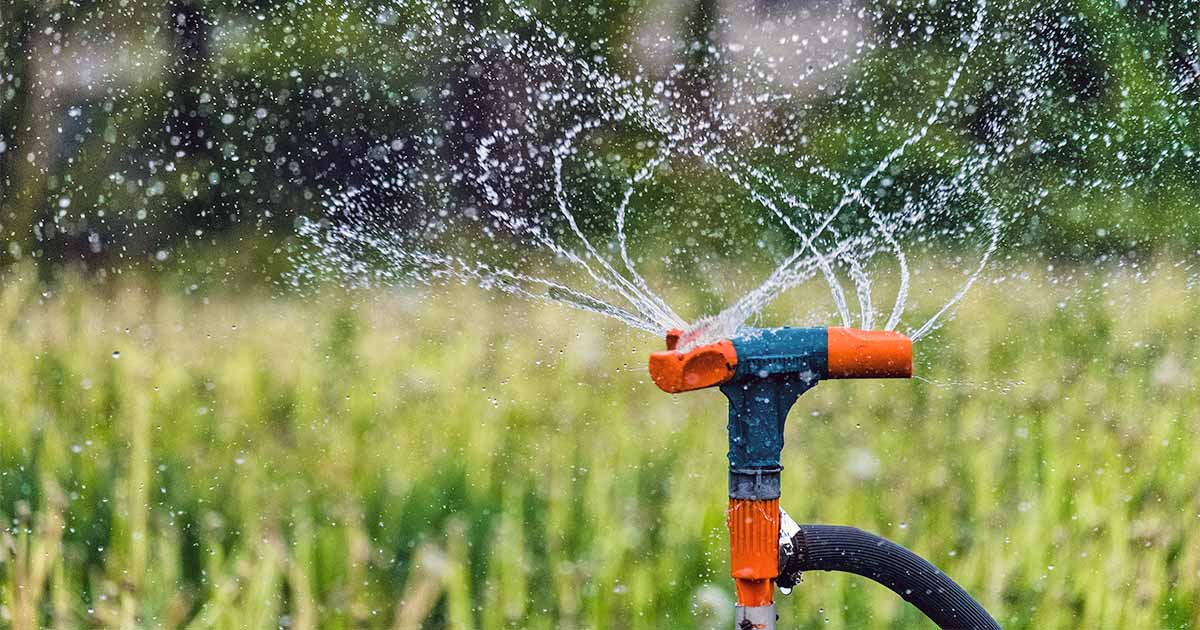
- Sprinkler Systems: Sprinkler systems are a popular choice for larger areas, such as lawns or expansive flowerbeds. These systems consist of underground pipes connected to above-ground sprinkler heads that distribute water in a circular pattern. Sprinkler systems are versatile and can be adjusted to deliver different amounts of water, covering a wide area. They are ideal for areas with uniform plant spacing and where overhead watering is desired.
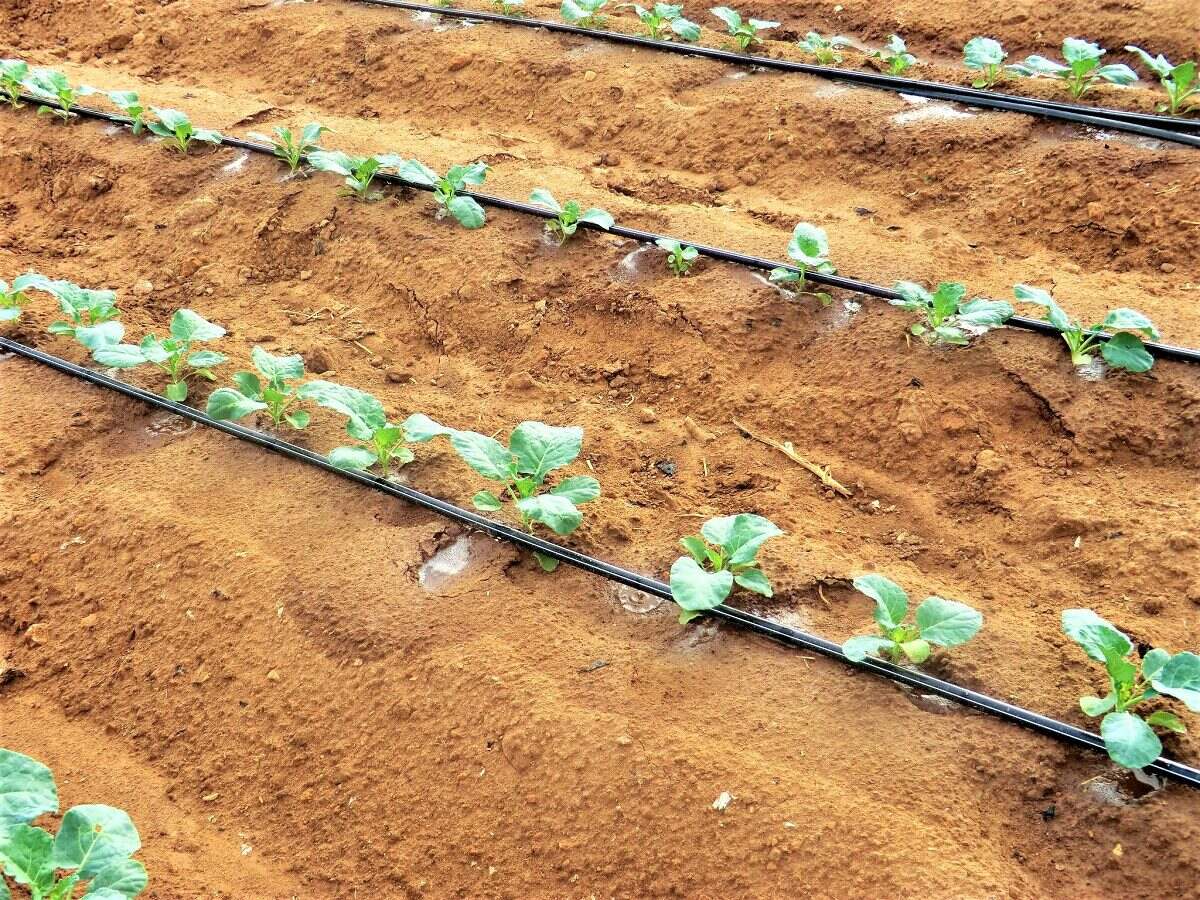
- Drip Irrigation Systems: Drip irrigation systems, also known as trickle irrigation systems, are ideal for gardens with individual plants, trees, or shrubs. These systems deliver water directly to the root zone of the plants through a network of tubing and small emitter devices, ensuring efficient water usage and minimal evaporation. Drip irrigation is highly targeted, reducing water wastage and promoting deep root growth.
Both sprinkler systems and drip irrigation systems have their unique advantages, and the choice depends on your garden’s layout, plant types, and watering requirements. Consider factors such as water efficiency, ease of installation, maintenance needs, and the level of customization you desire.
Additionally, there are other specialized irrigation systems available, such as soaker hoses or micro-sprinklers, which can be suitable for specific planting areas or requirements. Soaker hoses, for example, deliver water slowly along the length of the hose, effectively watering plants while reducing water runoff. Micro-sprinklers are designed for use in container gardens or hanging baskets, providing a gentle misting effect.
Take the time to assess your garden’s specific needs, consider the layout and types of plants you have, and choose the irrigation system that aligns best with your requirements. While both sprinkler systems and drip irrigation systems are effective, they cater to different garden sizes and layouts. Now that you have an understanding of the different types of garden irrigation systems, let’s move on to the next section to learn how to choose the right system for your garden.
Choosing the Right System for Your Garden
Choosing the right garden irrigation system is crucial to ensure that your plants receive the proper amount of water and that the system fits seamlessly into your garden layout. Here are some factors to consider when selecting the right system:
- Garden Size and Layout: Assess your garden’s size and layout to determine which irrigation system will work best. If you have a large lawn or expansive flowerbeds, a sprinkler system may be the most effective option. For smaller gardens with individual plants or containers, a drip irrigation system or specialized systems like soaker hoses and micro-sprinklers may be more suitable.
- Watering Requirements: Consider the watering needs of your plants. Some plants require more water than others, and some may have specific watering preferences. Different irrigation systems allow for different levels of customization in terms of water output, making it easier to tailor the watering to each plant’s needs.
- Water Source: Assess the water source available in your garden. Some irrigation systems, like drip irrigation, are more efficient and require lower water pressure. Others, like sprinkler systems, may require a higher water pressure to function optimally. Determine if you have access to a sufficient water supply and the necessary water pressure for the chosen system.
- Budget and Cost: Consider your budget for the irrigation system, including the initial installation costs and any potential maintenance expenses. Some systems may require more upfront investment, but they can save you money in the long run through water efficiency and reduced water wastage. Evaluate your budget and choose a system that fits within your financial constraints.
- Maintenance and Ease of Use: Consider the level of maintenance and ease of use of the system. Some irrigation systems may require more frequent maintenance, such as cleaning sprinkler heads or replacing emitters, while others are relatively low maintenance. Determine how much time and effort you are willing to invest in maintaining the system and choose accordingly.
By considering these factors, you will be able to narrow down the options and select the most suitable irrigation system for your garden. Remember, different systems have different advantages, so it’s important to choose one that aligns with your garden’s specific needs and your personal preferences. Once you’ve chosen the right system, you can move on to the exciting step of setting up your garden irrigation system!
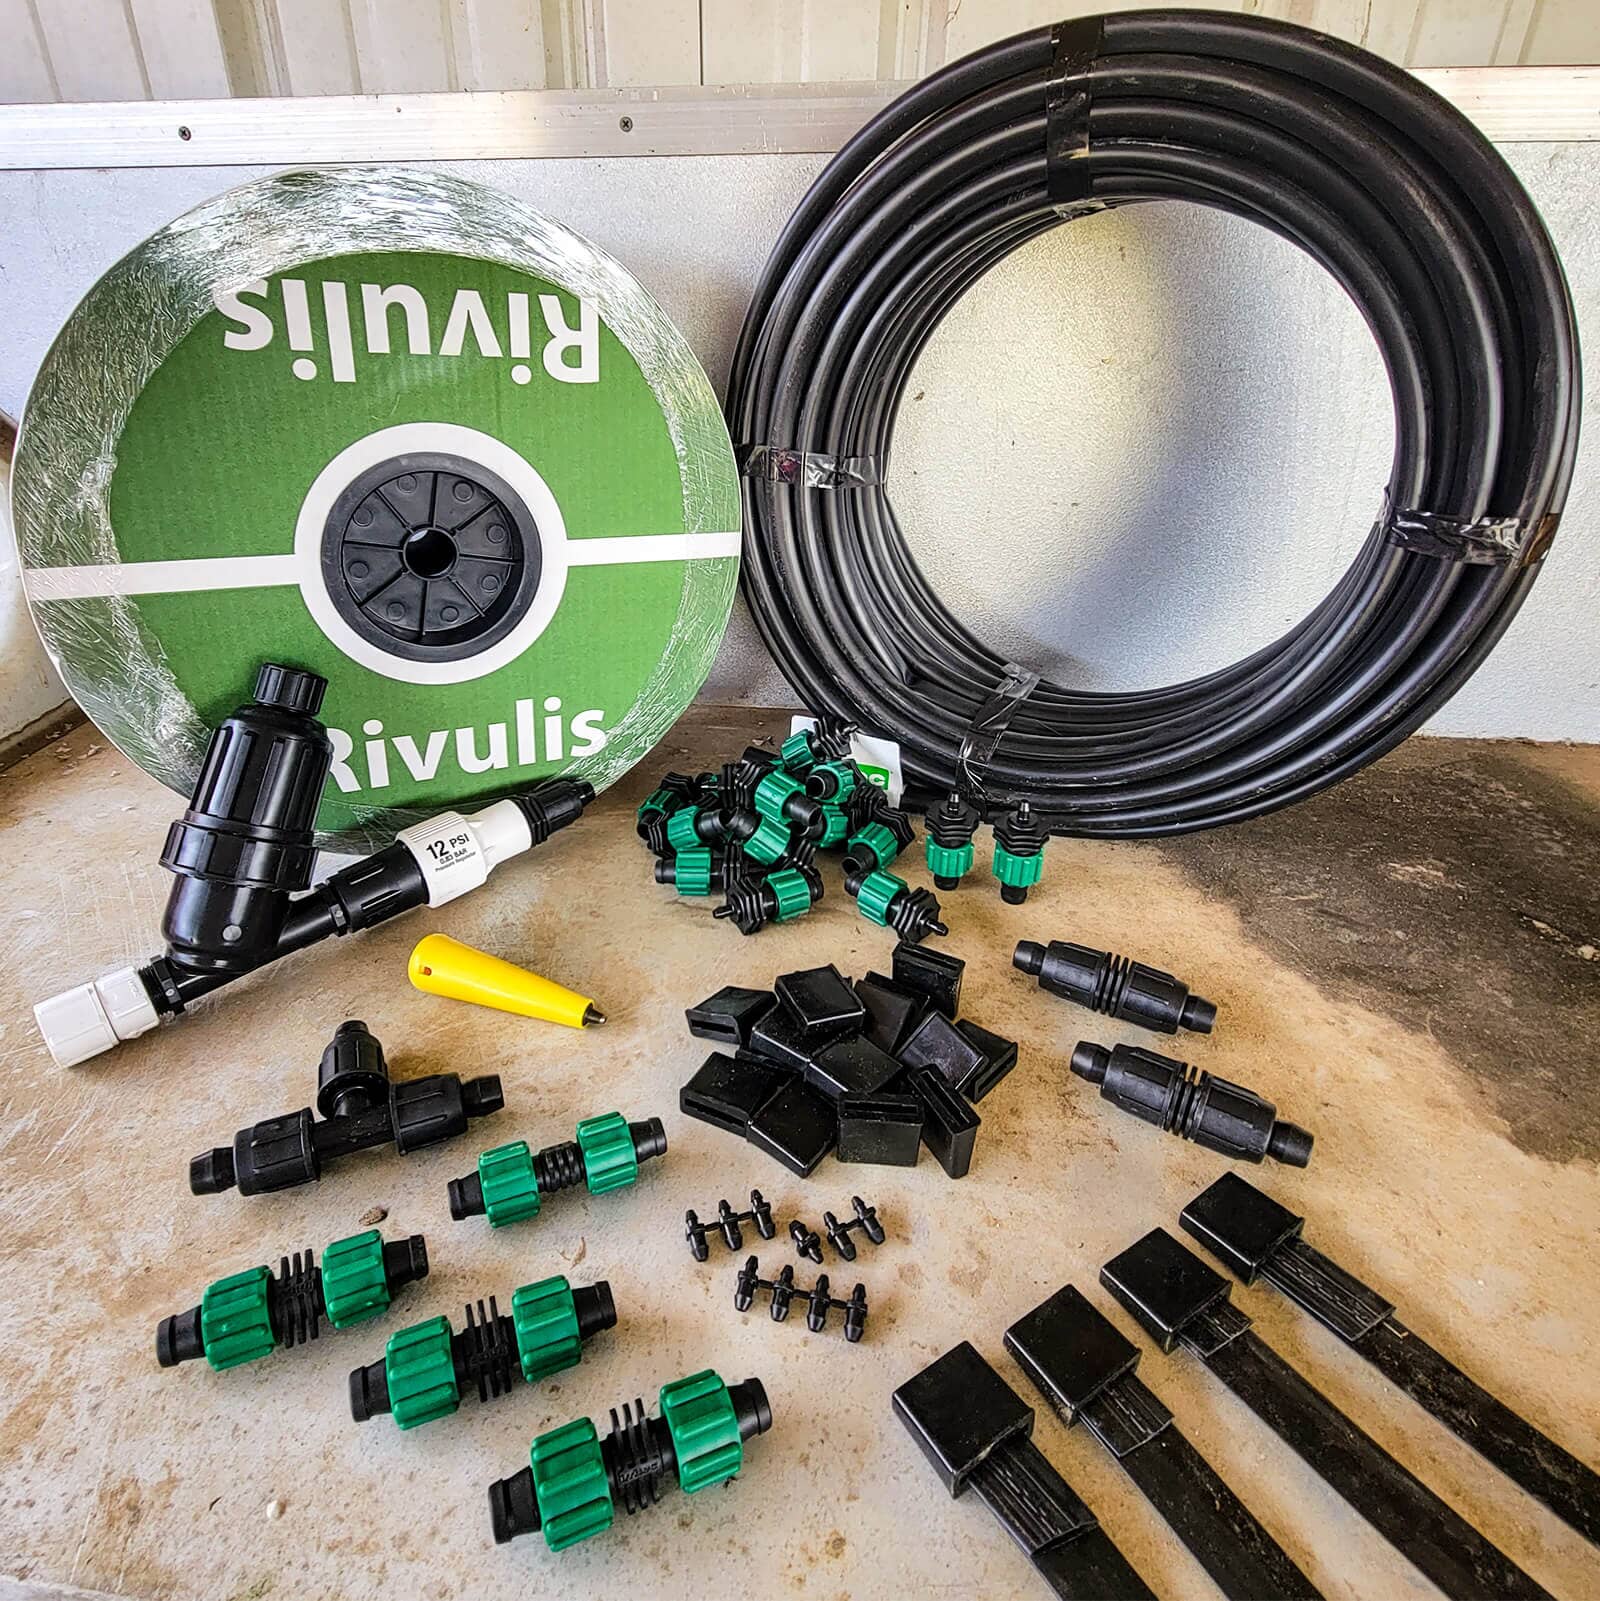
Basic Components of a Garden Irrigation System
A garden irrigation system consists of several essential components that work together to ensure efficient and effective watering. Understanding these components will help you plan and set up your irrigation system successfully. Here are the basic components of a garden irrigation system:
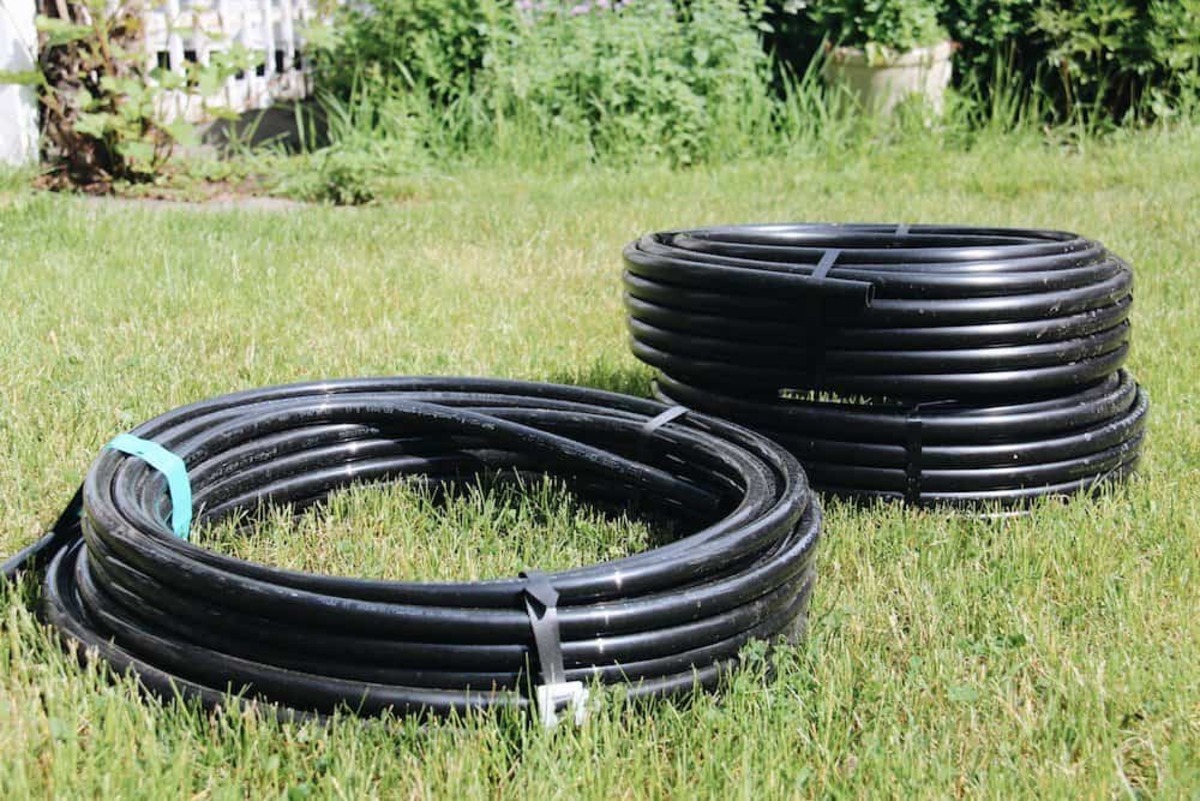
- Pipes and Tubing: The pipes and tubing form the backbone of the irrigation system and carry water from the water source to the desired watering areas. They come in various materials such as PVC, polyethylene, or drip tubing, depending on the type of system you choose.
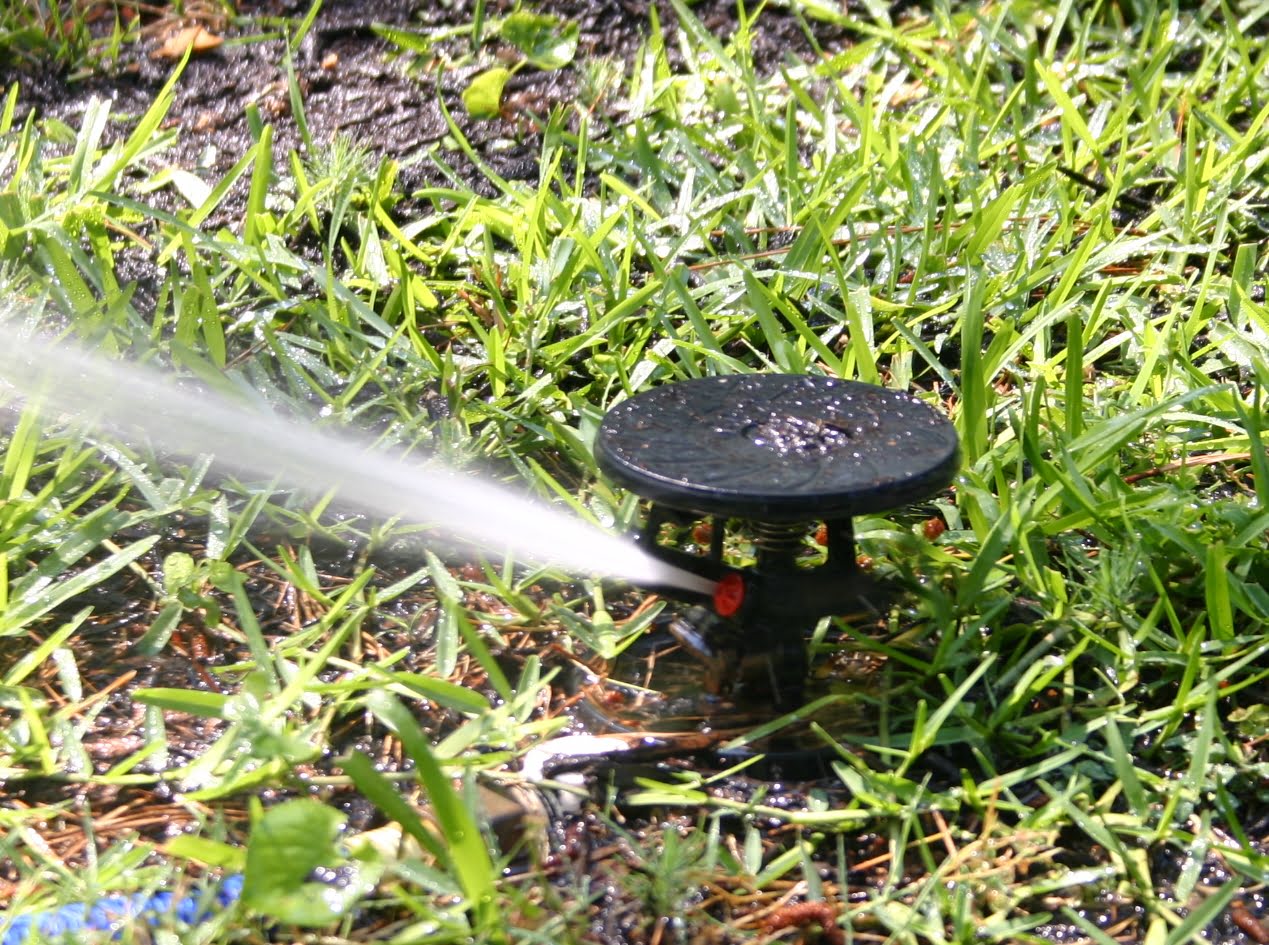
- Emitters: Emitters are devices that deliver water to your plants. In sprinkler systems, the emitters are sprinkler heads that disperse water in a specific pattern, while in drip irrigation systems, the emitters can be small nozzles or drippers that release water directly to the plant’s root zone.
- Valves: Valves act as control points for the water flow in your irrigation system. They allow you to turn on or off specific zones or sections of the system, providing flexibility and control over where water is directed.
- Fittings and Connectors: Fittings and connectors are used to join the pipes, tubing, and emitters in your irrigation system. They provide watertight connections and enable easy customization and adjustments to match the layout of your garden.
- Filters: Filters are optional components that help remove debris, sediment, and other particles from the water before it reaches the emitters. They prevent clogging and extend the lifespan of your irrigation system by ensuring the water is clean and free from debris that could damage or block the emitters.
- Pressure Regulators: Pressure regulators are devices that control the water pressure in your irrigation system. They ensure that the water is delivered at the appropriate pressure for efficient operation, preventing damage to the system and ensuring consistent water distribution.
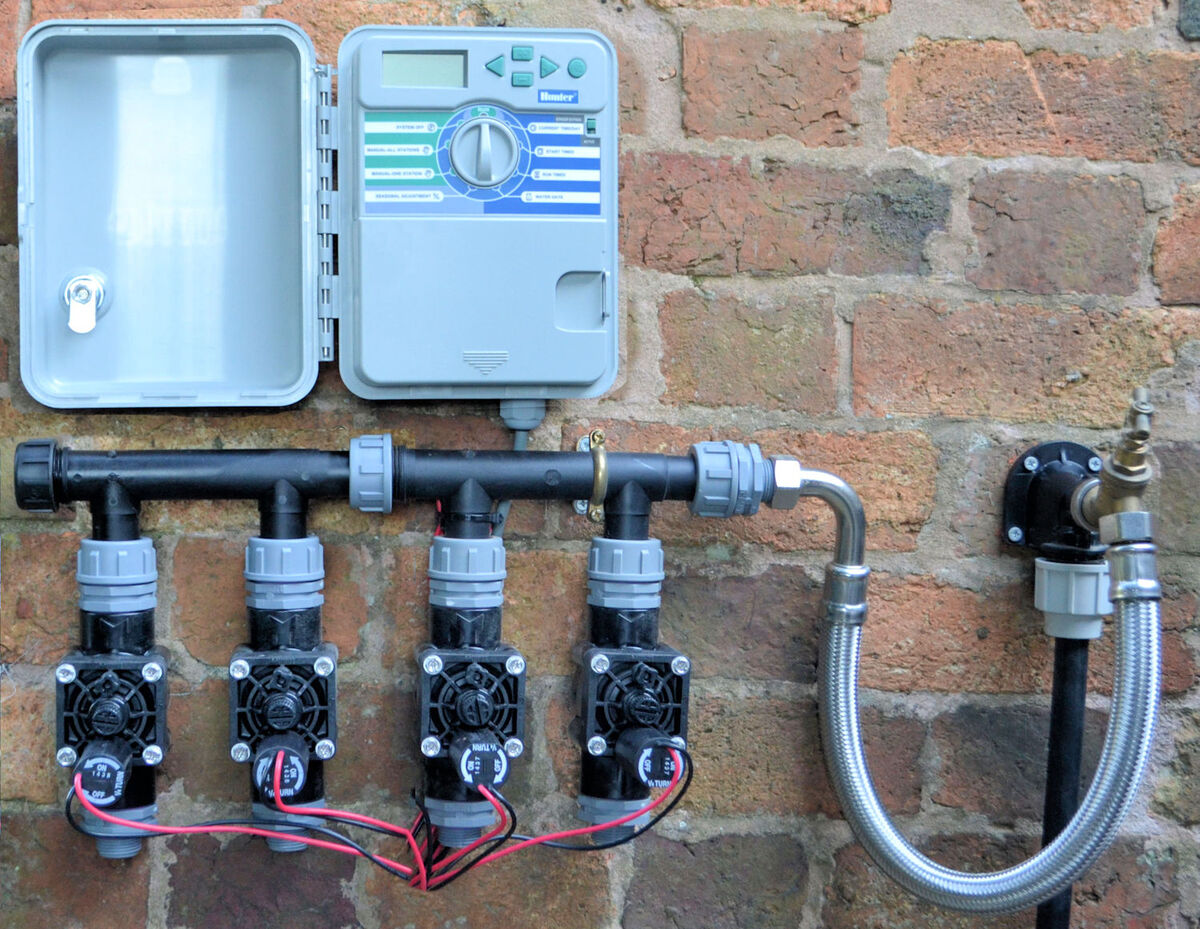
- Controller or Timer: The controller or timer is an essential component in automated irrigation systems. It allows you to set specific watering schedules, including the frequency and duration of watering. Some advanced controllers can even adjust watering based on weather conditions, further optimizing water usage.
- Backflow Preventer: A backflow preventer is a safety device that prevents water from the irrigation system from flowing back into the main water supply. It ensures that the water used for irrigation does not contaminate the main water source, protecting both the irrigation system and the water supply.
These basic components provide the foundation for a functional garden irrigation system. Depending on the type and complexity of your system, there may be additional components, such as pressure compensating devices, rain sensors, or flow meters, that can enhance the performance and efficiency of your irrigation setup.
Next, we will guide you through the step-by-step process of setting up your garden irrigation system, where you will learn how to install the components and configure them to meet the specific needs of your garden.
Step-by-Step Guide to Setting Up a Garden Irrigation System
Setting up a garden irrigation system may seem daunting, but with a step-by-step approach, it can be a manageable and rewarding DIY project. Follow these steps to install your garden irrigation system:
- Plan and Design: Start by surveying your garden and creating a detailed plan. Identify the areas that need watering, taking into account the types of plants, their watering requirements, and any slopes or obstacles in the landscape. Ensure that your water source is accessible and determine the number of zones you will need based on the layout of your garden.
- Prepare and Gather Materials: Once you have a plan in place, gather all the necessary materials and tools. These may include pipes, tubing, emitters, valves, fittings, connectors, a controller or timer, and any additional components specific to your chosen irrigation system.
- Install Sprinklers or Drip Lines: Begin the installation process by laying down the pipes or tubing for your sprinkler system or drip lines for your drip irrigation system. Install the sprinkler heads or emitters at the desired locations, ensuring proper spacing and coverage based on your garden’s needs.
- Set Up a Water Source: Connect the irrigation system to a suitable water source. This may involve tapping into an existing outdoor faucet or connecting to a dedicated water line. Ensure that you have the necessary fittings and connectors to create a secure and watertight connection.
- Install a Timer or Controller: Set up a timer or controller near your water source. Follow the manufacturer’s instructions to connect the controller to the water source and wire the valves. This will allow you to automate and program watering schedules based on your garden’s needs.
- Adjust Watering Frequency and Duration: Once the system is set up, adjust the watering frequency and duration on the controller to meet the specific needs of your plants. Consider factors such as plant type, weather conditions, and soil moisture levels when determining the optimal watering schedule.
- Test and Adjust: Test each zone of your irrigation system to ensure that the water is flowing correctly and that the coverage is adequate. Make any necessary adjustments to the sprinkler heads or emitters to ensure even distribution of water across your garden. Monitor the system periodically and make further adjustments as needed.
- Maintain and Troubleshoot: Regularly inspect and maintain your garden irrigation system to keep it in optimal condition. Check for leaks, clogs, or damaged components, and make necessary repairs or replacements. Clean filters and adjust pressure regulators as needed to ensure efficient operation.
By following these steps, you can successfully install and set up your garden irrigation system. Remember to refer to manufacturer instructions for specific components and seek professional assistance if needed. With your irrigation system in place, you can enjoy the convenience of automated watering and the satisfaction of a thriving, well-nourished garden.
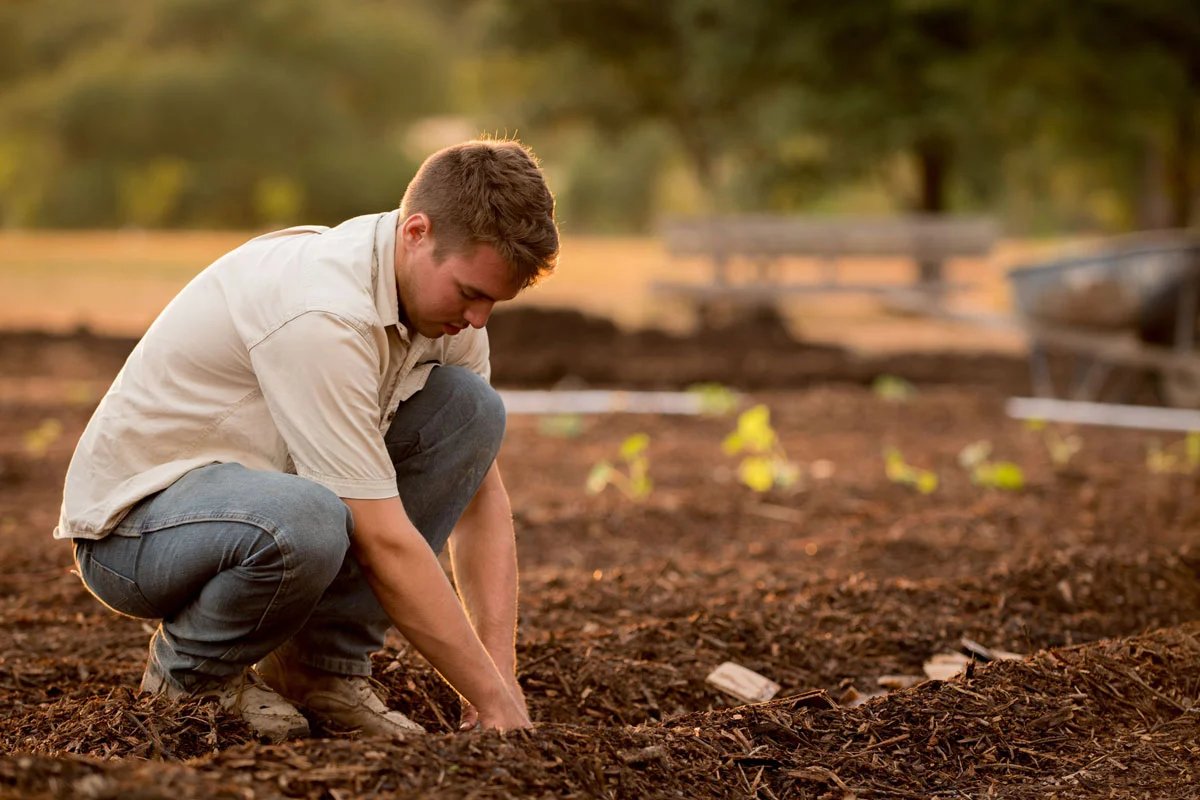
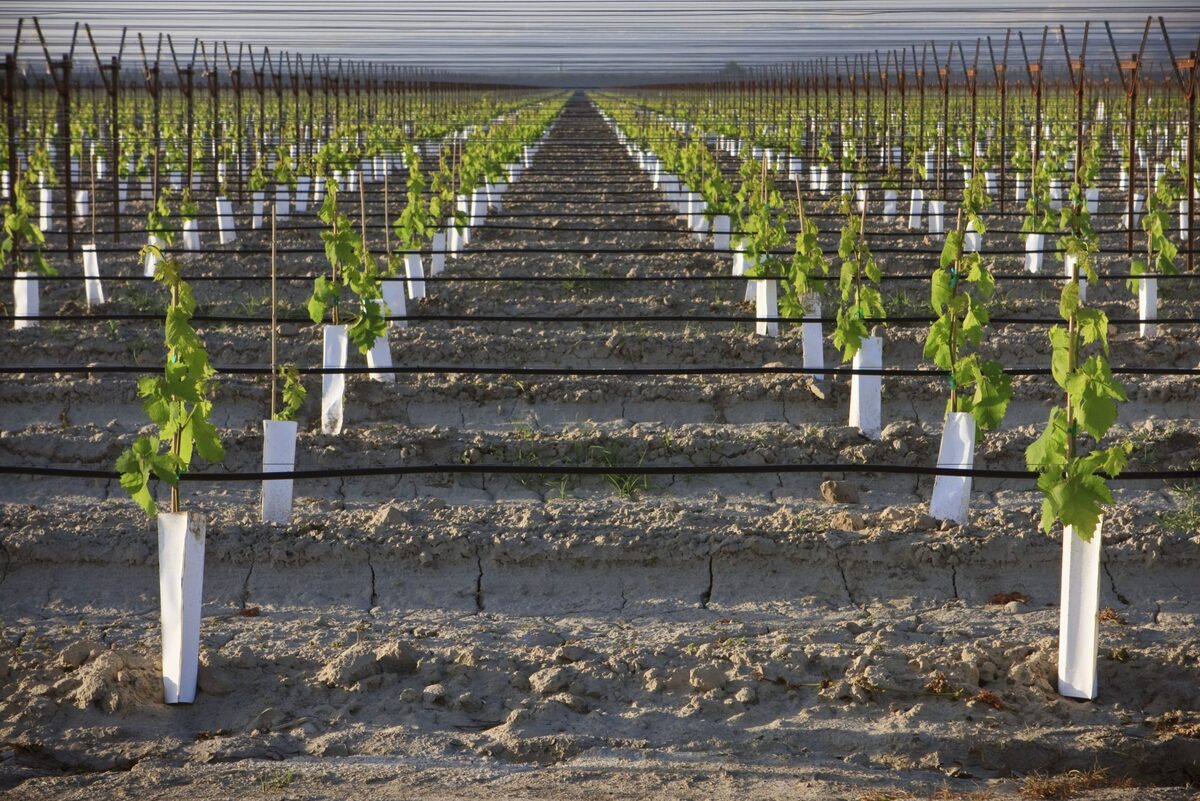
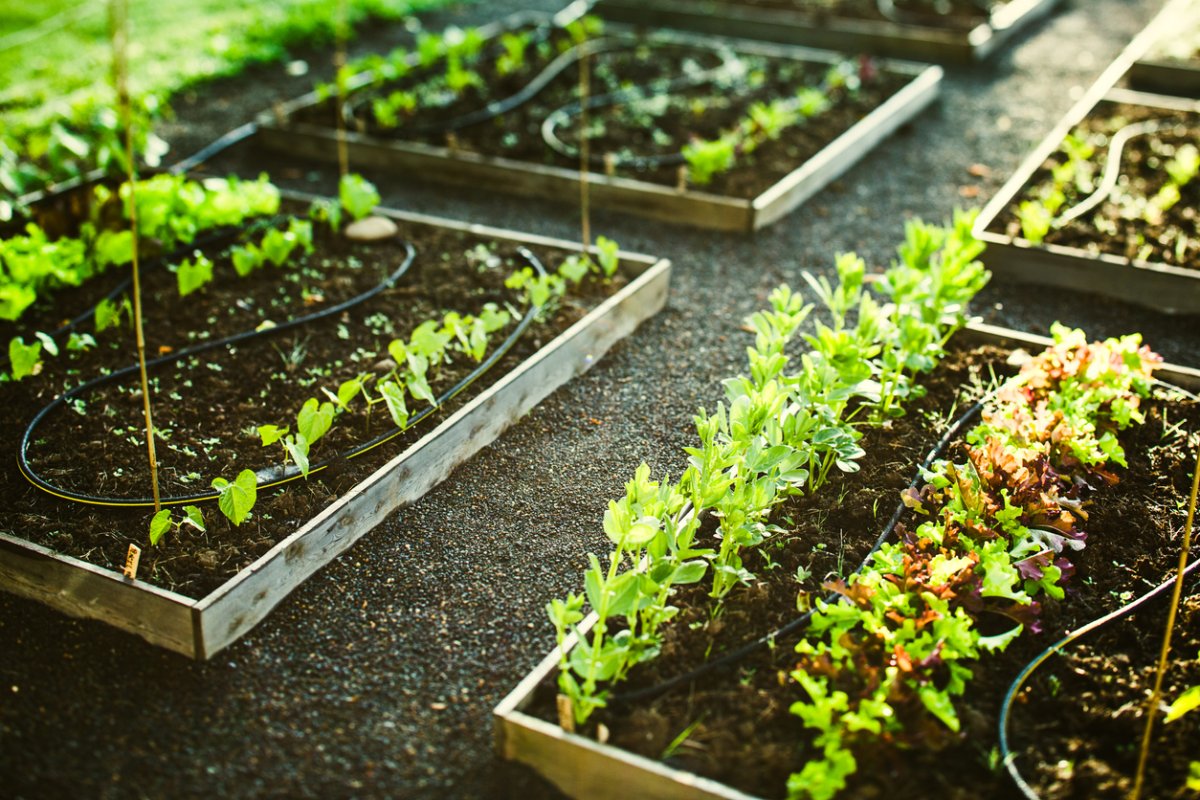
Installing Sprinklers or Drip Lines
Once you have planned the layout of your garden irrigation system and gathered all the necessary materials, it’s time to install the sprinklers or drip lines. The installation process will vary depending on the type of system you have chosen, so follow these general steps:
- Mark the Locations: Begin by marking the locations where you want to install the sprinklers or place the emitters for your drip lines. Ensure that the placement provides adequate coverage and suits the watering needs of your plants.
- Prepare the Area: Clear the area where the sprinklers or drip lines will be installed. Remove any obstacles such as rocks, weeds, or debris. This will help ensure that the installation is smooth and that the water distribution is not hindered by any obstructions.
- Start with the Main Line: If you are installing a sprinkler system, begin by connecting the main line to the water source. Use the appropriate fittings and connectors to create a secure and watertight connection. Lay the main line along the designated path, ensuring that it runs through the areas that require watering.
- Install the Sprinklers: For a sprinkler system, install the sprinkler heads at the marked locations along the main line. Dig holes at each location, ensuring that the depth allows the sprinkler heads to sit flush with the surface. Connect the sprinkler heads to the main line using the appropriate fittings.
- Connect the Drip Lines: If you are installing a drip irrigation system, connect the drip lines to the main line using connectors or tees. Lay the drip lines alongside the plants that need watering, ensuring that the emitters are positioned near the root zone of each plant.
- Secure the Lines: Once the sprinklers or drip lines are connected, secure them in place using stakes or clips. This will help keep the lines in position and prevent them from shifting or being accidentally damaged.
- Adjust and Test: After the installation is complete, adjust the height and angle of the sprinklers to ensure proper coverage. For drip lines, confirm that the emitters are delivering water directly to the root zone of the plants. Test each sprinkler or emitter to ensure that water is flowing correctly and that the coverage is even.
- Cover and Protect: Finally, cover the sprinklers or drip lines with soil or mulch to hide them and protect them from damage. This will also help retain moisture in the soil and prevent evaporation.
Remember to refer to the specific manufacturer’s instructions for the sprinklers or drip lines you are using as the installation process may vary. It’s also important to periodically inspect and maintain the sprinklers or emitters to ensure they are functioning properly and make any necessary adjustments as your garden grows and evolves.
Now that you have installed the sprinklers or drip lines, the next step is to set up a water source for your garden irrigation system.
Setting Up a Water Source
Setting up a proper water source is an essential step in ensuring the functionality and effectiveness of your garden irrigation system. Here are the steps to follow when setting up a water source:
- Locate the Water Source: Identify the water source that will supply water to your garden irrigation system. This could be an outdoor faucet, a well, or a rainwater collection system. Ensure that the water source is easily accessible and in close proximity to the area you plan to irrigate.
- Check the Water Pressure: Evaluate the water pressure available at the chosen water source. For most garden irrigation systems, the ideal water pressure ranges between 30 and 50 psi (pounds per square inch). If the water pressure is too high, you may need to install a pressure regulator to prevent damage to the system. If the pressure is too low, a booster pump may be necessary to ensure proper water flow.
- Install Backflow Prevention: Install a backflow preventer to protect your water supply from contamination. A backflow preventer is a device that prevents water from flowing back into the main water supply, ensuring that water used for irrigation does not contaminate the drinking water supply. Check with local regulations to determine the specific type of backflow preventer required for your area.
- Connect the Irrigation System: Connect the main line of your irrigation system to the water source. Use the appropriate fittings and connectors to create a secure connection. Ensure that the connection is watertight to prevent any leaks or water wastage.
- Consider Water Filtration: Depending on the quality of your water source, you may want to consider installing a filter to remove any debris, sediment, or particles. This helps prevent clogging of the system’s components, ensuring efficient water flow. The type and size of the filter will depend on the specific needs of your irrigation system and the quality of your water supply.
- Add Shut-off Valves: Install shut-off valves at strategic points along the irrigation system to allow for easy control and maintenance. These valves will enable you to isolate specific sections of the system for repairs or adjustments without disrupting the entire system.
- Test the Water Flow: Once the connection is made, turn on the water supply and test the flow. Check for any leaks or irregularities in the water flow. Adjust the pressure regulator, if necessary, to ensure the water pressure remains within the optimal range for your irrigation system.
It is important to ensure that you have the necessary tools and components to create a secure and reliable connection between your water source and your irrigation system. Proper installation and maintenance of the water source will help ensure that your garden receives the necessary water without any issues or disruptions.
The next crucial step in setting up your garden irrigation system is installing a timer or controller to automate the watering process.
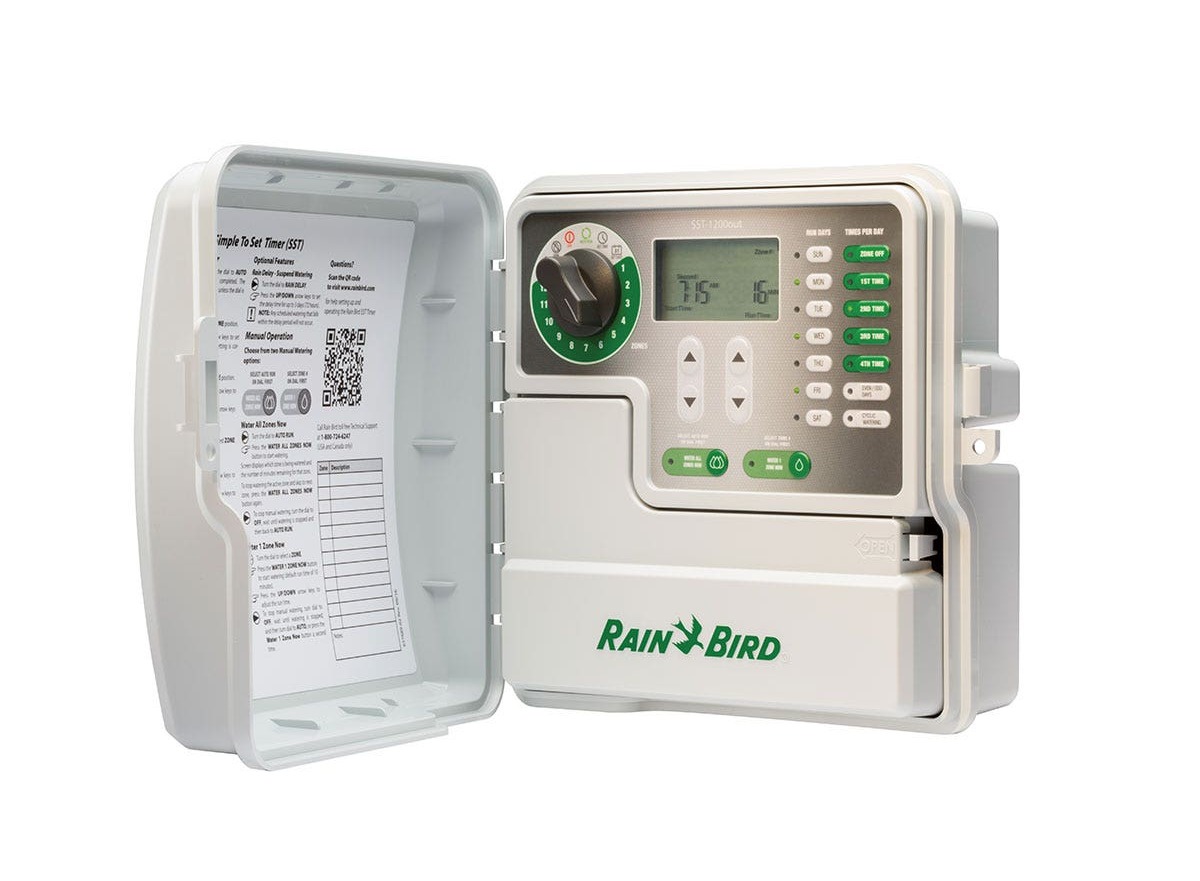
Installing a Timer or Controller
An essential component of a garden irrigation system is a timer or controller, which allows for automated and scheduled watering. Here’s a step-by-step guide on how to install a timer or controller for your irrigation system:
- Select a Suitable Location: Choose a location near your water source where the timer or controller will be easily accessible. It should be protected from the elements, such as rain and direct sunlight, to prevent damage.
- Shut Off the Water: Before installing the timer or controller, make sure to shut off the water supply to your irrigation system. This will prevent any accidental water flow during the installation process.
- Mount the Timer or Controller: Mount the timer or controller on a sturdy surface, such as a wall or post, using screws or brackets provided by the manufacturer. Ensure that it is securely attached and level. Make sure to leave enough space for wires and connections behind the unit.
- Connect the Wiring: Connect the wiring from the water source to the timer or controller. Follow the manufacturer’s instructions and wiring diagram provided with the unit to ensure proper connections. Use waterproof connectors or wire nuts to secure the connections and protect them from moisture.
- Connect the Valves: Connect the wiring from the timer or controller to the valves of your irrigation system. Each valve should have its own wire, which will allow the timer or controller to individually control each zone or section. Use wire connectors or wire nuts to secure the connections.
- Power Supply: Connect the timer or controller to a power source. Some models may require a battery, while others may need to be plugged into an electrical outlet. Follow the manufacturer’s instructions for the specific power requirements of your timer or controller.
- Program the Timer or Controller: Set the desired watering schedule and duration on the timer or controller. Most models allow you to specify watering days, start times, and watering duration for each zone. Some advanced controllers may even have smart features that adjust watering based on weather conditions.
- Test the System: Turn on the water supply and test each zone or section of your irrigation system to ensure that the valves open and close correctly according to the programmed schedule. Monitor the timer or controller to verify that it accurately keeps time and activates the irrigation system as planned.
It is important to follow the manufacturer’s instructions for your specific timer or controller model during installation. This will ensure that the unit is properly installed and programmed for optimal performance and longevity.
Once the timer or controller is successfully installed, you can easily control and automate the watering process in your garden, providing a consistent and efficient water supply for your plants. The next step is to adjust the watering frequency and duration to meet the specific needs of your garden.
Adjusting Watering Frequency and Duration
Once your garden irrigation system is set up and the timer or controller is installed, the next step is to adjust the watering frequency and duration to meet the specific needs of your plants. Here are some guidelines to help you find the right balance:
- Consider Plant Types and Growth Stage: Different plants have varying water requirements. Consider the types of plants in your garden and their specific needs, as well as their growth stage. Young plants and newly seeded areas may require more frequent watering, while established plants with deep root systems may require less frequent watering.
- Evaluate Environmental Factors: Take into account environmental factors such as climate, temperature, and rainfall patterns in your area. During hot and dry spells, you may need to increase the watering frequency, while during periods of high rainfall, you may need to decrease it. Keep an eye on weather forecasts and adjust watering accordingly.
- Monitor Soil Moisture: Regularly monitor the moisture level of your soil to determine when it’s time to water. Insert a soil moisture meter or use a trowel to check the moisture depth. Avoid overwatering by allowing the soil to dry slightly between watering cycles, ensuring that your plants receive adequate moisture without becoming waterlogged.
- Observe Plant Response: Pay attention to how your plants respond to the current watering schedule. Signs of underwatering may include wilting, yellowing leaves, or stunted growth, while signs of overwatering may include yellowing leaves, root rot, or fungus issues. Make adjustments if you notice any signs of stress or discomfort in your plants.
- Program the Timer or Controller: Use the programming features of your timer or controller to set the desired watering frequency and duration for each zone. Input the appropriate watering days, start times, and watering duration based on your evaluation of plant needs and environmental factors. Some controllers may even have water-saving features that automatically adjust watering based on weather data.
- Monitor and Fine-tune: Regularly monitor your garden and the performance of your irrigation system. Check for any dry spots or areas of excessive moisture. Fine-tune the watering schedule as needed to ensure that all plants receive adequate water while avoiding wastage and unnecessary water runoff.
- Periodically Review and Adjust: It’s important to periodically review and adjust your watering schedule as your garden evolves. As plants grow and mature, their water requirements may change. Regularly reassess the watering needs and adjust the timer or controller settings accordingly to maintain optimal plant health.
By considering plant types, growth stage, environmental factors, soil moisture, and plant response, you can fine-tune your watering frequency and duration to ensure that your garden gets the right amount of water at the right time. Regular monitoring and adjustment will help you optimize water usage and promote healthy plant growth.
The final section of this guide will cover maintenance and troubleshooting tips to help you keep your garden irrigation system in optimal condition.
Maintaining and Troubleshooting Your Garden Irrigation System
Maintaining your garden irrigation system is essential to ensure its optimal performance and longevity. By following these maintenance and troubleshooting tips, you can keep your system running smoothly:
- Inspect Regularly: Regularly inspect your irrigation system for any signs of damage, leaks, or clogs. Check the pipes, tubing, valves, and emitters for wear and tear. Look out for any signs of water pooling or dry spots in your garden, as these may indicate issues with the system.
- Clean Filters: If your system has filters, clean them periodically to remove any debris or sediment that may accumulate. Clogged filters can restrict water flow and affect the performance of your irrigation system. Refer to the manufacturer’s instructions for proper cleaning and maintenance procedures.
- Adjust Sprinkler Heads or Emitters: Periodically check and adjust the sprinkler heads or emitters to ensure they are providing adequate water coverage. Make sure there are no obstructions blocking the spray or drip pattern. Ensure that the water is reaching the desired areas and not spraying onto buildings, sidewalks, or other non-targeted areas.
- Check for Leaks: Inspect the system for any leaks or dripping water. Leaks can result in water wastage and negatively impact the efficiency of your irrigation system. Repair any leaks promptly by replacing damaged or faulty components or applying waterproof tape or sealant.
- Monitor Controller or Timer: Keep an eye on the timer or controller to ensure it is functioning correctly. Check that the set watering schedule is being followed and that the time is accurate. Replace batteries, if applicable, and adjust settings as needed when there are changes in plant needs or weather conditions.
- Follow Seasonal Adjustments: Adjust your watering schedule based on seasonal changes. During cooler months or periods of rainfall, you may need to reduce the watering frequency to avoid overwatering. As the weather gets hotter or during dry spells, increase watering as needed to compensate for increased water evaporation and plant water demands.
- Winterize the System: If you live in an area with freezing temperatures, it’s important to winterize your irrigation system to prevent damage from frozen water. Drain any remaining water from the system and protect exposed pipes or equipment by insulating them with foam covers or wrapping them with insulation tape.
- Seek Professional Help: If you encounter persistent issues or are unsure about how to resolve a problem with your irrigation system, seek professional help. An experienced technician can diagnose and address any complex issues and ensure your system functions optimally.
By following these maintenance practices and troubleshooting tips, you can keep your garden irrigation system in excellent condition. Regular inspection, cleaning, and adjustments will help you optimize water usage, prevent water wastage, and ensure the health and vitality of your plants.
With proper maintenance, your garden irrigation system will continue to provide the convenience and efficiency you desire, allowing you to enjoy a thriving and beautiful garden.
Conclusion
Congratulations on successfully completing the installation and setup of your garden irrigation system! By following this comprehensive guide, you have gained the knowledge and skills to create a convenient, efficient, and effective watering system for your plants.
A garden irrigation system offers numerous benefits, including water savings, time savings, consistent watering, and customizable options. You have learned about the different types of garden irrigation systems, including sprinkler systems and drip irrigation systems, and how to choose the right system for your specific garden needs. Understanding the basic components of an irrigation system and how to install them, along with setting up a water source, timer or controller, and adjusting watering frequency and duration, is crucial for ensuring optimal plant health.
Remember to regularly maintain and troubleshoot your irrigation system to keep it in excellent condition. Inspect for leaks, clean filters, adjust sprinkler heads or emitters, and monitor the controller or timer. By following these maintenance practices, you will ensure the longevity and efficiency of your system.
Building and maintaining a garden irrigation system may seem like a daunting task, but the rewards are well worth it. Your plants will thrive and flourish with consistent and efficient watering, and you will have more time to enjoy your garden and focus on other gardening tasks.
So, go ahead and put your newfound knowledge into action. Start planning, installing, and setting up your garden irrigation system, and watch as your plants grow and flourish with the right amount of water and care.
Happy gardening!