Home>Types of Gardening>Ornamental Gardening>How To Plant Black Eyed Susan Seeds
Ornamental Gardening
How To Plant Black Eyed Susan Seeds
Modified: January 22, 2024
Learn how to plant Black Eyed Susan seeds and create a beautiful ornamental garden. Our step-by-step guide will help you grow these vibrant flowers with ease.
(Many of the links in this article redirect to a specific reviewed product. Your purchase of these products through affiliate links helps to generate commission for Chicagolandgardening.com, at no extra cost. Learn more)
Table of Contents
- Introduction
- Step 1: Gather the Supplies
- Step 2: Prepare the Planting Area
- Step 3: Soak the Black Eyed Susan Seeds
- Step 4: Sow the Seeds
- Step 5: Provide Adequate Watering
- Step 6: Provide Proper Sunlight
- Step 7: Maintain Soil Moisture
- Step 8: Transplant Seedlings (Optional)
- Step 9: Protect from Pests and Diseases
- Step 10: Enjoy Blooming Black Eyed Susans
- Conclusion
Introduction
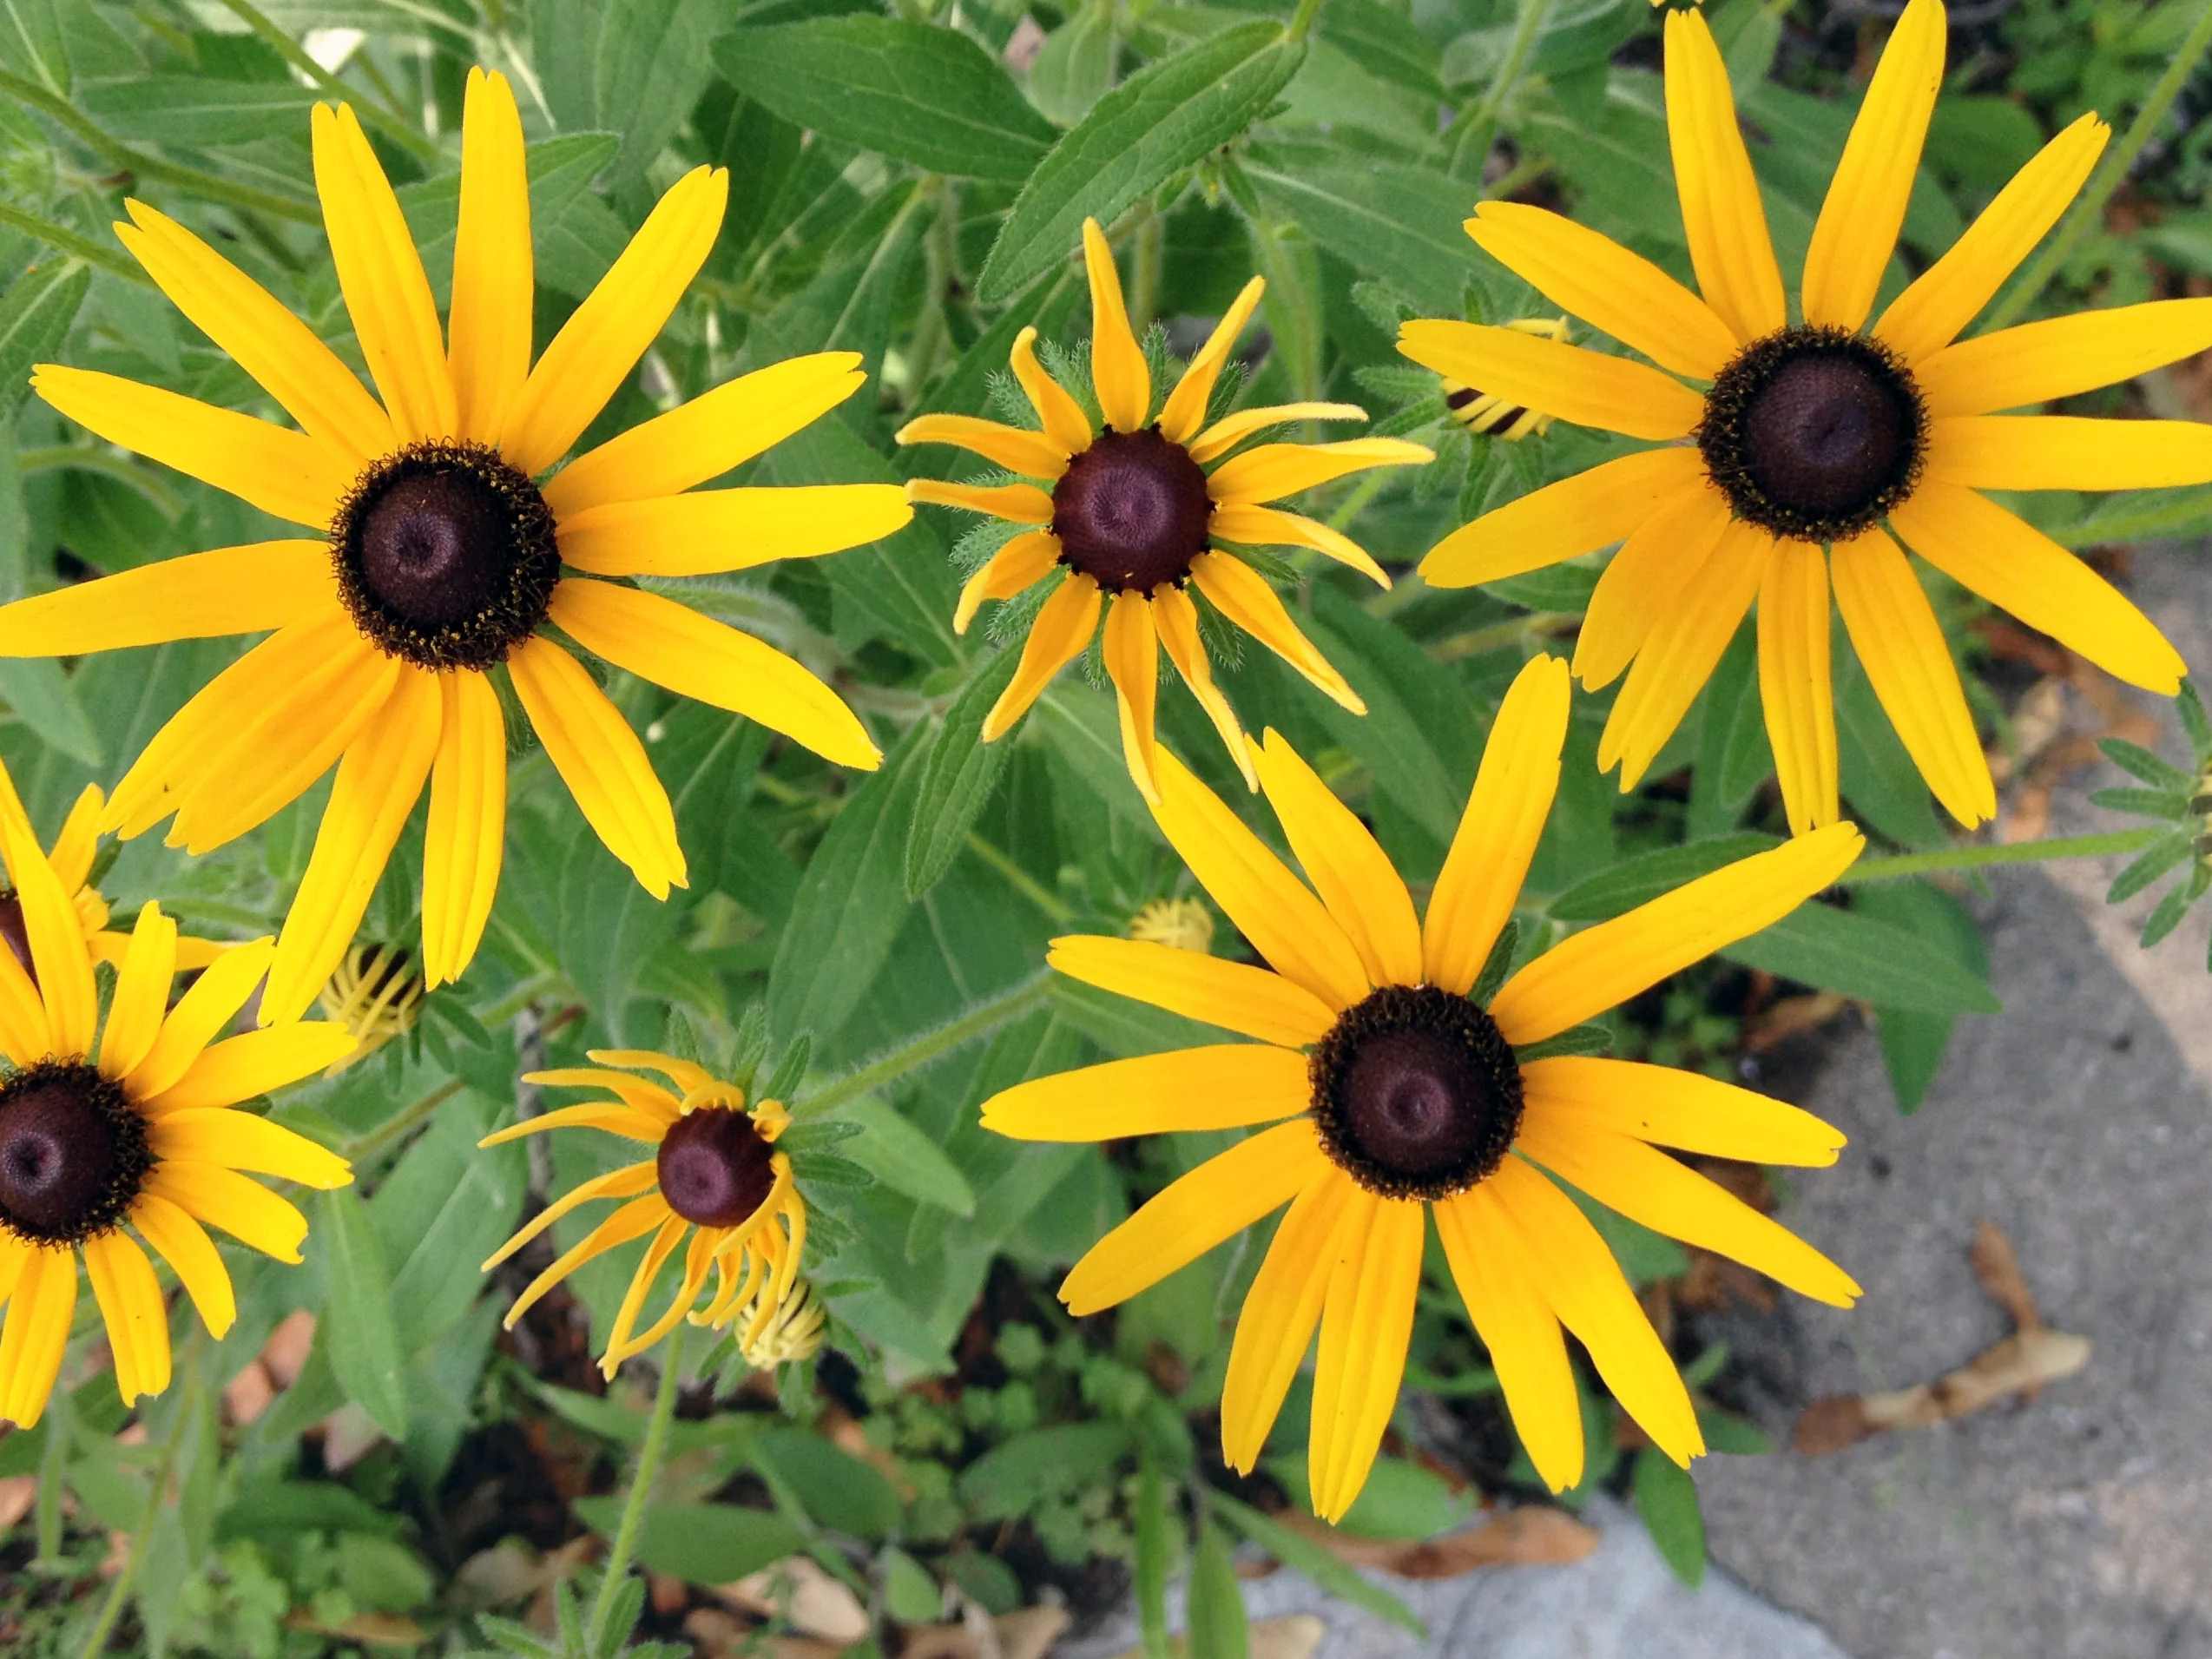
Welcome to the world of ornamental gardening! If you have a passion for beautiful flowers and want to add some vibrant colors to your garden, planting Black Eyed Susan seeds is a fantastic choice. Black Eyed Susans (Rudbeckia hirta) are native to North America and are widely loved for their bright yellow or orange blossoms with a dark center. These eye-catching flowers not only bring visual appeal but also attract pollinators like bees and butterflies, making them a valuable addition to any garden.
Whether you’re a beginner or an experienced gardener, planting Black Eyed Susan seeds is relatively easy and rewarding. In this article, we’ll guide you through the step-by-step process to successfully grow these beautiful flowers in your own garden. By following our tips and instructions, you’ll be able to enjoy the vibrant blooms and natural beauty of Black Eyed Susans in no time.
Before we delve into the planting process, let’s briefly understand the characteristics of Black Eyed Susans. These perennial plants are known for their ability to thrive in a wide variety of soil conditions, making them adaptable to different garden settings. They prefer full sun exposure, making them perfect for areas with ample sunlight. Black Eyed Susans are also drought-tolerant once established, so they can withstand hot, dry summers without much issue.
One of the great things about Black Eyed Susan seeds is that they can be sown directly into the ground or started indoors and later transplanted. This flexibility allows you to choose the method that best suits your gardening preferences and climate. Whether you opt for direct sowing or starting indoors, we’ll provide you with the necessary steps and guidelines to ensure success.
Now that you have a basic understanding of Black Eyed Susans, it’s time to gather your gardening supplies and prepare the planting area. So let’s get started and learn how to plant Black Eyed Susan seeds!
Step 1: Gather the Supplies
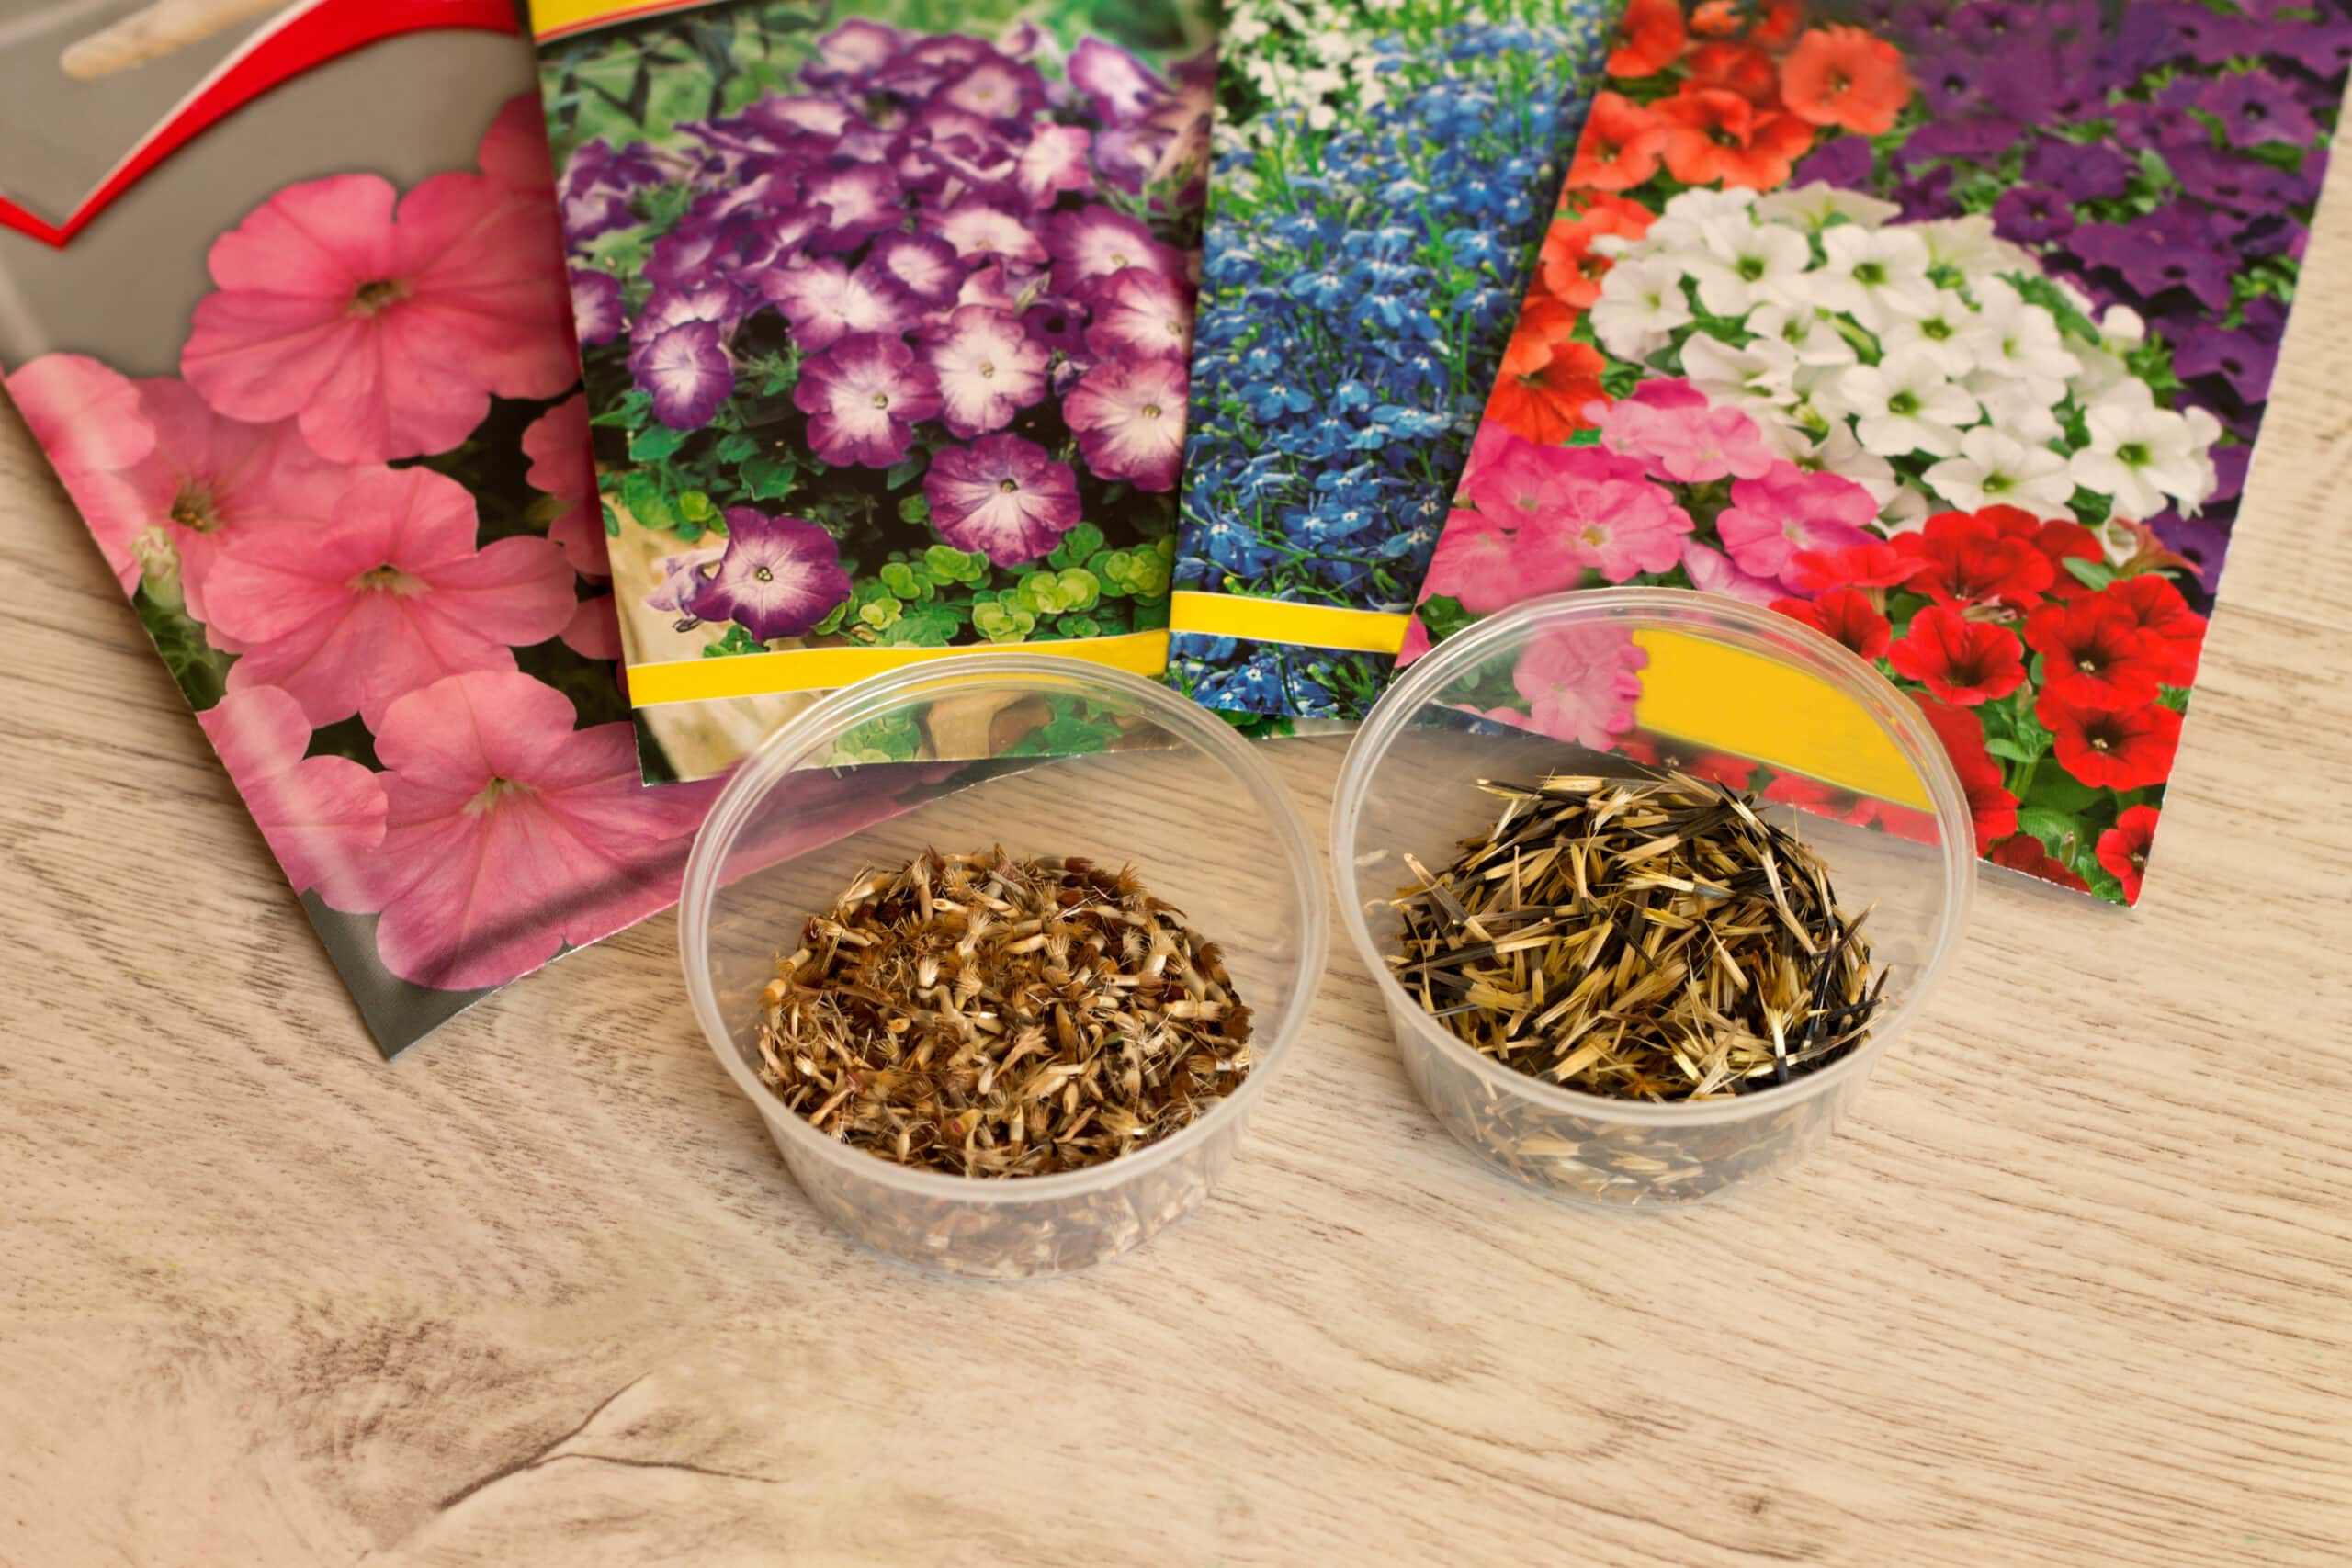
Before you begin planting Black Eyed Susan seeds, it’s essential to gather all the necessary supplies. Having everything ready in advance will make the process smoother and more efficient. Here are the supplies you’ll need:
- Black Eyed Susan seeds: You can purchase these seeds from a local nursery or online seed suppliers. Make sure to choose fresh and high-quality seeds for better germination.
- Garden soil: Black Eyed Susans prefer well-draining soil that is rich in organic matter. Ensure that your soil is loose and fertile for optimal growth.
- Garden tools: Gather basic gardening tools such as a trowel, garden gloves, and a watering can or hose.
- Pots or seed trays (optional): If you choose to start the seeds indoors, you will need small pots or seed trays with drainage holes to sow the seeds.
- Seed starting mix: If you opt for indoor germination, use a high-quality seed starting mix that provides the right balance of moisture and nutrients for the young seedlings.
- Plant markers: Keep track of your seeds by using plant markers or labels. This will help you identify the different varieties and keep your garden organized.
- Water source: Make sure you have a reliable water source nearby, whether it’s a garden hose or a watering can. Black Eyed Susans require regular watering to establish strong roots and promote healthy growth.
Once you have gathered all the necessary supplies, you’re ready to move on to the next step: preparing the planting area. This step involves clearing the designated space, removing any weeds or debris, and creating a suitable environment for the Black Eyed Susan seeds to thrive. Proper preparation will ensure that your seeds have the best chance of germination and growth, leading to a beautiful display of blooms in the future.
Step 2: Prepare the Planting Area
Preparing the planting area is a crucial step in successfully growing Black Eyed Susan seeds. By creating a conducive environment, you’ll provide the seeds with the necessary conditions for germination and healthy growth. Follow these steps to prepare the planting area:
- Select the location: Choose a sunny spot in your garden for planting Black Eyed Susans. These flowers thrive in full sun and require at least six to eight hours of direct sunlight per day. Select an area that is free from shade or competition from dense foliage, as this can inhibit their growth.
- Clear the area: Remove any existing vegetation, weeds, or debris from the selected planting area. Pull out weeds by hand or use a garden tool like a hoe to clear the space. Ensure the area is clean and ready for planting.
- Improve the soil: Black Eyed Susans prefer well-draining soil with good fertility. If your soil is heavy or poorly drained, consider adding organic matter like compost or well-rotted manure to improve its fertility and drainage. Work the organic matter into the soil to a depth of about 6 to 8 inches.
- Level the soil: Use a garden rake to level the soil surface. Remove any large clumps or rocks that may hinder the sowing process. A smooth and level soil surface will facilitate even seed distribution and growth.
By taking the time to prepare the planting area, you are creating an optimal environment for the Black Eyed Susan seeds. This will promote healthy growth and increase the chances of successful germination. Now that the planting area is ready, it’s time to move on to the next step: soaking the Black Eyed Susan seeds.
Step 3: Soak the Black Eyed Susan Seeds
Soaking the Black Eyed Susan seeds before planting can significantly enhance their germination rate. This step helps to soften the seed coat and improve water absorption, allowing the seeds to sprout more easily. Follow these steps to effectively soak your Black Eyed Susan seeds:
- Prepare a container: Choose a shallow container like a small dish or tray. Ensure that the container is clean and free from any chemicals that may harm the seeds.
- Fill the container with water: Fill the container with room temperature water. Use enough water to fully submerge the seeds.
- Add the seeds: Carefully place the Black Eyed Susan seeds into the water-filled container. Make sure all the seeds are fully immersed in the water.
- Soak the seeds: Allow the seeds to soak in the water for approximately 12 to 24 hours. This soaking period helps to break down the seed coat and enhances germination.
- Drain the water: After the soaking period, carefully pour out the water, ensuring that the seeds remain in the container. It’s essential to drain the excess water to prevent the seeds from rotting.
By soaking the Black Eyed Susan seeds, you are providing them with the moisture needed to kickstart the germination process. This step can significantly increase the chances of successful sprouting and healthy seedling development. Once the seeds have been soaked, it’s time to move on to the next step: sowing the seeds in the prepared planting area.
Step 4: Sow the Seeds
Sowing the Black Eyed Susan seeds is an exciting and crucial step in the planting process. Properly placing the seeds in the soil will determine the success of germination and the overall growth of your plants. Follow these steps to sow your Black Eyed Susan seeds:
- Choose the sowing method: You have two options for sowing Black Eyed Susan seeds – direct sowing or starting indoors. Direct sowing involves planting the seeds directly into the ground, while starting indoors allows you to start the seeds in containers before transplanting them later. Choose the method that best suits your gardening preferences and climate.
- Direct sowing method: If you choose to sow the seeds directly into the ground, create small grooves or furrows in the prepared soil. Space the furrows about 12 to 18 inches apart to allow the plants ample room to grow. The furrows should be approximately 1/4 to 1/2 inch deep.
- Indoor sowing method: If you prefer starting the seeds indoors, fill small pots or seed trays with a quality seed starting mix. Moisten the soil slightly before planting the seeds. Place one or two seeds in each pot or cell, gently pressing them into the soil, but do not bury them too deep.
- Cover the seeds: Once you have placed the seeds in the furrows or pots, cover them lightly with soil or seed starting mix. If you are direct sowing, cover the seeds with approximately 1/4 inch of soil. For indoor sowing, a light sprinkle of soil or vermiculite on top of the seeds is sufficient.
- Moisten the soil: After sowing, gently water the soil to ensure that it is evenly moist. Avoid overwatering, as soggy soil can lead to seed rot or fungal diseases. Use a watering can or a gentle misting spray to avoid dislodging the seeds.
Now that you have sown the Black Eyed Susan seeds, it’s time to move on to the next step: providing the seeds with adequate watering to promote germination and growth.
Step 5: Provide Adequate Watering
Proper watering is crucial for the successful germination and growth of Black Eyed Susan seeds. Water provides the essential moisture needed for the seeds to sprout and establish strong root systems. Follow these guidelines to provide adequate watering for your Black Eyed Susan seeds:
- Moisture balance: Black Eyed Susan seeds require consistently moist soil for germination. Ensure that the soil is neither too dry nor waterlogged. Aim for a moisture balance where the soil feels slightly damp to the touch but not saturated.
- Watering frequency: Water the seeds regularly to keep the soil consistently moist. Check the moisture level of the soil every couple of days, especially in dry weather conditions. Water gently to prevent dislodging the seeds or causing soil erosion.
- Deep watering: When watering, apply water deeply to encourage the roots to grow downwards. This helps to establish a strong root system, making the plants more resilient and better able to withstand drought conditions in the future.
- Adjust based on weather conditions: Be mindful of the weather conditions and adjust your watering schedule accordingly. Increase watering during hot and dry periods, as the soil tends to dry out faster. Conversely, reduce watering during periods of heavy rain or high humidity.
- Water at the base: Direct the water towards the base of the plants rather than overhead. This method helps prevent diseases and ensures that the water reaches the roots where it is needed the most.
- Mulching: Consider applying a layer of organic mulch around the plants. Mulch helps to retain moisture in the soil, reduce weed growth, and regulate soil temperature. It also helps prevent water evaporation, reducing the frequency of watering.
By providing adequate watering, you are creating an optimal environment for the Black Eyed Susan seeds to germinate and develop into healthy plants. Consistent moisture will promote sturdy growth and vibrant blooms. As the seeds begin to sprout and grow, it’s important to ensure they receive sufficient sunlight for photosynthesis. Moving on to the next step, we will discuss the importance of providing proper sunlight for your Black Eyed Susans.
Step 6: Provide Proper Sunlight
Proper sunlight is essential for the healthy growth and development of Black Eyed Susan plants. These sun-loving flowers require full sun exposure to thrive and produce vibrant blooms. Follow these guidelines to provide your Black Eyed Susans with the proper sunlight they need:
- Choose a sunny location: Plant your Black Eyed Susan seeds in a location that receives at least 6 to 8 hours of direct sunlight per day. Ensure that there are no obstructions, such as tall trees or buildings, casting shade over the planting area.
- Observe the sunlight pattern: Take note of how the sunlight moves across your garden throughout the day. Choose a spot that receives the most sunlight and has a minimal amount of shade during the day.
- Avoid extreme heat: While Black Eyed Susans love the sun, they can sometimes struggle with intense heat. If you live in a region with extremely hot summers, consider providing partial shade during the hottest parts of the day to protect the plants from scorching.
- Monitor for sunburn: Keep an eye out for signs of sunburn on the leaves of your Black Eyed Susan plants. If the leaves appear scorched or develop brown patches, it may be an indication of too much direct sunlight. In such cases, consider moving the plants to a slightly shadier area or providing some temporary shade.
- Rotate for even sunlight exposure: If your Black Eyed Susan plants are growing in containers or raised beds, rotate them occasionally. This will ensure that all sides of the plants receive an even amount of sunlight, promoting balanced growth.
By providing proper sunlight, you are enabling your Black Eyed Susan plants to carry out photosynthesis effectively, resulting in healthy foliage and vibrant blooms. However, sunlight alone is not enough to ensure their well-being. In the next step, we will discuss the importance of maintaining soil moisture for the optimal growth of your Black Eyed Susans.
Step 7: Maintain Soil Moisture
Maintaining proper soil moisture is essential for the healthy growth and development of Black Eyed Susan plants. These flowers thrive in moist soil, but it’s important to strike a balance and avoid overwatering. Follow these guidelines to effectively maintain soil moisture for your Black Eyed Susans:
- Monitor soil moisture: Regularly check the moisture level of the soil around your Black Eyed Susan plants. Stick your finger about an inch into the soil to assess its moisture content.
- Water when necessary: Water the plants when the top inch of soil feels dry. Aim to keep the soil consistently moist but not waterlogged. Avoid allowing the soil to completely dry out between waterings.
- Water deeply: When you water, ensure that you provide enough water to penetrate the root zone. Watering deeply encourages the roots to grow deeper into the soil, promoting a stronger and more drought-tolerant plant.
- Appropriate watering schedule: Adjust your watering schedule based on the weather and the needs of your plants. During hot and dry periods, you may need to water more frequently, while during cooler and rainier periods, you may need to water less often.
- Mulch: Consider applying a layer of organic mulch, such as straw or wood chips, around your Black Eyed Susan plants. Mulch helps to retain moisture in the soil, reduce weed growth, and regulate soil temperature. It also helps prevent water evaporation, reducing the frequency of watering.
- Prevent waterlogged soil: Avoid overwatering your Black Eyed Susans, as excess moisture can lead to root rot and other fungal diseases. Ensure that the planting area has proper drainage and that water does not accumulate around the roots.
By maintaining proper soil moisture, your Black Eyed Susan plants will have the necessary water to sustain their growth and bloom beautifully. It’s important to closely monitor the moisture level and adjust your watering practices accordingly. In the next step, we will discuss the optional step of transplanting seedlings for optimal growth and spacing.
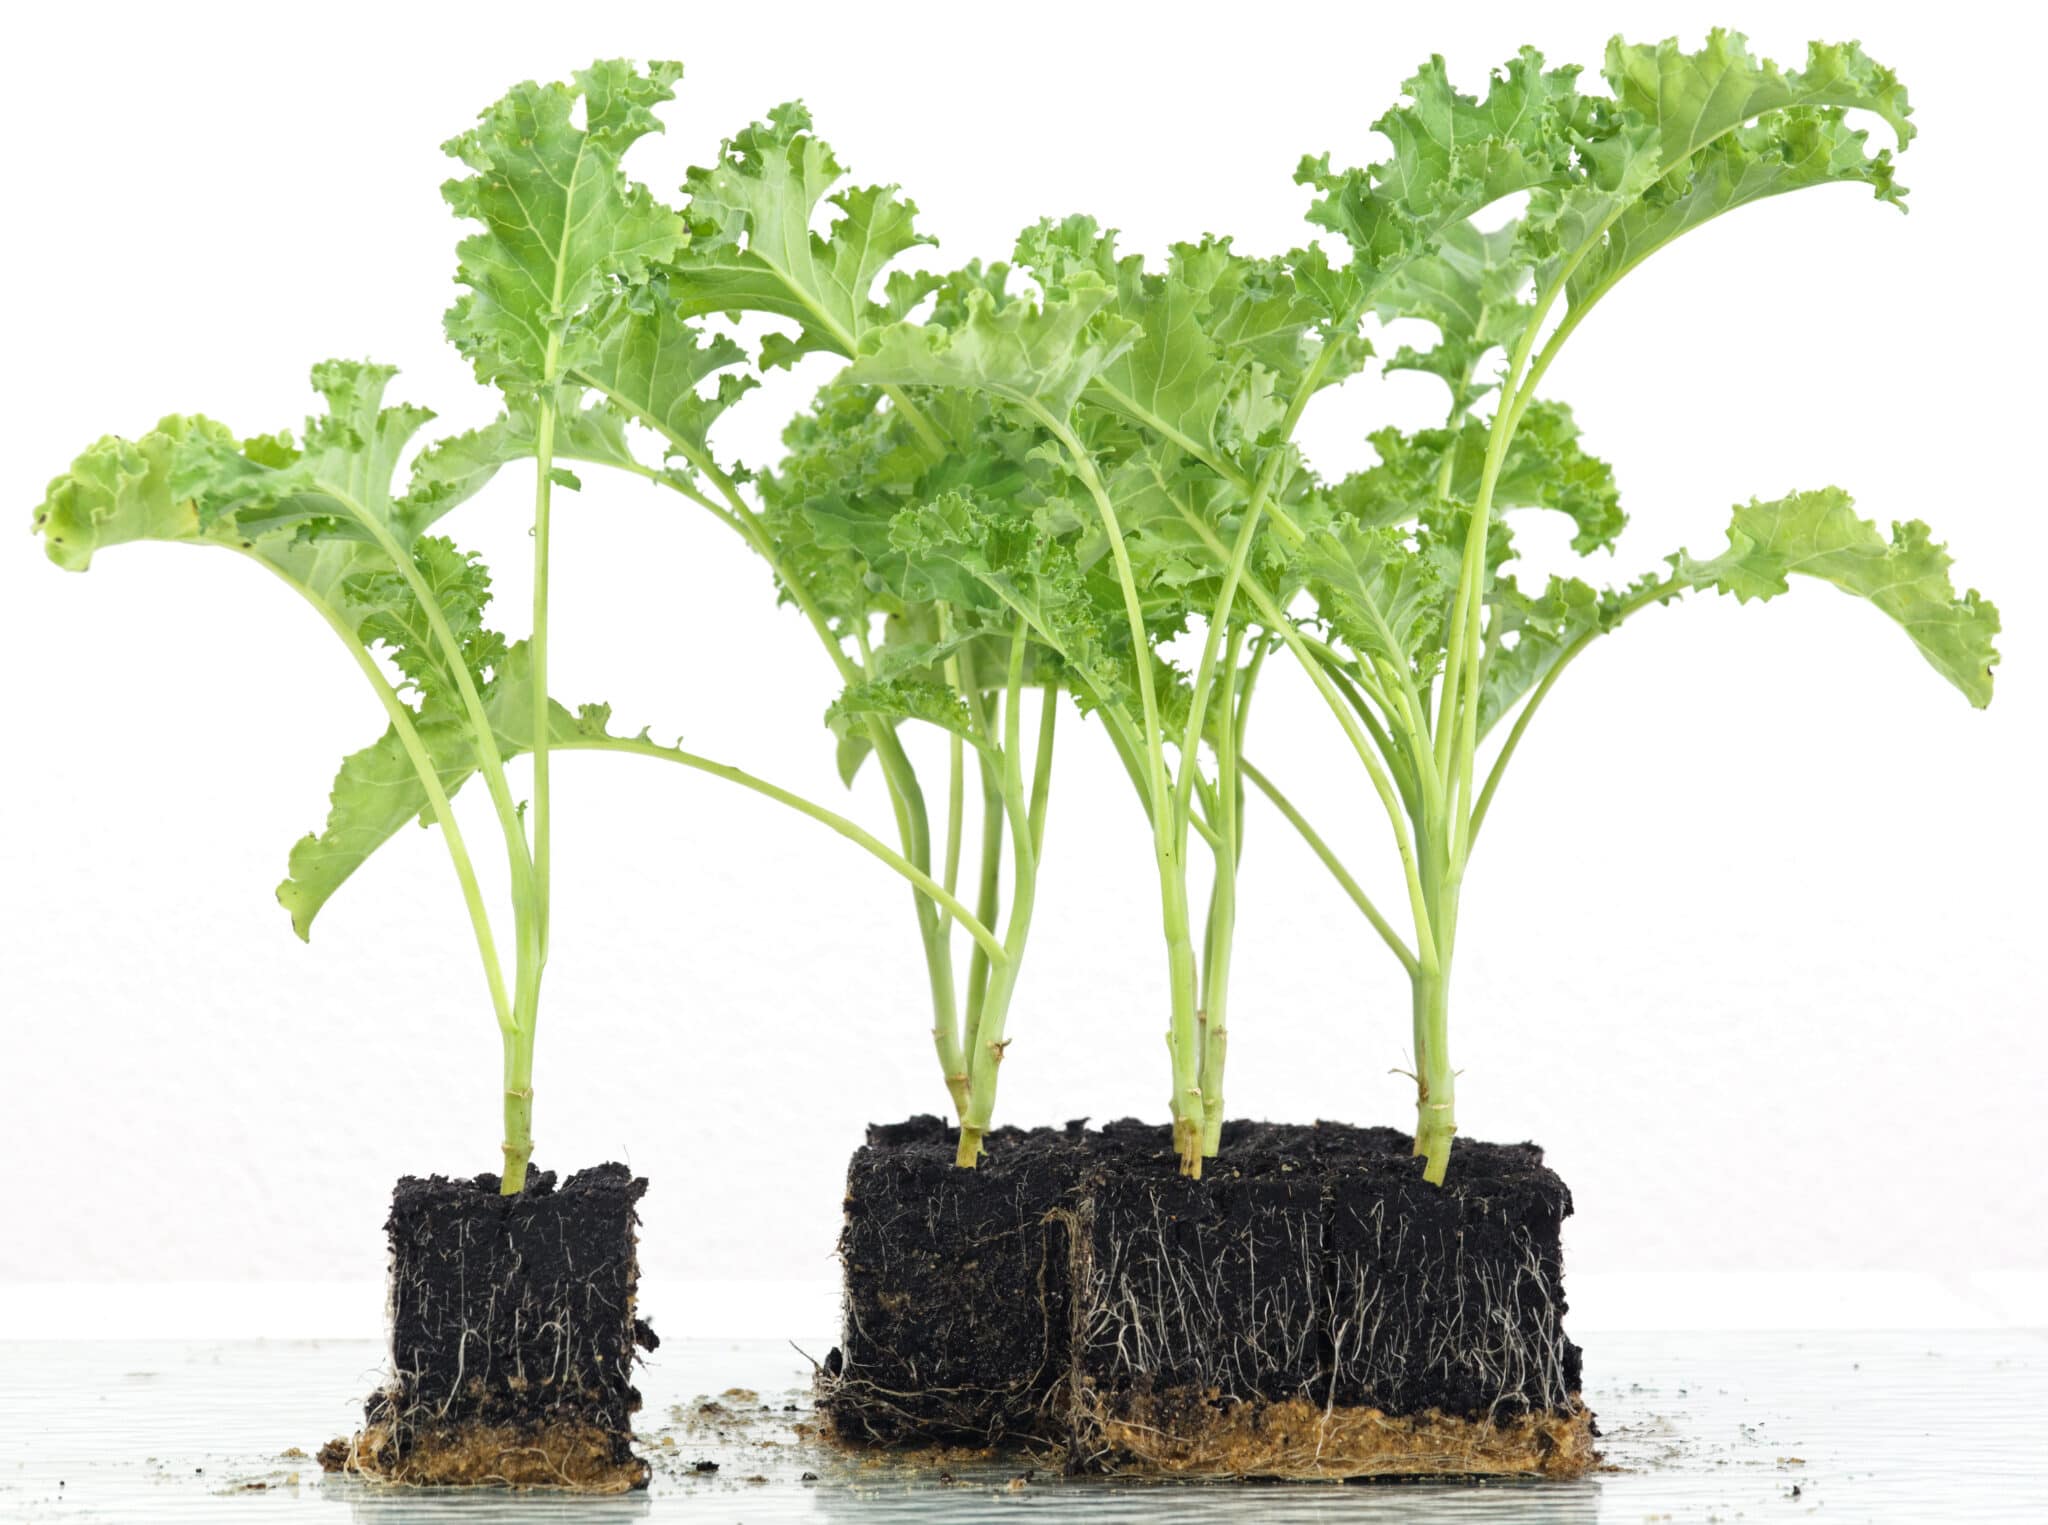
Step 8: Transplant Seedlings (Optional)
Transplanting seedlings is an optional step in the cultivation of Black Eyed Susan plants. While direct sowing is a common method, starting the seeds indoors and later transplanting them can provide certain advantages. Transplanting allows for better control over the growing conditions and spacing of the plants. Here are the steps to successfully transplant Black Eyed Susan seedlings:
- Timing: Start your Black Eyed Susan seeds indoors approximately 6-8 weeks before the last expected frost in your area. This will give the seedlings ample time to grow before they are ready for transplanting.
- Prepare containers: Use small pots or seed trays with drainage holes to sow the seeds indoors. Fill the containers with a quality seed starting mix and moisten it before planting the seeds.
- Sow the seeds: Place 1-2 Black Eyed Susan seeds in each pot or cell, pressing them gently into the seed starting mix. Cover with a thin layer of soil or vermiculite.
- Provide proper care: Place the containers in a warm and bright location, ensuring they receive sufficient sunlight or artificial light. Keep the soil moist but not waterlogged.
- Harden off seedlings: Before transplanting the seedlings, it’s important to acclimate them to outdoor conditions. Gradually expose the seedlings to outdoor conditions by placing them outside for a few hours each day, gradually increasing the exposure time over a week or two.
- Transplant seedlings: Choose a location in your garden with suitable sunlight exposure and well-draining soil. Dig a hole slightly larger than the root ball of each seedling. Gently remove the seedling from its pot, being careful not to disturb the roots. Place it in the hole and backfill with soil, gently firming the soil around the base of the plant.
- Water and protect: Water the transplanted seedlings immediately after planting to help settle the soil around the roots. Continue to water regularly, keeping the soil consistently moist until the plants are established. Consider using a protective cover, such as garden fabric, to shield the young seedlings from strong sun or harsh weather conditions.
Transplanting seedlings allows for better spacing and control over the growing conditions, leading to healthier and more robust Black Eyed Susan plants. However, if you choose to direct sow the seeds, skip this step and move on to the next step, which focuses on protecting the plants from pests and diseases.
Step 9: Protect from Pests and Diseases
Protecting your Black Eyed Susan plants from pests and diseases is crucial to ensure their health and vitality. While these flowers are generally resilient, they can still be susceptible to certain pests and diseases. By taking preventive measures and promptly addressing any issues, you can keep your Black Eyed Susans thriving. Here are some tips to protect your plants:
- Monitor regularly: Regularly inspect your Black Eyed Susan plants for signs of pests or diseases. Look for any visible damage, discoloration, or unusual growth patterns.
- Identify common pests: Familiarize yourself with common pests that affect Black Eyed Susans, such as aphids, slugs, snails, and powdery mildew. Learn to identify the early signs of infestation or infection.
- Natural pest control: Use natural methods to control pests whenever possible. This can include handpicking and removing larger pests, using insecticidal soaps or neem oil sprays, or introducing beneficial insects like ladybugs or lacewings to combat pest populations.
- Proper watering technique: Avoid overwatering your Black Eyed Susans, as excessive moisture can lead to fungal diseases. Instead, water at the base of the plants and avoid wetting the foliage unnecessarily.
- Prune and clean: Regularly remove any dead, damaged, or diseased foliage from your Black Eyed Susan plants. Pruning helps improve air circulation and reduces the risk of fungal infections.
- Maintain proper spacing: Ensure that there is enough space between your Black Eyed Susan plants to promote good air circulation. Crowded plants are more prone to diseases, so thin them out if necessary.
- Apply organic fungicides: If fungal diseases like powdery mildew persist, consider using organic fungicides specifically formulated for ornamental plants. Follow the instructions on the label and apply them as directed.
- Remove weeds: Regularly remove weeds from the planting area, as they can harbor pests and diseases that may affect your Black Eyed Susans.
By taking proactive measures to protect your Black Eyed Susan plants, you can ensure their continued growth and beauty. Regular monitoring, preventive measures, and prompt action will go a long way in maintaining healthy plants. In the final step, we will discuss the joy of witnessing your Black Eyed Susans bloom and how to appreciate their beauty.
Step 10: Enjoy Blooming Black Eyed Susans
Congratulations! You have successfully nurtured your Black Eyed Susan plants from seeds or seedlings, and now it’s time to enjoy the beautiful blooms. Black Eyed Susans are known for their vibrant yellow or orange petals with the striking dark center, bringing a splash of color and attracting pollinators to your garden. Here are some tips to fully appreciate and care for your blooming Black Eyed Susans:
- Observe the blooms: Take a moment to admire the stunning flowers of your Black Eyed Susan plants. Notice the intricate details, color variations, and the intricate patterns of the dark center.
- Support taller varieties: If you are growing taller varieties of Black Eyed Susans, consider providing support to prevent them from toppling over due to strong winds or heavy rain. Use stakes or plant supports to keep the plants upright.
- Deadhead spent flowers: To encourage continuous blooming, remove spent flowers by pinching or cutting them off. This practice, known as deadheading, redirects the plant’s energy towards producing new blooms rather than forming seeds.
- Monitor for signs of disease: continue to monitor your Black Eyed Susans for any signs of pests or diseases. Promptly address any issues to prevent them from spreading and affecting the overall health of your plants.
- Harvest seeds (optional): If you want to save seeds for future planting, allow some of the flowers to go to seed. Once the seed heads have dried and turned brown, you can collect the seeds and store them in a cool, dry place for next year’s planting.
- Appreciate pollinators: Black Eyed Susans are loved by bees, butterflies, and other pollinators. Take a moment to watch these important garden visitors as they gather nectar and pollinate the flowers.
- Share the beauty: Share the joy of your blooming Black Eyed Susans with friends, family, and fellow gardening enthusiasts. It’s a wonderful way to spread the beauty of these delightful flowers and inspire others to cultivate their own gardens.
Remember to continue providing proper care, such as watering and maintaining soil moisture, even after the flowers have bloomed. With proper care and attention, your Black Eyed Susans will continue to flower and bring joy year after year. So sit back, relax, and revel in the beauty of your blooming Black Eyed Susans.
Conclusion
Congratulations on successfully planting Black Eyed Susan seeds and nurturing them to bloom! Throughout this guide, we have explored the step-by-step process to grow these stunning flowers in your garden. From gathering supplies to enjoying the vibrant blooms, you have gained valuable insights on how to cultivate Black Eyed Susans and provide them with the care they needed.
By creating an optimal environment, including choosing a sunny location, preparing the soil, providing adequate watering, and ensuring proper sunlight exposure, you have set the stage for healthy growth and abundant blooms. Additionally, understanding how to protect your Black Eyed Susan plants from pests and diseases ensures their continued vitality.
Whether you chose to start your Black Eyed Susans from seeds or seedlings, the journey of watching them sprout, grow, and finally bloom is truly rewarding. Take the time to appreciate the intricate details of the flowers and the pollinators they attract, making your garden come alive with the wonders of nature.
Remember to continue caring for your Black Eyed Susans as they bloom, by supporting taller varieties, deadheading spent flowers, monitoring for diseases, and harvesting seeds if desired. Sharing the beauty of your blooming Black Eyed Susans with others can also bring joy and inspire fellow gardeners.
Now, armed with your newfound knowledge and passion for ornamental gardening, you can continue to explore other exciting plant varieties and enhance the beauty of your garden.
So go forth, enjoy the beauty of your Black Eyed Susans, and continue to cultivate a vibrant and thriving garden that brings you happiness and tranquility. Happy gardening!