Home>Gardening Techniques>Plant Care>What Seeds To Start Indoors In February

Plant Care
What Seeds To Start Indoors In February
Modified: January 22, 2024
Discover the best seeds to start indoors in February for optimal plant care. Learn which plants thrive when started early and get a head start on your gardening season.
(Many of the links in this article redirect to a specific reviewed product. Your purchase of these products through affiliate links helps to generate commission for Chicagolandgardening.com, at no extra cost. Learn more)
Table of Contents
Introduction
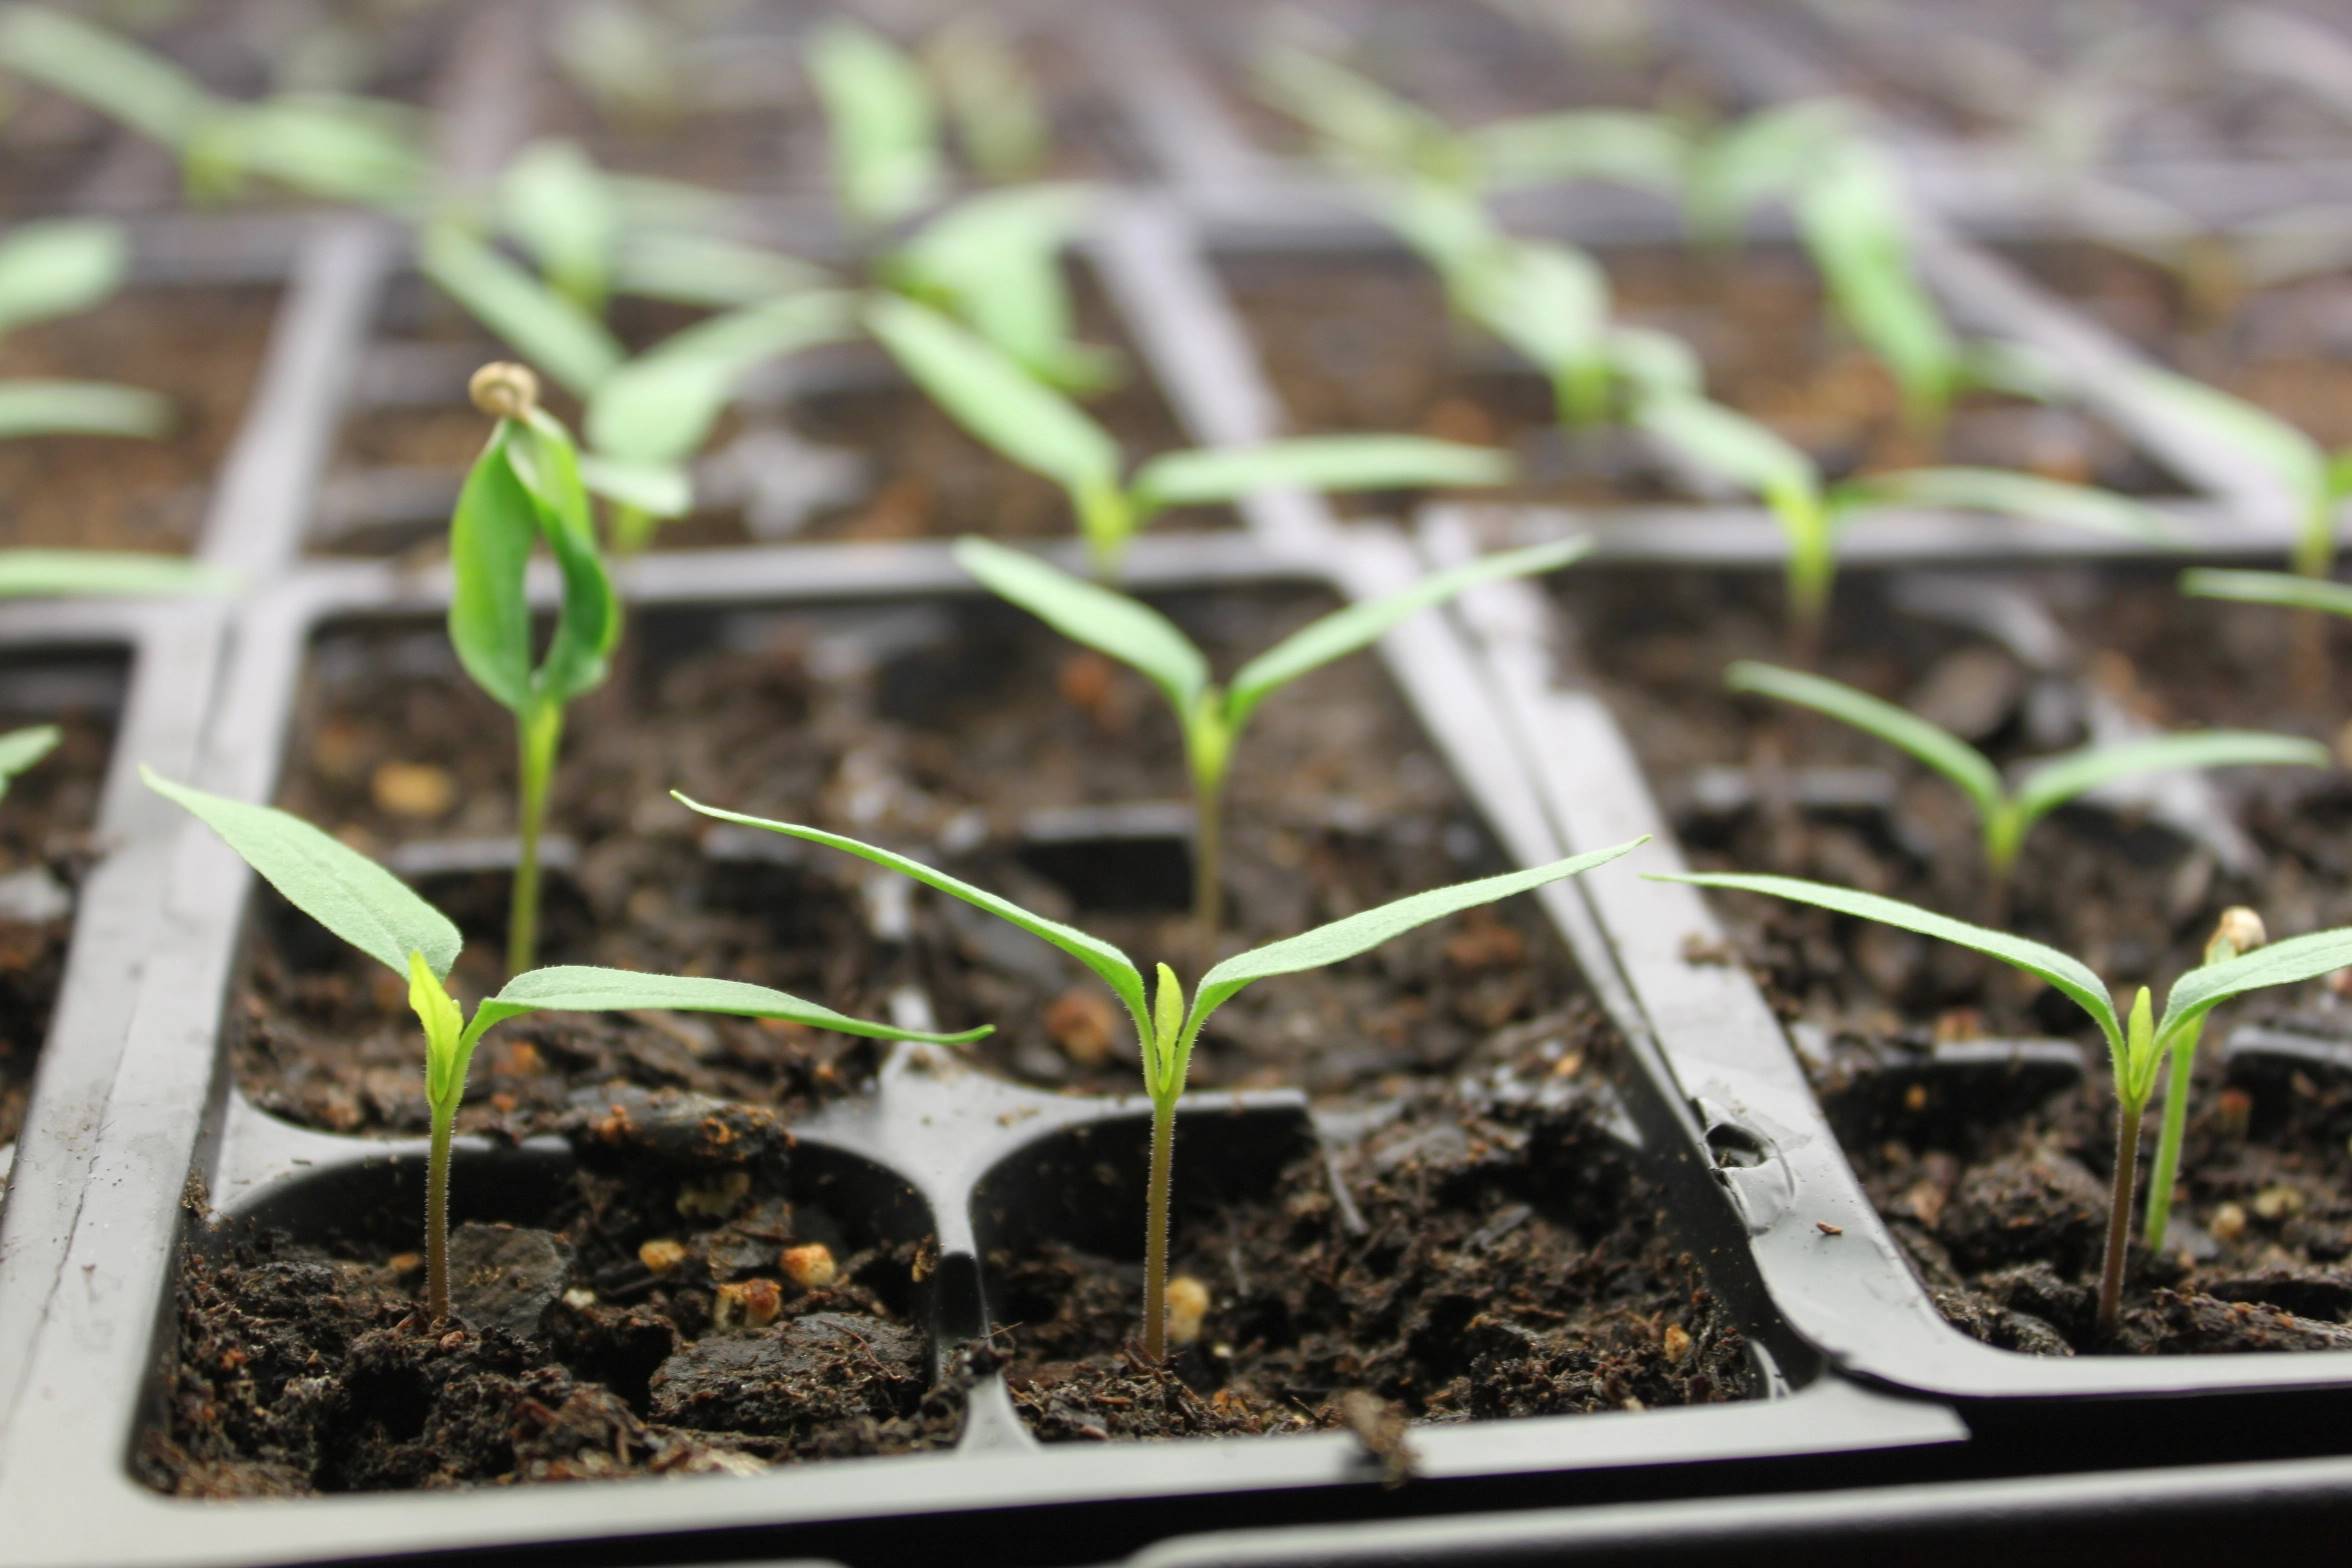
Welcome to the exciting world of starting seeds indoors in February! As the winter season begins to wind down, gardeners and plant enthusiasts eagerly prepare for the arrival of spring. While it may still be too early to start planting directly in the garden, February is the perfect time to start seeds indoors, giving them a head start for when the weather warms up.
Starting seeds indoors has numerous benefits, allowing you to extend your growing season, have greater control over growing conditions, and save money on buying established plants from nurseries. Whether you’re a seasoned gardener or a beginner, this article will guide you through the process of starting seeds indoors in February and help kickstart your garden’s success.
Before diving into the specifics of which seeds to start indoors in February, it’s essential to consider a few factors. Firstly, the average last frost date in your region is crucial information to know, as it will determine the appropriate timing for transplanting seedlings outdoors. Additionally, having a suitable indoor growing space, such as a sunny window sill or a grow light setup, is essential for seedling development.
Now, let’s explore a variety of seeds that thrive when started indoors in February. From flavorful tomatoes to vibrant herbs, these early-starting seeds will ensure a bountiful and diverse garden in the upcoming months.
Benefits of Starting Seeds Indoors
Starting seeds indoors offers a range of benefits that contribute to the success of your garden. Let’s take a closer look at some of the advantages:
- Extended Growing Season: By starting seeds indoors, you can get a head start on the growing season. This means you’ll have mature plants ready to be transplanted into your garden as soon as the weather permits, resulting in an extended harvest period.
- Greater Control: When you start seeds indoors, you have full control over the growing environment. You can adjust temperature, humidity, and light levels to suit the specific requirements of each plant, ensuring optimal conditions for germination and growth.
- Cost Savings: Buying established plants from nurseries can be costly. Starting seeds indoors allows you to grow a large number of plants at a fraction of the cost. You can also choose from a wider range of seed varieties, including heirlooms and rare plants that may not be readily available as seedlings.
- Customization: Starting seeds indoors gives you the opportunity to customize your garden based on your preferences. You can grow unique varieties, experiment with new plant species, and have more control over the size, shape, and overall composition of your garden.
- Healthier Seedlings: When you start seeds indoors, you have better control over disease prevention and pest management. Seedlings grown indoors are less susceptible to outdoor pests and diseases, resulting in healthier and stronger plants.
- Education and Enjoyment: Starting seeds indoors provides an opportunity for hands-on learning and a deeper understanding of the plant lifecycle. It can be a rewarding and enjoyable activity, especially for children, as they witness the magic of seed germination and plant growth.
These benefits make starting seeds indoors in February a worthwhile endeavor. Not only will you have a thriving garden, but you will also gain a sense of accomplishment and fulfillment as you nurture your plants from seed to harvest.
Factors to Consider Before Starting Seeds Indoors in February
Before you begin the exciting process of starting seeds indoors in February, there are some important factors to consider:
- Last Frost Date: Knowing the average last frost date in your region is crucial. This information will help you determine when it’s safe to transplant your seedlings outdoors. Starting seeds too early and exposing them to frost can hinder their growth and survival.
- Indoor Growing Space: Assess the space you have available indoors for seed starting. A sunny windowsill facing south is ideal, as it provides ample natural light. If you don’t have access to sufficient natural light, consider using artificial grow lights to provide the necessary light intensity for seedling development.
- Temperature and Humidity: Most seeds require a certain temperature range for successful germination. Ensure that the indoor temperature is suitable for the specific seeds you’re starting. Using a heating mat or placing seed trays near a heat source can help create favorable conditions. Additionally, maintaining proper humidity levels, especially in dry indoor environments, can promote germination and prevent seedling drying out.
- Seed Starting Mix: Choose a high-quality seed starting mix that promotes good drainage while retaining moisture. Avoid using garden soil as it can contain weed seeds and pathogens that may hinder the growth of your seedlings.
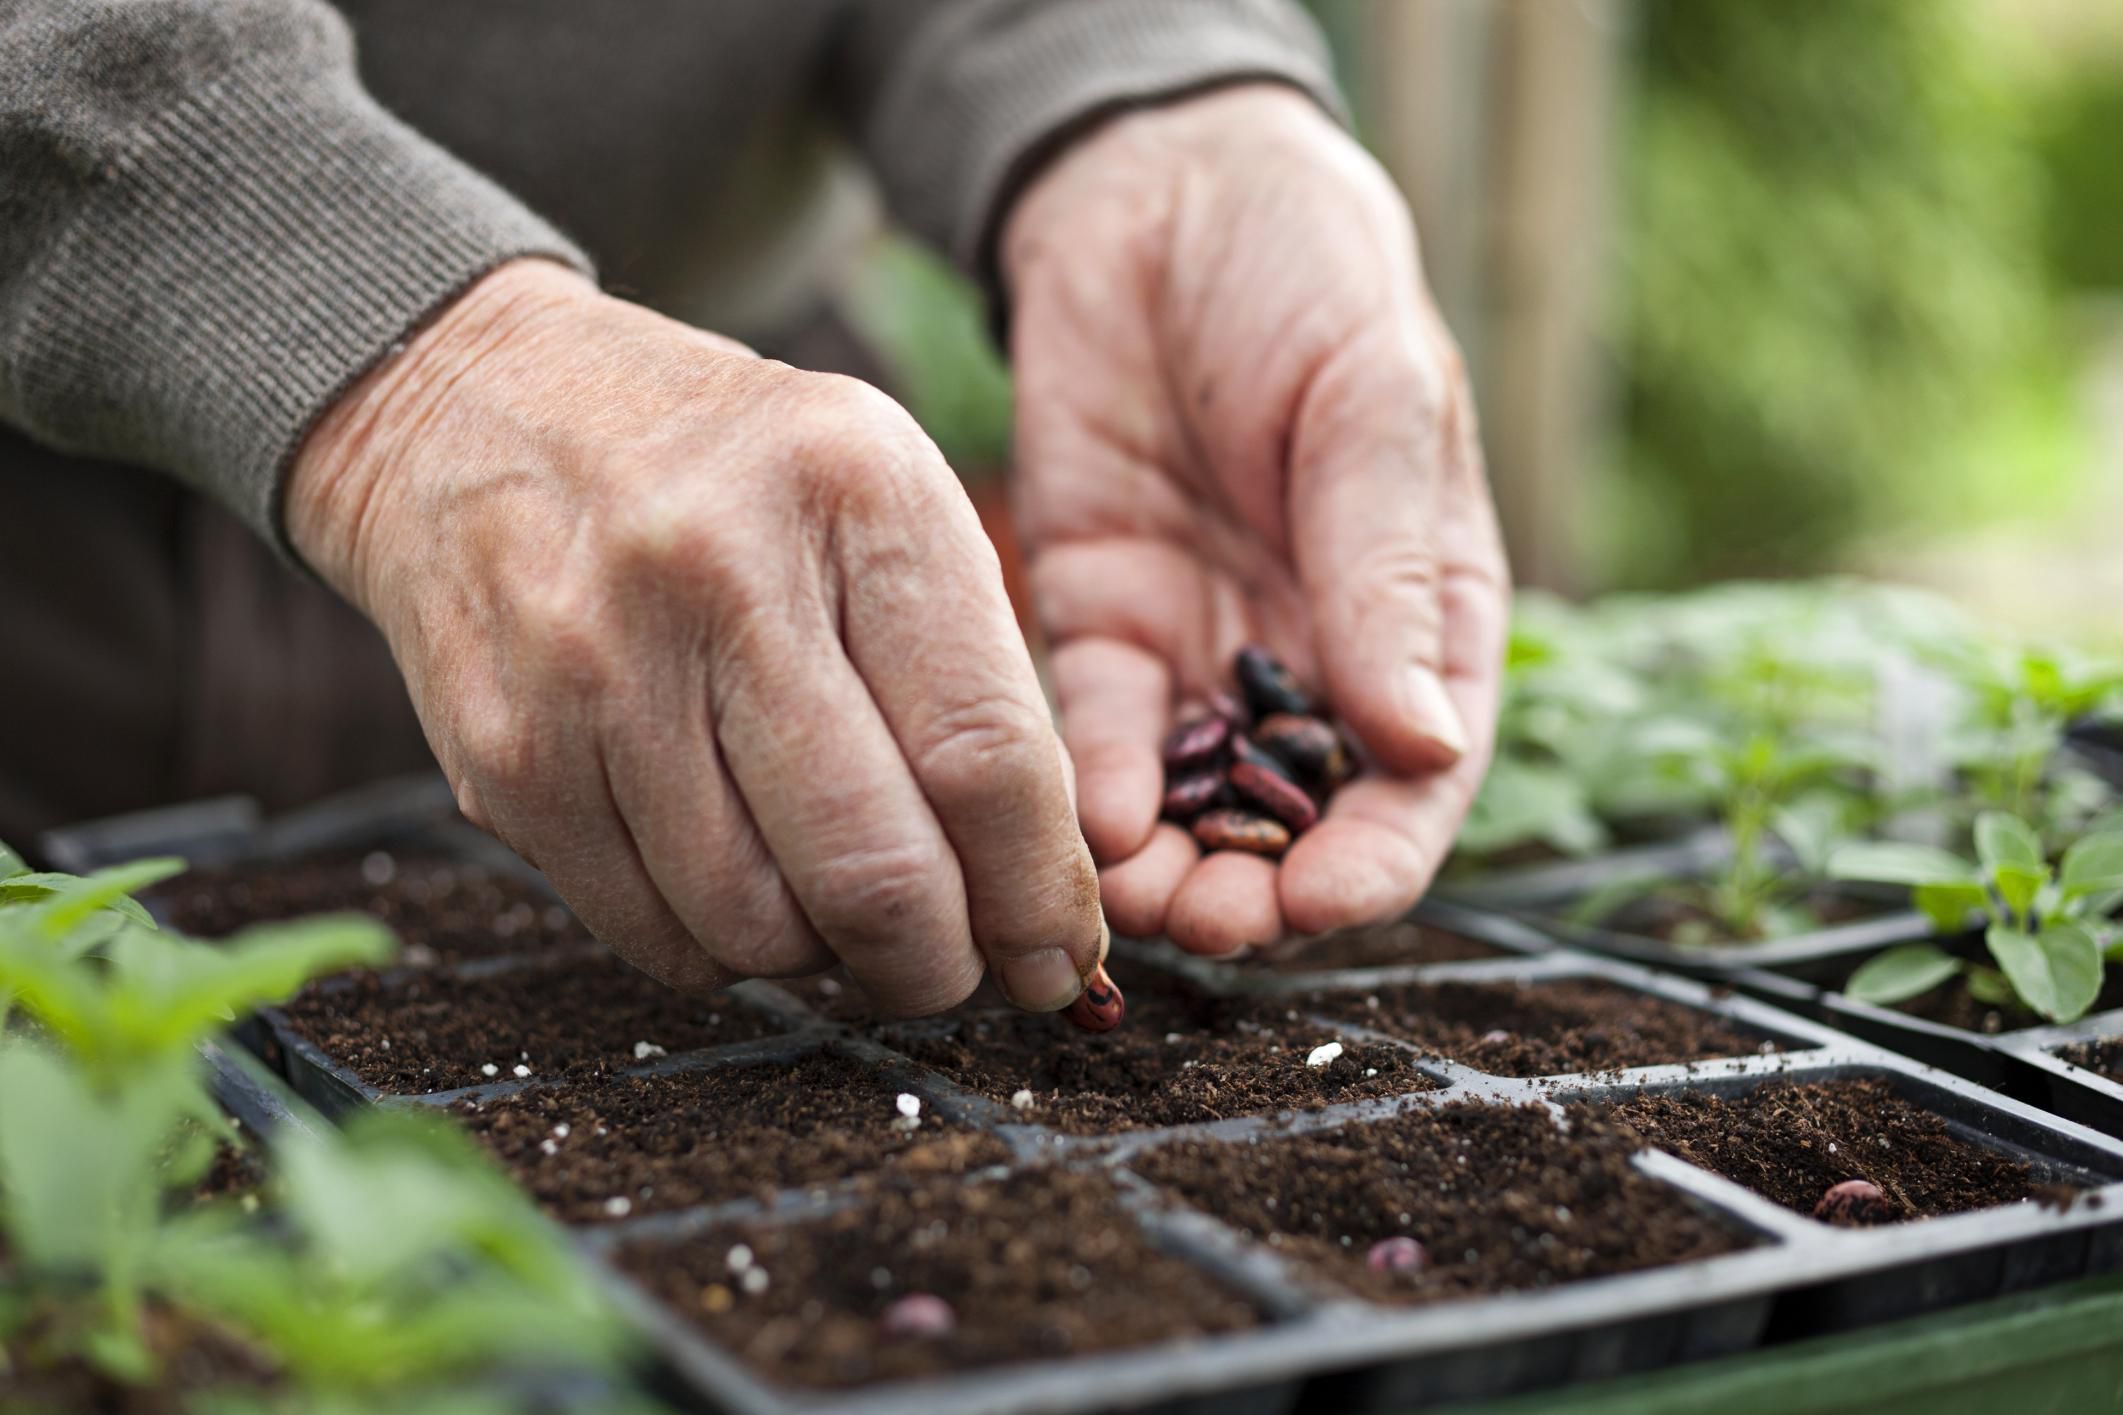
- Containers and Labels: Select appropriate containers for starting your seeds, such as seed trays, peat pots, or cell trays. These should have adequate drainage holes to prevent waterlogging. Remember to label your containers with the seed variety and the date of sowing to avoid confusion later on.
- Watering and Fertilization: Proper watering is essential for seedling growth. Use a gentle misting or bottom-watering technique to prevent over-watering and minimize disturbance to the delicate seedlings. Additionally, consider using a balanced organic fertilizer or a diluted liquid fertilizer to provide essential nutrients for healthy growth.
- Hardening Off: As your seedlings grow, you’ll need to gradually expose them to outdoor conditions before transplanting them into the garden. This process, known as hardening off, helps acclimate the seedlings to changes in temperature, wind, and sunlight, ensuring their successful transition to the garden.
Considering these factors will set you up for success when starting seeds indoors in February. Taking the time to plan and prepare will lead to strong and healthy seedlings ready for the great outdoors.
Seeds to Start Indoors in February
February is an exciting time to start a variety of seeds indoors. Here are some popular plant seeds that can be started in February:
- Tomatoes: Tomatoes are a staple in many gardens. Start tomato seeds indoors in February to ensure they have enough time to grow and produce a plentiful harvest. Choose from a wide range of tomato varieties, including cherry, beefsteak, and heirloom.
- Peppers: Whether it’s sweet bell peppers or fiery hot chili peppers, starting pepper seeds in February will give them a head start. Peppers require a longer growing season, so starting them early indoors is essential for a successful harvest.
- Eggplant: Eggplants thrive when started indoors in February. There are numerous eggplant varieties, including classic purple ones and unique white or striped varieties. Get a jumpstart on growing this versatile vegetable by starting the seeds indoors early in the season.
- Broccoli: Broccoli is a cool-season vegetable that can be started indoors in February. It’s packed with nutrients and is a popular choice for many gardeners. Transplant the seedlings outdoors once the weather is suitable for them to thrive.
- Cabbage: Cabbage is another cold-hardy vegetable that can be started indoors in February. From green cabbage to red cabbage and even Savoy cabbage, there are many varieties to choose from. Enjoy the crispy leaves and unique flavors of homegrown cabbage.
- Cauliflower: Cauliflower is a delicious and versatile vegetable that can be started indoors in February. It requires cool temperatures to grow, making it an ideal candidate for early indoor sowing. Harvest the heads when they are firm and dense.
- Onions: Starting onion seeds indoors in February will give you a head start on growing this essential kitchen ingredient. From sweet onions to red onions and even green onions, there are various onion varieties to choose from for indoor seed starting.
- Lettuce: Lettuce is a quick-growing leafy green that can be started indoors in February for an early harvest. There are countless lettuce varieties, including crisphead, romaine, and loose-leaf lettuce. Enjoy fresh and flavorful salads straight from your garden.
- Spinach: Spinach is a nutrient-packed leafy green that thrives in cooler temperatures. Start spinach seeds indoors in February and enjoy this versatile vegetable in salads, sautés, and smoothies throughout the growing season.
- Herbs: February is an excellent time to start a variety of herbs indoors. From basil and cilantro to parsley and thyme, herbs add flavor and aroma to your dishes. Grow herbs indoors and transplant them outdoors once the frost has passed.
These are just a few examples of seeds that can be started indoors in February. You can choose a combination of vegetables and herbs based on your climate, growing preferences, and culinary interests. Get creative and have fun experimenting with different seed varieties!
Tomatoes
Tomatoes are undoubtedly one of the most popular vegetable crops to grow in home gardens. They are versatile, delicious, and come in a wide range of varieties to suit every gardener’s preference. Starting tomato seeds indoors in February is a fantastic way to ensure a successful harvest.
Tomato seeds generally require a warm and consistent temperature for germination, making them well-suited for starting indoors. Begin by filling seed trays or pots with a quality seed starting mix. Plant the seeds at a depth of about a quarter-inch and lightly cover them with the soil. Keep the soil consistently moist but avoid overwatering, as it can lead to damping-off disease.
Place the seed trays in a warm location with a temperature between 70-80°F (21-27°C). You can use a heating mat underneath the trays to provide bottom warmth and promote germination. Once the seeds germinate and the seedlings have a few sets of true leaves, thin them out if they are too crowded, ensuring each plant has enough space to grow.
As the seedlings grow, provide them with adequate light. Place them in a sunny south-facing window or use fluorescent or LED grow lights if natural light is limited. Tomato seedlings need at least 12-14 hours of light each day to develop properly.
When the outdoor temperatures have warmed up and there is no longer a threat of frost, usually around 6 to 8 weeks after sowing, it’s time to transplant the tomato seedlings into the garden. Harden off the seedlings by gradually exposing them to outdoor conditions for a week before planting. Choose a sunny location in the garden with well-draining soil and sufficient space between the plants.
There are countless tomato varieties to choose from, such as beefsteak, cherry, heirloom, and determinate or indeterminate types. Consider your space, climate, and taste preferences when selecting the best tomato varieties for your garden. With proper care and attention, your tomato plants will reward you with juicy and flavorful homegrown fruits throughout the summer.
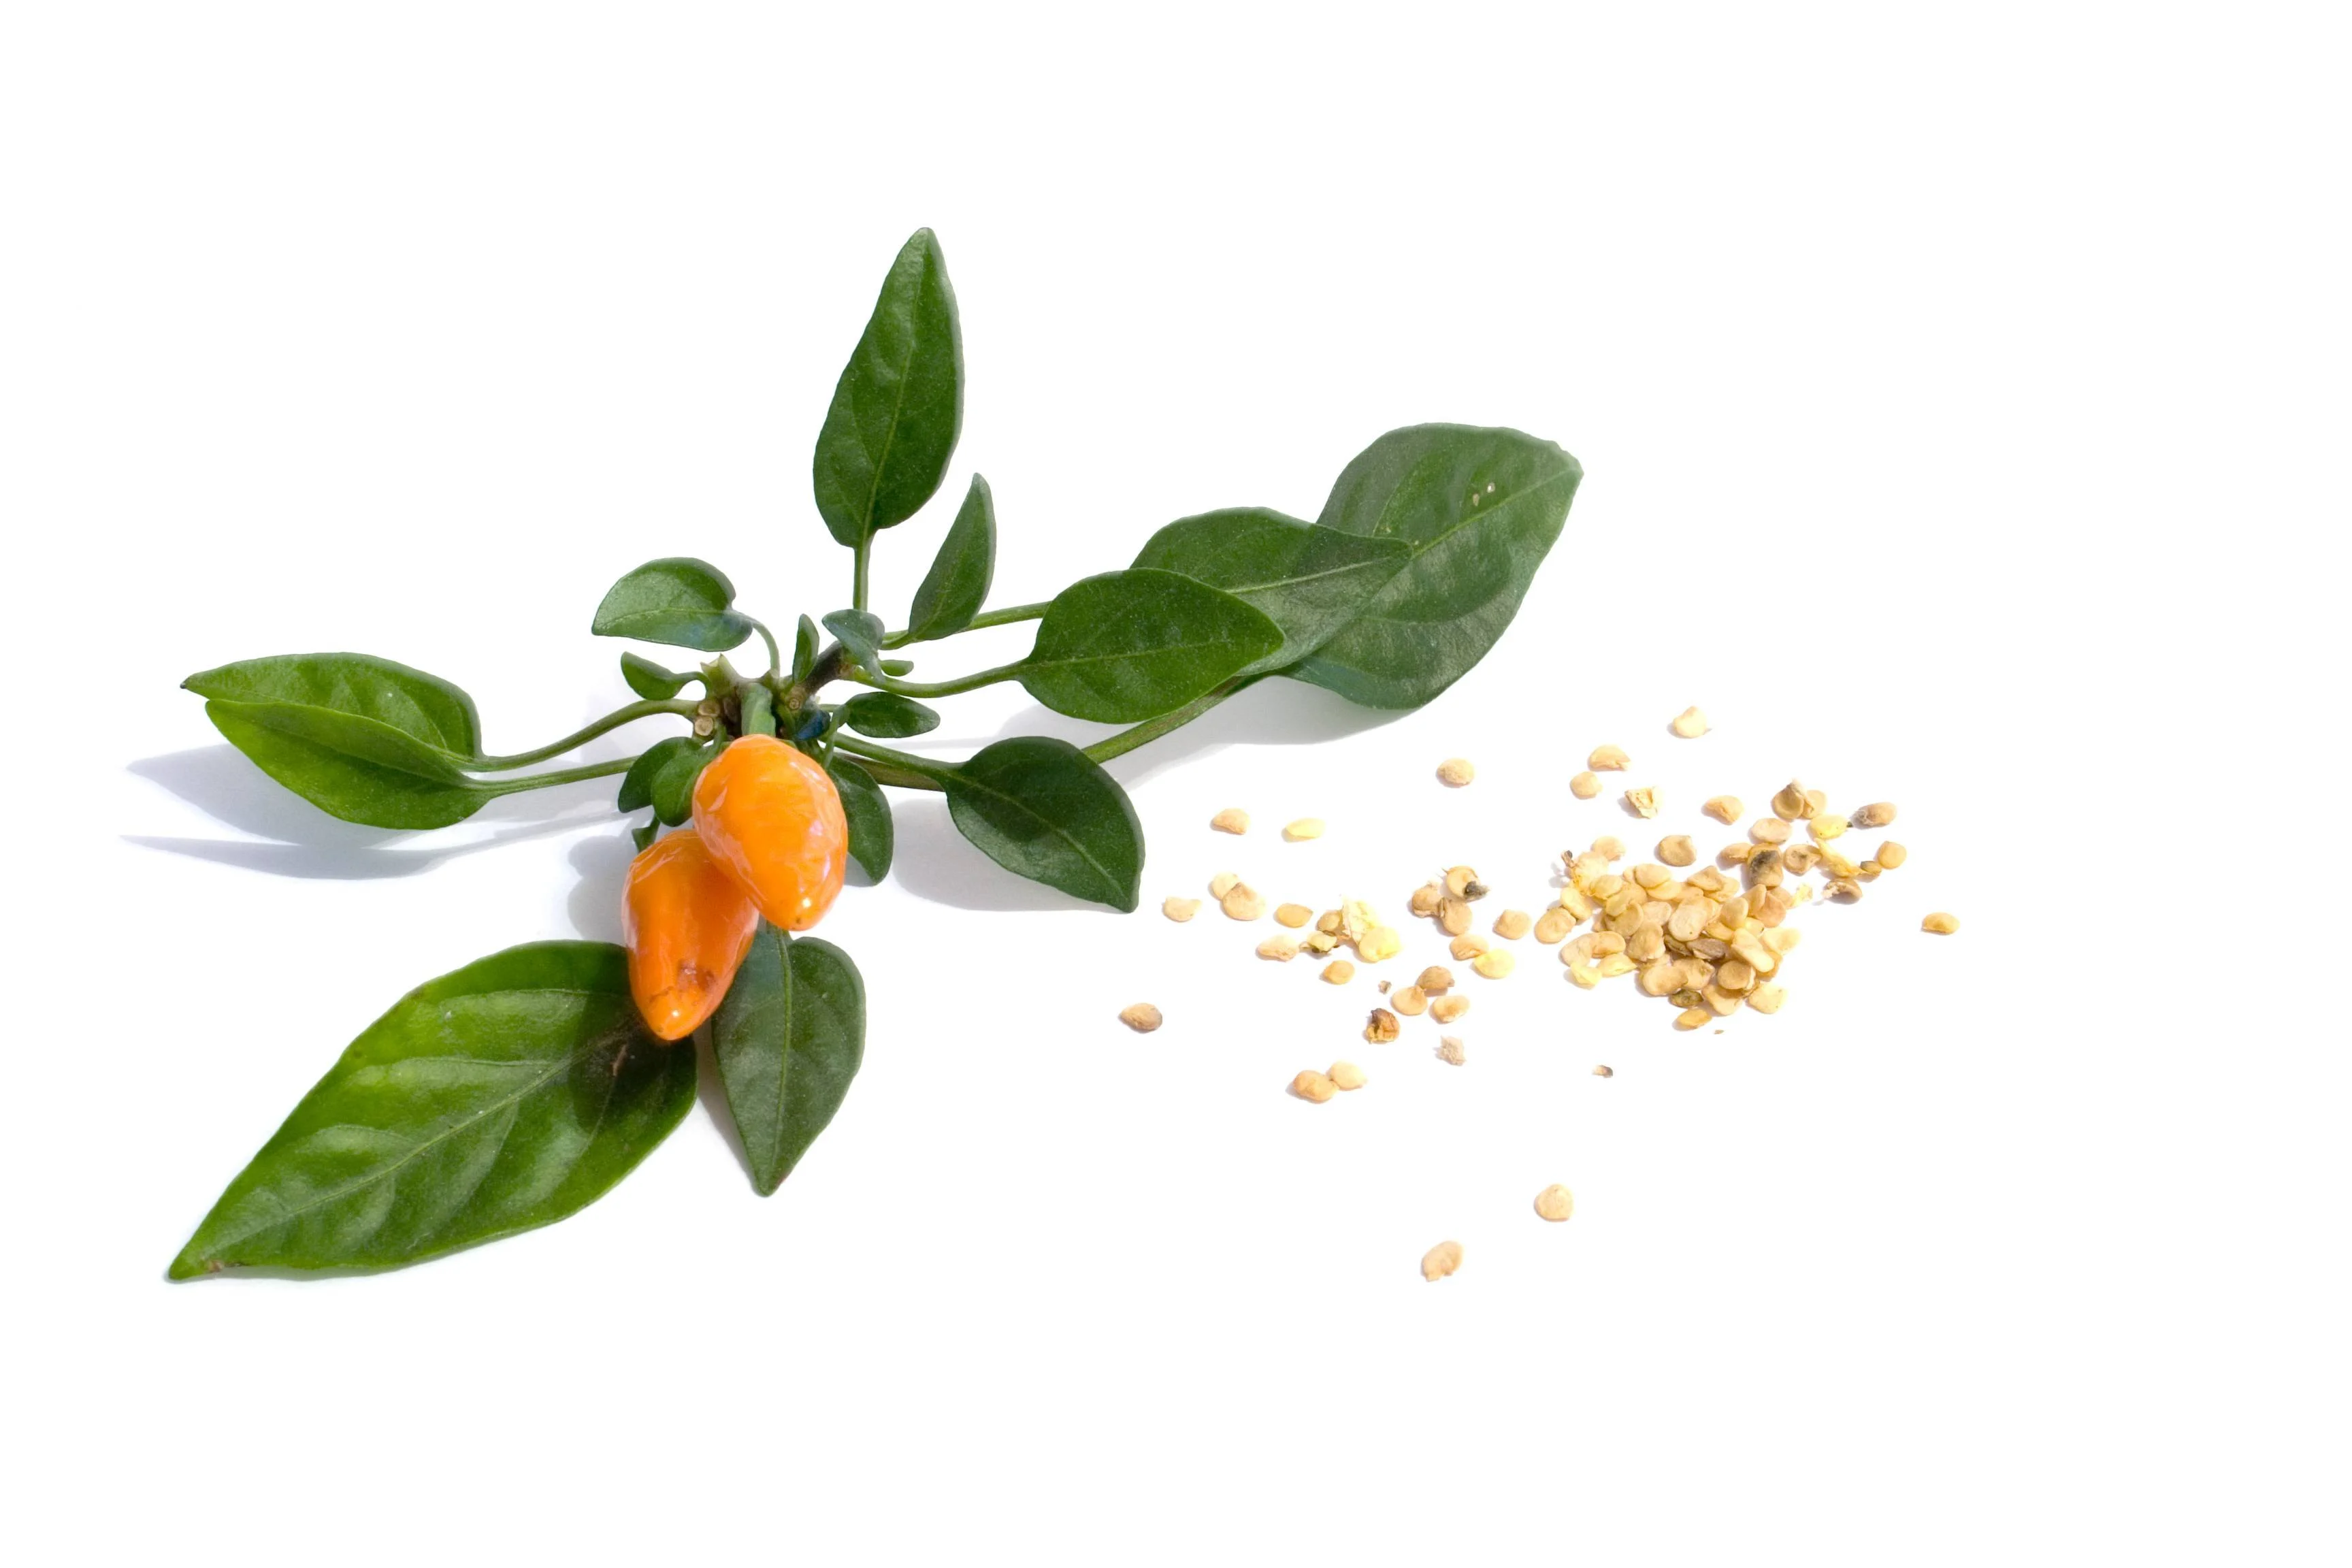
Peppers
Peppers are a delightful addition to any garden, adding color, heat, and flavor to a variety of dishes. Starting pepper seeds indoors in February is essential, as peppers require a longer growing season to reach maturity and produce abundant harvests.
To start pepper seeds, fill seed trays or pots with a well-draining seed starting mix. Plant the seeds at a depth of about a quarter-inch and lightly cover them with soil. It’s recommended to soak the pepper seeds overnight before sowing to help speed up germination.
Pepper seeds thrive in warm temperatures. Place the seed trays in a location with consistent temperatures between 70-85°F (21-29°C). Using a heating mat can provide bottom heat and promote faster germination. Keep the soil evenly moist but avoid overwatering, as it can lead to seed rot or damping-off.
Once the pepper seedlings have emerged, provide them with adequate light to prevent them from becoming leggy. Peppers require bright light for at least 12-14 hours a day. If natural sunlight is scarce, use fluorescent or LED grow lights to supplement the light intensity.
As the seedlings grow, thin them out if they are overcrowded, ensuring each plant has enough space to develop. Transplant the seedlings into larger pots when they have a few sets of true leaves. This will provide more room for root growth and help establish stronger plants.
When the threat of frost has passed and the soil has warmed up, typically around 8-10 weeks after sowing, you can transplant the pepper seedlings into the garden. Choose a sunny spot with well-drained soil and space the plants according to the recommended spacing for the specific pepper variety.
Pepper varieties range from sweet bell peppers to hot chili peppers. Depending on your taste preferences, you can select mild, medium, or fiery hot varieties. Some popular pepper varieties to consider include bell peppers, jalapeños, habaneros, and cayenne peppers.
Caring for pepper plants involves regular watering, providing support for taller varieties, and feeding them with a balanced organic fertilizer. Peppers thrive in warm and sunny conditions, so make sure they receive at least 6-8 hours of direct sunlight each day.
With proper care and attention, your pepper plants will reward you with vibrant fruits that can be used in various cuisine styles, whether fresh, roasted, grilled, or dried.
Eggplant
Eggplants, with their glossy purple skin and creamy white flesh, are a beautiful and delicious addition to any home garden. Starting eggplant seeds indoors in February gives them a head start and increases the chances of a successful harvest.
To start eggplant seeds, fill seed trays or pots with a well-draining seed starting mix. Sow the seeds at a depth of about a quarter-inch and cover them lightly with soil. Keep the soil consistently moist, but avoid overwatering, as it can lead to rotting. Eggplant seeds germinate best in warm temperatures, so ensure they are placed in a warm location, ideally around 75-85°F (24-29°C).
Once the eggplant seedlings have emerged, provide them with ample light. Place them in a sunny windowsill or use fluorescent or LED grow lights to provide them with at least 12-14 hours of light each day. Rotate the seedlings regularly to ensure even growth and prevent them from leaning towards the light source.
As the seedlings grow, thin them out if they are overcrowded, leaving the strongest and healthiest plants. When the seedlings have developed a few sets of true leaves and the outdoor temperatures have warmed up, usually around 8-10 weeks after sowing, transplant them into larger pots.
Eggplants thrive in warm weather and require a minimum temperature of around 70°F (21°C) to grow well. If you live in a cooler climate, consider growing eggplants in containers that can be moved indoors or covered during cooler nights.
Choose a sunny spot in the garden with well-draining soil for transplanting the eggplant seedlings. Space the plants according to the recommended spacing for the particular eggplant variety you are growing. Some popular eggplant varieties include classic purple eggplants, slender Asian varieties, and even white or striped eggplants for a unique twist.
To care for eggplant plants, regular watering is essential, particularly during dry spells. Provide support for taller varieties to prevent the plants from bending or breaking under the weight of the fruits. Additionally, feed the plants with a balanced organic fertilizer every few weeks to promote healthy growth and fruit production.
Harvest the eggplants when they reach their full size and have a glossy appearance. Simply cut or twist them off the plant, leaving a small portion of the stem attached.
With their versatile culinary applications, eggplants are perfect for grilling, roasting, sautéing, or using in dishes like eggplant parmesan or baba ganoush. By starting eggplant seeds indoors in February, you’ll be able to enjoy a bountiful harvest of this delicious and visually stunning vegetable.
Broccoli
Broccoli is a nutritious and versatile vegetable that thrives in cool weather, making it an excellent choice for early season planting. Starting broccoli seeds indoors in February allows you to get a head start on the growing season and enjoy a bountiful harvest of this delicious cruciferous vegetable.
To begin, fill seed trays or pots with a well-draining seed starting mix. Plant the broccoli seeds at a depth of about half an inch and cover them lightly with soil. Keep the soil consistently moist, but be careful not to overwater, as this can lead to dampening off.
Broccoli seeds prefer cooler temperatures for germination. Place the seed trays in a location with a temperature range of around 60-75°F (15-24°C). If the temperature is on the higher end, you can use a fan to provide air circulation and prevent damping off.
As the broccoli seedlings emerge, provide them with adequate light. Place them in a sunny south-facing window or use fluorescent or LED grow lights to ensure they receive 12-14 hours of light each day. Maintain a distance of 2-4 inches between the lights and the seedlings to prevent heat damage.
When the seedlings have developed a few sets of true leaves, thin them out if they are overcrowded, leaving the strongest plants with enough space to grow. It’s important to transplant the broccoli seedlings into larger pots once they outgrow their starter containers, ensuring they have enough room for root development.
About 4-6 weeks after sowing, when the threat of frost has passed and the outdoor soil has warmed up, it’s time to transplant the broccoli seedlings into the garden. Choose a sunny location with well-draining soil amended with compost or well-rotted manure.
Space the broccoli plants according to the recommended spacing for the specific variety you are growing, usually around 18-24 inches apart. The soil should be kept consistently moist, especially during dry spells. Mulching around the plants can help retain moisture and deter weeds.
Harvest the broccoli heads when they are firm and tight, and the individual florets are still compact. Cut the main head just below the base, leaving a few inches of stem attached. Harvesting the central head prompts the growth of additional side shoots, often referred to as “broccoli side shoots,” which can also be harvested and enjoyed.
Broccoli is a versatile vegetable that can be steamed, roasted, stir-fried, or used in a variety of dishes such as soups, salads, and pastas. By starting broccoli seeds indoors in February, you’ll ensure a successful and abundant harvest of this nutritious and delicious vegetable.
Cabbage
Cabbage is a cool-season vegetable that thrives in the early spring and fall months, making it an ideal candidate for starting seeds indoors in February. Whether you prefer crunchy coleslaw or hearty cabbage rolls, growing your own cabbage from seed allows you to enjoy this versatile vegetable at its freshest.
To start cabbage seeds, fill seed trays or pots with a high-quality seed starting mix. Sow the seeds at a depth of about a quarter-inch and lightly cover them with soil. Keep the soil consistently moist but avoid overwatering, as it can lead to damping-off.
Cabbage seeds germinate best in temperatures between 60-70°F (15-21°C). Find a location in your home that provides these optimal temperature conditions, such as a sunny windowsill or a heated seed tray. Consider using a seedling heat mat to enhance germination rates.
Once the cabbage seedlings emerge, provide them with adequate light. Place them in a sunny spot with direct sunlight or supplement with fluorescent or LED grow lights if natural light is limited. Aim for 14-16 hours of light per day to promote healthy and robust growth.
As the seedlings develop, thin them out if they are overcrowded, ensuring each plant has enough space to mature. Transplant the seedlings into larger pots when they have a few sets of true leaves, allowing the roots to spread and establish before transplanting them outdoors.
Before transplanting the cabbage seedlings into the garden, prepare the soil by loosening it and incorporating organic matter such as compost or aged manure. Cabbage prefers well-draining soil with a slightly acidic pH level between 6.0 and 6.8.
Space the cabbage plants according to the recommended spacing for the specific variety you are growing, typically around 12-18 inches apart. Keep the soil consistently moist by watering deeply and evenly, ensuring the water reaches the root zone. Mulching around the plants can help conserve moisture and suppress weeds.
Harvest cabbage heads when they reach the desired size and have a firm texture. Cut the heads at the base of the plant, using a sharp knife, leaving the outer leaves intact to protect the inner leaves. If you’re growing varieties with compact heads, such as savoy or red cabbage, loosen the outer leaves to inspect and harvest one head at a time.
Enjoy fresh cabbage in a variety of culinary creations, including soups, stews, stir-fries, and salads. By starting cabbage seeds indoors in February, you’ll have a head start on the growing season, allowing you to savor the flavors of homegrown cabbage in no time.
Cauliflower
Cauliflower is a nutritious and versatile vegetable that can be grown in the early spring or fall. Starting cauliflower seeds indoors in February allows you to get a head start on the growing season and enjoy the tender, flavorful heads of this cruciferous vegetable.
To start cauliflower seeds, fill seed trays or pots with a well-draining seed starting mix. Plant the seeds at a depth of about a quarter-inch and cover them lightly with soil. Keep the soil consistently moist but avoid overwatering, as it can lead to fungal diseases.
Cauliflower seeds germinate best in cooler temperatures, between 60-70°F (15-21°C). Find a cool location in your home, away from direct heat sources, where the temperature remains relatively stable. Consider using a seedling heat mat to provide consistent bottom heat for improved germination.
Once the cauliflower seedlings emerge, provide them with bright light. Place them in a sunny spot near a south-facing window or use fluorescent or LED grow lights to ensure they receive 12-14 hours of light each day. Adequate light exposure is crucial for healthy growth and the development of compact heads.
As the seedlings grow, thin them out if they are overcrowded, leaving the strongest plants with enough space to thrive. When the seedlings have developed a few sets of true leaves and are sturdy enough to handle, transplant them into larger pots to provide more room for their root systems to grow.
When the threat of frost has passed and the soil has warmed up, usually around 8-10 weeks after sowing, it’s time to transplant the cauliflower seedlings into the garden. Choose a location with full sun exposure and well-draining soil enriched with organic matter.
Space the cauliflower plants according to the recommended spacing for the specific variety you are growing. Typically, cauliflower plants should be spaced around 18-24 inches apart to allow enough room for the heads to develop fully. Regularly water the plants, ensuring the soil remains consistently moist, as fluctuating moisture levels can cause the heads to become discolored or develop unevenly.
Harvesting cauliflowers requires some attention to the timing. The heads should be firm, dense, and tightly closed, with the curds still compact. Harvesting too early or too late can result in heads that are less flavorful and have a grainy texture. Cut each mature head at the base of the plant, leaving a few inches of stem attached.
Cauliflower is a versatile vegetable that can be enjoyed raw, cooked, roasted, or steamed. It pairs well with various seasonings and can be incorporated into a wide range of dishes, from stir-fries and curry to soups, salads, and even cauliflower rice or mash.
By starting cauliflower seeds indoors in February, you’ll give yourself a head start on the growing season, allowing you to enjoy the delicious and nutritious harvest of homegrown cauliflower.
Onions
Onions are a kitchen staple that adds flavor and depth to a variety of dishes. Starting onion seeds indoors in February allows you to have a head start on growing these versatile and savory bulbs, ensuring a successful harvest.
To begin, fill seed trays or pots with a well-draining seed starting mix. Plant the onion seeds at a depth of about a quarter-inch and cover them lightly with soil. Keep the soil consistently moist, but avoid overwatering, as it can lead to rotting.
Onion seeds germinate best in cooler temperatures, around 60-70°F (15-21°C). Place the seed trays in a cool location, such as a basement or a room with a stable temperature. Consider using a seedling heat mat to provide bottom warmth, which can enhance germination rates.
As the onion seedlings emerge, provide them with bright light. Place them in a sunny windowsill or use fluorescent or LED grow lights to ensure they receive 12-14 hours of light each day. Rotate the trays regularly to promote even growth and prevent legginess.
When the onion seedlings have developed a few sets of true leaves and are about the thickness of a pencil, they are ready to be transplanted into larger pots. Transplanting them into individual pots will provide more space for their root system to develop.
Before transplanting the onion seedlings into the garden, prepare the soil by loosening and enriching it with compost. Onions prefer loose, well-draining soil with a pH level between 6.0 and 7.0.
Space the onion plants according to the recommended spacing for the specific variety you are growing. Onions can be planted in rows or blocks, with spacing depending on whether you prefer larger bulbs or smaller green onions. Keep the soil consistently moist and weed-free to ensure optimal growth.
Onions have shallow roots, so it’s crucial to provide them with consistent moisture throughout the growing season. However, be cautious not to overwater, as soggy soil can lead to root rot. Mulching around the plants can help retain moisture and suppress weed growth.
Harvesting onions depends on the desired use. Green onions can be harvested when they reach the desired size, typically around 6-8 weeks after transplanting. For mature onions with dry outer skins, harvest them when the tops have yellowed and fallen over. Dig them gently from the ground, allowing them to dry and cure in a well-ventilated, dry area for a few weeks.
Homegrown onions can be used in a variety of dishes, from stir-fries and salads to soups, stews, and roasted dishes. By starting onion seeds indoors in February, you’ll have a plentiful supply of fresh and flavorful onions to enjoy throughout the growing season and beyond.
Lettuce
Lettuce is a versatile and easy-to-grow leafy green that is a staple in many salads and sandwiches. Starting lettuce seeds indoors in February allows you to enjoy the crisp and flavorful leaves of homegrown lettuce earlier in the season.
To start lettuce seeds, fill seed trays or pots with a quality seed starting mix. Sow the seeds thinly and cover them lightly with soil, as lettuce seeds require light to germinate. Keep the soil consistently moist but avoid overwatering, as it can lead to fungal diseases.
Lettuce seeds prefer cooler temperatures for germination, around 55-70°F (13-21°C). Find a cool location in your home, away from direct heat sources, where the temperature remains relatively stable. You can cover the trays with a plastic dome or plastic wrap to create a humid microclimate and promote germination.
Once the lettuce seedlings emerge, provide them with bright light. Place them in a sunny windowsill or use fluorescent or LED grow lights to ensure they receive 12-14 hours of light each day. If using artificial lights, keep them about 6-8 inches above the seedlings to prevent leggy growth.
As the lettuce seedlings develop true leaves, thin them out if they are overcrowded, leaving the strongest and healthiest plants with enough space to grow. You can harvest the thinnings as baby lettuce, adding them to salads or sandwiches for a fresh and tender taste.
Before transplanting the lettuce seedlings outdoors, harden them off by gradually exposing them to outdoor conditions over the course of a week. Start with a few hours of sunlight per day and gradually increase the exposure, taking care to protect them from extreme weather conditions.
Choose a location in the garden that receives partial shade or filtered sunlight for lettuce cultivation. Lettuce prefers well-draining soil enriched with compost or organic matter. Space the plants according to the recommended spacing for the specific lettuce variety you are growing.
Water the lettuce plants regularly, keeping the soil consistently moist. Mulching around the plants can help retain moisture and suppress weed growth. Harvest the outer leaves of the lettuce plants as they mature, or cut the entire head when it reaches the desired size and shape.
Lettuce varieties range from crisphead and romaine to loose-leaf and butterhead. Experiment with different varieties to enjoy a diverse range of colors, textures, and flavors in your salads.
Homegrown lettuce provides a fresh and nutrient-dense addition to your meals. By starting lettuce seeds indoors in February, you’ll be able to savor the taste of homegrown lettuce earlier in the season and enjoy the satisfaction of growing your own salad greens.
Spinach
Spinach, with its dark green leaves and nutrient-rich profile, is a popular and versatile leafy green that can be enjoyed in salads, smoothies, and cooked dishes. Starting spinach seeds indoors in February allows you to enjoy an early harvest and reap the benefits of this nutritious vegetable.
To begin, fill seed trays or pots with a quality seed starting mix. Sow the spinach seeds at a depth of about half an inch and cover them lightly with soil. Keep the soil consistently moist but avoid overwatering, as excessive moisture can lead to rotting.
Spinach seeds require cool temperatures for proper germination, around 50-70°F (10-21°C). Find a cool location in your home, away from direct heat sources, and aim for a stable temperature range. A slightly higher germination temperature can be achieved by using a seedling heat mat set to the lower end of the temperature range.
Once the spinach seedlings emerge, provide them with bright light. Place them in a sunny windowsill or use fluorescent or LED grow lights to ensure they receive 12-14 hours of light each day. Rotate the trays regularly to promote even growth and prevent the seedlings from leaning towards the light source.
As the spinach seedlings develop, thin them out if they are overcrowded, leaving the strongest and healthiest plants with enough space to thrive. Harvest the thinnings as baby spinach leaves for an early taste of homegrown spinach.
Before transplanting the spinach seedlings into the garden, harden them off by gradually exposing them to outdoor conditions. Start with a few hours of sunlight per day, gradually increasing the exposure over the course of a week. Protect them from extreme weather conditions during this transition period.
Choose a garden location that receives partial shade or filtered sunlight for growing spinach. Spinach prefers moist, well-draining soil enriched with compost or organic matter. Space the plants according to the recommended spacing, allowing enough room for each plant to fully mature.
Water the spinach plants regularly, keeping the soil consistently moist. Mulch around the plants to retain moisture and prevent weed growth. Harvest the outer leaves of the spinach plants as they mature, or cut the entire plant when it reaches the desired size, usually around 6-8 weeks after transplanting.
Spinach is packed with essential nutrients and can be enjoyed both raw and cooked. Use it in salads, sandwiches, stir-fries, or sautés for a healthy dose of vitamins and minerals.
By starting spinach seeds indoors in February, you’ll be able to enjoy an early harvest of this nutritious leafy green. Embrace the flavors of homegrown spinach and elevate your culinary creations with this versatile and healthful vegetable.
Herbs
Herbs are perfect for adding fragrance, flavor, and freshness to your culinary creations. Starting herb seeds indoors in February allows you to grow a variety of herbs that can enhance your cooking and provide a delightful sensory experience in your garden.
To begin, fill seed trays or pots with a well-draining seed starting mix. Sow the herb seeds according to the package instructions, ensuring they are covered with a fine layer of soil. Some herb seeds may require light for germination, so follow specific guidelines for each variety.
Herb seeds have different germination temperature requirements, ranging from 60-75°F (15-24°C). Place the seed trays in a location with the appropriate temperature range, providing optimal conditions for successful germination. Consider using a seedling heat mat to maintain a consistent temperature if necessary.
As the herb seedlings emerge, provide them with bright and direct light. Place them in a sunny windowsill or use fluorescent or LED grow lights to ensure they receive 12-14 hours of light each day. Rotate the trays regularly to prevent the seedlings from leaning or reaching towards the light source.
Depending on the herb variety, thin out the seedlings if they are overcrowded, leaving the strongest plants with enough space to grow. When the herb seedlings have developed a few sets of true leaves, they can be transplanted into larger pots or containers to accommodate their root growth.
When the risk of frost has passed and the outdoor temperatures are warmer, usually around 6-8 weeks after sowing, you can transplant the herb seedlings into your garden or outdoor containers. Choose a sunny spot with well-draining soil and make sure to space the herbs according to the recommended spacing for each variety.
Water the herb plants regularly, ensuring the soil is consistently moist but not waterlogged. Different herbs have varying moisture requirements, so it’s important to monitor the specific needs of each herb. Mulching around the plants can help retain moisture and suppress weed growth.
Harvest your herbs as needed by snipping off the desired amount of leaves or sprigs. Regular harvesting encourages the plants to produce more foliage, ensuring a continued supply of fresh herbs throughout the growing season.
Some popular herbs to start indoors in February include basil, cilantro, parsley, rosemary, thyme, mint, and oregano. Each herb offers unique flavors and aromas that can elevate your culinary dishes or be used for medicinal purposes.
Enjoy the convenience and satisfaction of having fresh herbs at your fingertips by starting herb seeds indoors in February. Whether you use them in cooking, teas, or aromatherapy, growing herbs can bring a delightful and aromatic experience to your gardening and culinary pursuits.
Tips for Starting Seeds Indoors in February
Starting seeds indoors in February requires a bit of planning and care to ensure successful germination and healthy seedling growth. Here are some helpful tips to get you started:
- Know your frost dates: Determine the average last frost date in your region to determine when it’s safe to transplant seedlings outdoors. This information is essential for timing your indoor seed starting.
- Choose the right seeds: Select seeds that are suitable for starting indoors in February. Opt for cool-season crops or those that require an extended growing season, such as tomatoes, peppers, and herbs.
- Use quality seed starting mix: Ensure you use a well-draining seed starting mix that is specifically formulated for starting seeds. Avoid using regular garden soil, which can be heavy and may contain pathogens.
- Provide adequate light: Place your seed trays or pots in a sunny location, such as a south-facing window. If natural light is limited, supplement with fluorescent or LED grow lights to provide the necessary light intensity and duration for seedling growth.
- Maintain appropriate temperature and humidity: Most seeds require specific temperature ranges for optimal germination. Provide a warm and consistent temperature between 60-80°F (15-27°C), and maintain proper humidity levels by covering seed trays with clear plastic to create a mini greenhouse effect.
- Water carefully: Keep the soil consistently moist but avoid overwatering, which can lead to damping-off or root rot. Use a spray bottle or a gentle watering can to avoid disrupting delicate seedlings.
- Thin out seedlings: Once the seedlings have a few sets of true leaves, thin them out to provide enough space for each plant to grow and thrive.
- Harden off seedlings: Before transplanting seedlings outdoors, gradually expose them to outdoor conditions to acclimate them. Start by placing them outside for a few hours a day, gradually increasing the duration over the course of a week.
- Transplant at the appropriate time: Wait until the outdoor soil has warmed up, and there is no longer a risk of frost before transplanting seedlings into the garden. Follow spacing recommendations for each plant to ensure proper growth.
- Properly care for seedlings: Provide regular watering, sufficient light, and appropriate nutrients to ensure healthy growth. Protect seedlings from pests and diseases by monitoring for signs and taking appropriate action if necessary.
By following these tips, you’ll increase your chances of success when starting seeds indoors in February. Remember to stay patient, as seed starting can be a rewarding but nuanced process. With proper care and attention, you’ll soon be rewarded with strong and healthy seedlings ready for the outdoor garden.
Conclusion
Starting seeds indoors in February is an exciting and rewarding endeavor for plant enthusiasts and gardeners. By taking advantage of this early start, you can extend the growing season, have greater control over growing conditions, and enjoy a wider variety of plants in your garden. Whether you’re growing vegetables like tomatoes, peppers, and broccoli, or cultivating herbs and leafy greens, starting seeds indoors allows you to nurture and care for your plants from the very beginning.
Before starting seeds, consider the factors that influence successful indoor seed starting, such as average frost dates, indoor growing space, temperature, and humidity levels. By planning accordingly, you’ll create an optimal environment for germination and seedling development.
Each plant variety has its own specific requirements, so be sure to follow seed packet instructions and provide the right conditions for each type of seed you’re starting. From tomatoes and peppers to lettuce and herbs, the possibilities are endless, and the opportunity to grow a diverse and abundant garden is at your fingertips.
As you embark on your indoor seed starting journey, remember to provide proper lighting, maintain appropriate moisture levels, thin out seedlings when needed, and gradually acclimate them to outdoor conditions before transplanting into the garden. These care practices will help your seedlings thrive and prepare them for a successful transition to the outdoor environment.
Starting seeds indoors in February not only gives you a head start on the growing season but also provides a fulfilling experience. The joy of seeing tiny seeds sprout and grow into healthy plants is unmatched. So roll up your sleeves, gather your seeds, and get ready to embark on a fantastic adventure of indoor seed starting. With proper care and attention, you’ll have robust and thriving plants that will provide you with an abundance of fresh produce for your table and a beautiful garden to enjoy throughout the growing season.